
How to Stain Woodwork
[et_pb_section fb_built=”1″ admin_label=”section” _builder_version=”3.22″][et_pb_row admin_label=”row” _builder_version=”3.25″ background_size=”initial” background_position=”top_left” background_repeat=”repeat”][et_pb_column type=”4_4″ _builder_version=”3.25″ custom_padding=”|||” custom_padding__hover=”|||”][et_pb_text admin_label=”Text” _builder_version=”4.7.7″ background_size=”initial” background_position=”top_left” background_repeat=”repeat” hover_enabled=”0″ sticky_enabled=”0″]
Or How to Avoid the Mistakes We Made
(You’re Welcome!)
To me the woodwork was the final step of the construction phase. And staining the woodwork is the final of the final. Now we have this How-To Stain Woodwork so that you don’t repeat the mistakes we made — you’re welcome!
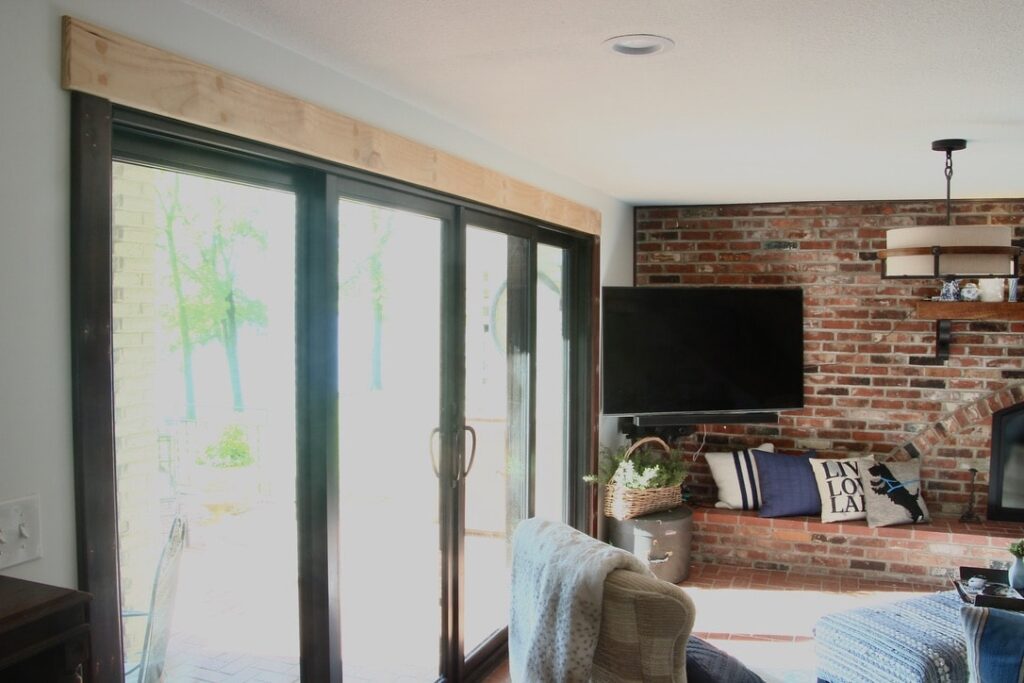
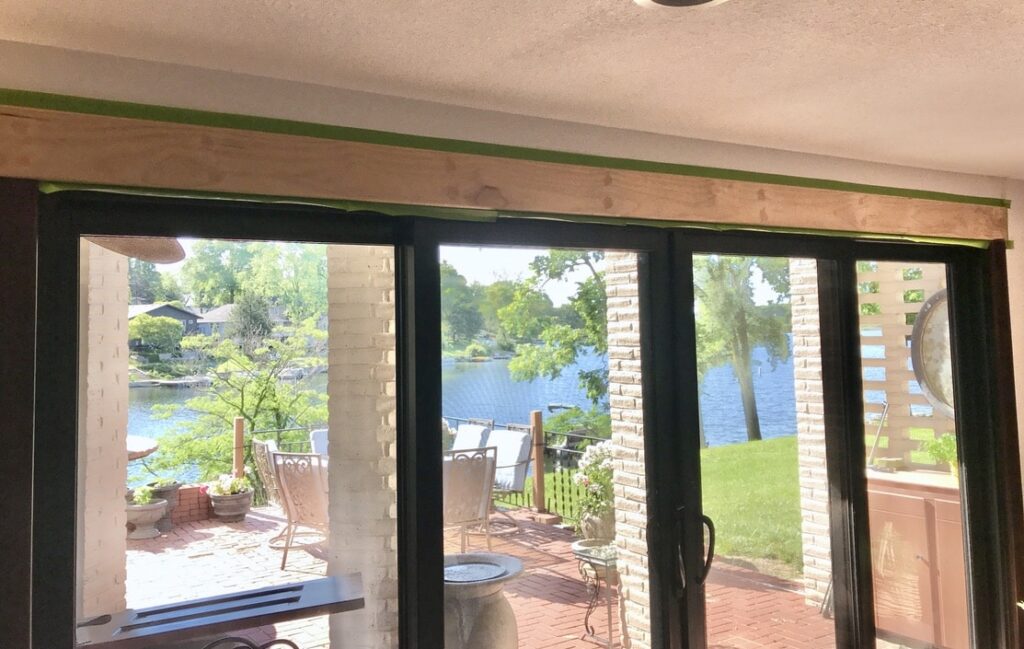
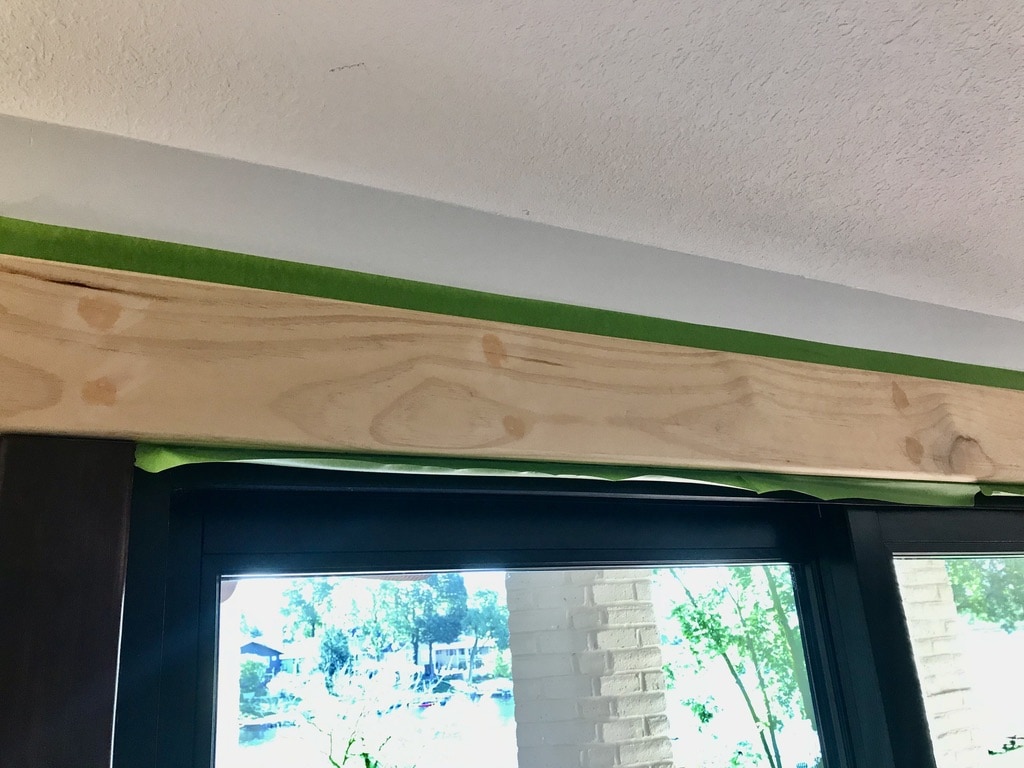
I’ve been looking at the raw wood for so long, I almost didn’t notice it any more.Then I finally got to the point where it was just such a thorn that I had to tackle it. Plus, if I want window treatments I needed to get that header done!
Not sure why it was so intimidating to me. Why I kept putting it off. I had stained furniture and doors, but I had never stained woodwork on the walls and I needed a How-To Stain Woodwork guide, but nothing I read prepared us for this.
I stained the majority of the trim boards before the contractor put them up. About 1/3 of the new trim still needed to be done, and of course all the nail holes and splices, etc needed to be attended to also.
I’m a pine and paint kinda gal and we’ve never had stained woodwork before. But in this house, we are matching the existing doors and woodwork which is a hybrid mix of a base coat of Rich Mahogany with Spanish Oak wiped over that.
I prefer to use gel stain. I feel like I have more control.
How to Stain Woodwork Always Starts With the Prep Work
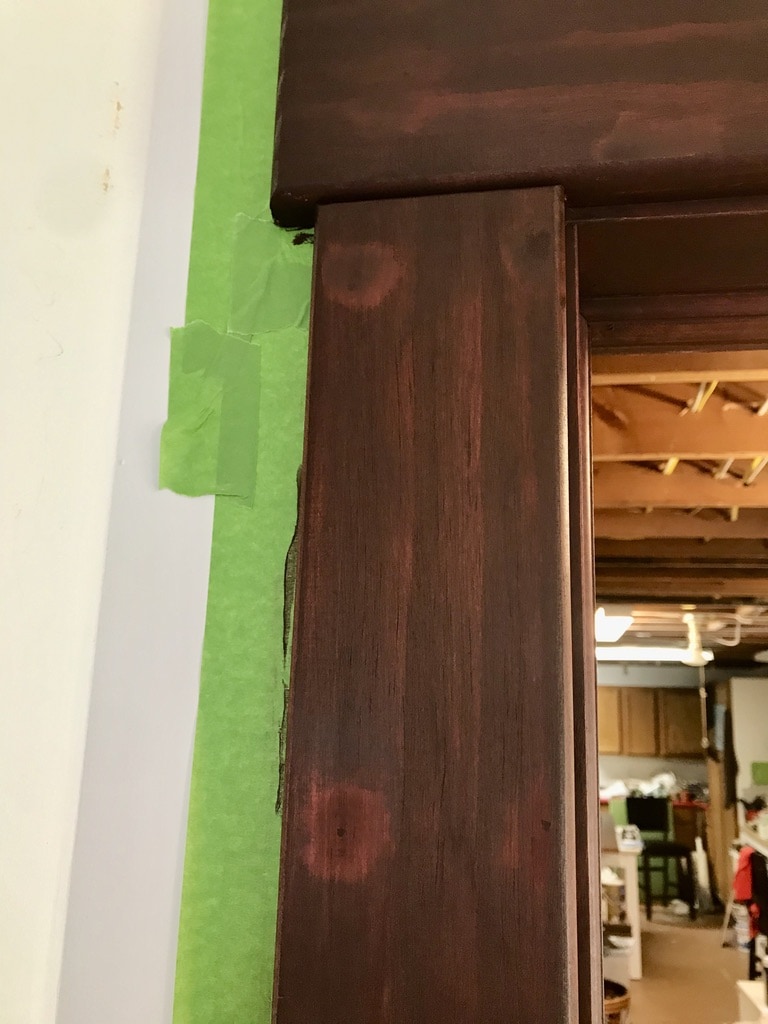
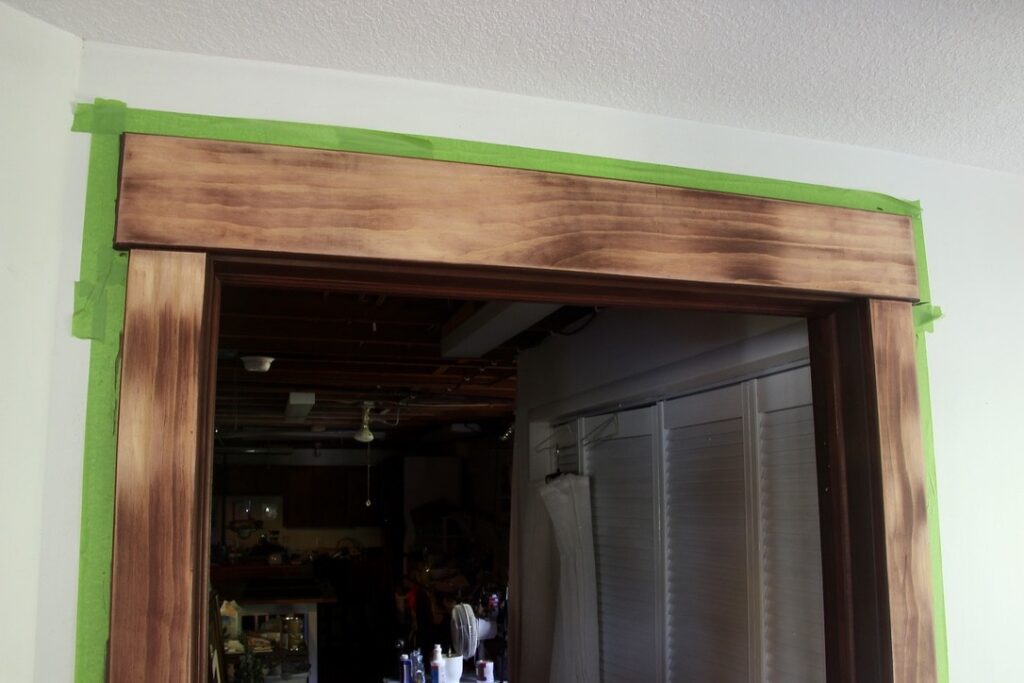
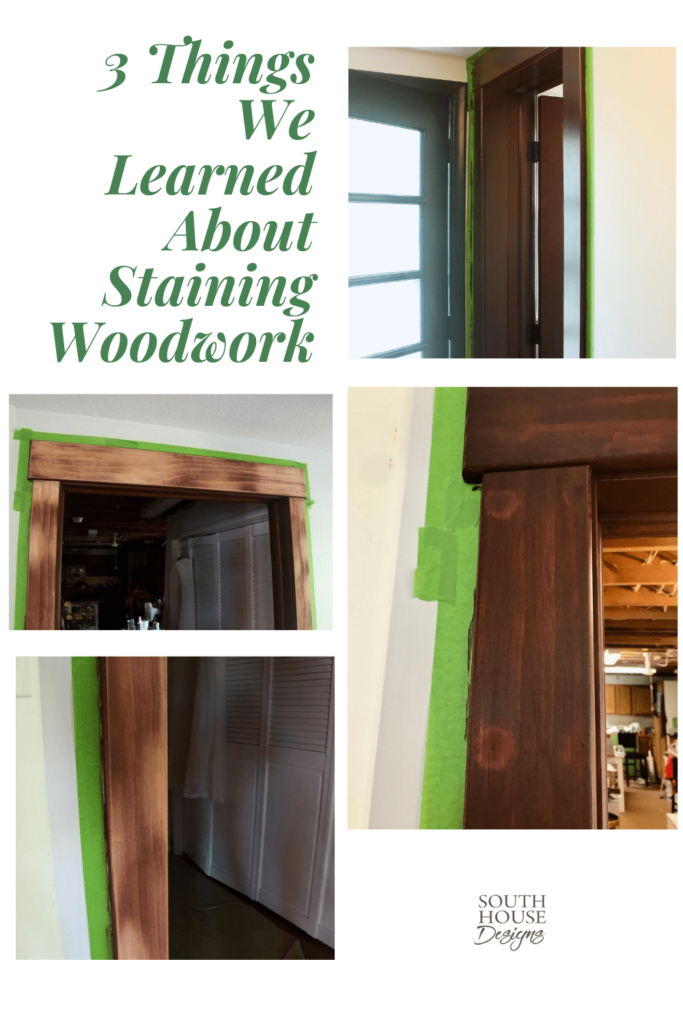
Protect your walls with painters tape . . . . so much tape!
Then fill all the nail holes and splices — where two boards join — and the corners where two boards join, etc. Be sure to use a STAINABLE Wood Filler.
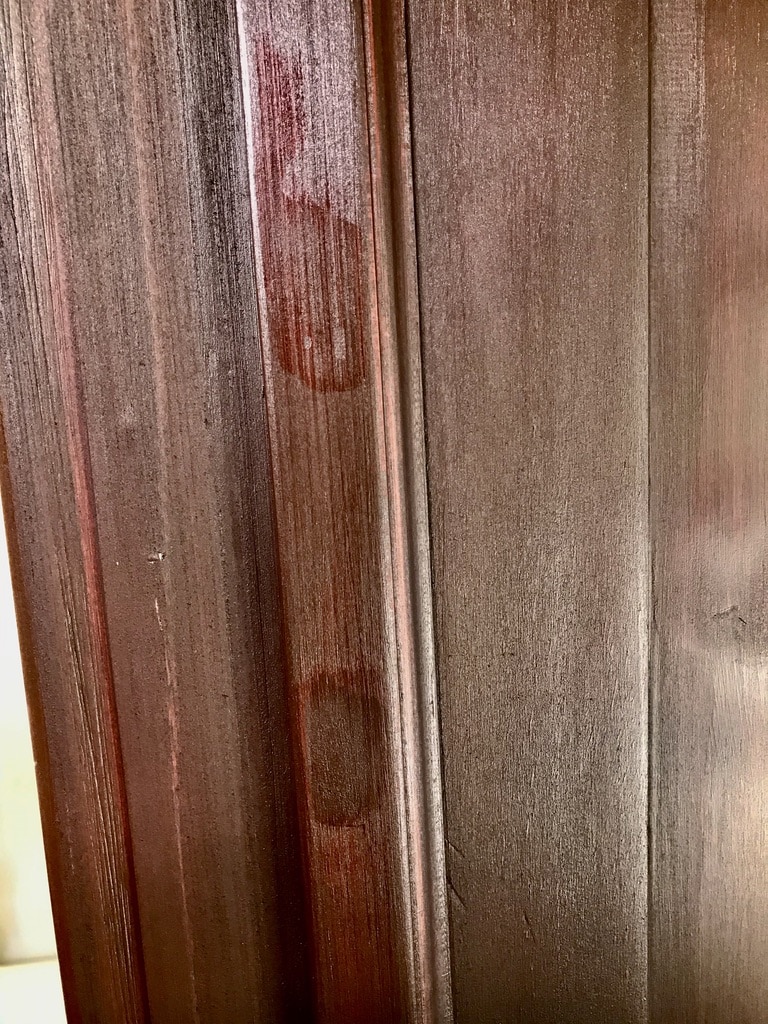
We used a Stainable Wood Filler. It was great for all the nail holes and divots in the already stained wood that our contractor put up. In others words any place that wasn’t raw wood.
I wish I could recommend it. It’s a product from a company I have always trusted. However, not this time. But honestly, I don’t know of any wood filler that is as functionally perfect as we all think it should be. So this is where we learned a lot and are passing this knowledge through pain on to you . Hopefully you will avoid our pain,
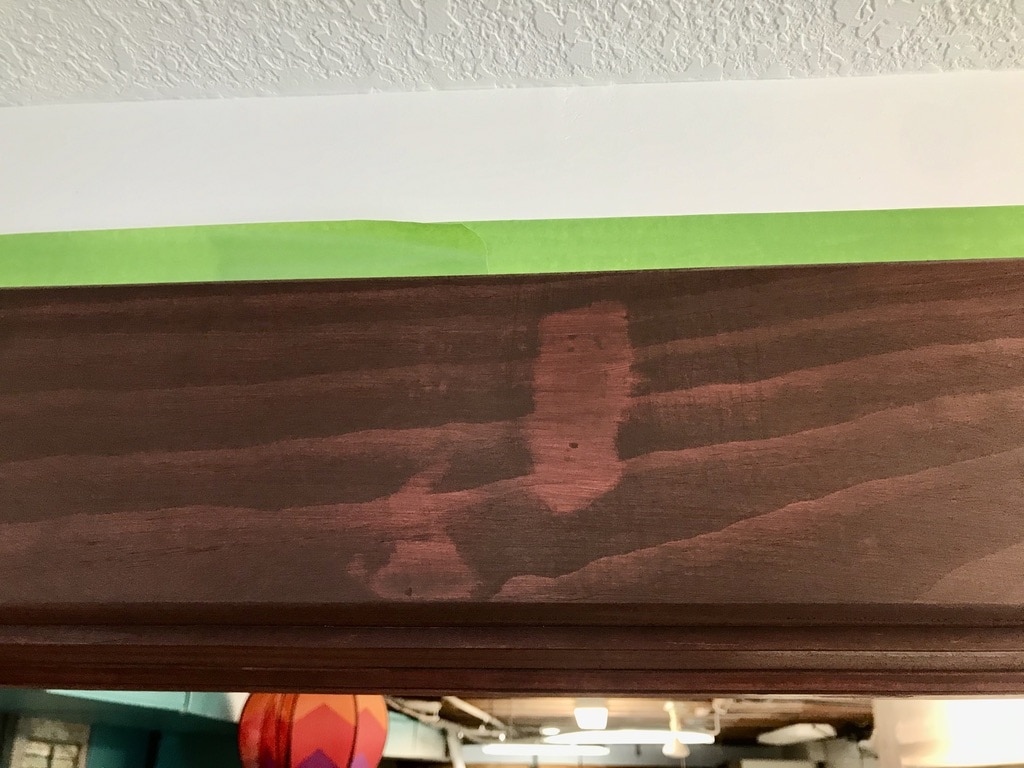
You get the idea! Full of blotches and spots.
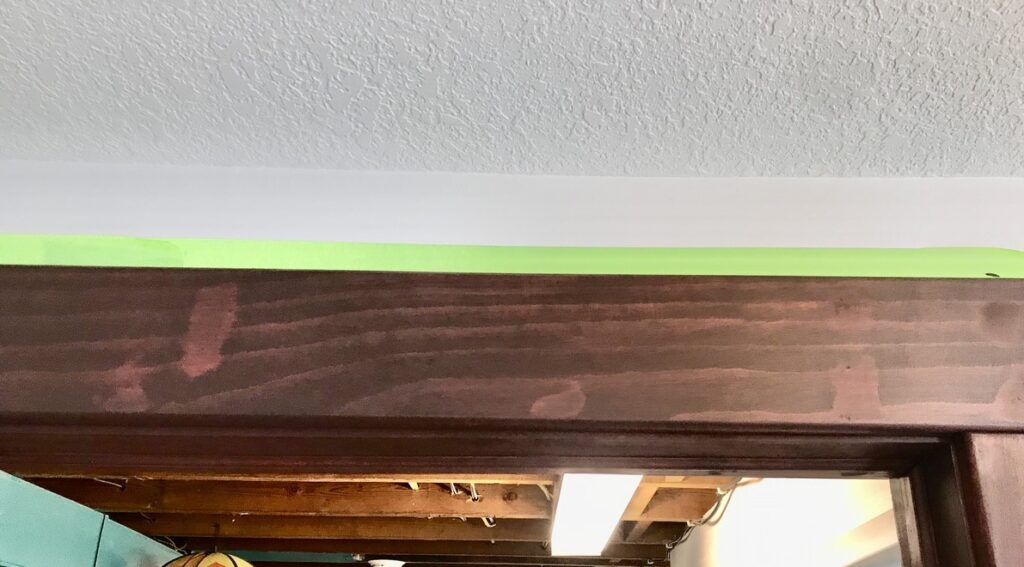
This is the doorway just off the dining area. To the right is another exterior door and the powder room. To the left is the game table and TV area. So although this doorway goes is the entry to the laundry, hobby room and storage, it is a very visible feature in the room. It needs to look good.
So on the backside, I experimented with second coats and other colors, etc. Wha waa waa!
So I resorted to calling the 800 number on the Wood Filler container.
I applaud that they have a support line, they were quick to reach; however, they were a bit thin on help for this particular issue. They acknowledged that this product can be troublesome, and I have decided that’s true with all wood fillers.
The support line gave me three distinct tips that could have helped us had I known:
1) Minimize the time between applying the filler and applying the stain
Do NOT let it sit for a long time before you stain, like weeks as we did. Try to stain the next day. I now understand that the longer it sits, the harder the polymer compound gets and it won’t accept the stain at the same rate as the surrounding wood will accept the stain.
2) Sand, sand, sand!
It’s not enough to sand it so that it is smooth. I had to actually sand it to where we could not see it either. The oily looking spot around the actual filler is where some part of the filler leaches into the wood grain and affects how it takes the stain. See those spots above? You don’t want to see them!
3) Apply stain with sand paper
They also mentioned something about applying the stain with wet high grit sand paper to work it into the filler. I couldn’t find any more detailed info about this on the their site or all of Google. It did not work for me, but I may not have been doing it right.
So What DID Work?
Going back a step.
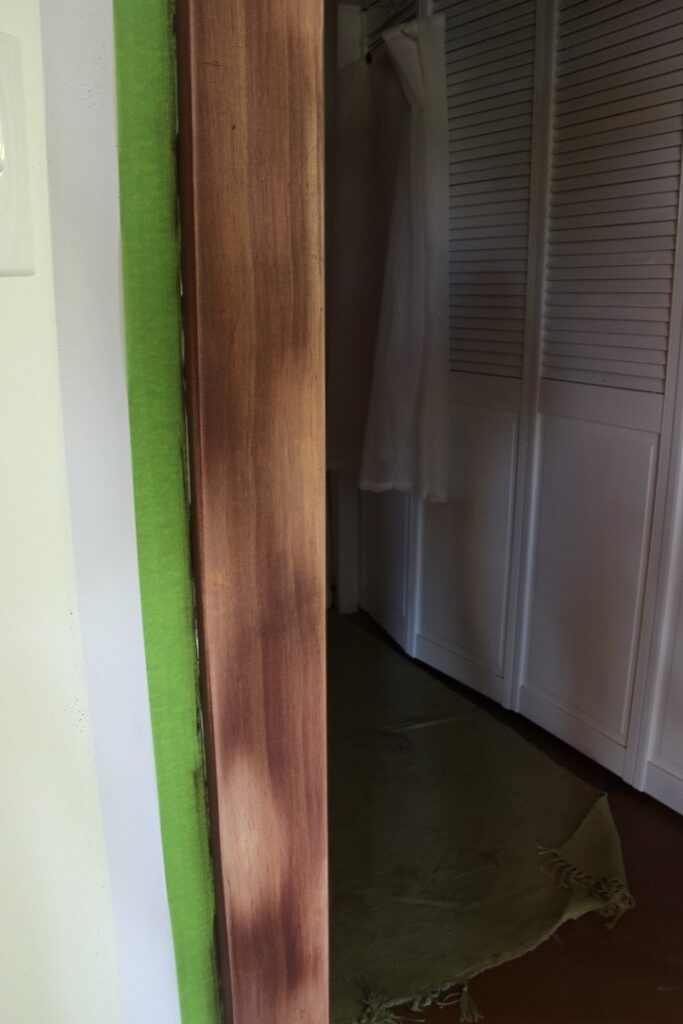
We had to sand everything back down as much as we could to raw wood. I concentrated on the splotches.
Once this was done. I applied the Red Mahogany gel stain with a wide foam brush, following very quickly behind with a soft rag – I used old t-shirt cut into squares.
This gel stain is oil-based, so it needs to dry overnight. Then I used the Spanish Oak sparingly. I used a rag, dipped a small corner of it in the stain and gently wiped over the first coat. This is more of a wiping on and off all at once, leaving just a bit of depth and softening the red cast.
This is why I like working with gel stain, you can see what you’re getting in real time, I can add more and more if I want or back off.
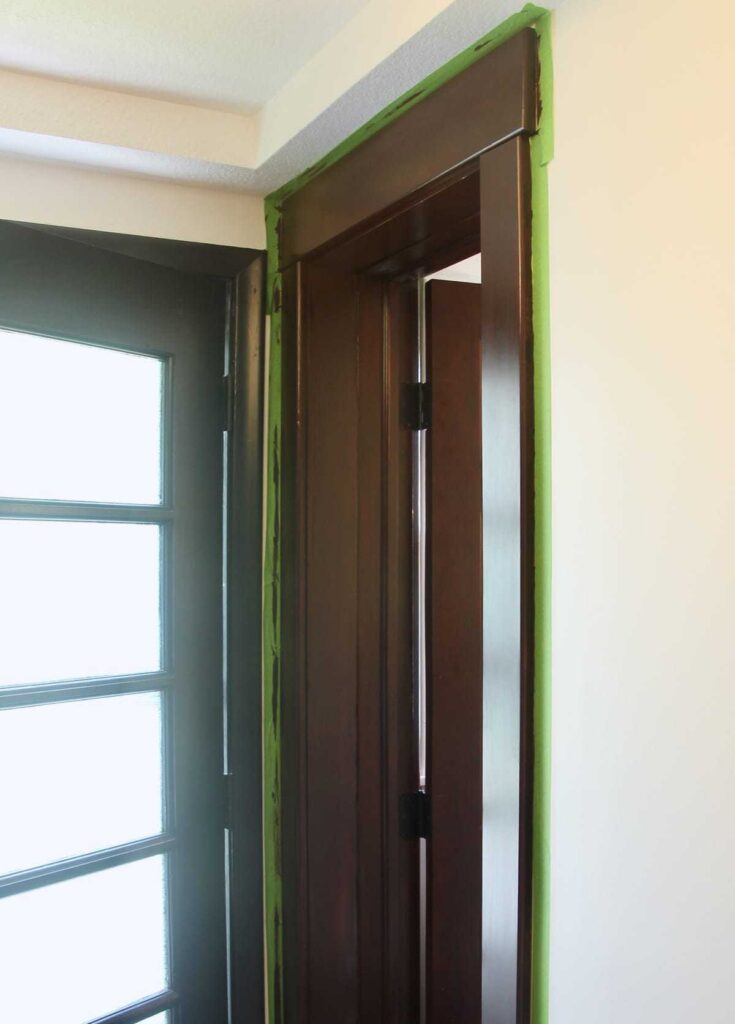
Let the second coat dry overnight and if it all looks good with a fresh set of eyes, then it’s time for the fun part of gently removing the tape — all that amazing green tape. Gotta love Frog Tape!!!
Look at those perfectly clean edges! And even after it was up there an inordinate length of time. I was afraid the bond with the wall would start to loosen before our final staining. Nope! Perfect!!!
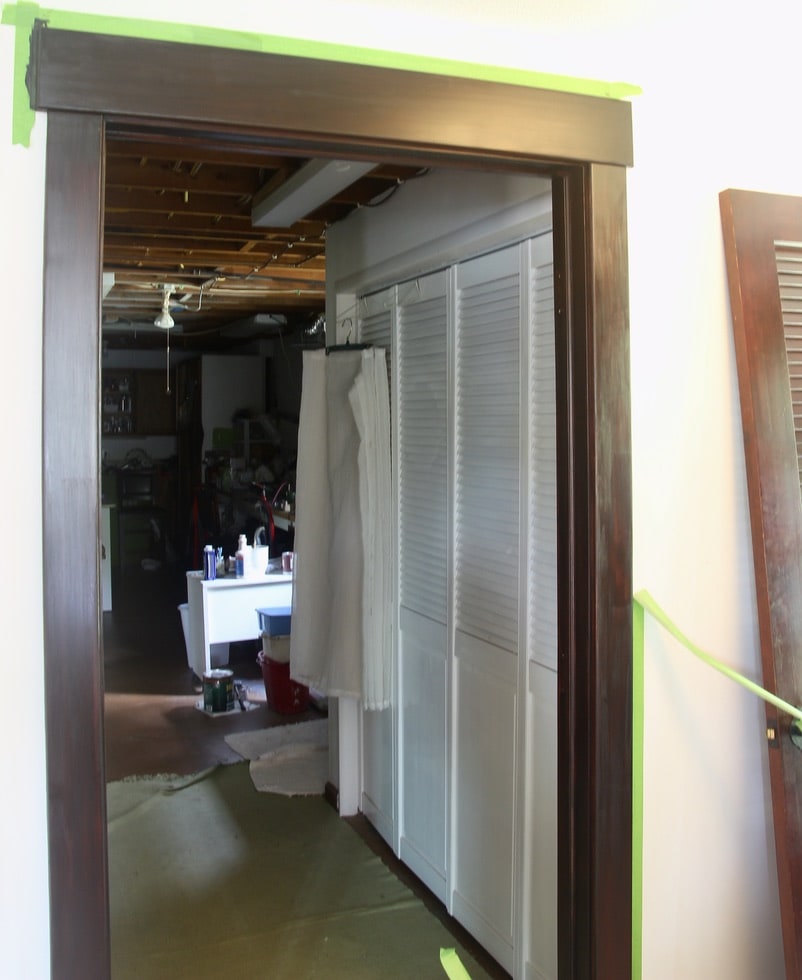
In the end, look how wonderful it looks to pull that amazing green tape and see all the trim finished and matching throughout the downstairs. Now to tackle the upstairs!
And my sliders will get their long-awaited curtain panels. Yea!
All said, if we hadn’t had the hiccup of the wood filler, staining the woodwork would have been much easier than I anticipated and the results were worth every bit of the effort.

[/et_pb_text][/et_pb_column][/et_pb_row][/et_pb_section]
Did you use a polyurethane or wax after the second coat of stain? It looks beautiful.
Thanks bunches Jessie. It’s a polyurethane. (I have never used wax on trim work as I needs to be cleaned so often. It can really take a beating)