
How To Turn Simple Candles into Something Special with Lace
Decorate plain candles (pillars, tapers, and more) with lace using a simple wax technique. Plus, eight additional inspiring lace craft projects.
Lace has a way of instantly softening a project — adding texture, detail, and just a hint of something special.
So when the first Handcrafted Society Challenge of 2026 rolled around with lace as the theme, my mind went straight to candles — my antidote to winter blues.
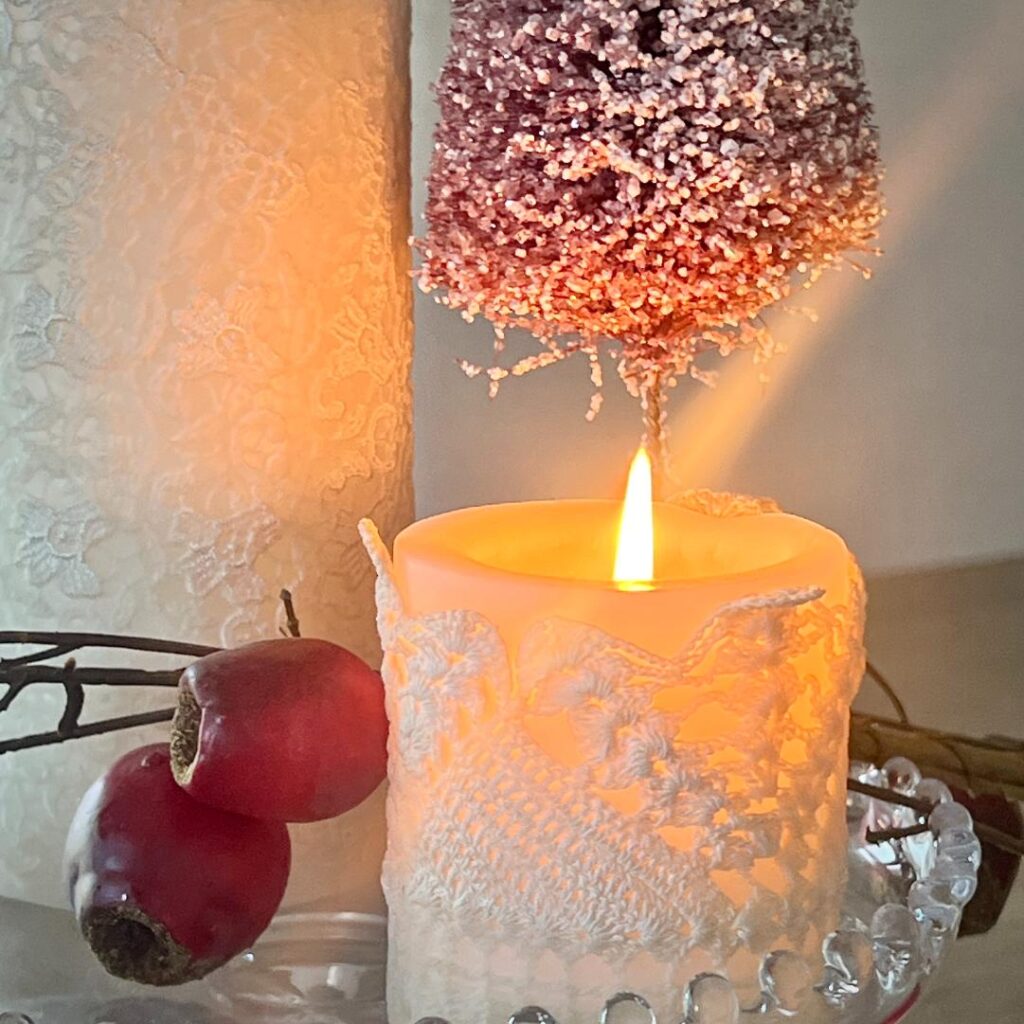
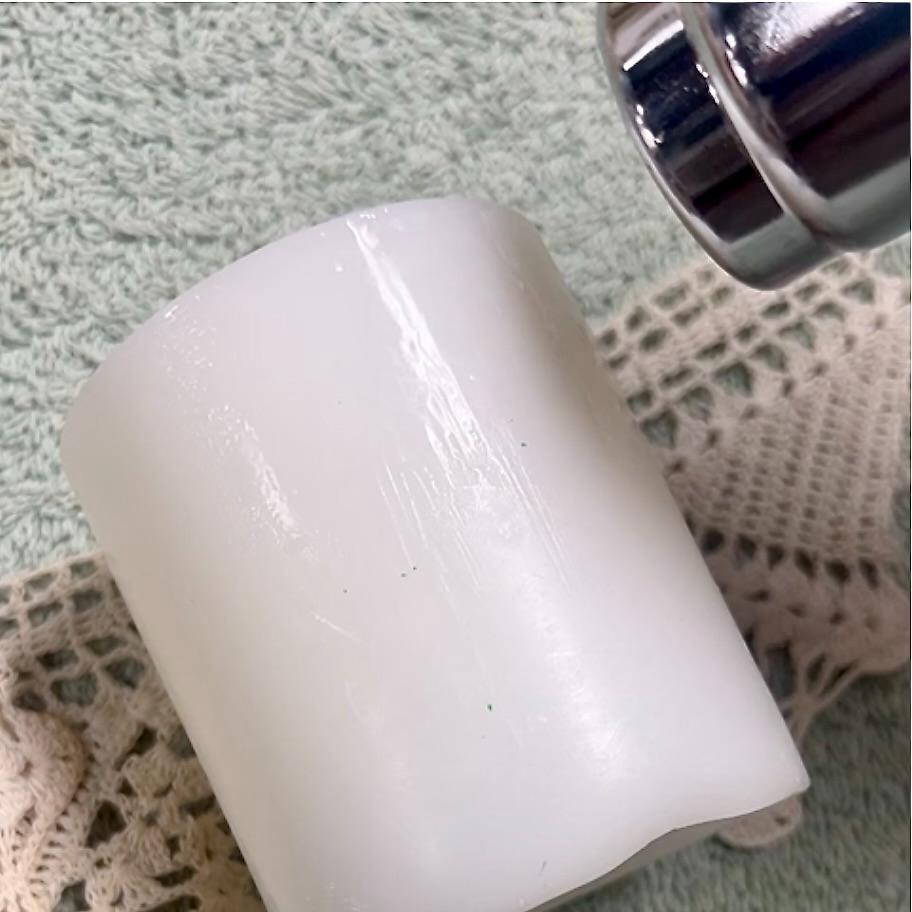
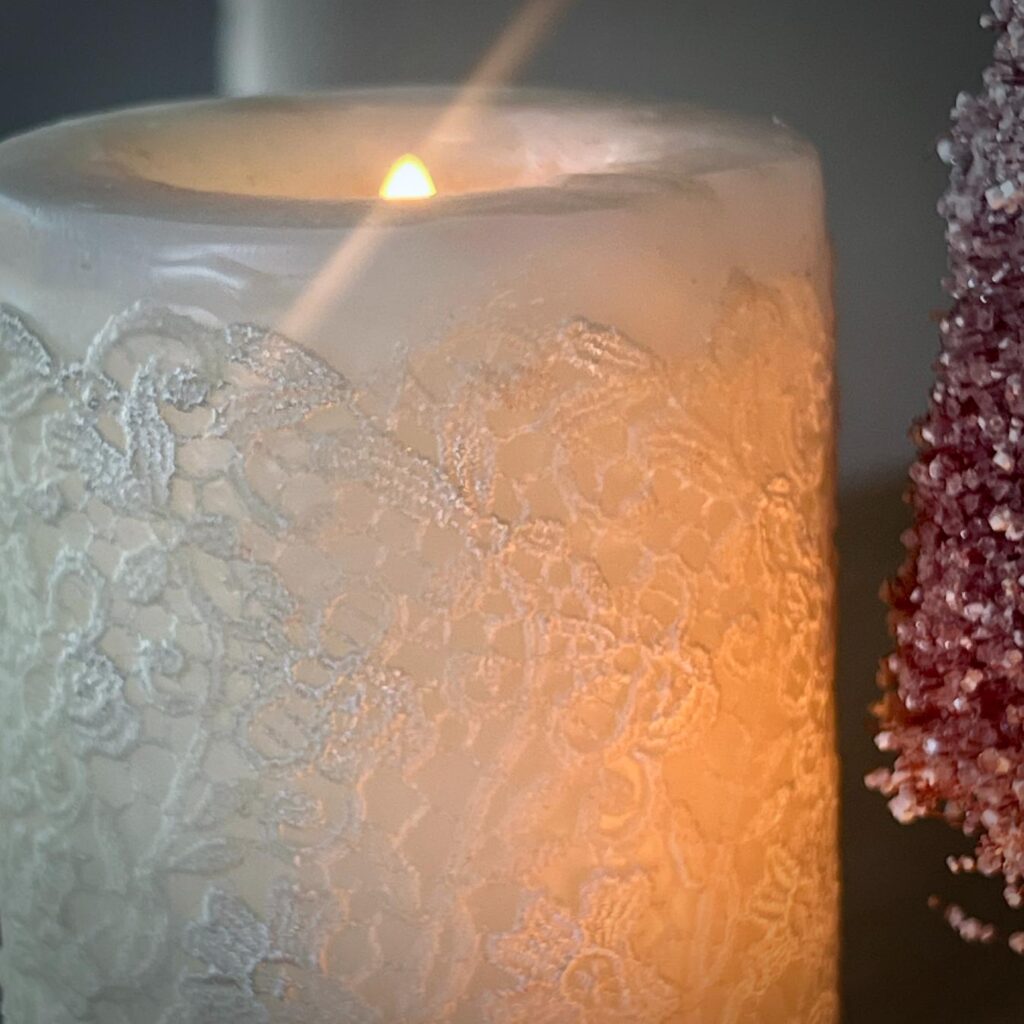
I’ve decorated candles before using napkins and a simple wax-embedding technique, and it turns out that lace works just as beautifully. By embedding lace scraps into the outer layer of wax, even the most basic pillar, taper, or votive candle gets an elevated, handcrafted look.
This lace candle project is my take on the challenge — but it’s just one of eight creative ways to craft with lace. Be sure to scroll to the end of the post for even more lace-inspired ideas from this month’s challenge.
TABLE OF CONTENTS:
The links in this post may include affiliate links, which means if you purchase anything using these links, you pay no extra, but I may receive a small commission that helps keep this blog running. I truly appreciate you using affiliate links whenever possible. Please know that I will never recommend a product I do not believe in!
Anxious to Dive Right In? This Card’s For You:
Quick How-To for Lace-Embellished Candles
Materials
- Real wax candle (pillar, taper, votive, or flameless with a real wax exterior)
- Lace (scraps or yardage)
- Protected work surface
- Optional: Paint or Rub ’n Buff for highlighting details
Tools
- Heat gun
- Scissors
Instructions
- Position the Lace
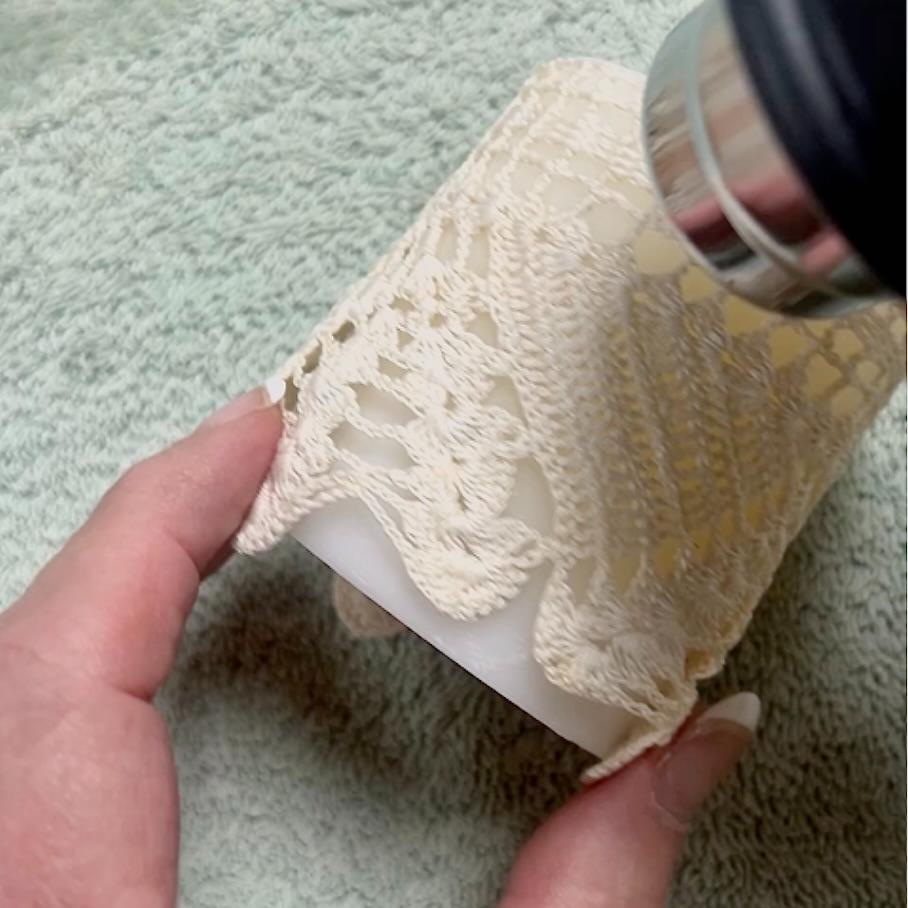
Wrap or place lace against the candle where desired, smoothing it flat against the wax. - Heat the Wax
Using a heat gun, gently warm the surface of the candle until the wax softens. - Embed the Lace
Lightly press the lace into the softened wax, continuing to heat as needed until it becomes embedded in the outer layer. - Smooth & Set
Allow the wax to cool completely. The lace should appear sealed just beneath the surface. - Optional Finish
Once cooled, lightly dry-brush or rub paint or Rub ’n Buff over raised lace details for subtle contrast
Notes
Prep Tip: press lace flat and smooth
Works Best On
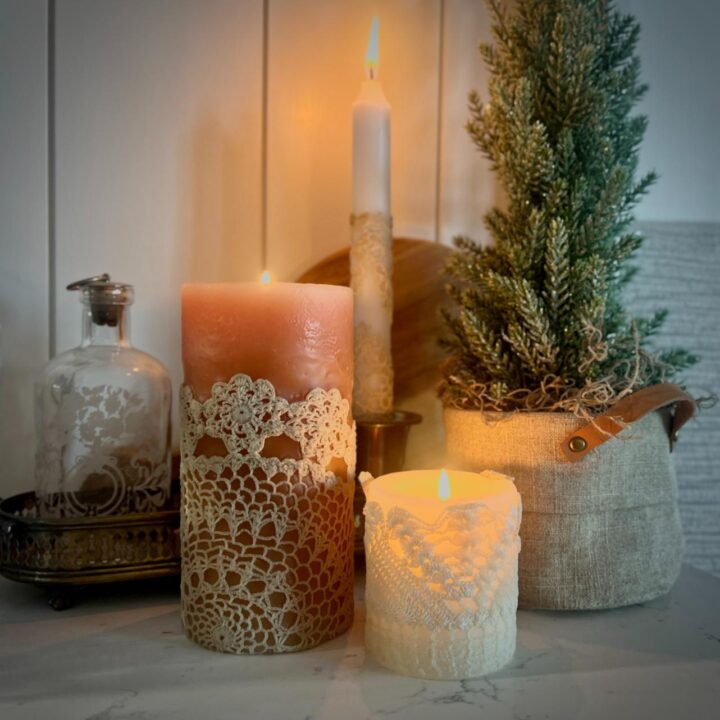
- Pillar candles
- Taper candles
- Votive-style candles
- Flameless candles with a real wax exterior
Keep scrolling for all my details and tips.
Detailed Instructions and Tips For
Crafting Our Lace Candles
With a real wax candle, lace, and a heat gun at hand (this is mine that I highly recommend), the rest of the process comes together easily.
Step 1) Prep the Lace-
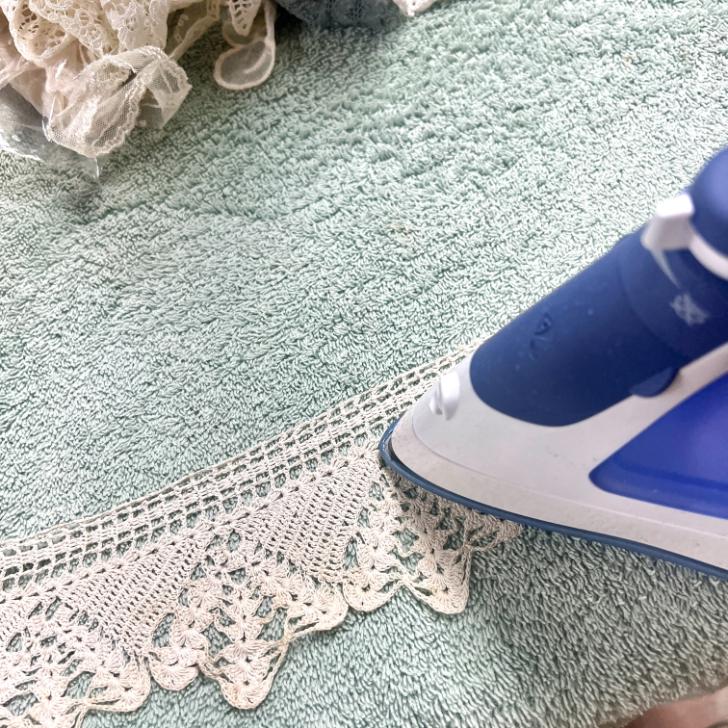
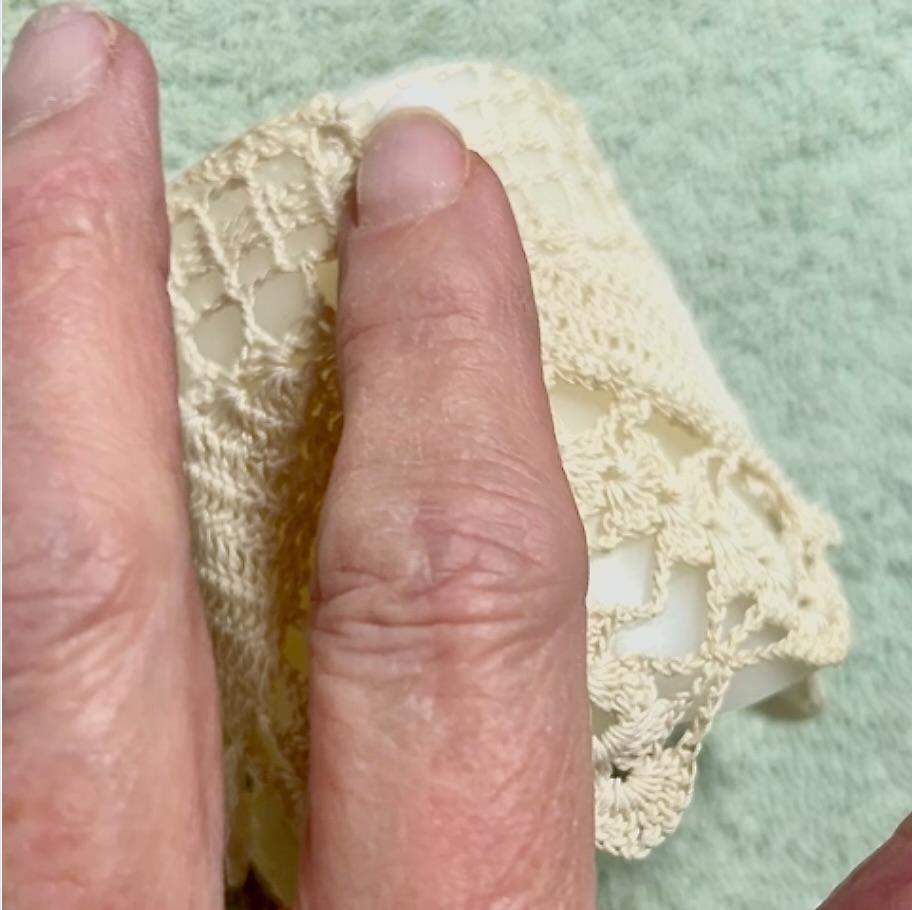
Always start with a flat, smooth piece of lace — it’s much easier to work with. Press the lace first if needed.
I found it easiest to:
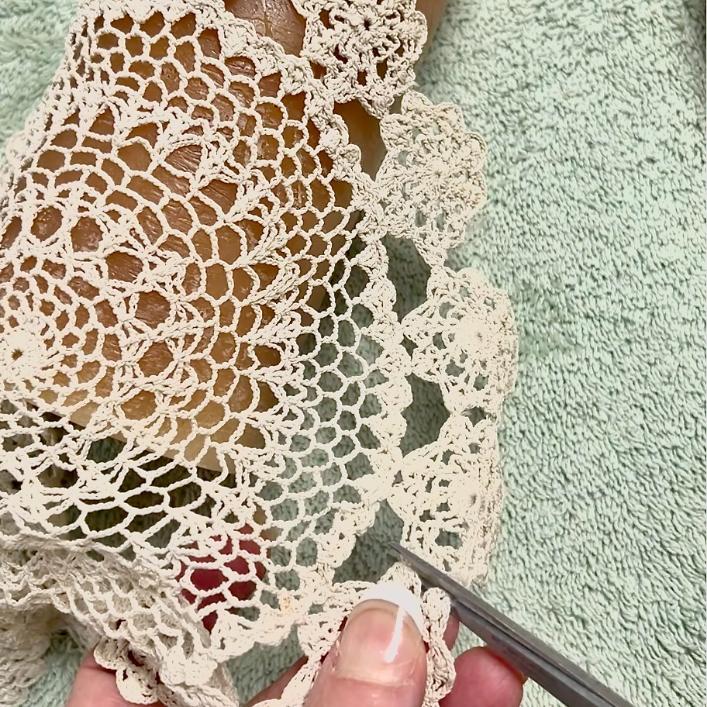
- Trim the lace to an approximate size and shape for each candle
- Be slightly generous at first
- Pull the lace snug so the ends meet neatly on the back of the candle
- Do a final trim just before heating that section of wax
Important: If your candle needs to fit into a holder, be sure to position the lace above the height of the holder so it doesn’t interfere with placement.
2) Heat Settings Matter-
I used a medium-high heat setting on my heat gun (about 4 out of 6) with the blower set on low.
A few key tips:
- Keep the heat gun moving constantly
- Aim for a broad area of softened wax, not one small, deep puddle
- Gentle, even heat gives you more control and a smoother finish
3) Embedding the Lace–
As soon as the first area of wax becomes soft and glossy, position the lace and gently press it into place with your fingers.
For the remaining areas:
- Heat the candle with the lace already in place
- Allow the wax to soften and seep up through and over the lace
This is where you can really play with the look:
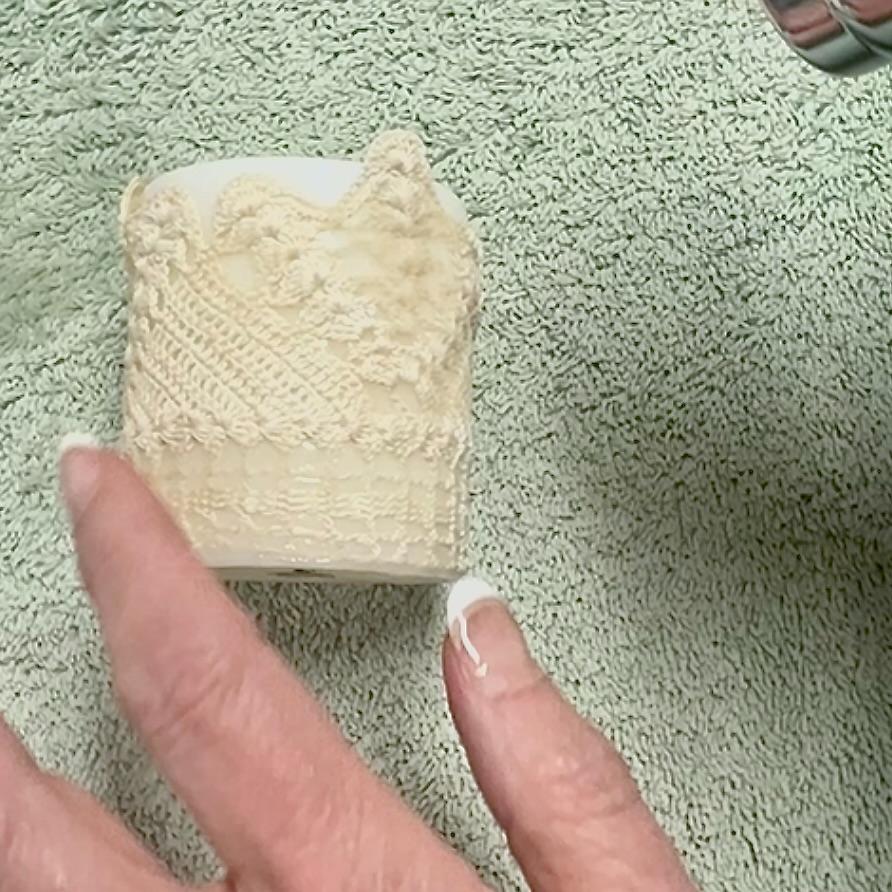
- For a softer, more subtle effect, allow the lace to become mostly submerged
- For thicker lace, you may prefer a partially embedded look so more texture remains visible
There’s no right or wrong here — just the aesthetic that appeals to you and complements your lace.
Tip: The longer you apply heat, the more the wax will cover the lace.
4) Smooth the Wax or Let It Cool-
While the wax is still warm, you have options:
- Gently roll the candle on a smooth surface if you’d like to embed the lace a bit more
- Or simply let the wax cool naturally in place
Once cooled, the lace should appear sealed just beneath the surface of the wax or with thick lace, the lace may be exposed above the surface of the wax.
5. Optional Finishing Touch–

If you’d like to add contrast, subtle color, or a hint of metallic shine:
- Lightly dry-rub paint or Rub ’n Buff over the raised areas of the lace
This step is optional but can really highlight the texture and elevate the finished look.

A Note on Using Lace-Decorated Candles
As with any decorated candle, a little intention goes a long way.
I tested this technique on both traditional candles and flameless candles. For flameless styles, this method works beautifully as long as the candle has a real wax exterior (not plastic).
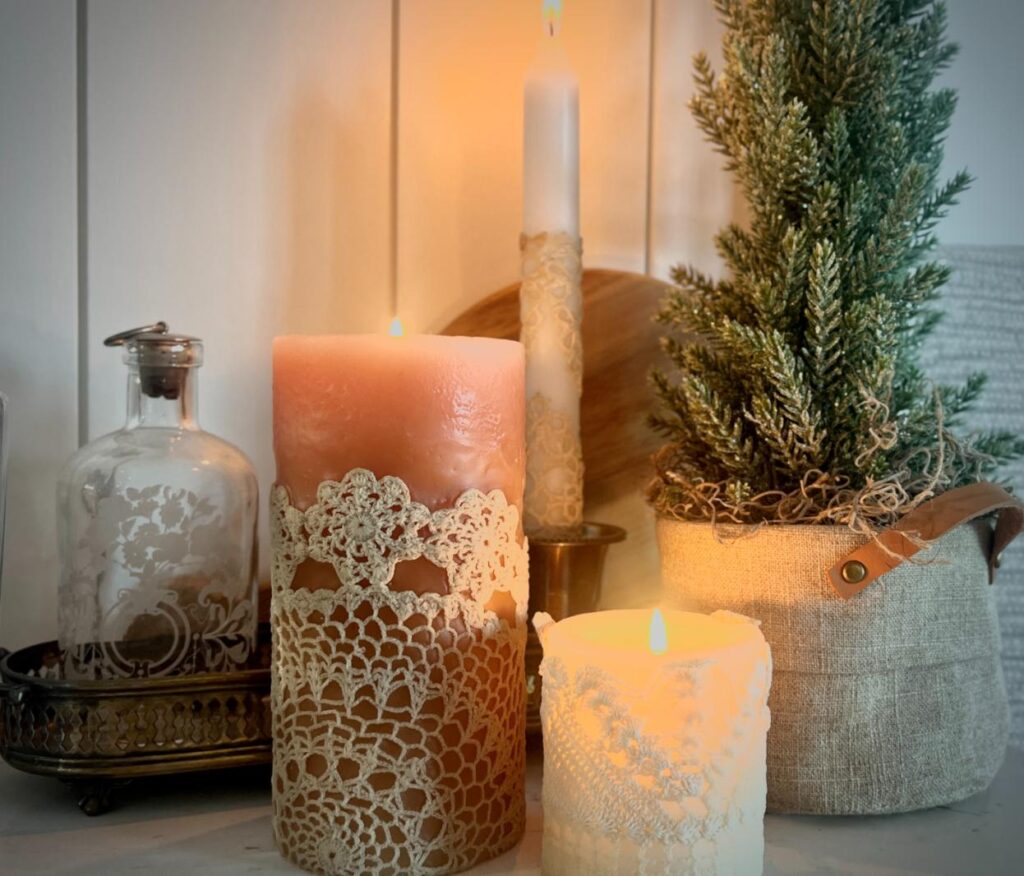
For pillar candles, the lace is embedded in the outer layer of wax. Since most pillar candles burn down the center and form an outer wax wall, the lace is unlikely to come in contact with the flame.
With taper candles, I place the lace lower on the candle and plan to extinguish them before the flame reaches that point. Any candles with lace placed higher are intended for decorative use only.
As always, never leave burning candles unattended.
Styling and Gift Ideas
Lace-embellished candles have a soft, timeless feel that works beautifully across seasons and occasions. A few favorite ways to use them:
Style Them
- Group pillars of varying heights on a tray for a simple centerpiece
- Pair tapers with vintage or brass candle holders for a romantic table setting
- Mix lace patterns for visual interest while keeping the candle color consistent
- Use flameless versions for shelves, mantels, or bedside tables
Gift Them
These candles make especially thoughtful handmade gifts:
- Hostess gifts — simple, neutral, and easy to style in any home
- Galentine’s gifts — soft, feminine, and meaningful without being fussy
- Bridal showers or wedding décor — lovely as table accents or favors
- Baby showers — particularly sweet in soft whites and ivories
Wrap a candle or two in tissue, add a simple tag, and you’ve got a gift that feels personal, intentional, and truly handmade.
One of my favorite parts of these Handcrafted Society challenges is seeing how differently each maker interprets the same theme. Lace may be delicate, but the creativity behind it is anything but.
Below you’ll find eight more lace-inspired projects from my talented Handcrafted Society friends — each one offering a unique take on crafting with lace.


Projects like this are a good reminder that creativity doesn’t have to be complicated to feel special.
A simple material, a familiar technique, and a little willingness to experiment can lead to something truly lovely.
I hope this lace candle project inspires you to look at what you already have and imagine new possibilities.


You are so creative, my friend! I never would have thought to attach a doily to the candles, but they turned out so pretty! Plus, this looks so easy and fun to do! Pinning now!
Thanks Donna! It is so easy and rather cathartic to do!
I love the way this came together, Diane. My Granny had a few small pieces of crochet and lace that she never got to finish, and I’ve been holding onto them because I wasn’t sure what to do with them. This would be a great solution so I can’t wait to try this now! Big hugs and thanks for the creative idea, CoCo
Perfect for just that CoCo. Let me know when you try them. I’d love to update my post with your interpretation.
A perfect way to repurpose lace or doilies is by dressing up your candles. A lovely, creative idea, Diane.
I love to see what we all come up with each month. So seldom do we have two of the same. I love having you as part of this circle!!!
Wow these candles look so fancy with the lace embellishment! I love how they turned out. Plus the process looks pretty simple! Thanks for the inspiration sweet friend!!
These lace candles look like something to buy in a bougie boutique! You are always so clever, Diane! Such an accessible project that is both nostalgic and unique!
Diane – With every HCS post, I am always eager to see what you create. You are endlessly creative and make such unique projects that are beautiful and functional. These lace candles are a perfect example. They would make lovely gifts too! Thank you for the clear instructions.
It’s always so fun, and a bit funny-odd, where our/my visions go, right? But that’s what makes this such fun. Besides getting to work with such delightul ladies.