How to Make Love Letter Sugar Cookies (Easy Valentine Cookies for Beginners)
These easy Valentine sugar cookies look fancy but are perfect for novice bakers. Learn how to decorate with chocolate wax seals step by step.
Do you swoon over the idea of creating cute frosted sugar cookies?
Did you spend way more time than you care to admit watching cookie-decorating videos during the holidays?
Same. 🙋♀️
So consider this post a little love letter from one wannabe cookie decorator to another.
These sweet love letter sugar cookies are designed especially for novice bakers and beginner decorators. They look charming, feel a little fancy, and best of all—they’re totally doable.
You don’t even need a cookie cutter.
You will, however, need a wax seal stamp (and trust me—it’s the fun part).
The basic steps:
- Make your sugar cookie dough
- Make the chocolate “wax” seals
- Cut and bake the cookies
- Frost and embellish
TABLE OF CONTENTS:
The links in this post may include affiliate links, which means if you purchase anything using these links, you pay no extra, but I may receive a small commission that helps keep this blog running. I truly appreciate you using affiliate links whenever possible. Please know that I will never recommend a product I do not believe in!
Quick How-To Card For the Confident Crafter
Whose Ready to Jump Right in

How to Make Love Letter Sugar Cookies (Beginner Friendly)
A beginner-friendly tutorial for love letter sugar cookies using royal icing and chocolate wax seals—easy, forgiving, and fun to decorate.
Materials
- Cut-out sugar cookie dough (homemade)
- Wilton candy melt discs (or similar)
- Royal icing
Tools
- Wax seal stamps (metal)
- Heat gun or double boiler
- Parchment paper
- Metal cookie sheet
- Pastry or piping bags
Instructions
- Make & Chill Dough – Roll dough to desired thickness, sandwich between parchment or plastic wrap, and chill.
- Create Chocolate Seals – Melt candy melts, press with cold wax seal stamps on a frozen cookie sheet, and let set.
- Cut & Bake – Cut rectangles to resemble envelopes and bake according to recipe.
- Decorate – Outline with thick royal icing, flood with thinned icing, and press chocolate seal into place before icing sets.
Notes
No cookie cutters required. Beginner mistakes welcome.
Keep scrolling for all the detailed steps + hints and tips!
Detailed Valentine Cookie How-To
Step 1) Sugar Cookie Dough-
If you already have a favorite cut-out sugar cookie recipe, by all means—use it.
What I don’t recommend is store-bought slice-and-bake dough. It tends to spread, which isn’t ideal when you’re going for neat edges and a specific shape. There are tricks to control spreading, but if you’re putting in that much effort, you’re honestly better off using a recipe designed for cut-out cookies from the start.
I use this sugar cookie recipe from Laura at Joy Food Sunshine. The texture is excellent, but I make a few small tweaks for flavor:
- Substituted unsalted butter for salted
- Increased the vanilla slightly
- Added a generous splash of butter-flavored extract for extra depth
Because of the extra liquid, I needed to add 1–2 tablespoons of flour to keep the dough just right.
While the dough is still soft and workable, roll it out into two slabs of your desired thickness and large enough for your rectangle cookies. Sandwich each slab between two sheets of plastic wrap and chill according to your recipe instructions.
While the dough chills, it’s the perfect time to make the chocolate seals.
Materials and Supplies-
For the Cookies
- Homemade cut-out sugar cookie dough, your favorite recipe, refer back to notes in Step1.
- Rolling pin
- Sharp knife or pizza cutter (no cookie cutter needed)
- Plastic wrap
- Parchment paper
- Baking sheets
For the Chocolate “Wax” Seals
- Candy melt discs (I used Wilton)
- Metal wax seal stamps, this is the heart one I have
- Heat gun, this is the one I bought and LOVE and this is another good one for all kinds of crafts
or a small double boiler setup - Metal cookie sheet (for chilling)
- Freezer space
For Decorating
- Royal icing (two consistencies recommended: outline + flood), mine is part of the same cookie recipe
- Pastry or piping bags, you don’t even need tips. just snip the end.
If you’re new to royal icing, don’t stress—this project is very forgiving.
Step 2) Make Chocolate Seals-
If you’re a video learner, I’ve got ya!
Just click this video below and you’ll jump right to it.

This step took a little experimenting, so I’m sharing what worked (and what didn’t) to save you the trouble.
I originally assumed chocolate would behave like wax—but chocolate cools more slowly, and I quickly learned that cold stamps are the key to clean release.
Once I figured that out, this method worked like a charm.
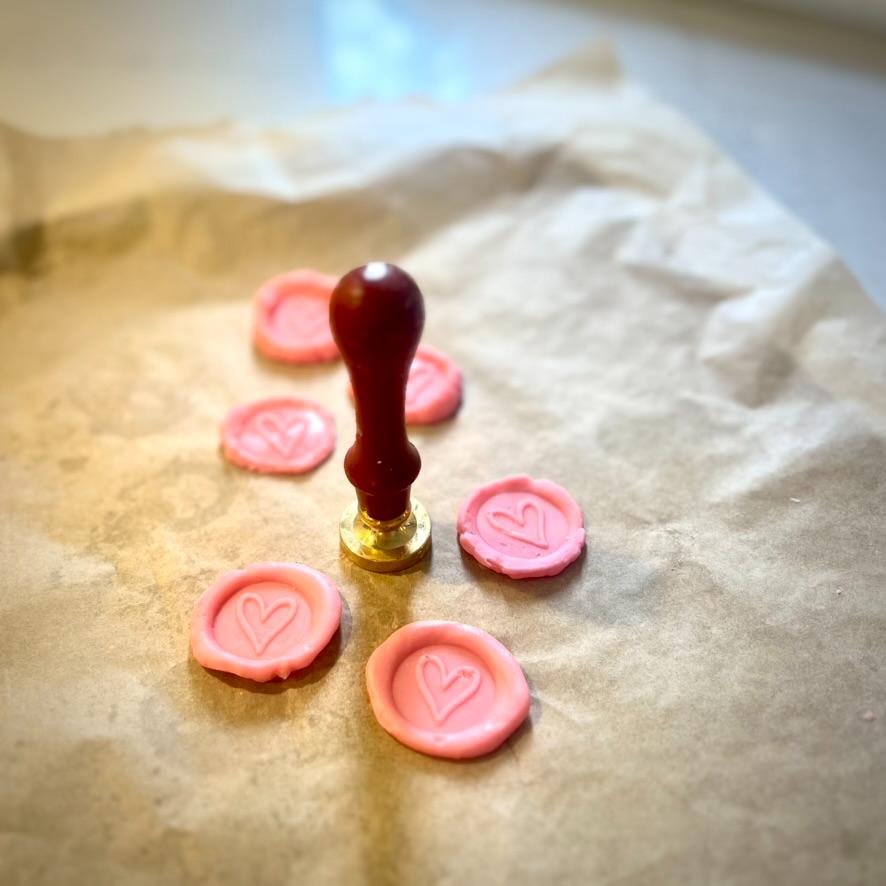
What Worked Best
Because I had three different wax seal stamps, I was able to make three seals at a time on a single small piece of parchment paper.
Here’s the process that worked consistently:
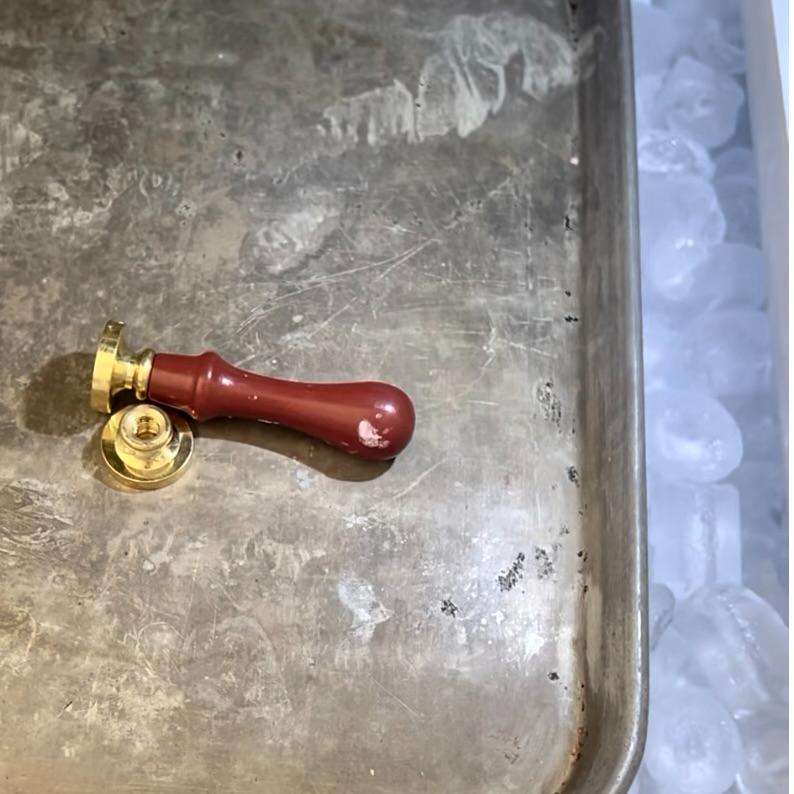
1. Place metal cookie sheet and your wax seal stamps in the freezer for at least 20 minutes.
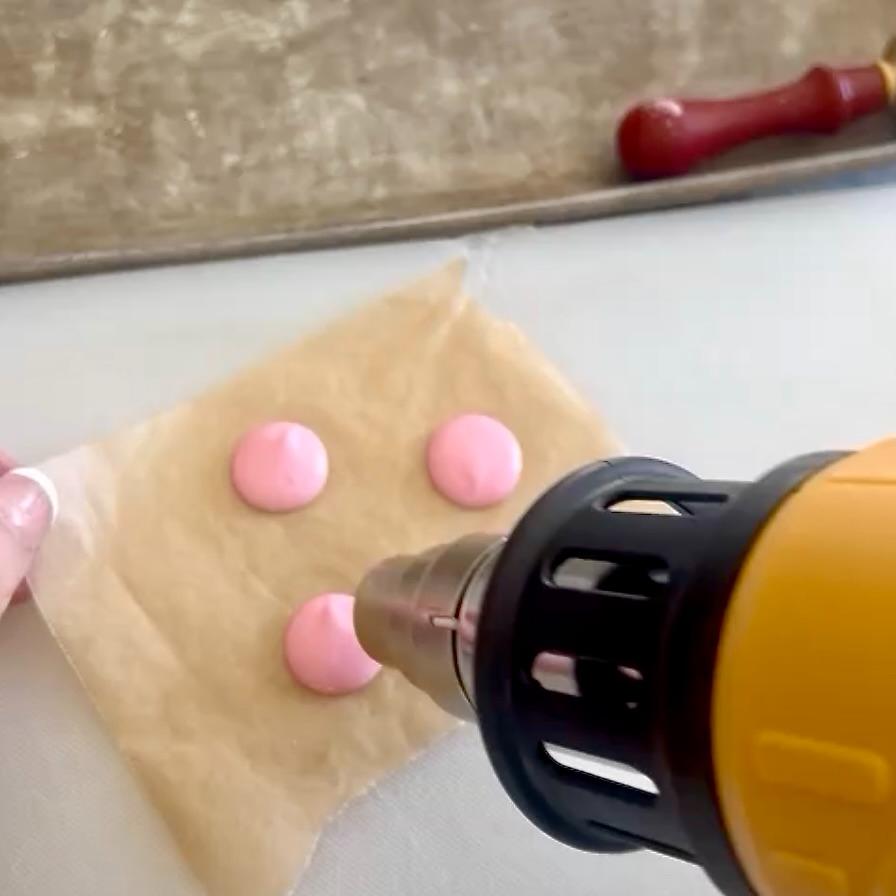
2. Place 3 candy melt discs on a small piece of parchment paper on a heat safe surface.
3. Using a heat gun, melt the discs for 15-20 seconds, keeping the heat moving.
- With just a little experimenting, I found my candy discs melted perfectly at level 4 (out of 6) and the blower on low.
4. Working quickly, pull the cookie sheet and stamps from the freezer.
5. Slide the parchment paper onto the cold baking sheet.
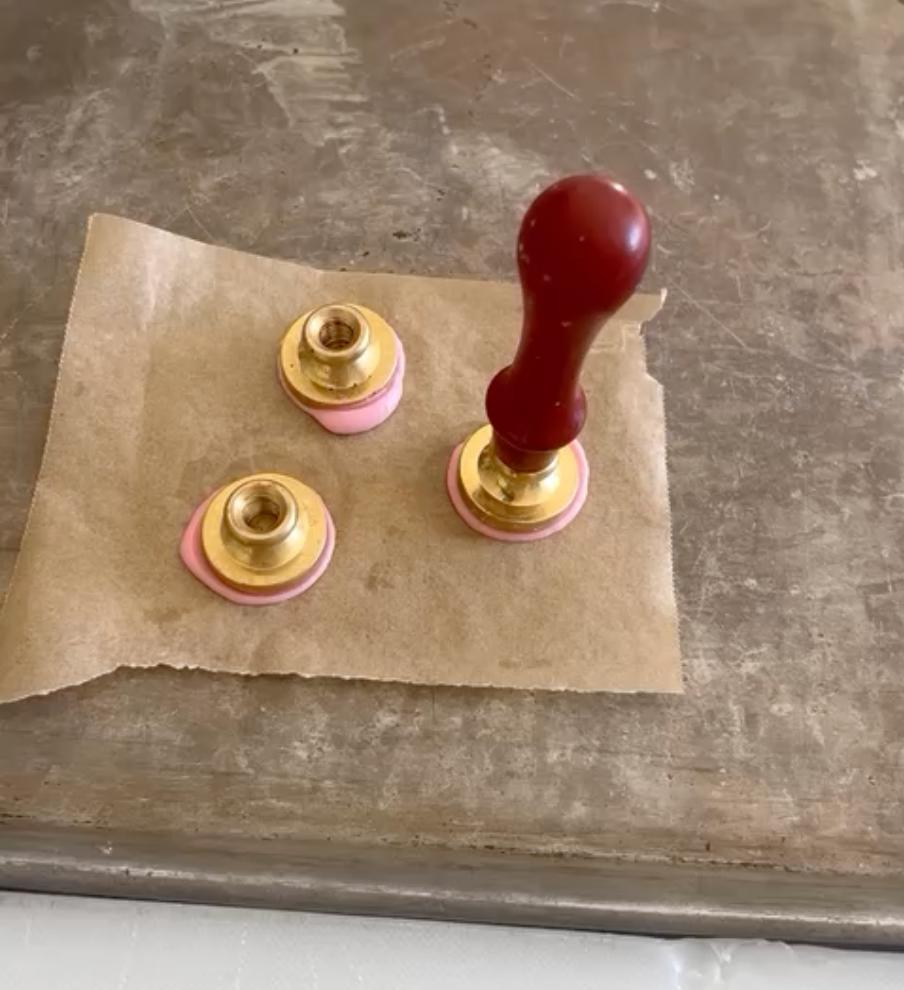
6. Press a cold stamp into each melted chocolate mound.
7. Let rest for about 30 seconds, then lift straight up — the seal should release cleanly.
A Few Helpful Notes

Once I got the hang of it, I discovered I could work efficiently:
- I melted three discs at a time, using three different stamps.
- I could get two full rounds from one freezer session by waiting about 15 seconds, then melting another set of discs and reusing the still-cold tray.
- The first round releases fastest because the stamps are fully chilled.
- The second round may take slightly longer since the stamps aren’t quite as cold.
- Work efficiently so the chocolate stays warm while you transfer to the cold sheet.
- If your seal sticks or breaks, it usually means the stamp was either too warm or left in place too long.
Want Thicker Seals?
For a thicker, more dimensional seal:
- Melt one disc for about 15 seconds
- Place a second disc directly on top
- Heat again for another 15 seconds
- Transfer to the cold cookie sheet and apply the cold stamp
No Heat Gun? No Problem.

If you don’t have a heat gun, you can improvise:
- Use a double boiler to melt the candy melts, or my version of a steamer basket in a small saucepan of water
- Spoon a small puddle of chocolate onto parchment paper placed on a cold cookie sheet
- Press with cold stamps as described above
Timing will vary depending on your heat gun, chocolate brand, and room temperature—so don’t stress if you need to tweak the seconds a bit. A test run or two makes all the difference.
SIDENOTE: Are you intrigued about using a heat gun to melt the chocolate? It is sooo much easier than the whole double boiler thing. And virtually no clean-up!
But maybe you don’t think you can justify a heat gun for this one use. I’ve got ya!!!
I bought my heat gun to make these candles that I still love. They have become a favorite go-to for hostess gifts and more. They look so high-end boutique — yet they are so quick and easy!!!.
Step 3) Cut and Bake Cookies-
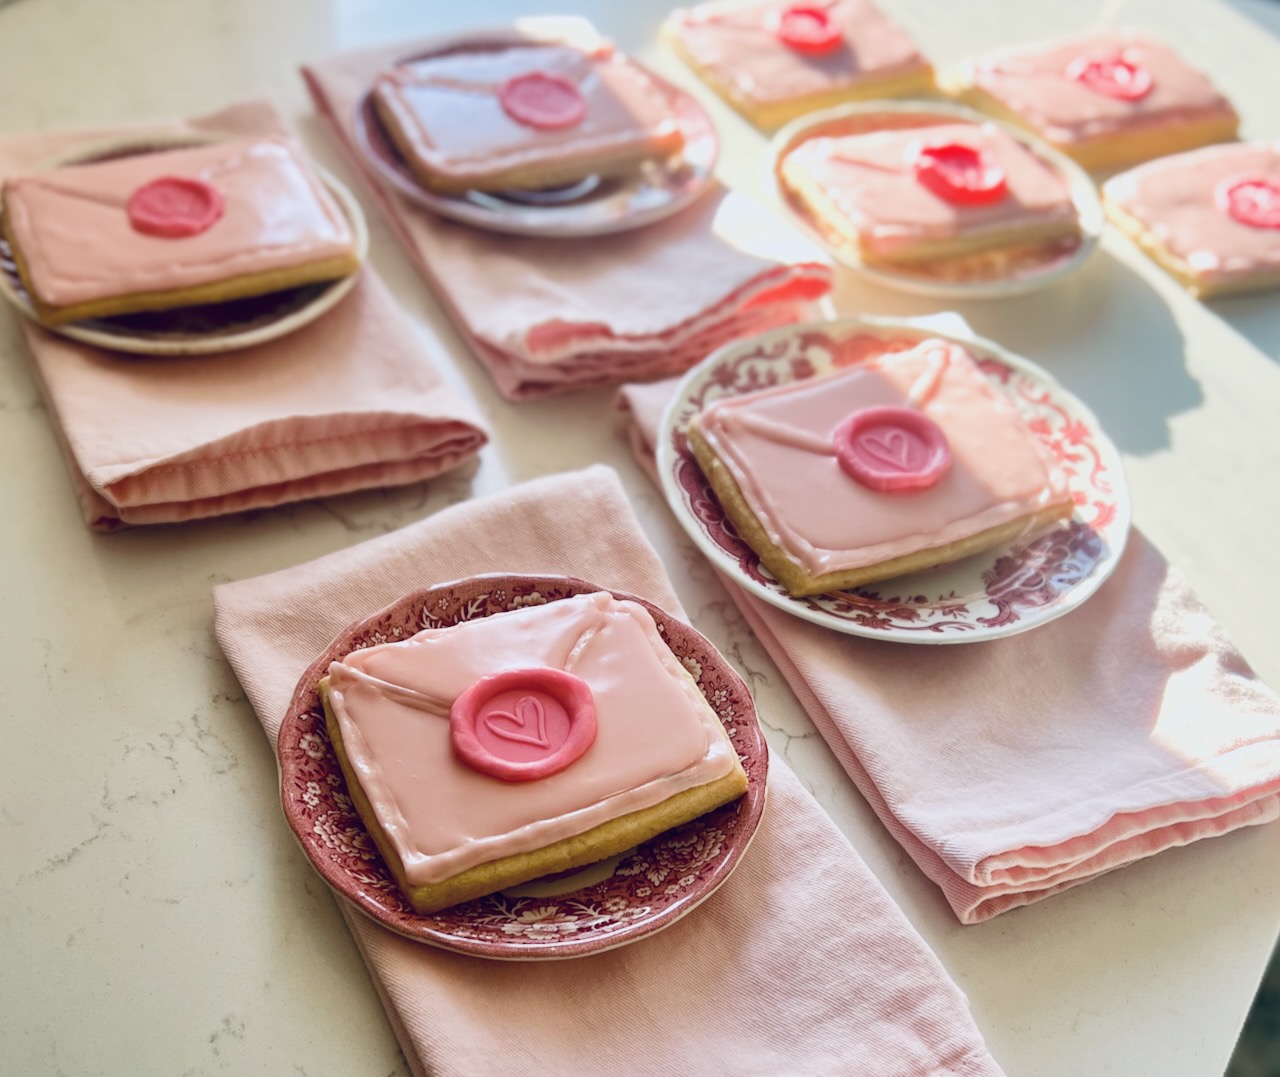
Once your dough is chilled, cut your cookies into rectangles. Mine were approximately 2.75 × 4.25 inches to resemble envelopes—but feel free to adjust the size or shape.
Bake according to your recipe instructions and allow the cookies to cool completely before decorating.
Step 4) Frost the Cookies-
I also used the royal icing recipe included with Laura’s sugar cookie recipe. It came together quickly with powdered sugar, corn syrup, milk, and vanilla.
I added two tiny drops of soft pink gel food coloring—just enough for a subtle blush.
Here’s how I prepped the icing:
- Placed a cup of icing in one pastry bag for outlining
- Then I thinned the remaining frosting in the mixing bowl with a splash of milk. This thinner icing was loaded into a second pastry bag for flooding the envelopes
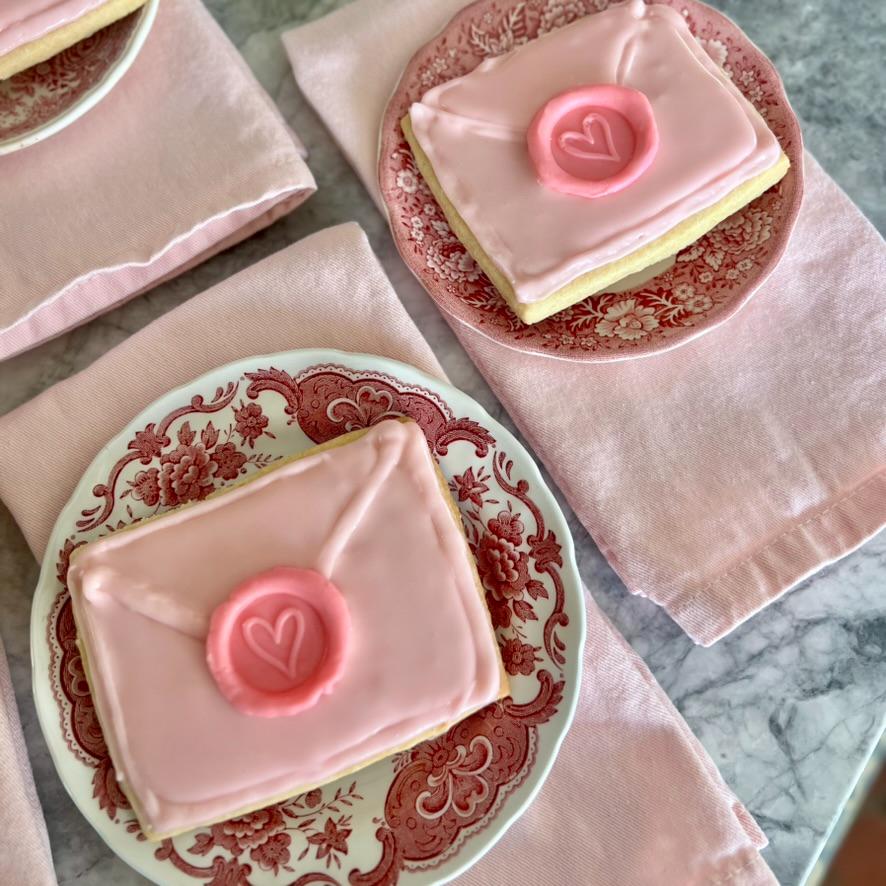
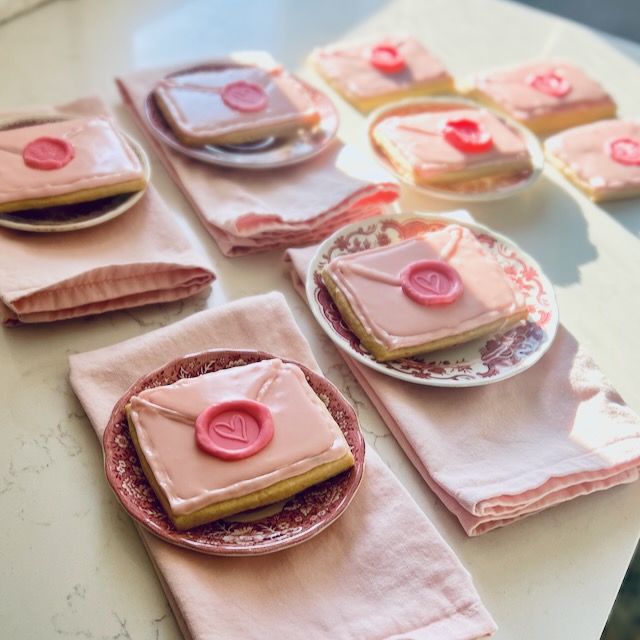
First, I outlined the envelope and added two diagonal lines to suggest the flap. Then I flooded the cookie with the thinner icing.
Before the icing set, I gently pressed a chocolate seal into place.
Final Thoughts
Super easy? Yes.
Perfect? Absolutely not.
Adorable and satisfying? 100%.
And considering I hadn’t worked with royal icing in probably 20 years, I was thrilled with the results.
Watch out—this may be the beginning of a very royal future.
These cookies are such a fun way to get creative without stressing about long-term storage or perfection—and they make the sweetest little Valentine treat.
These cookies are a great way to spread some extra love right now!