DIY Cutest Clay Valentine Conversation Hearts the Easy Way
The trademark Valentine’s day candy can be easily supersized into the cutest Valentine decor — embellishments for tabletop displays, to wreaths and lots of “in-betweens”!
I have the easiest way to make them your very own conversation hearts with air dry clay inspired by the real candy hearts — even mimicking the original real conversation hearts’ method of a letter press for the message – as opposed to the current laser printing.
This easy way is fun and a bit quicker because we tint the clay before picking up our rolling pin and cookie cutter to make our clay hearts
Coming up with the fun phrases might just be the hardest part! But no worries, I’ve compiled quite a list at the end of the post to get you started
Of course, personalizing these is highly encouraged!!!
Plus, this is a great beginning clay project — after all, we know the real candy hearts have tons of imperfections! Just saying . . . . no need to obsess over perfection!
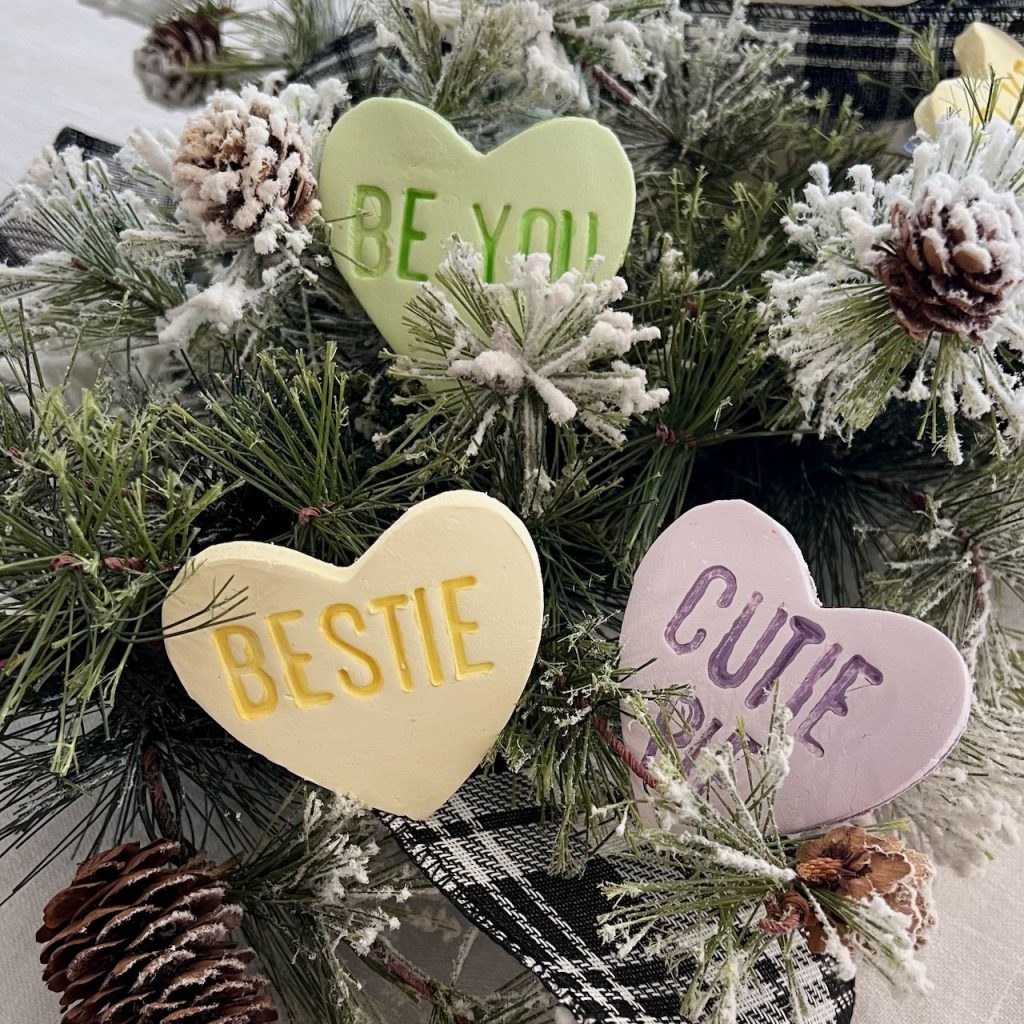
TABLE OF CONTENTS:
Let’s Make Clay Conversation Hearts — the Easy Way!
Materials and Supplies:
- White Air Dry Clay — I used this Sculpey from Michael’s or from Amazon, but I usually use this Das
- Acrylic Paint — craft store paint in different colors, see note below
- Heart Shaped Clay Cutter or Cookie Cutter , mine is 2.5-inches
- Letter Stamp Set, ones made for clay work best, but you can optionally use rubber stamps
- Needle tool, thin awl, or skinny drink straw (like a cocktail stir), optional
- Gloves, one pair per paint color (not optional)
- Clay Roller (can substitute a non-porous rolling pin)
- Craft knife, optional
- Wax Paper (I used the backing paper from adhesive vinyl)
- Plastic bags or plastic wrap
- Paper Towels
- Small bowl with water
- Small brush, such as an old toothbrush
- Smooth, protected work surface
NOTE: The acrylic paints are used to tint your air dry clay. I wanted my hearts to mimic the pastel hearts of old — of my youth. But I used much bolder versions of each of my pastel colors because I am mixing a small amount of paint with a proportionally large amount of white clay. I don’t want to add too much paint, or it might alter the properties of the clay. The more saturated the paint color, the less you have to mix in.
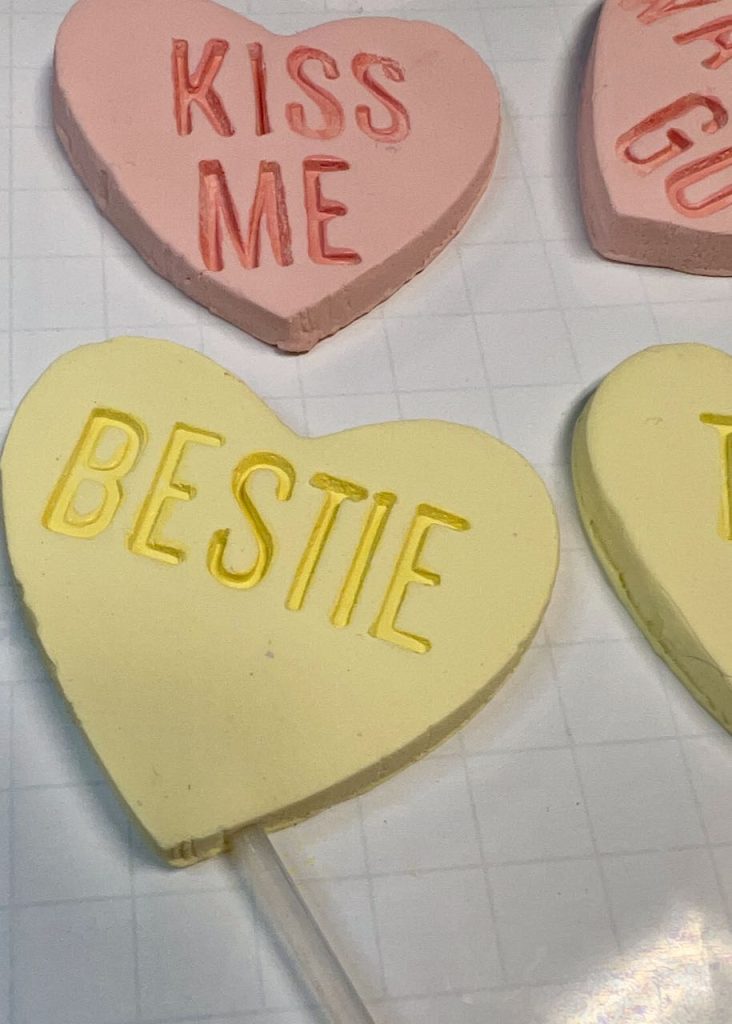
Also, I wanted to have my text be in the bolder color of the heart itself, rather than all red text like the real conversation hearts.
So you need a small bottle of craft paint for each color of hearts you want to make, and optionally a red for the text.
As you probably know, many links here are affiliate links, meaning I may receive a small compensation, but you do not pay a penny more. I greatly appreciate you using one of my links whenever possible.
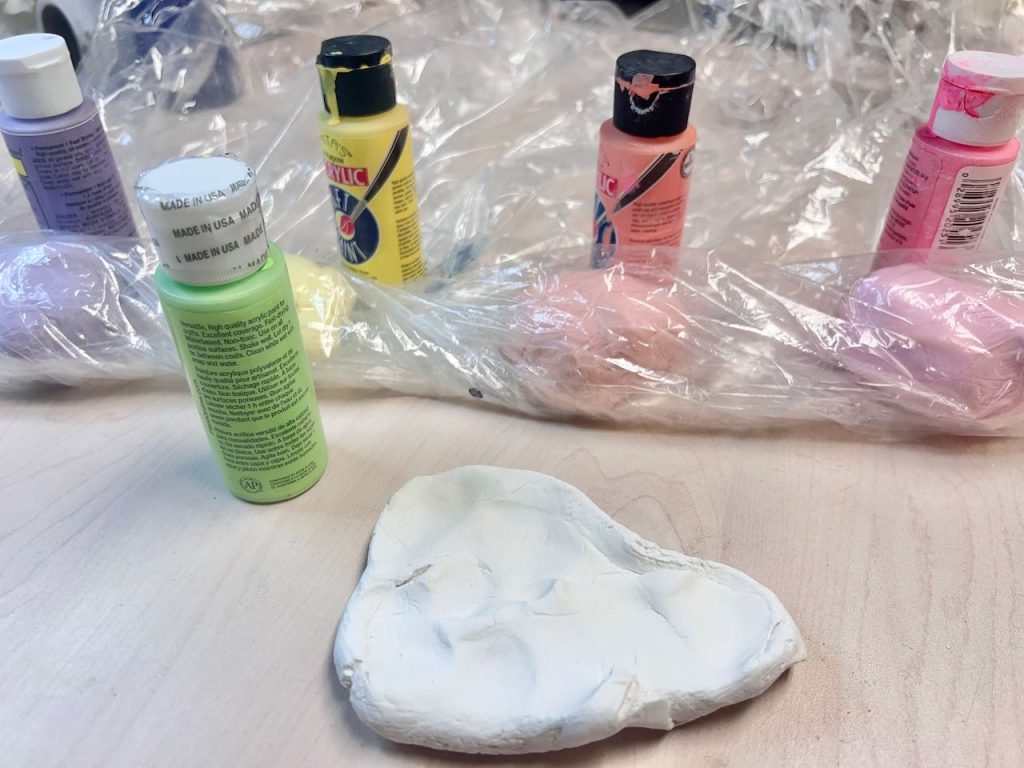
Step 1) Condition and Tint the Clay–
Cut off a small section of clay for each color. I cut off 3/4 – 1-inch for each of 5 colors.
Immediately wrap up remaining clay in air tight plastic wrap. and wrap each block in a plastic bag or wrap.
NOTE: With air dry clay, always keep it wrapped up when it is not actively being worked. I have learned to keep a damp paper towel close by. If you get interrupted, a damp paper towel can serve as a temporary solution.

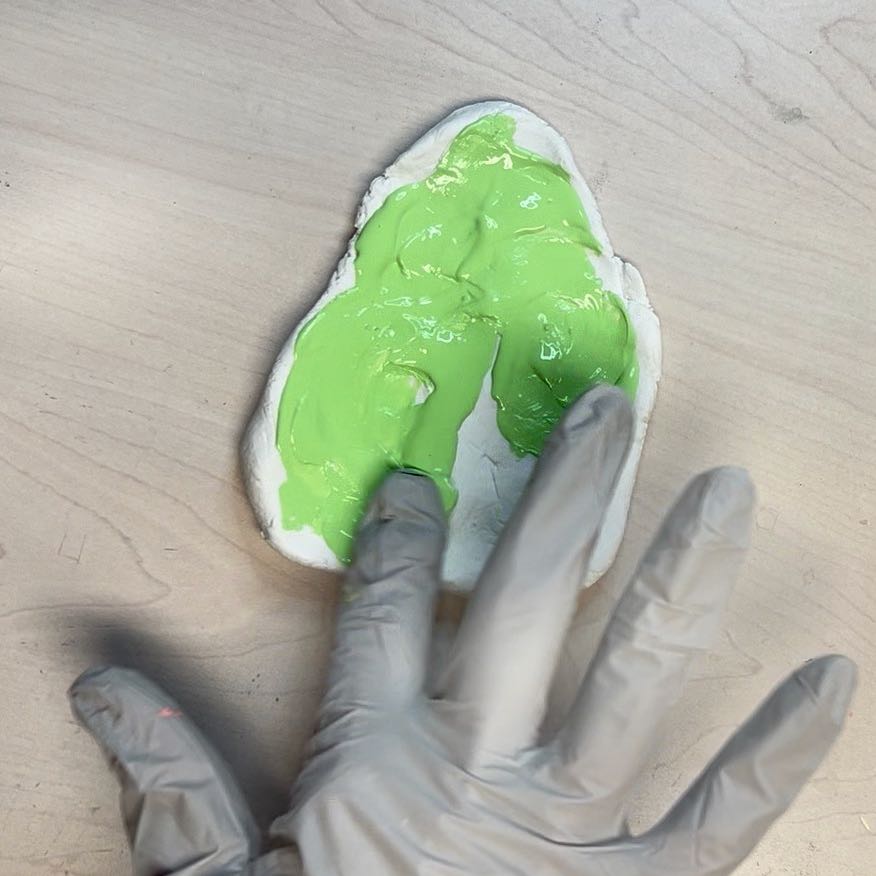
Roll the first small block of clay in your hands to warm it and condition it. Once it is pliable, smush it into a long-ish flat blob on your work surface.
With gloves on. add a generous squirt of paint. Use a finger to smear it around to cover the clay blob.
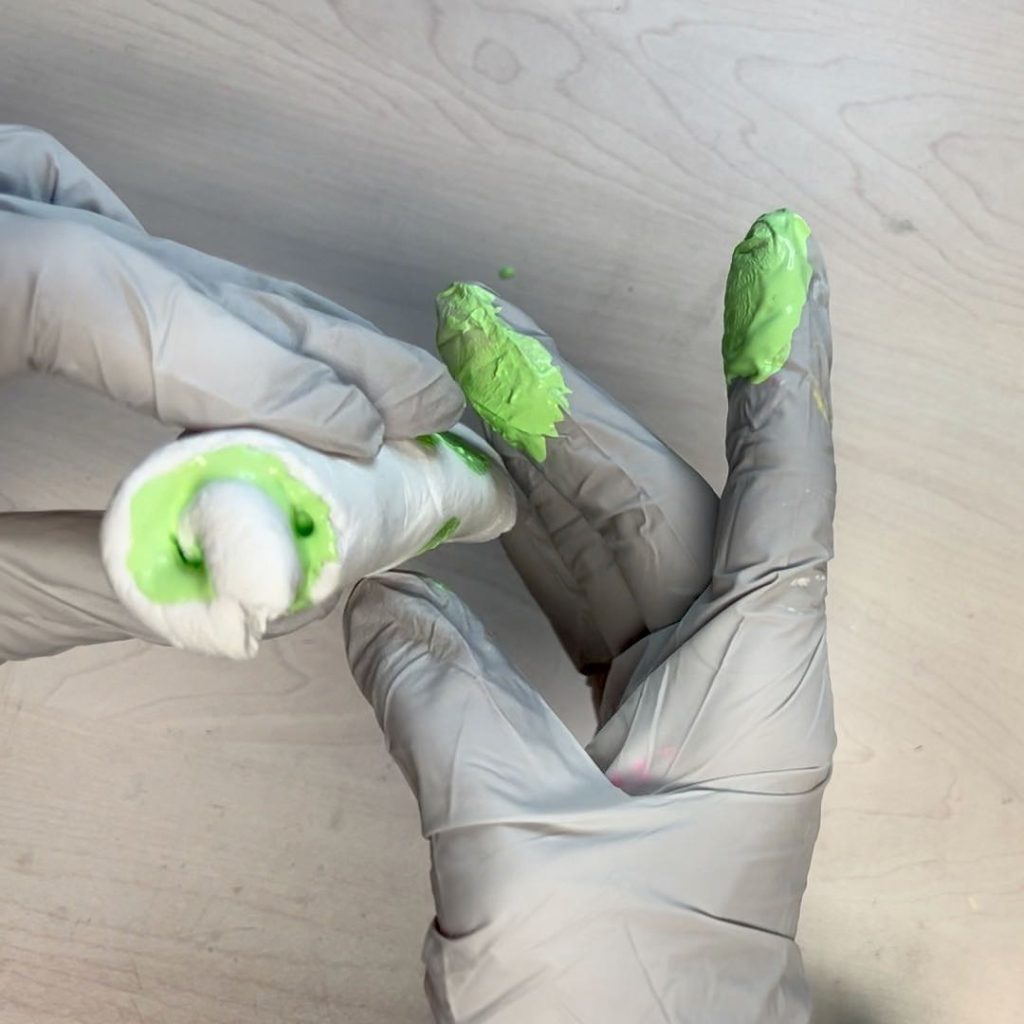
Start at one narrow end and roll it up.
Now channel your kindergarten self and work and knead it between your hands. Really work it to get all that color thoroughly incorporated. If you feel like it needs more color, repeat the process.
Think of this as therapeutic stress relief — just like a stress ball, right? Certainly much cheaper (and fun) than therapy!
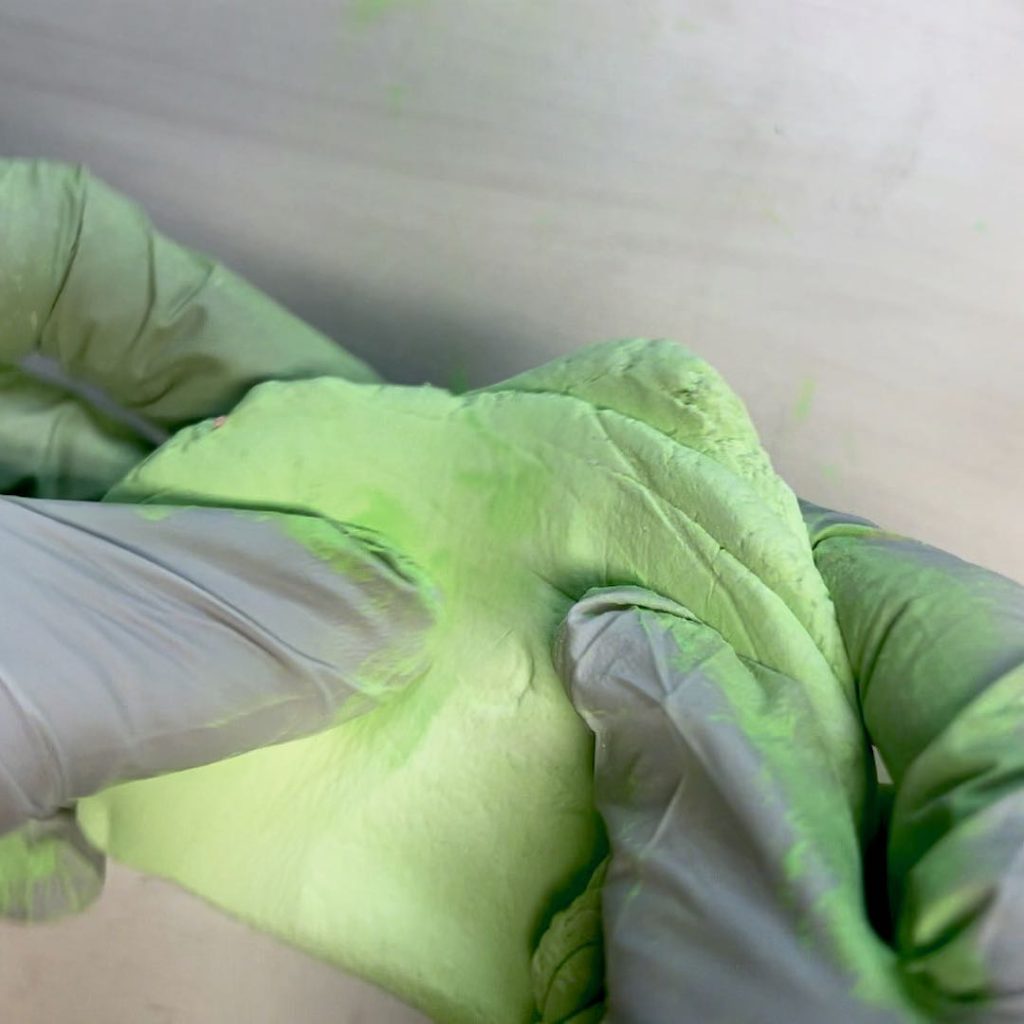
When there is no more wet paint, and you’re just working to get the color evenly incorporated, you can knead it rather aggressively on your covered work surface. If it wants to stick, try kneading on a layer of wax paper.
Once your first color is all incorporated, wrap it in a plastic bag or plastic wrap.
Change your gloves!!!
Repeat with your next block of clay and paint color.
Step 2) Cut Out Your Clay Hearts —
Cutting:
On a piece if wax paper, use your clay roller or non-porous rolling pin to roll out your clay to your desired thickness.
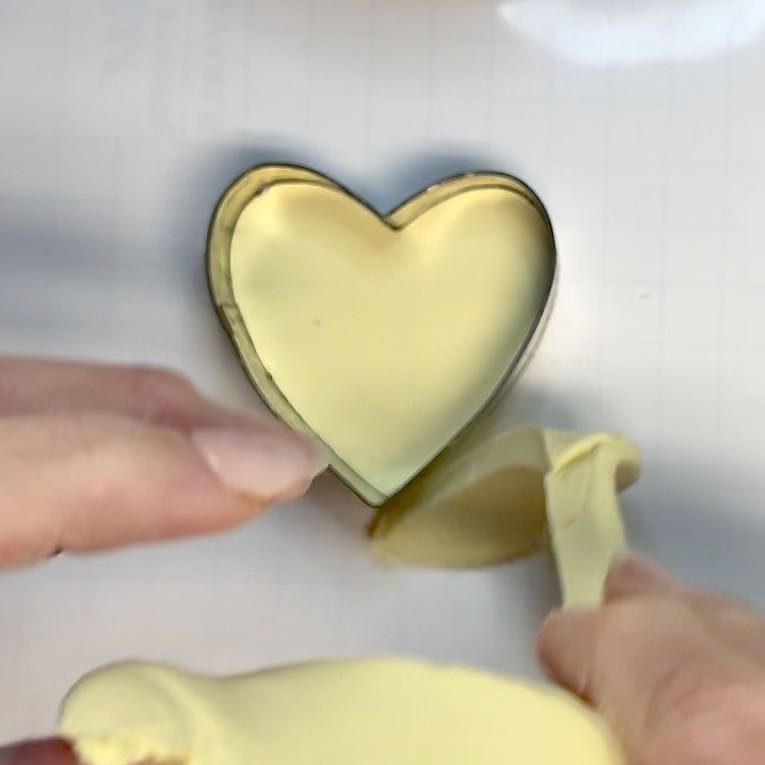
Use you heart cutter to cut your clay.
Wipe the edge of your cutter between cuts. If clay sticks to it, you can dip it in a bit of cornstarch.
Remove the excess clay and roll into a ball and move to the side and cover.
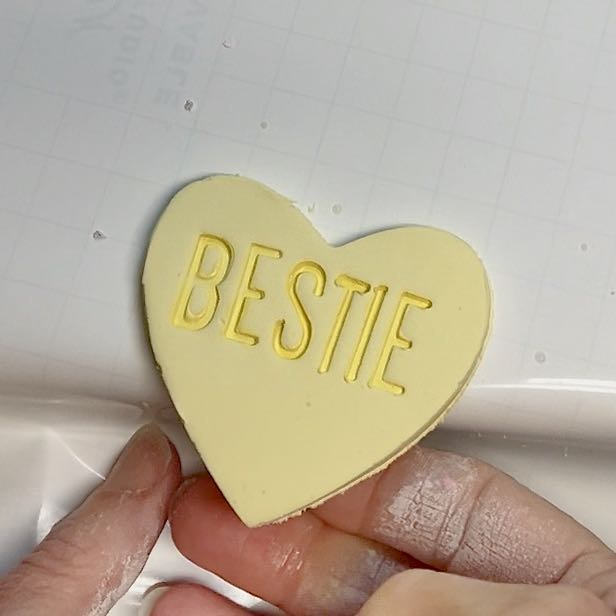
Stamping:
PRO TIP: Keep your bowl of water handy. As soon as you use a stamp, drop it in the water. Then stamp the next letter and into the water, repeat, repeat.
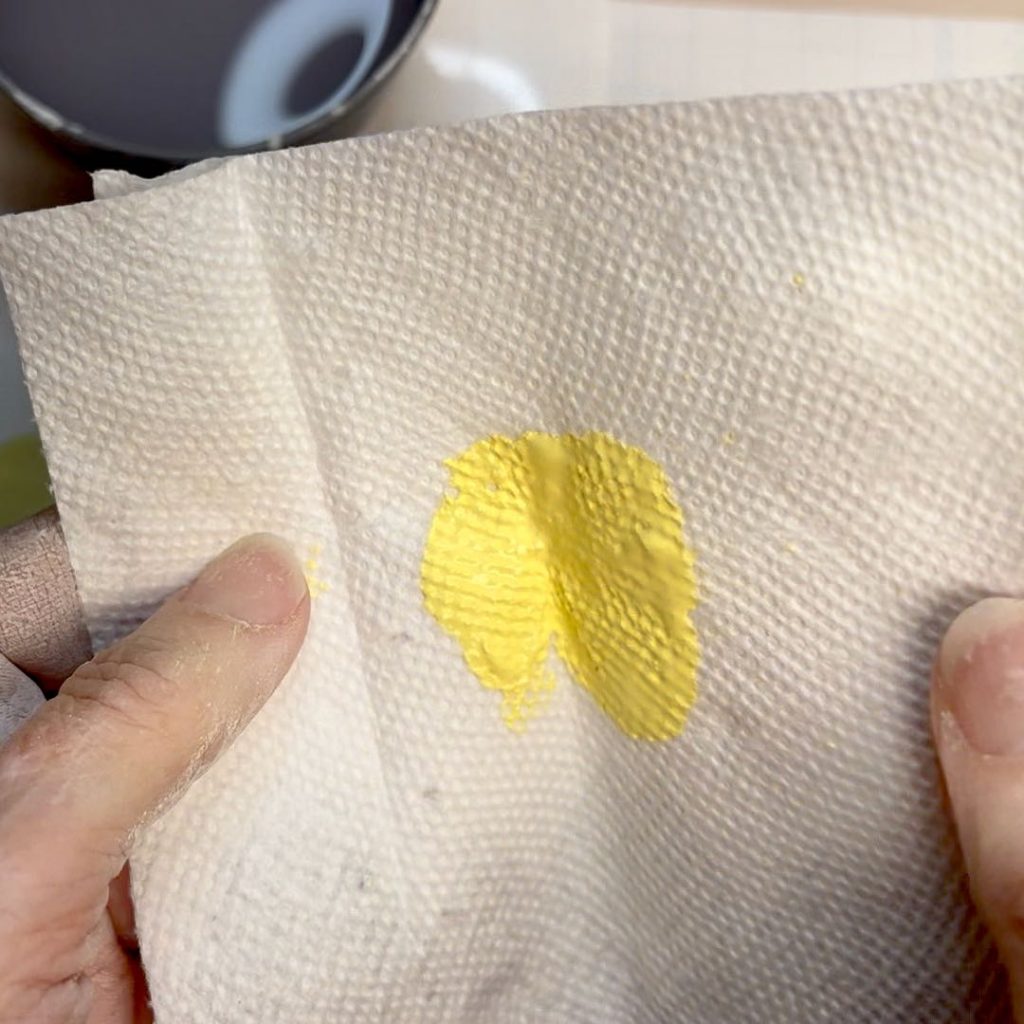
Fold a dry paper towel in half. Squirt a small-ish dollop of paint in the center, then fold the paper towel along one edge of the dollop and open to create a stamp pad of acrylic paint for our works. Your paint should not be too thick. It should just coat the bottom of your stamp not up the sides.
PRO TIP: Considering the width of each letter, start with one of th center letters and move outward in each direction
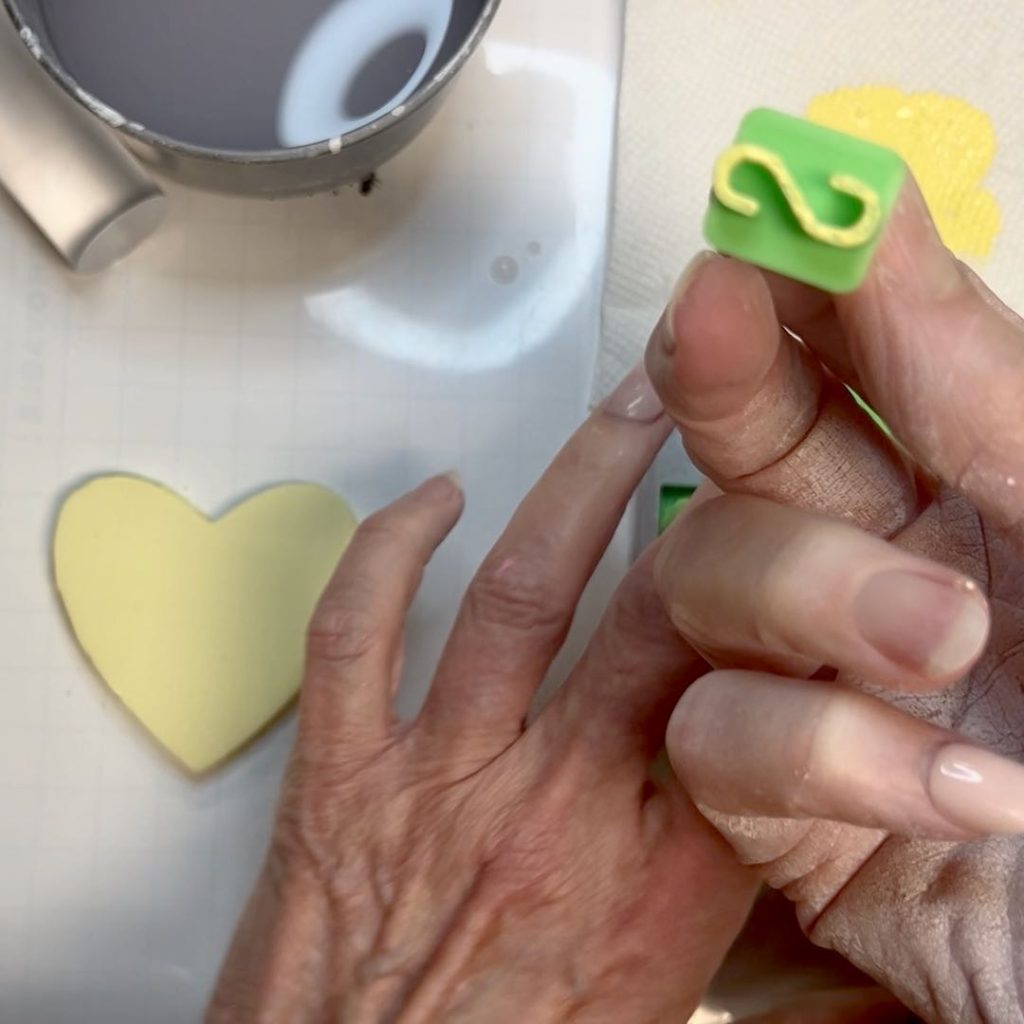
Dip the first letter in the paint. Look to make sure the letter is covered. If too much paint, blot some off on the paper towel. With a straight up and down movement, apply stamp to the clay.
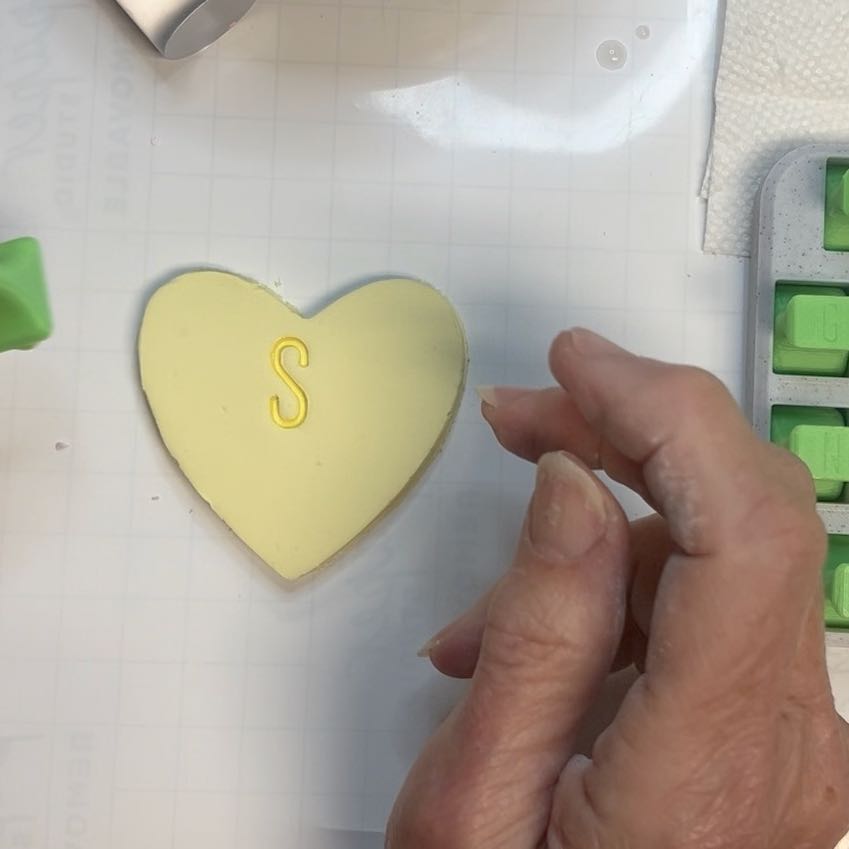
PRO TIP: Don’t push so hard that you leave stamp outlines. If you botch a letter or two, no worries, just roll up that heart with the excess clay and start this step again.
Each successive conversation heart will get better and better! You’ll get the feel for how hard to push and how to look at the spacing between your letters.
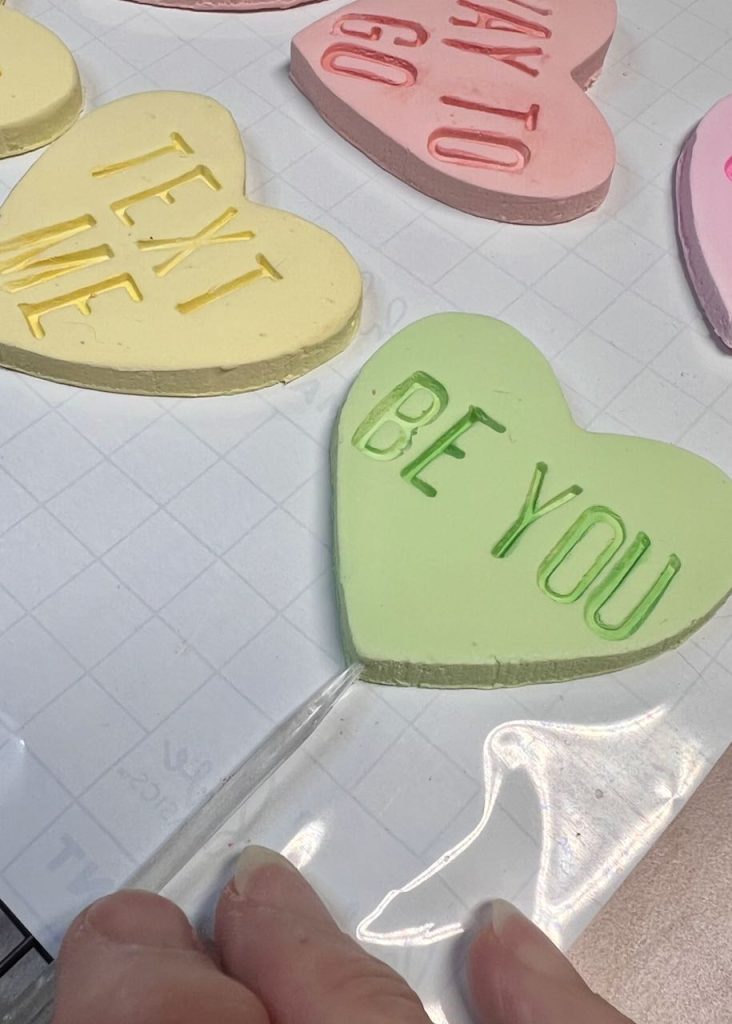
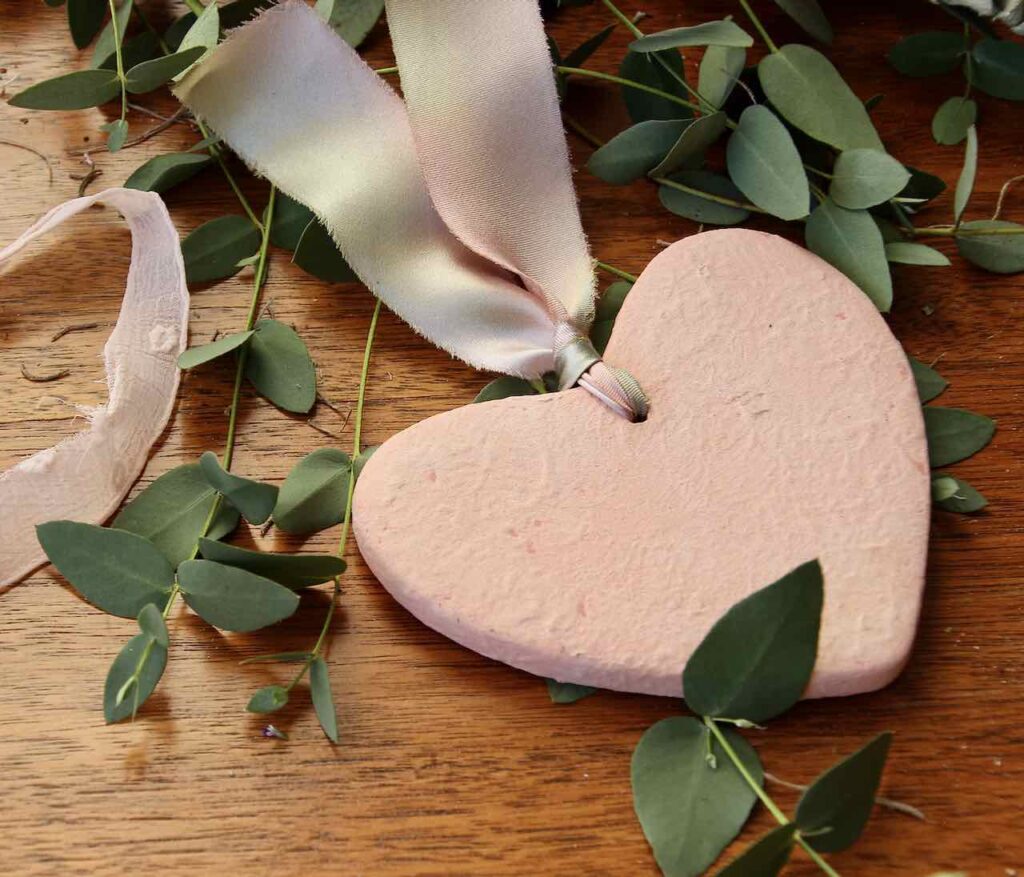
When your heart is cut and stamped, Now it the time to add any holes for ribbon or twine. I also added some holes for skewers to some in case I wanted to use a few to embellish house plants.
Step 3) Final Touches And Drying–
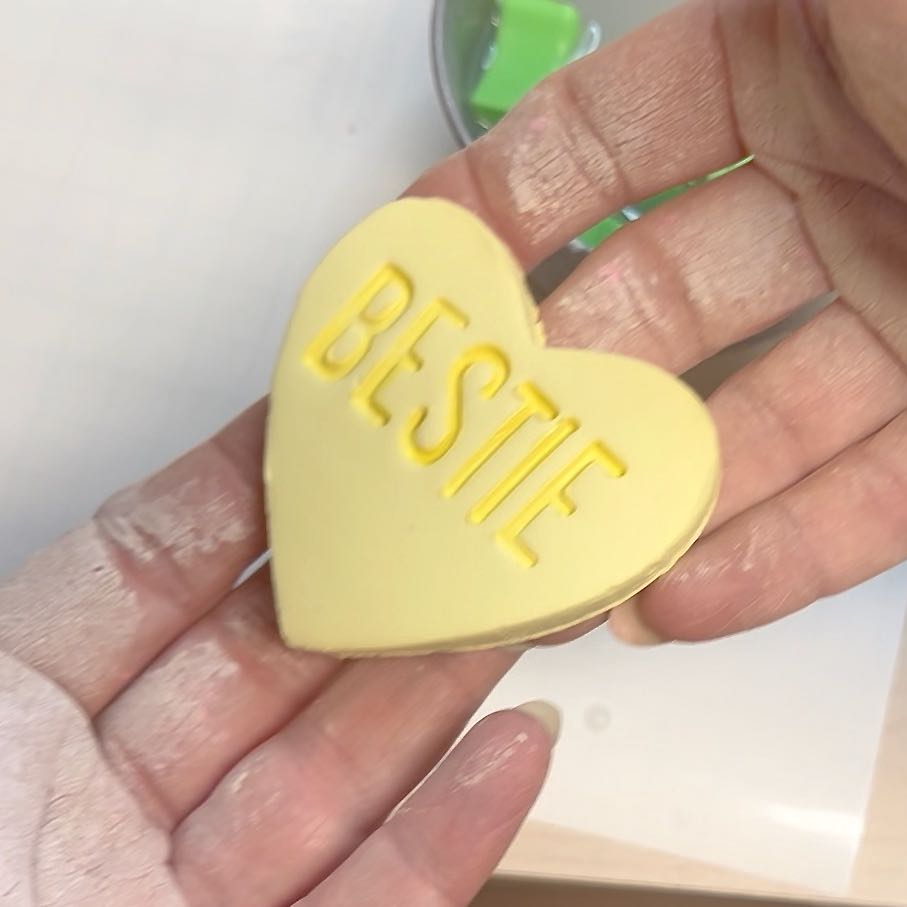
Slide the wax paper to the table edge. You should be able to slide one hand under the heart as it comes off the table.
PRO TIP: when the clay is still soft and pliable, a damp finger can smooth out any surface marks. and smooth and refine edges.
The bottom edge of your clay heart may be a bit “scruffy”. Dip a finger in your water and gently smooth those edges. You’ll be able to refine them even more after they have dried.
Place on a tray or table where they can dry.
With a fresh paper towel, wipe the letter stamps clean and dry. This is where the small brush come in. Don’t let any paint dry in the corners of the letter. Place the stamps back in the rack.
Repeat steps 2 and 3 for the remaining clay of the first color. Any clay that is too small for a heart can be save in a resealable bag for another project.
Then onto the next color and the next.
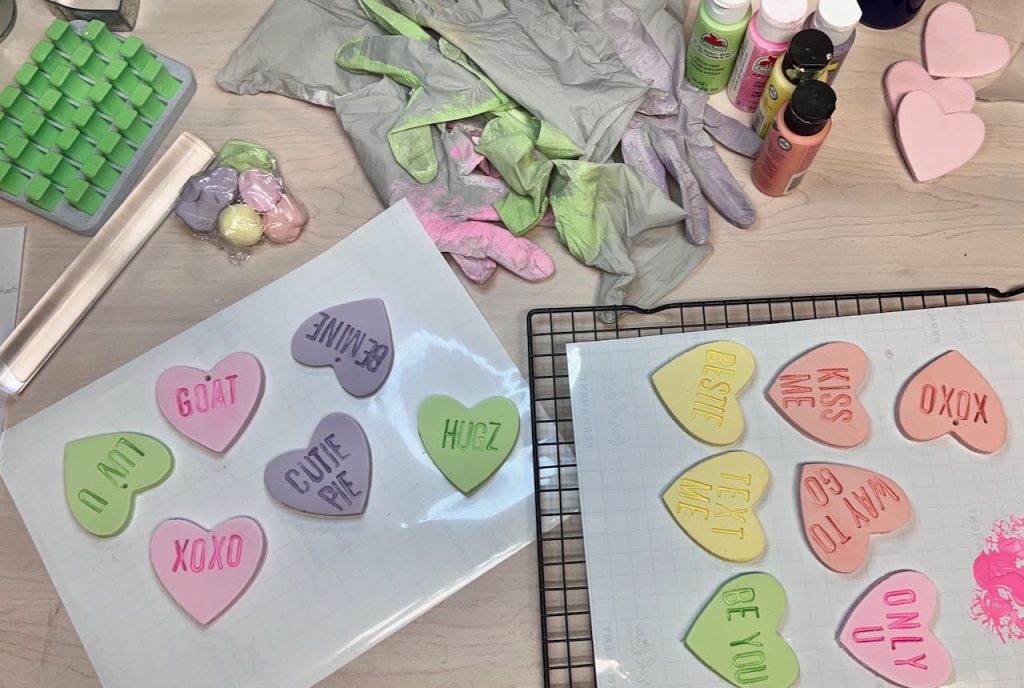
Leave your cut and stamped hearts to dry. See your clay packaging for the length of time you can expect. You’ll notice the color of your clay lightening a bit as it dries. Each clay is a bit different. Such as Sculpey clay’s color change is not as significant as Das clay.
After the first night of drying, turn them over.
If you must speed up the drying after 24 hours, you can follow this tip:
PRO TIP: Place your clay pieces on a tray in a cold oven. Turn oven on to lowest setting, generally 175 for several hours.Turn off oven and leave them to cool along with the oven. If you have a convection mode, use that instead.
Once they are dry, it super easy to clean up any rough spots with the fine side of a nail file or high grit sand paper.
How to Use Your Super-Sized Clay Hearts
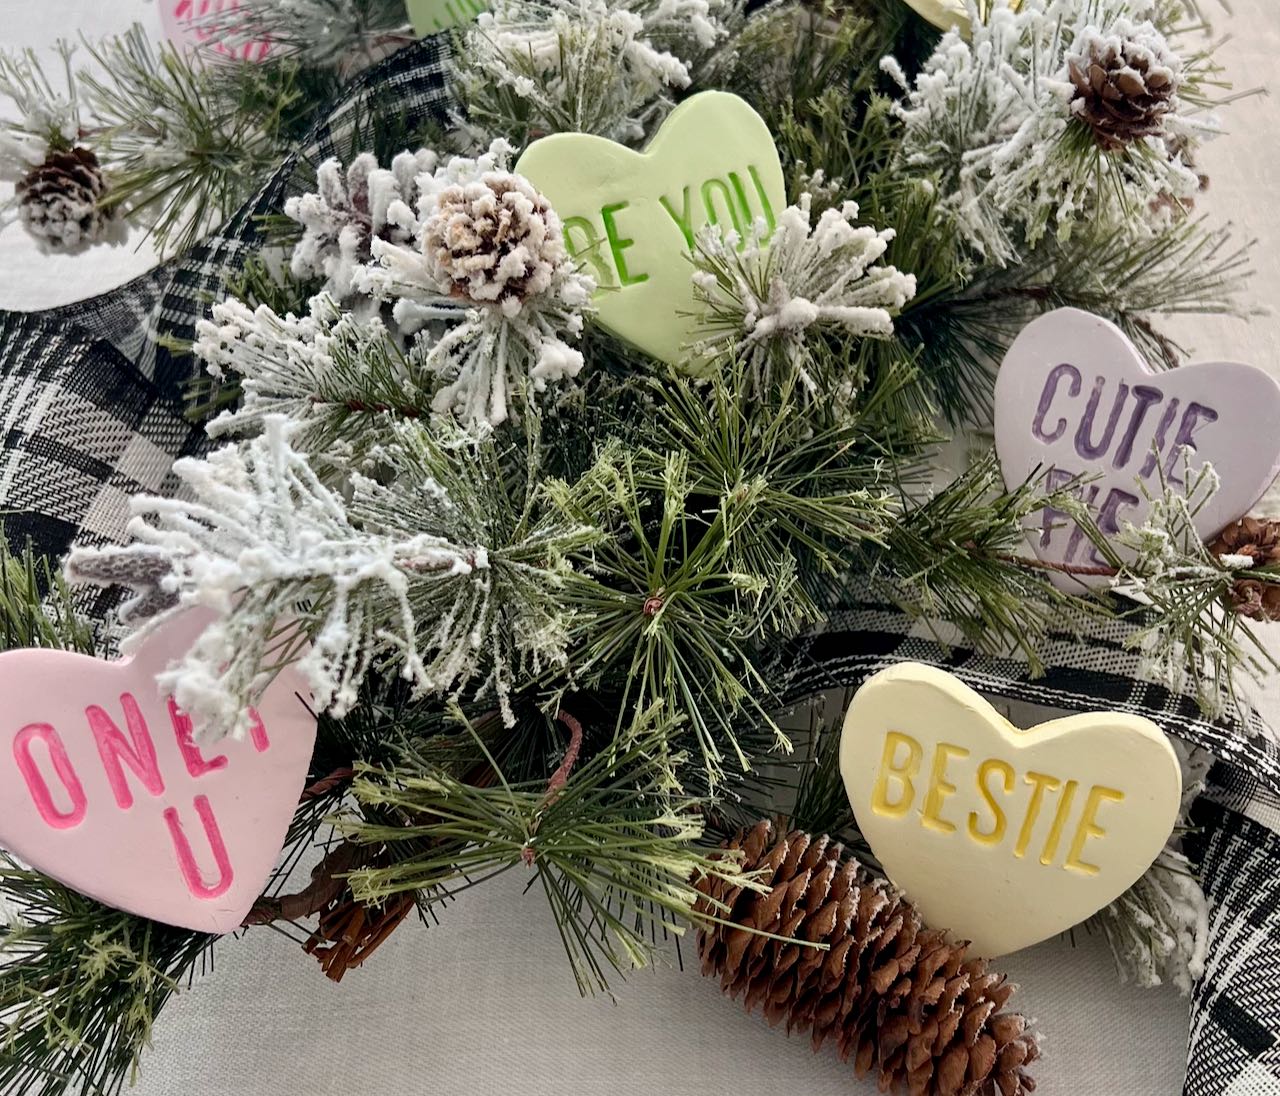
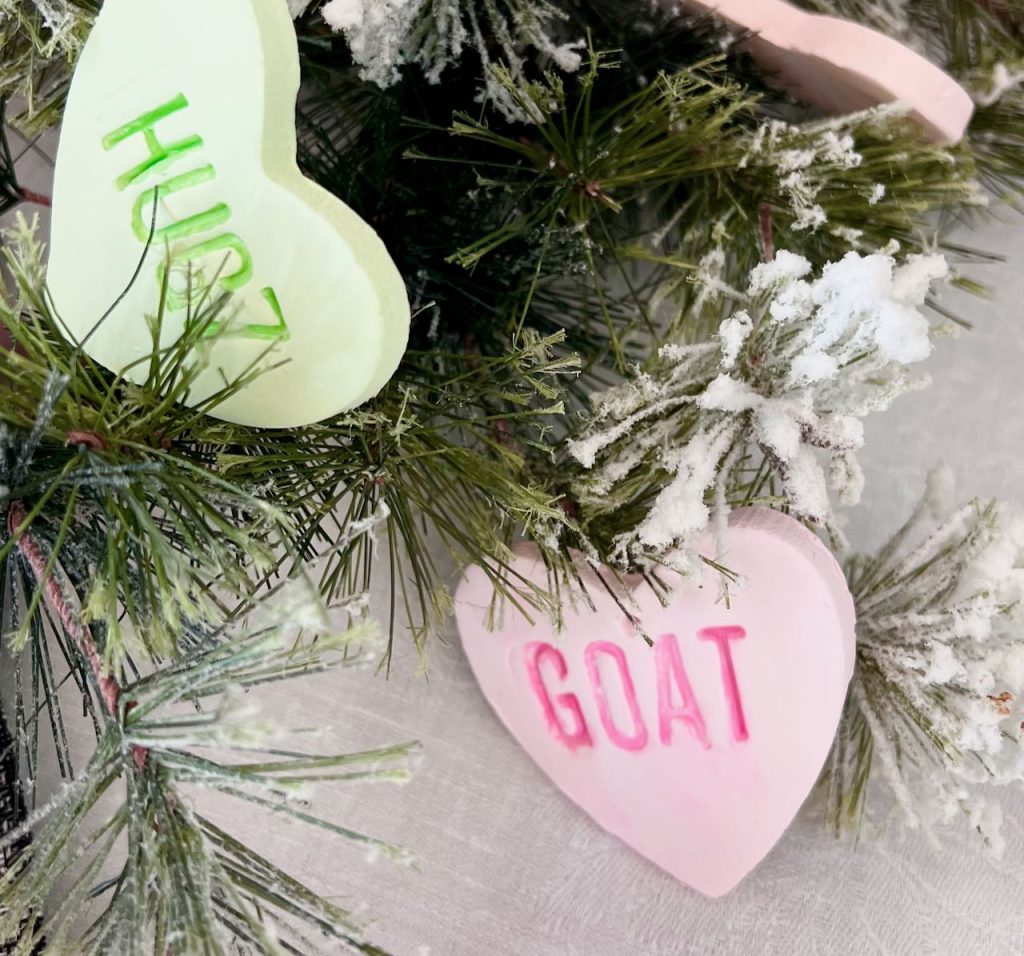
So many fun ways. In these pictures, I propped them in amongst some wintery green branches for a Dinner Party centerpiece.
They were the perfect nod to the season without going all hot pink glitter. I’m just not a hot pink glitter gal!
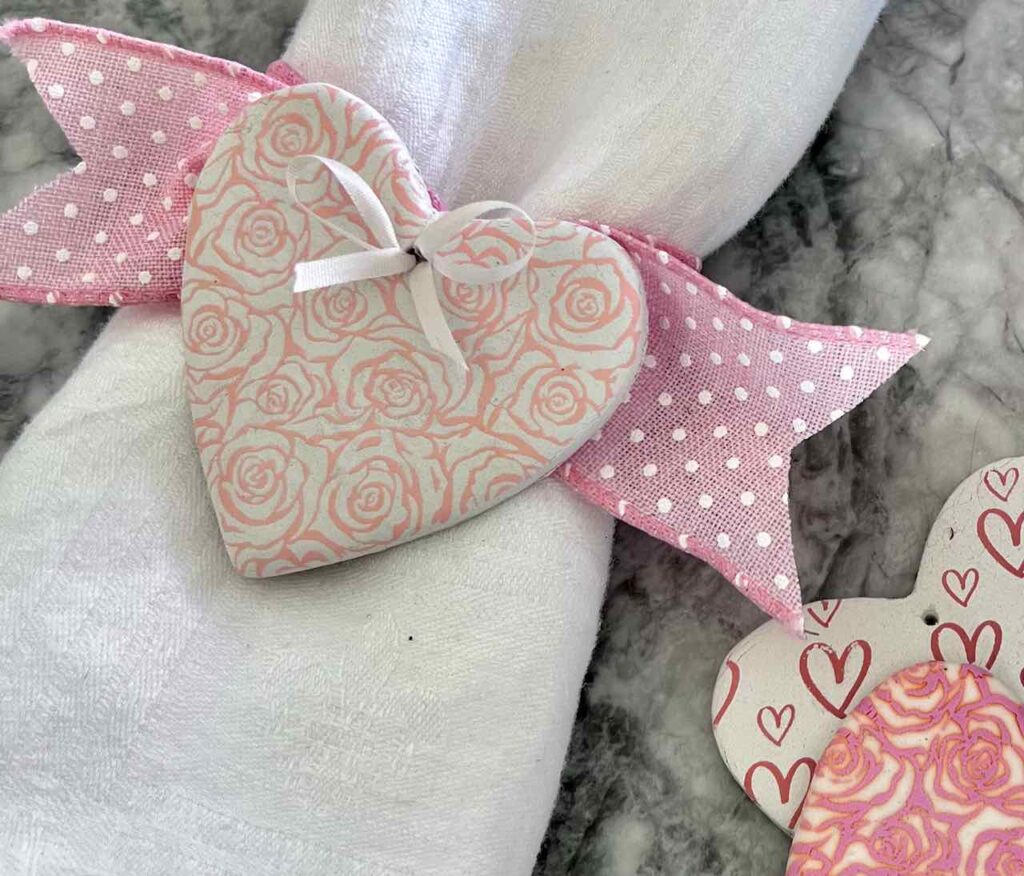
I have smaller clay hearts I made by silk-screening patterns on the clay. These conversation hearts can be used all the same ways — embellishing wreaths, filling out a tiered tray, adding to open shelving, or a hutch. They can fill bowls or vignettes.
They can be used with skewers to bring some seasonal love to your house plants.
Those with a hole for ribbon or twine can be tied around the neck of a vase or large pitcher, or hung from a mug rack. They can also become napkin rings or place cards.
So many ways to use them!
I hope this inspired you to try air dry clay if you haven’t already.
Suggested Phrases
- A person name or initials
- Be you
- Cutie Pie
- Miss You or Miss U
- Way To Go
- Luv You or Luv U
- Love You or Love U
- Only You, Only U
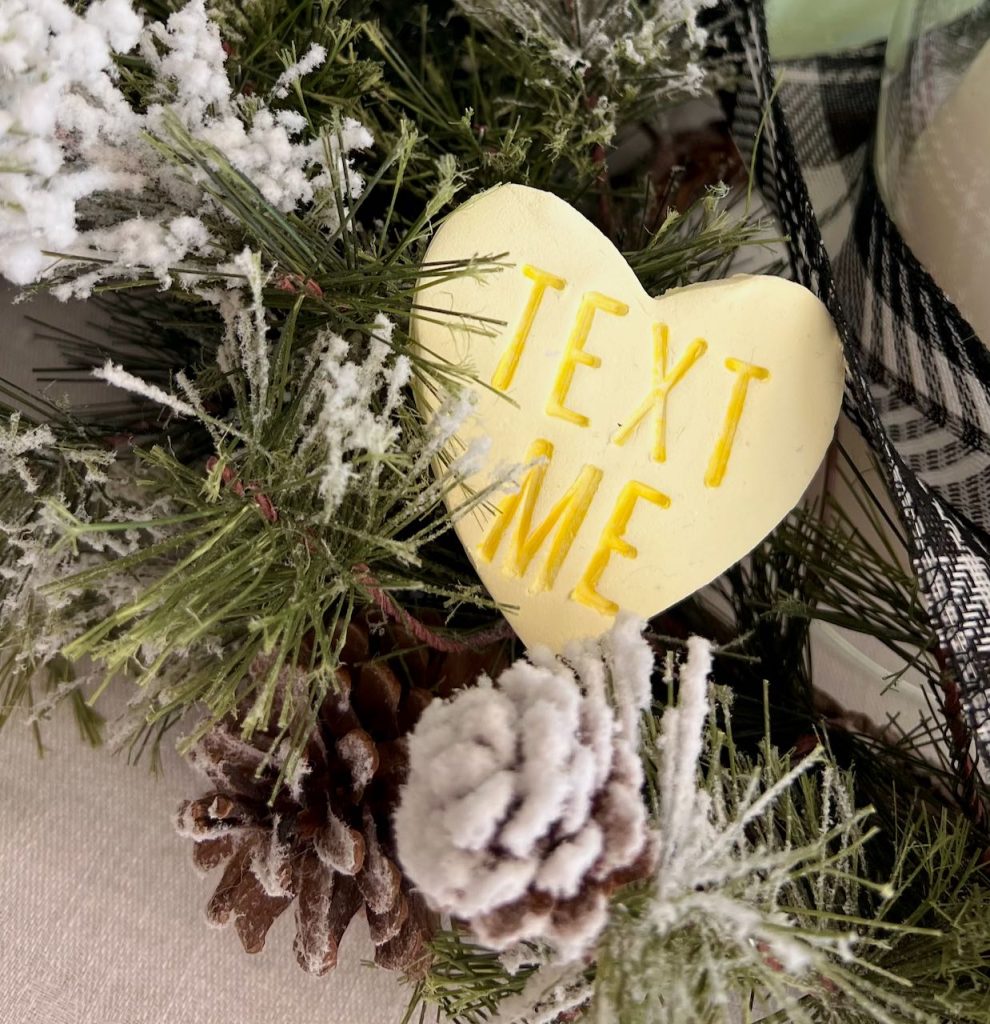
- Text Me
- Call Me
- Kiss Me
- XOXO
- Bestie
- GOAT
- Hugz, or Hugs
- Real Luv
- True Luv
- Hug Me
- LOL
- BFF
- Love Bug
- Luv Ya
- Smile
- Angel
- Wise Guy
This is just for starters!?
Please pin this to help you (and me, thanks!) ⬇️

Tell me, what text would you add?

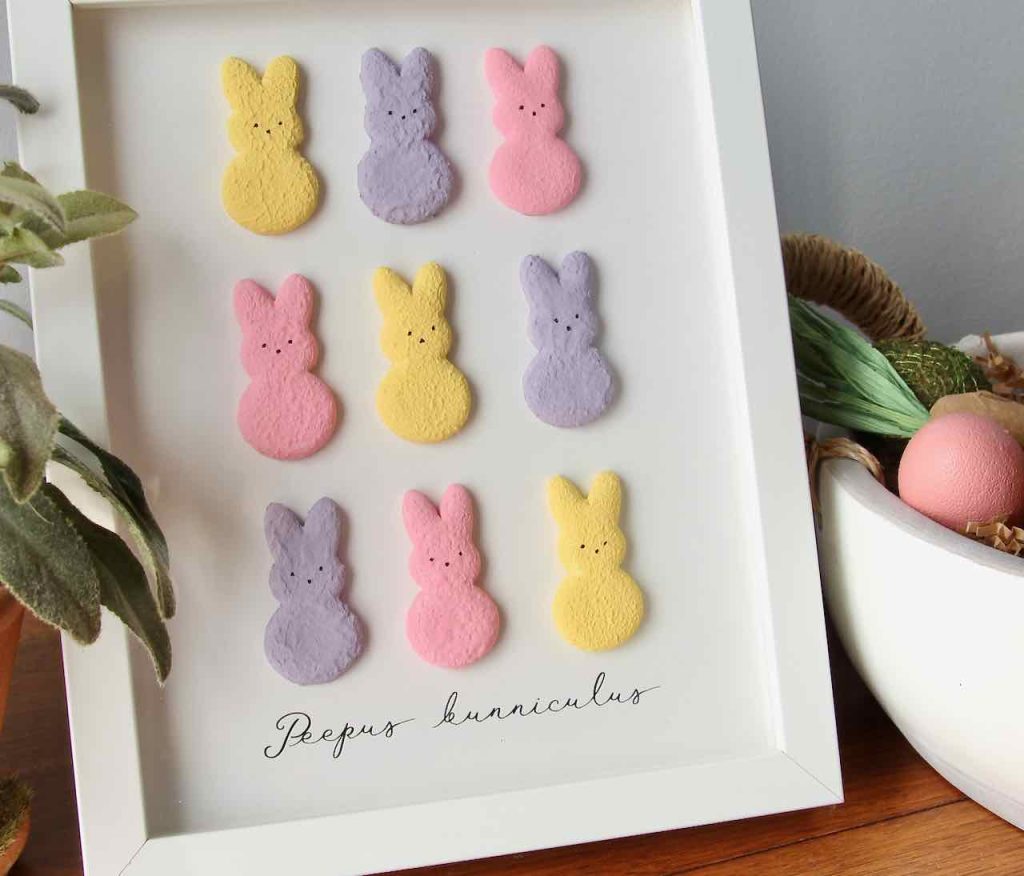
More Fun Air Dry Clay Projects You’ll Enjoy–
The conversation hearts are adorable Diane! Pinned 🙂
Thanks Cindy!