
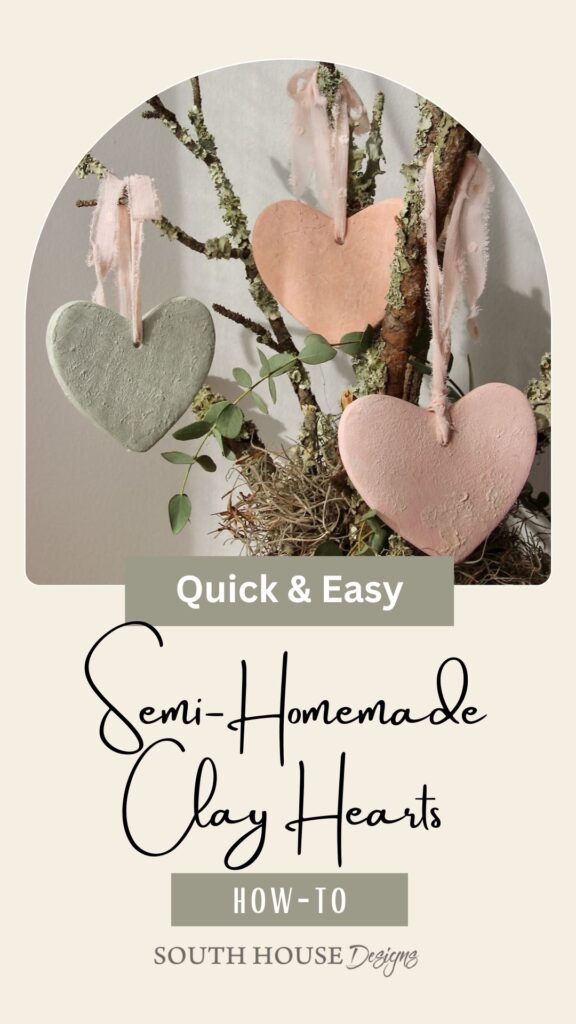
Easy How To: Modern Paint Technique on Plain Clay Hearts
Semi-homemade clay hearts are easy and fun to make. Plus you can customize for your occasion, your home!
You’ve heard of semi-homemade cakes and cookies right? Where you start with a mix and substitute or add your own special ingredients for streamlined yumminess. Impressive results with less time and fuss.
We’re doing the same thing with this craft. We’re taking store bought (or online ordered for even easier access) clay hearts and giving them a new look of handmade pieces the simple way!
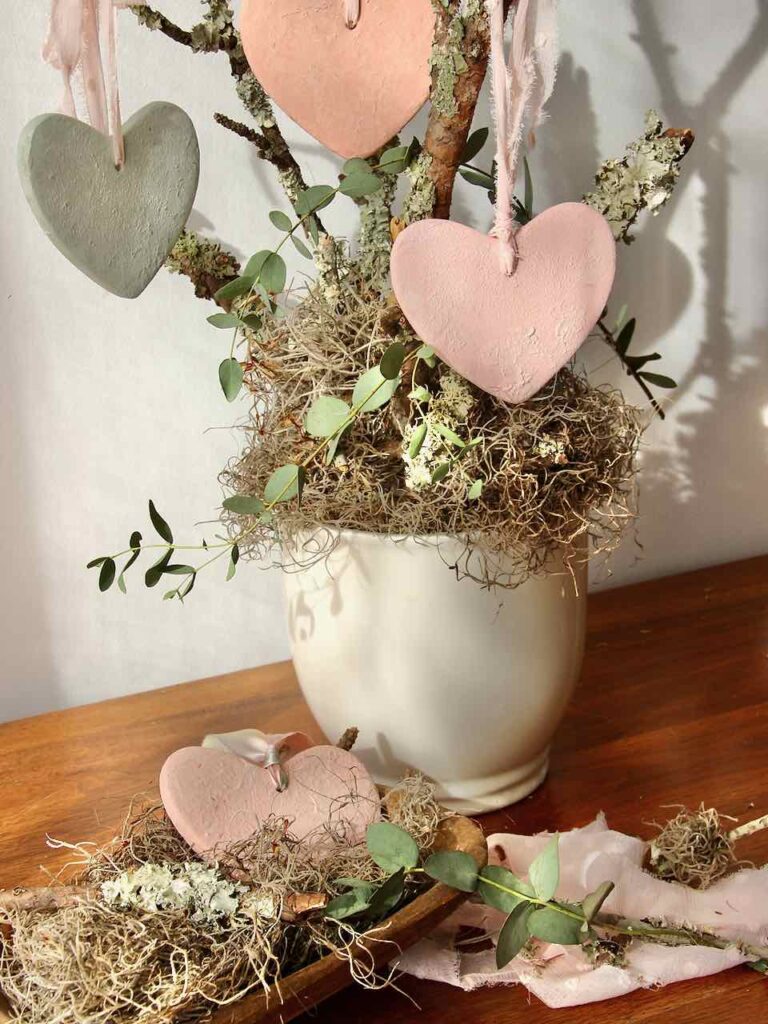
Table of Contents
- Let’s Get Started Giving Plain Clay Hearts a Special Paint Treatment
- Step 1) Find or Make Your Ribbon —
- Step 2) Pick Your Paint Colors —
- Step 3) Paint Base Color —
- Step 4) Add Texture–
- Step 5) Add a Sun-faded or Subtle Lime Look —
- Step 6) Open the Hole-
- Step 7) Add Protective Finish Coat —
- Hearts are Ready for Decor Duty
- Do You Prefer Video?
- Plan B: If You Can’t Find Store Bought Hearts
- How To Make Air Dry Clay Dry Faster
Let’s Get Started Giving Plain Clay Hearts a Special Paint Treatment
Please note: some link may be affiliate links which means there is no extra cost to you, but I may receive a bit of compensation. Please know I will never recommend a product I wouldn’t be using myself!
Materials and Supplies:
- Store bought clay hearts — or make with air-dry clay, see Plan B below.
- Acrylic paint – matte finish, inexpensive craft paint works great
- Baking soda or Plaster of Paris
- Flour
- Ribbon (or cord, or twine)
- Paint brushes – craft brush, not artist brushes
- Chip brush
- Protective cover for your work surface
- Dixie cups or something to prop your hearts on while drying
- Misting bottle of water, optional but ohh, so helpful when blending paint
- Cup of water and paper towels handy
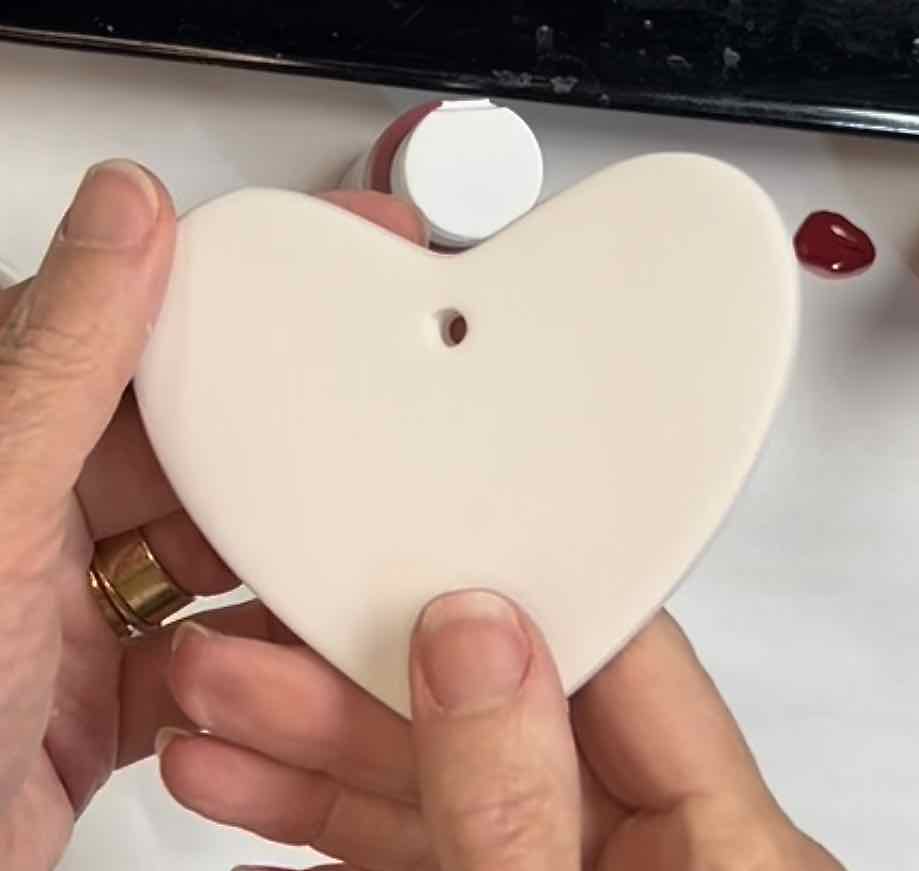
NOTE: I bought my heart blanks at Hobby Lobby, but they are not available online. If your Hobby Lobby is sold out, I’ve included a bit smaller substitute I found on Amazon.
Step 1) Find or Make Your Ribbon —
HINT: Wether it’s a simple craft project or a whole room makeover, I choose my paint colors LAST!
Yes, you read that right. I tend to start with whatever textile might be involved. The textile elements tend to be the items that are most limited in choice, and often times is the inspiration or jumping off point. That gorgeous rug you can’t get past, the new sofa of your dreams, the fabric you found for luscious floor length drapes. Paint colors, tones and tints are literally limitless.
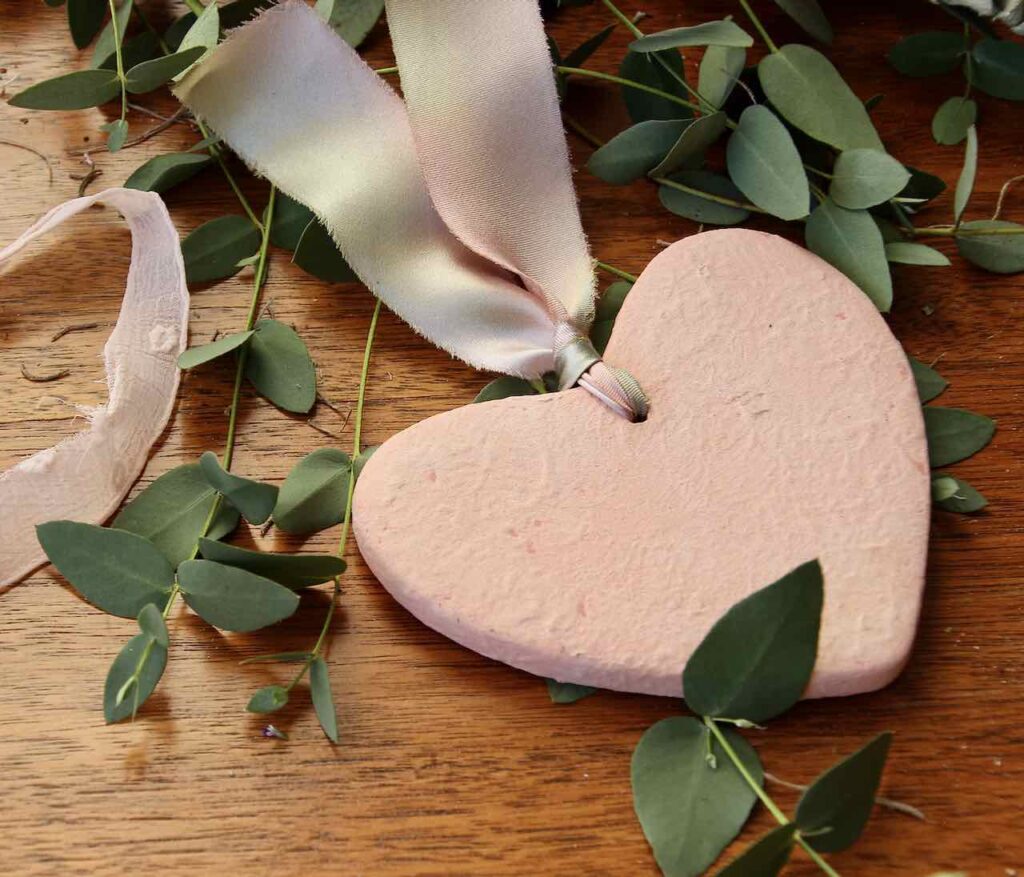
So for this simple project, I have a subtle Valentines Day arrangement in mind, possibly using eucalyptus or sage lambs ear. So I know I want a soft blush color. Kind of a soft feminine version of terra cotta.
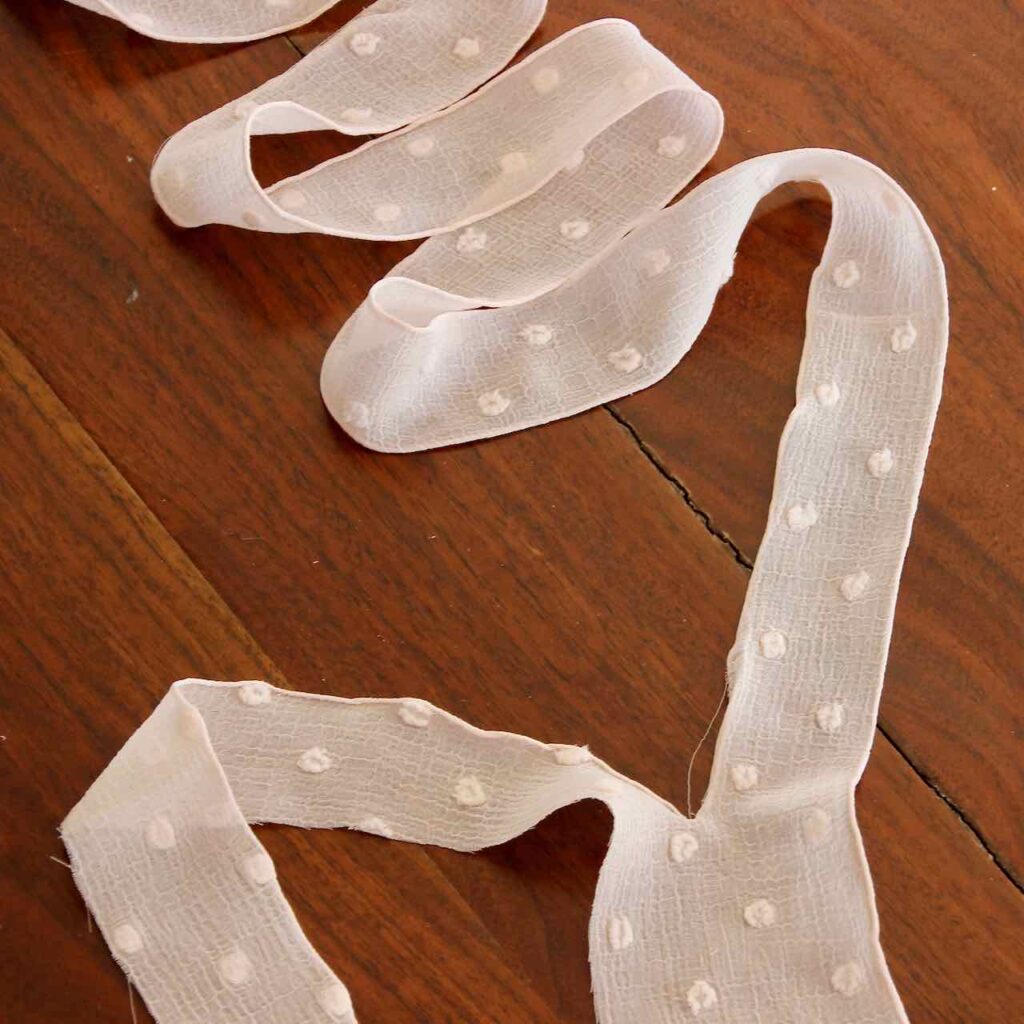
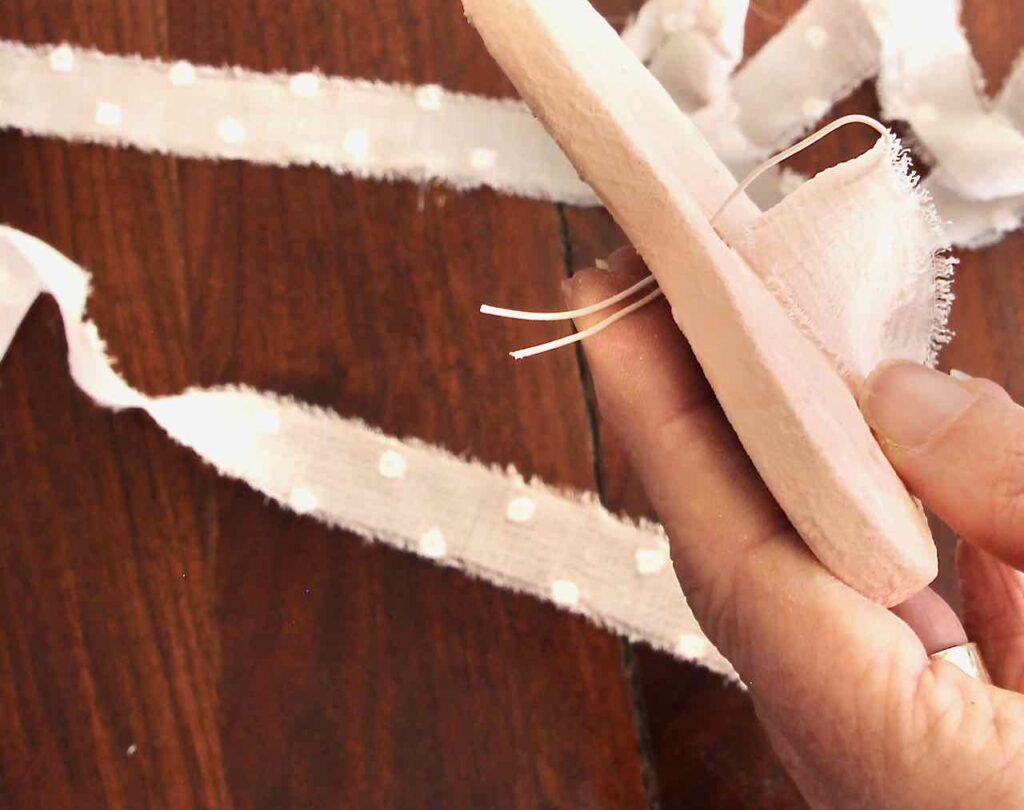
Next, I went searching for ribbon and came up dry — nothing in my stash, nothing ready made, so I decided to make my own.
Lucky for us, frayed ribbon is all the rage! Workhorses denim and canvas have been enjoying the frayed spotlight for quite a while now. For frayed canvas check this out, and for frayed denim check out your closet.
But now, the frayed spotlight has widened to the more genteel fabrics of velvet and chiffon. And I had my heart set of frayed chiffon ribbon. Yes, just about any woven fabric can be snipped, ripped and frayed. And it’s so much fun!
TIP: Did you know that at JoAnn’s, you can buy as little as 4-inches of fabric?
True! Depending on how wide you want you ribbon, your frayed ribbon will be quite a savings over readymade ribbon!
BONUS: How to Snip and Rip Custom Ribbon

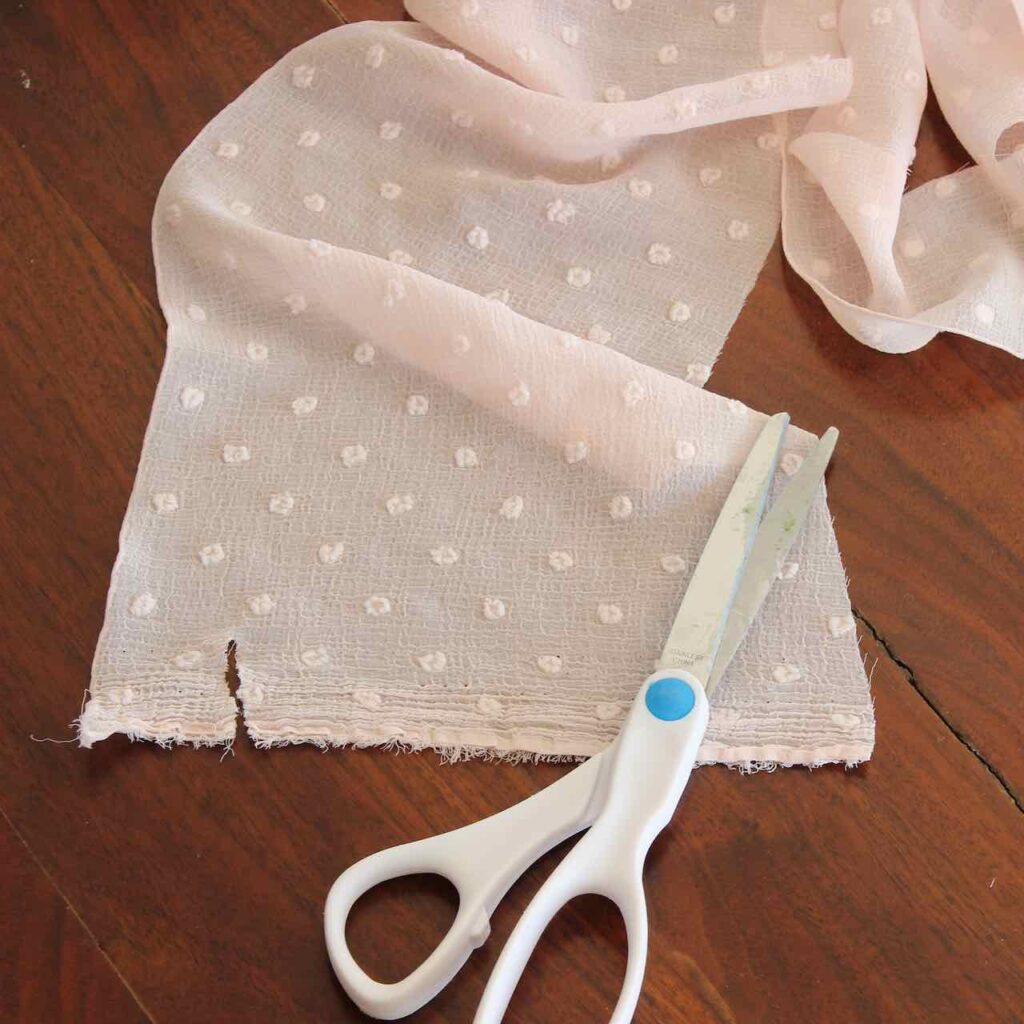
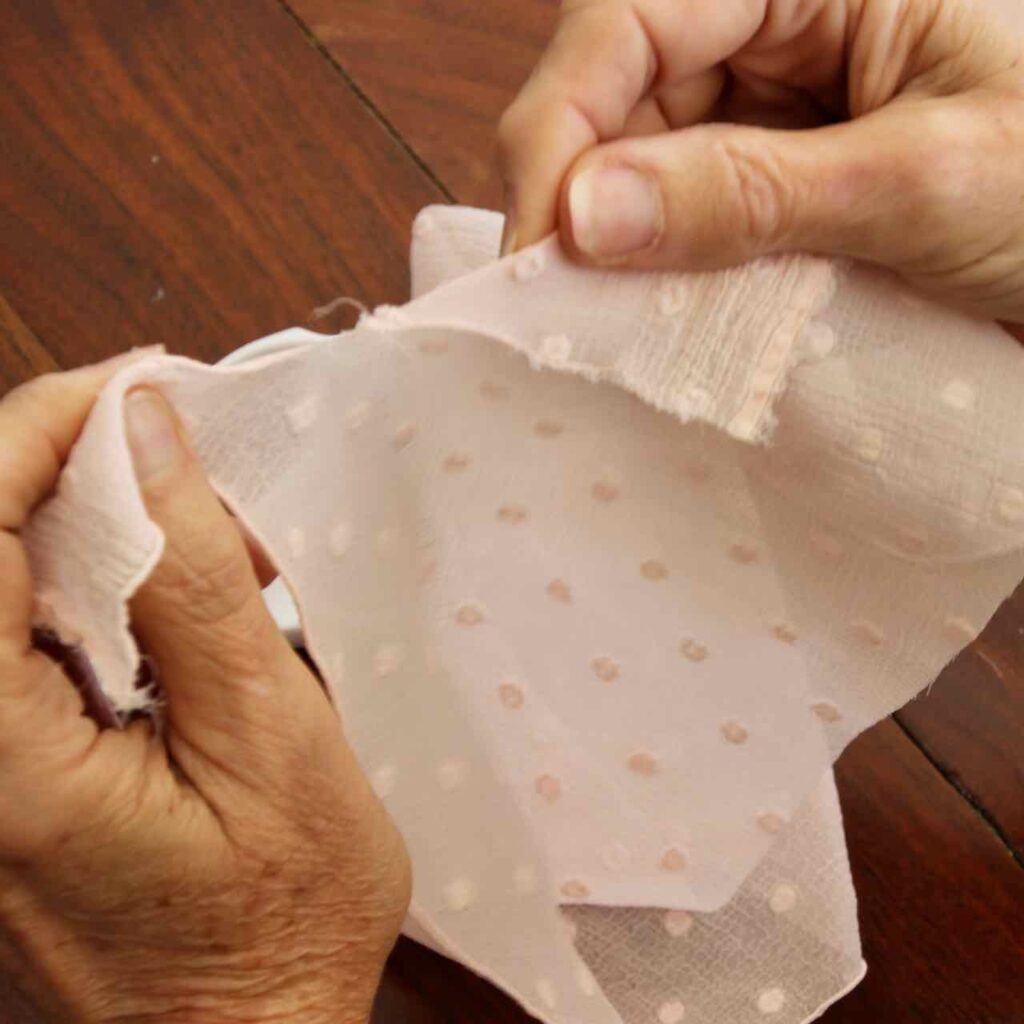
Steps to Snip and Rip Ribbon:
- Most woven fabrics will work
- Snip past the selvedge edge
- Pull the two snipped sides apart:
- Pull off the threads along the edge
- So charming!
Step 2) Pick Your Paint Colors —
Now that you have your ribbon or cord, time to pick or mix your paint colors.
Use any acrylic craft paints with a matte finish. We’re talking basic, cheap craft store paint here.
I use dixie cups to mix my colors. Use whatever you have on hand — wax paper works great.
Step 3) Paint Base Color —
I don’t totally mix my colors because I love a bit of mottling. So I add a generous squirt of my main color in the center with a squirt of white paint and then a small bit of another variant (in this case a more terra cotta color) on the other side.
Then I give it one light swirl with my craft brush and apply a base coat onto my heart. As I paint, I can spread it around and mix is more if there is too much contrast for my liking, It’s very forgiving, just work quickly and don’t overthink it. Be sure to get around the edge. Keep a mister bottle of water handy. A light spritz will help move the color around.
Set on your dixie cup or your prop to dry.
It doesn’t take long! Once the finish is matte, you know it’s probably dry enough to handle.
Gently turn it over and repeat on the backside.
Let it dry.
Step 4) Add Texture–
This is where the baking powder comes in.
I like to more fully mix my paint at this point, possibly adding a drop of white or a slightly different color so this layer is not just a repeat of the base layer. Here, we’re going for subtle hue changes, barely noticeable, and certainly not dramatic.
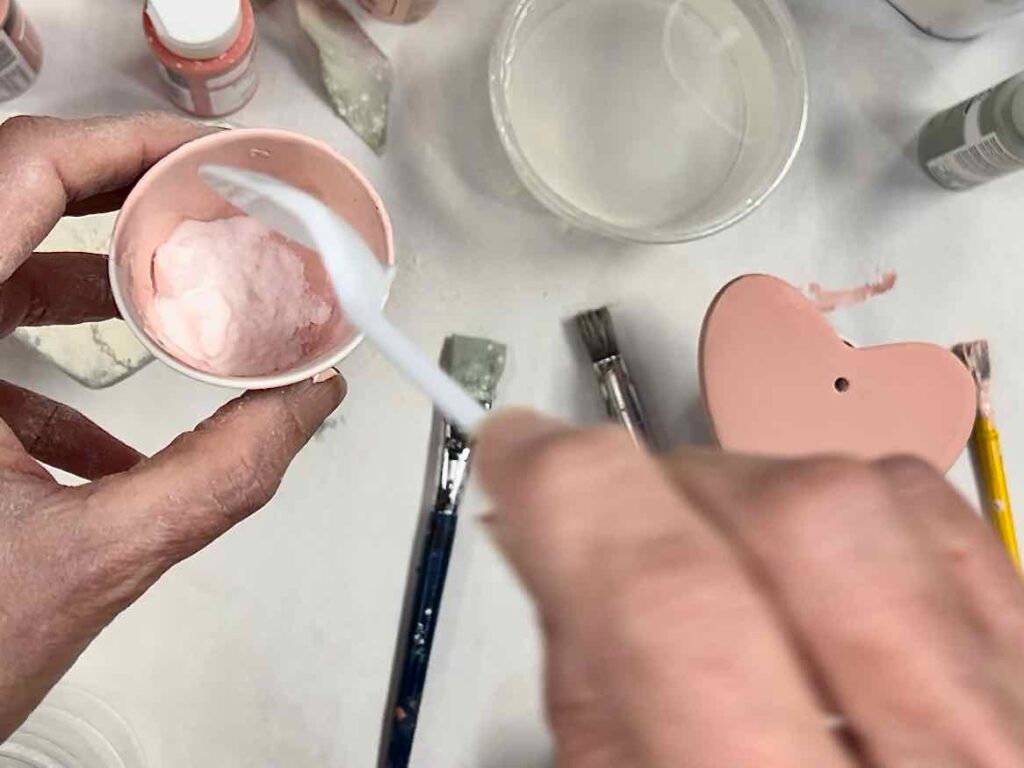
Once our paint is mixed, Add a generous amount of baking soda and just slightly mix it in. This will give variety to the amount of texture on your heart.
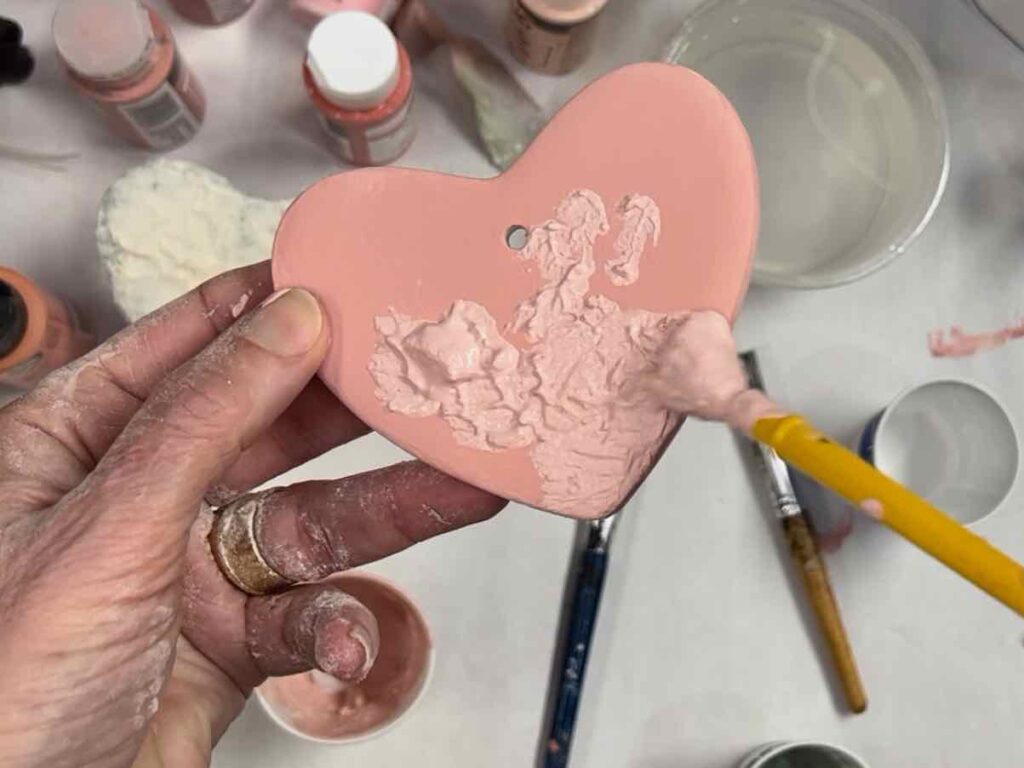
Now apply in a rather pouncing type motion. If you like it more even and subtle, swirl it gently all over. Pouncing will allow you to build up some areas and leave other more plain. Play with it until you get the look you like. Have too much, you can always scrape some off.
If you want more, let this dry and repeat.

Here, I added a second layer on this one.
Quick break in the action to ask if you are enjoying this post. Have you considered subscribing, so you’ll receive all the great content I can create — brought right to your inbox? You decide how much is right for you.
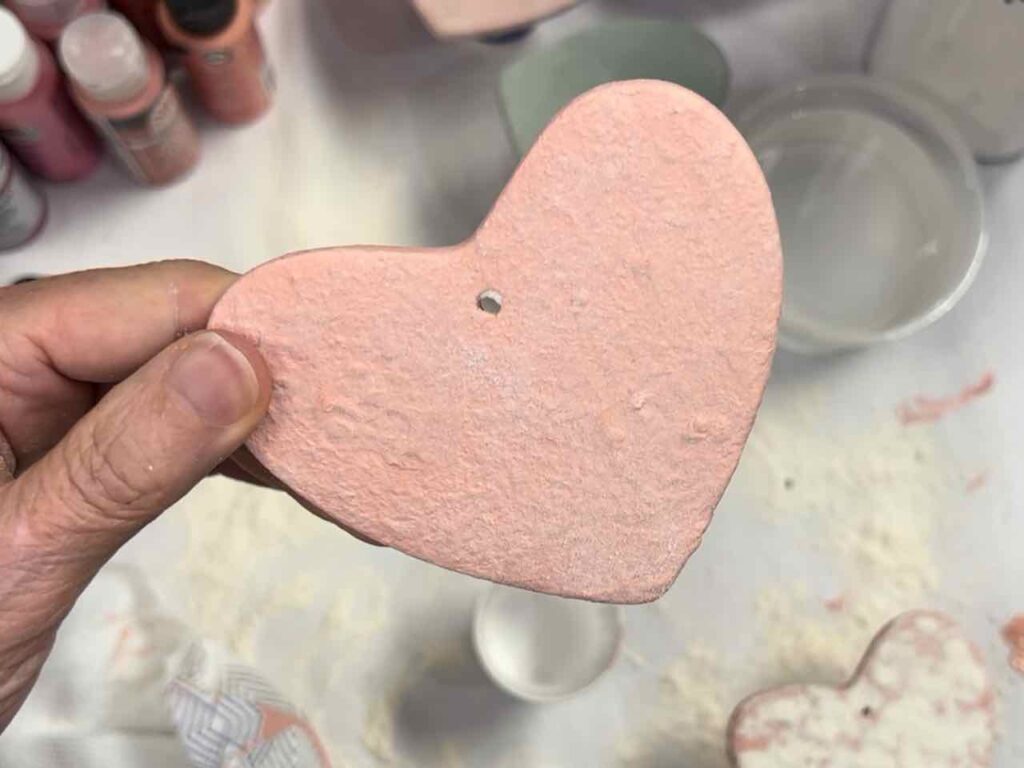
Step 5) Add a Sun-faded or Subtle Lime Look —
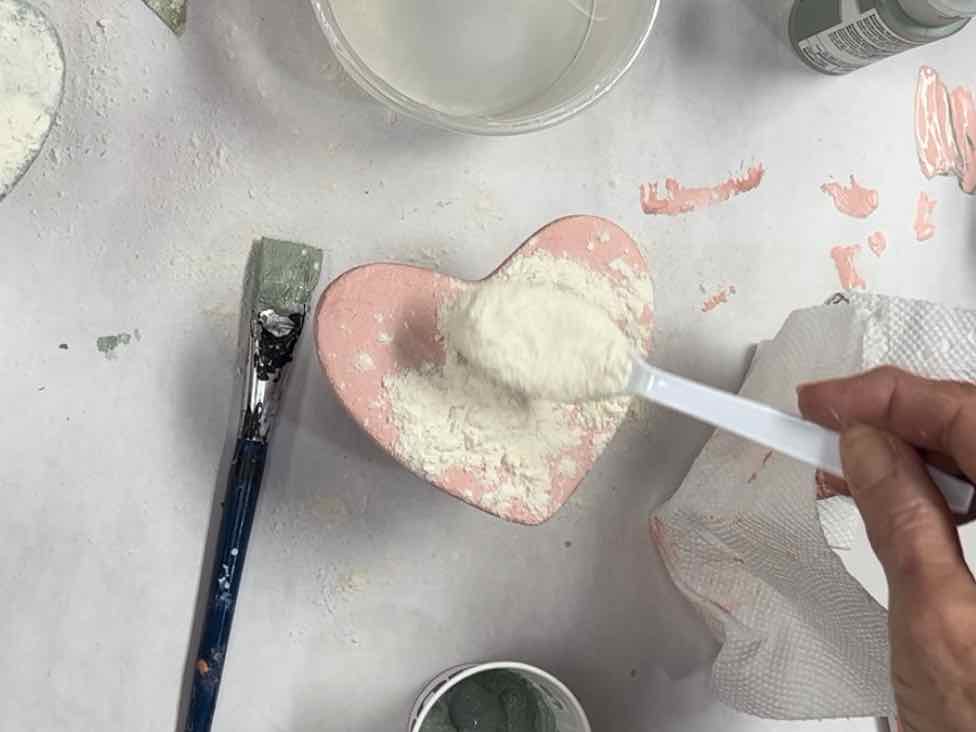
When you have the texture as you like (whether that’s one coat or more) immediately sprinkle a generous helping of flour over the wet paint.
Press it down in the the paint lightly with you finger tips. And don’t forget the sides.
Let it dry.
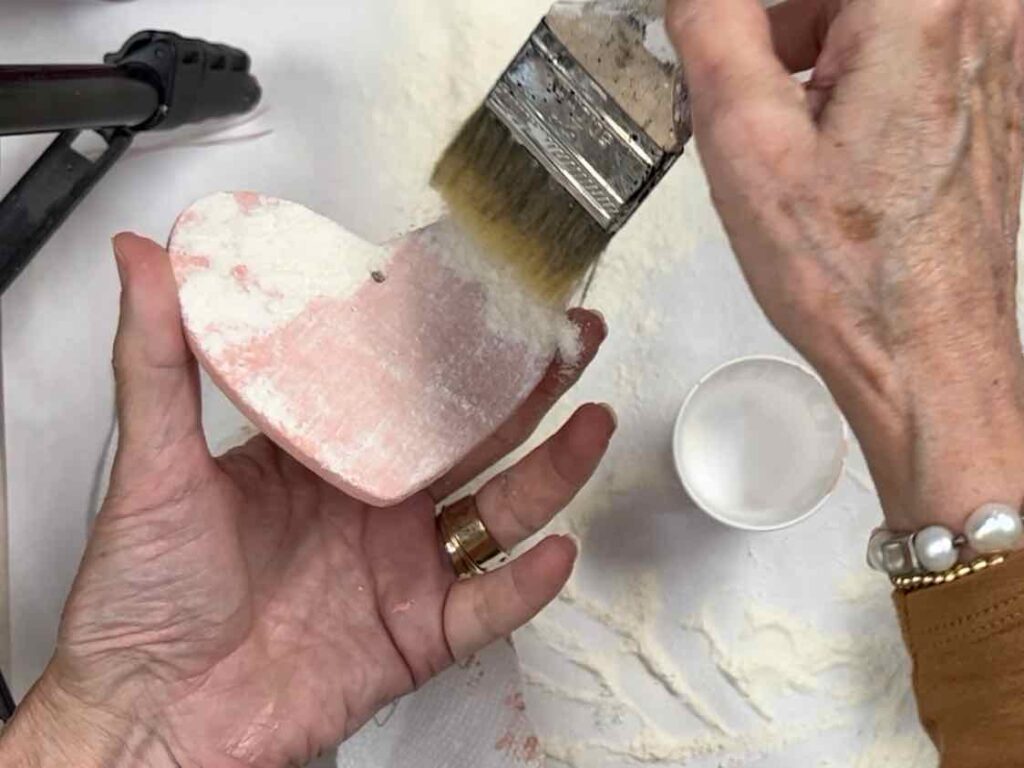
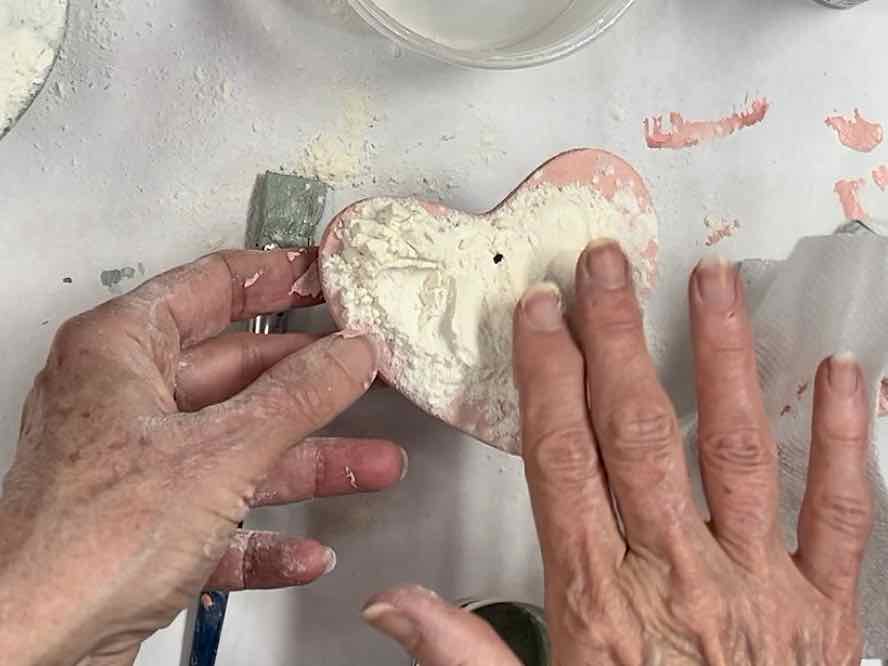
With your clean dry chip brush, gently brush off the flour.
Step 6) Open the Hole-
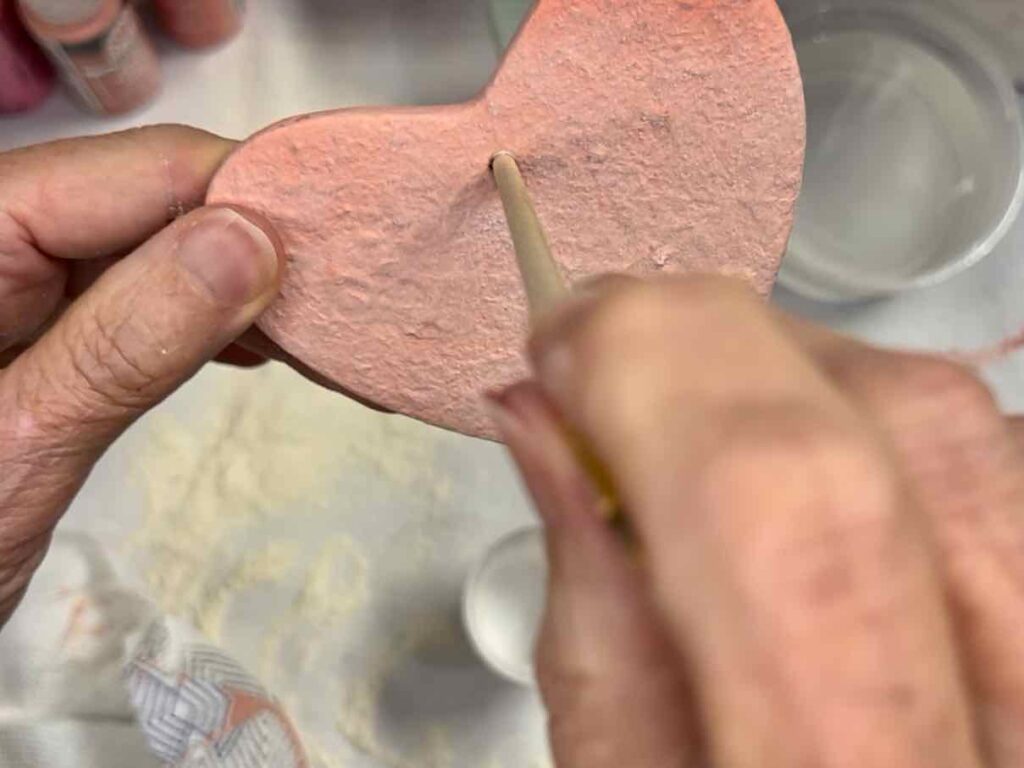
Before everything dries, use a skewer or the end of a thin paintbrush — whatever’s handy and clean out the hole that often gets filled with paint and flour.
Step 7) Add Protective Finish Coat —
This is strictly optional. And mostly dependent on how you will be using them.
If they will probably be handled, I’d give them a protective coating. Whatever coating you choose, just make sure it is matte. Mod Podge makes a matte finish now and RustOleum has a matte spray which works great. That would be my first choice with just very light layers for minimal build up.
Hearts are Ready for Decor Duty
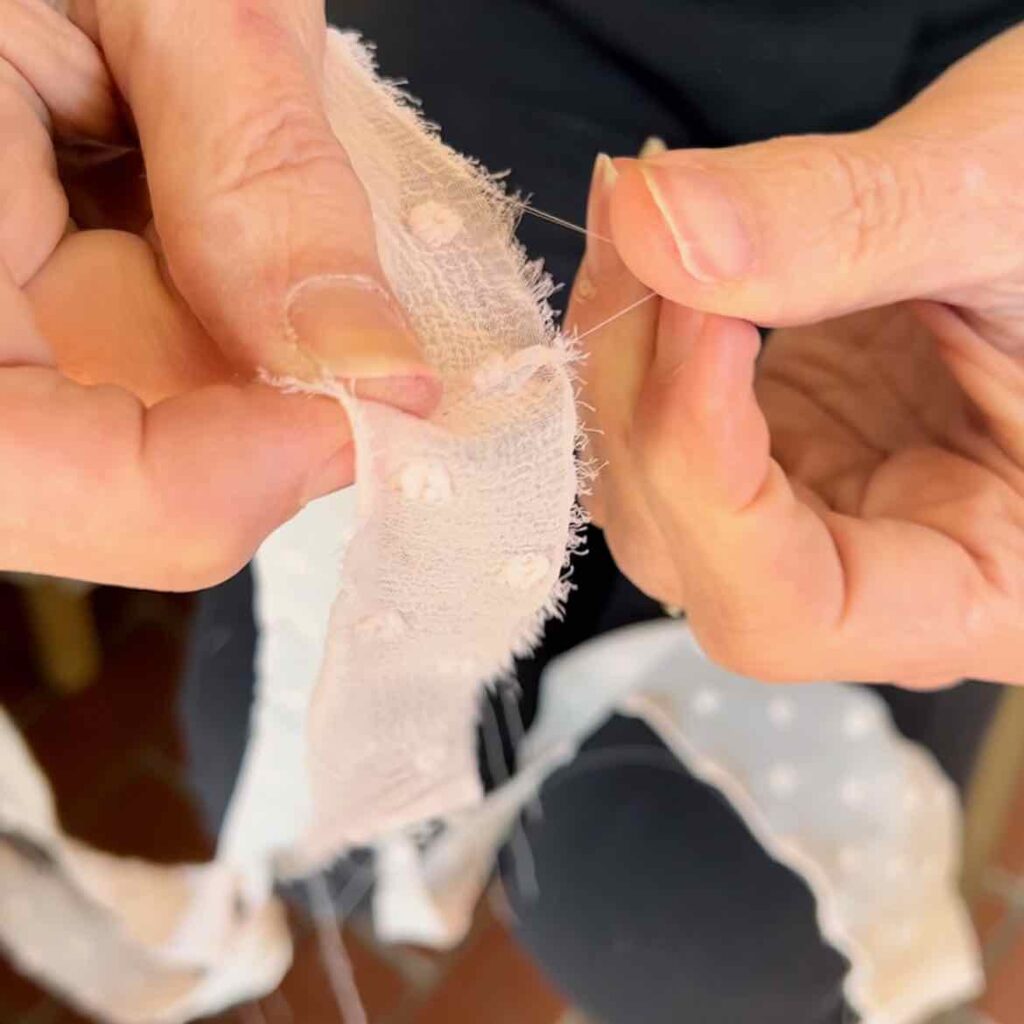
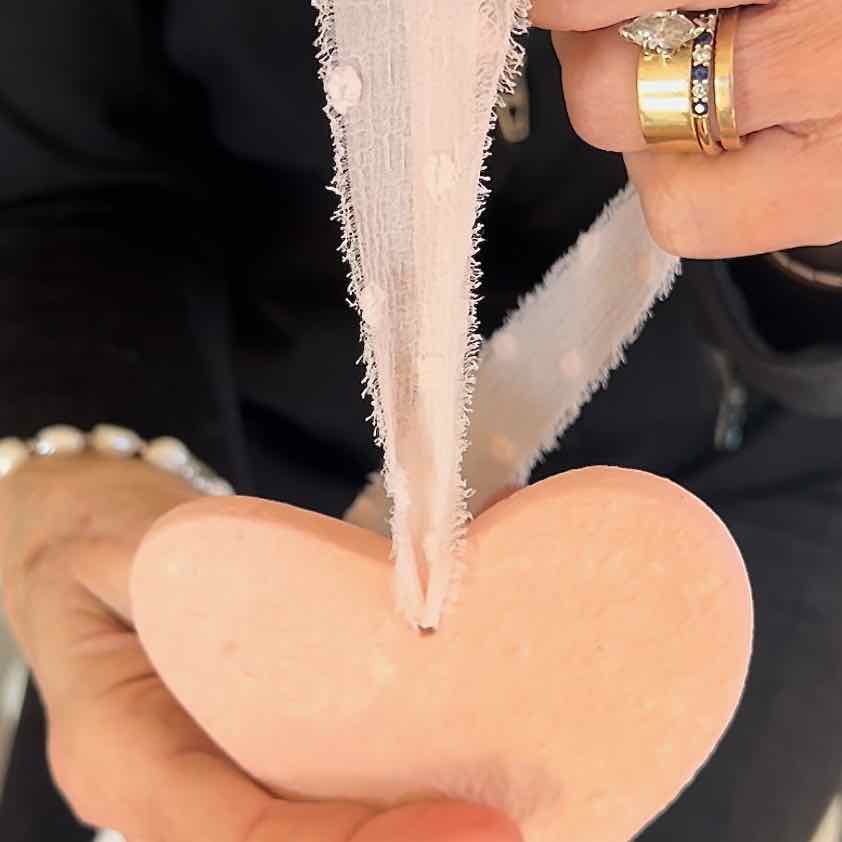
EXTRA: Want in on my trick for threading big fat ribbons through little holes? So easy, so obvious, and it’s all right here.
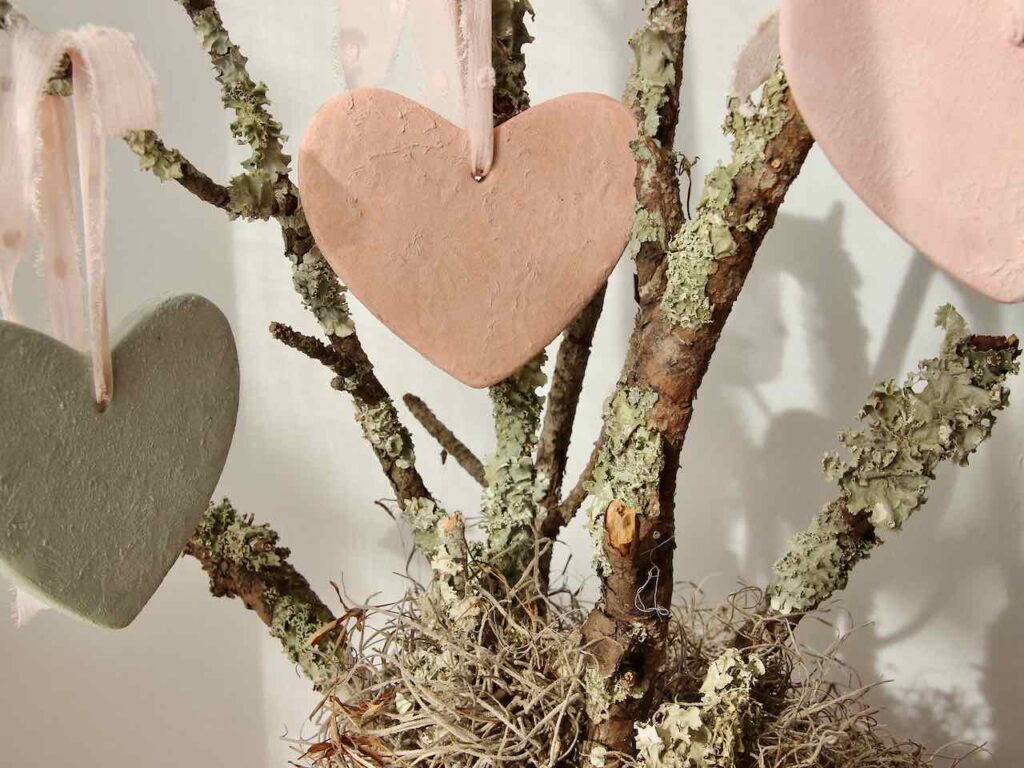
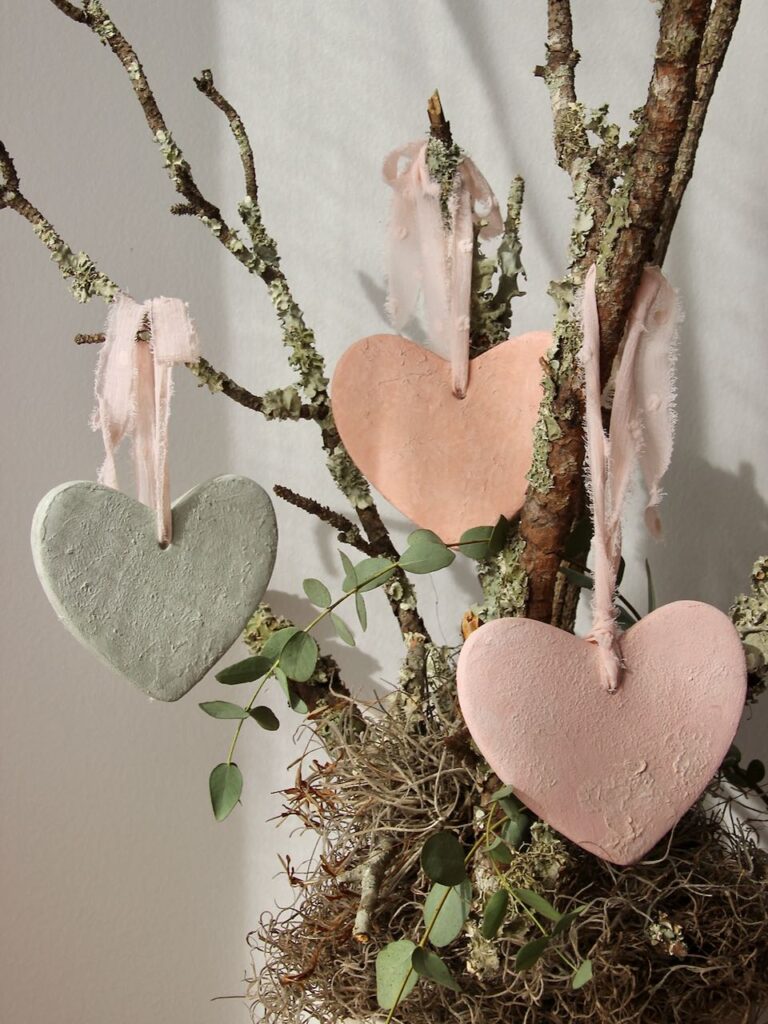
How to Use Your Clay Hearts:
- Tuck into dough bowls or tiered trays
- Top a stack of books
- Hang from branches, or wreath
- Make a garland
- Hang at various heights in a window
- Write names on ribbon and use as place cards
- Tie to a Valentines/Galentines treat bag
- As a gift wrap topper for weddings, anniversaries, baby shower, etc.
- Party favors for wedding or baby shower
- And that’s just for starters!
Do You Prefer Video?
If so, I have a short video of the steps above, less than 7 minutes. Click the image to jump to my You Tube channel. and don’t forget the back arrow button will bring you right back here.
Plan B: If You Can’t Find Store Bought Hearts
Not to worry! There’s still an easy way to make clay hearts.
Air dry clay! There are many varieties out there, but for me, I prefer DAS brand. It doesn’t shrink and rarely cracks. It’s very easy to work with and for less than $10, you will have clay to make tons of hearts with leftover for many, many more projects to come. If fact my next post shows more heart options using DAS air dry clay.
Materials & Supplies Making Clay Hearts:
- Package of air dry clay
- Heart shape cutter (cookie cutters)
- Drinking straw or skewer
- Clay tissue blade or dental floss
- Acrylic rod for rolling or a dedicated rolling pin
- Two popsicle stick, paint mixing sticks, or similar
- Large tile or thick craft paper to roll and cut on
- Saran wrap or equivalent, optional but helpful
TIP: The DAS clay will be light grey. Don’t worry, it dries white as the moisture evaporates out of it.
To Make Your Clay Hearts:
- Cut off a small chunk of clay, reseal pkg
- Roll clay between damp hands until its softened up and malleable
- Lay your two sticks parallel, spaced so your acrylic rod or pin can roll along their length
- Roll the clay between these sticks so you have an even depth.
- Lay the plastic wrap over the clay. Press cutter straight down.
- Lift cutter straight up and then cut another and another.
- Remove plastic wrap and all the scrap clay around the hearts
- Poke hanging hole with straw or skewer, optional. If you plan to use then as fridge magnets or place cards or filler for dough bowl or tiered trays, skip the hole.
- Use a clay tissue blade to carefully lift each heart up. It’s a bit messier, but you can release the clay by pulling dental floss in opposite directions and sliding it on the cutting surface under the clay.
- While the clay is still soft, wet your fingertip and gently run it along the bottom edge of the heart where it tends to be a bit rough from the cutter edge and from releasing from the cutting surface.
- Set aside to dry. Plan ahead.This can take a while.
You don’t want to dry them too quickly as that is typically when air dry clay will crack.
I start with my pieces right side up. After about 12 hours, I flip it over for another 12 hours or so. Then, if I need to speed it up, I’ll follow the steps below.
How To Make Air Dry Clay Dry Faster
- Place them on a sheet of parchment paper on a cookie cooling rack
- Place in a cool oven
- Turn on oven to 175. Use Convection if you have it.
- Turn off oven after 20 minutes
- Leave them to cool in the oven
Repeat as necessary.
Are you bit with the clay bug yet? If not, wait until you see this next clay craft I’m working on!!!! So much fun! Be sure to subscribe so you don’t miss it ?!
To your Valentines board
Your Wedding board
Your Baby Shower board
Your Clay Crafts board
Your Paint Craft board
Everywhere you know you’ll look for it!
(thanks bunches!)
As always, I love having you here with me. This was a long one, lots of ideas and info to share. II hope you feel inspired. It bears repeating: please don’t hesitate with any questions or suggestions.

What an amazing DIY! These hearts are beautiful. I LOVE The paint colors and the textures on them are just lovely. Also, that ribbon is stunning! Great tutorial!! Pinned!
Thanks bunches Rachel. What a treat and I sure appreciate the pin.
Super cute Diane! If I get my post dive tonight I am going to share!!!
Oh Wendy, thanks so much! You’re a doll!
Love this idea Diane, the texture looks great, and I the fabric is that special soft touch. I can see these on tables for a wedding on the tree you show, or even as place cards and a memento of the day. Thank you for sharing with Whimsy Home Wednesday.
Your hearts turned out beautifully! I’m featuring you at the Home Matters Party on Thursday. Thanks for sharing!
Such great news Allyson! Thanks so much for hosting and of course, for featuring my hearts!