
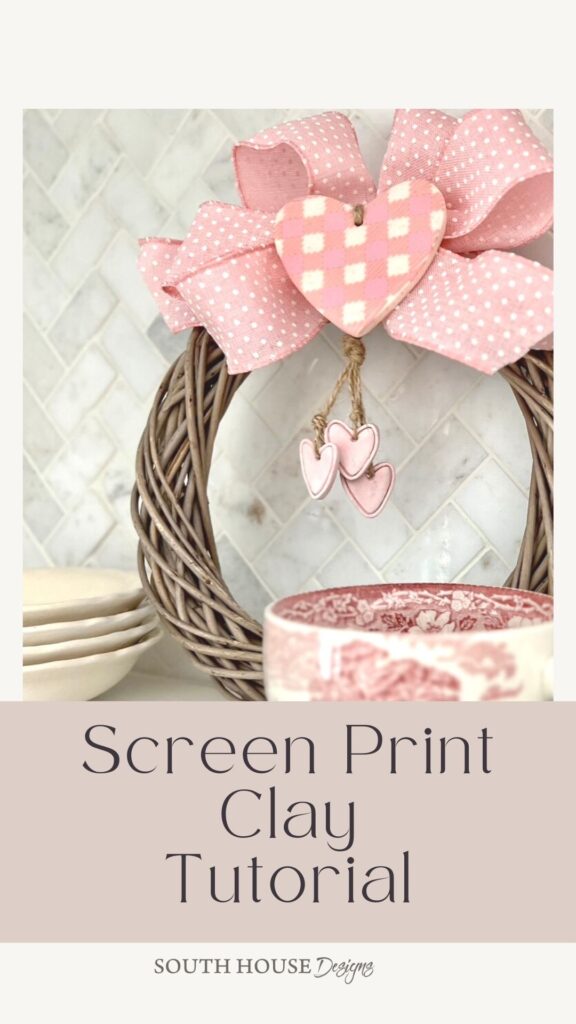
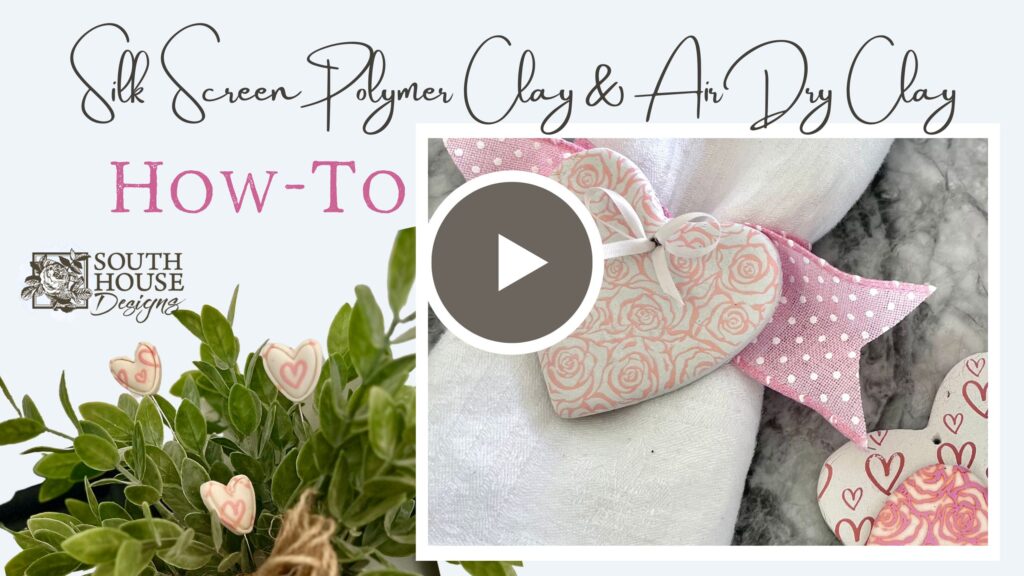
Actually Silk Screen on Polymer Clay or Air Dry Clay? It’s Easy!
[/et_pb_text][/et_pb_column][/et_pb_row][/et_pb_section][et_pb_section][et_pb_row][et_pb_column type=”4_4″][et_pb_text]Actually Silk Screen on Polymer Clay or Air Dry Clay? It’s Easy!
It’s surprisingly easy and quick to silk screen clay to elevate a piece of humble clay into a unique accent for your decor, your entertaining, your seasonal celebrations, gifts and more.
Yes, you read that right. The same silk screen process used on all those t-shirts in your closet is now available — in a simplified way — for decorating clay, both types of clay, polymer clay and air dry clay.
This is becoming very popular for polymer clay earrings, but I wanted to apply it to my passion — all things home related, all kinds of home decor items
Best part: it is so quick and easy. Clay crafts are great for people of all ages; experienced crafters and hobby crafters alike, regardless of skill level
HINT: This is a looong post! I wanted it to be comprehensive for a total beginner. If that’s not you, feel free to jump to just the silk-screen part or whatever part you need via the Table of Contents links
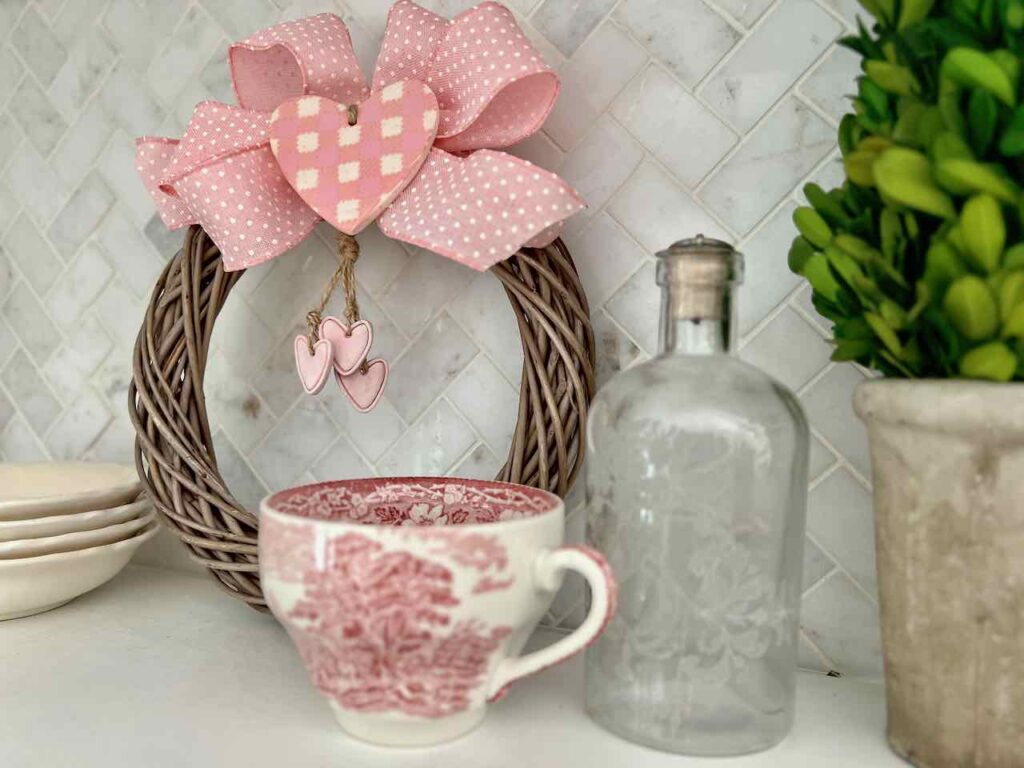
Table of Contents:
- Table of Contents:
- Materials and Supplies:
- Step 1) Roll Out Your Clay, either type of clay —
- Step 2) Silk Screen Your Clay —
- Step 3) Let Paint Dry —
- Step 4) Cut out Your Shape —
- Step 5) Holes? —
- Step 6) Cure Your Clay —
- Step 7) Optionally, Seal Your Clay Creations —
- The Screens —
- The Cutters —
- How about to embellish gift packaging:
- To Accent a Wreath:
- Seasonal Accents for a Tiered Tray:
- To Hang from Branches or Stick in Plants:
- For Entertaining:
If you prefer video for your content consumption, I have a 20 min, video at the end of the post covering most of these points.
Let’s Start With Some Common FAQ’s. and get the background covered and out of the way:
What is the Difference Between Polymer Clay and Air Dry Clay?
Actually, quite a bit. To keep it simple for this post:
- Their ingredients are quite different.
- Polymer is made of polyvinyl chloride
- Air dry clay is often call a natural clay. In general it’s made of Water, inorganic fillers and vegetable bindings. DAS brand, specifically does not contain any plastic, PVC, phthalate or BPA.
- How they cure (or harden)
- Polymer has to be cured (or baked) in the oven, a regular home oven.
- Air dry is just that. It dries slowly in the air, no oven required. Although if you need to speed it along a bit (I’m not known for my patience), see the trick towards the end of this post.
- Sanding method, if your end project needs some smoothing
- Polymer — safest to use wet sandpaper in water
- Air dry — fine grit sandpaper on a mini block or a nail file
What is the Difference Between Silk Screening and Stenciling?
They are similar in that they both create a design by masking off the background.
That’s it for similarities!
The main differences are in:
- How you add the paint
- Screen Print – you pull the paint across the surface
- Stencil — You apply the paint with a pouncing straight up and down motion with a special stencil brush
- Limits in the design
- Stencil — every piece of background has to be attached, so there can be no “stencil islands”.
- Screen Print — no limitations as all the individual pieces are burned into the silk mesh, so a very detailed pattern is possible.
Let’s Get Started Silk Screening Some Clay
Materials and Supplies:
You can keep is really simple, wit just these essentials:
- Clay
- Acrylic Paint
- Screen
- Parchment Paper
- Flat Hard Surface, like a tile or thick glass
- Container of Water large enough for your screen to lay flat in
These will add to the fun and ease if you can swing it:
- Acrylic Roller
- Tissue Blade
- Two Bass Wood Sticks
- Clay Cutters
If you choose polymer clay:
- An aluminum baking pan and cover
- Rubbing alcohol
If you choose air dry clay:
- Air-tight container for remaining clay
- Drying rack from your kitchen
- Fine grit sandpaper or nail file
If you get bit by the clay bug, then you’ll want to add:
- Clay pasta machine
- Fun extras like texture sheets, more cutters, more colors of clay
NOTE: these clays are not considered toxic, but they are not food-safe. That’s why you do not want to use your kitchen rolling pin. You want dedicated aluminum pans to cure (bake) your polymer clay pieces in. I am fine using my cooling rack because I layer parchment paper under my clay pieces.
These are the screens and polymer clay cutters I used — LOVE them!
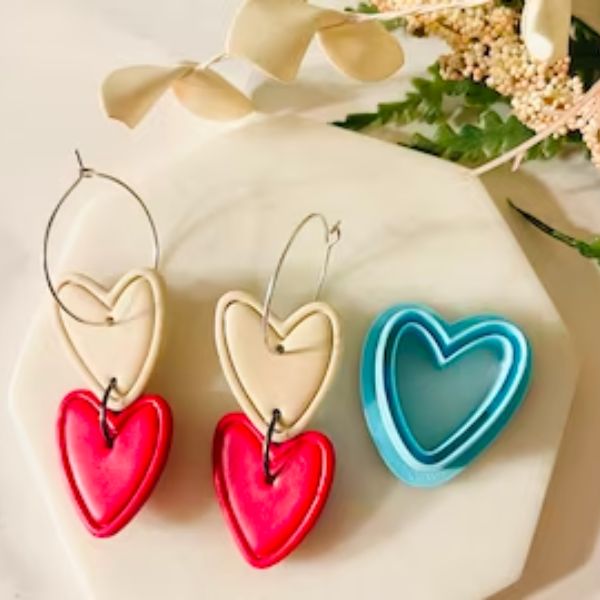
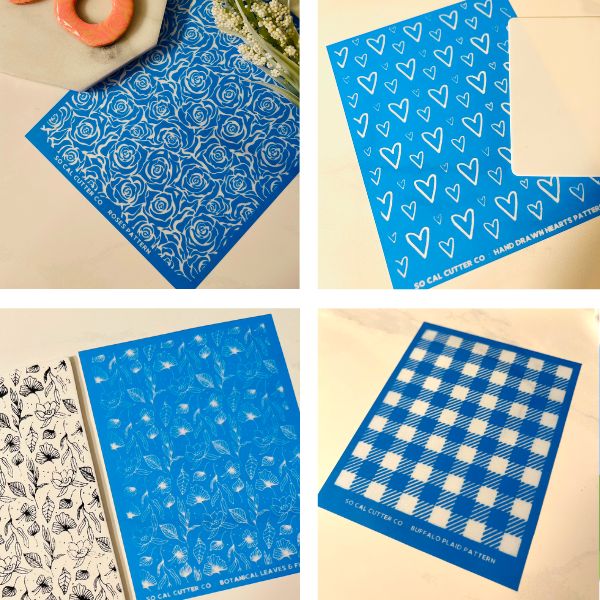
They are all from Ginger and Felix at So Cal Cutter Co. And they have many, many more styles to choose from! Have fun exploring (and tell the I sad “hi”). They will take great care of you!!!
Check them out here.
I’ve curated what I use and some of the best tools for just starting out.
These are affiliate links, which means I have spent time gathering only the items I trust and believe in for you. You pay nothing extra, but I may receive a small commission.
Step 1) Roll Out Your Clay, either type of clay —

Cut a piece of clay off the block and knead it to soften until pliable. If it starts getting sticky, stop kneading, let it rest for fives minutes. Wash your hands with cold water and return to your clay. Letting it cool off a bit and using cool hands will probably do it.
I used white clay for this post.
But feel free to use what color is best for your project.
If you want to tint your clay, do it now:
- Air Dry Clay — Add some colorant into your raw clay and knead it thoroughly until it is fully incorporated and all one color. If you are using DAS brand air dry clay, your white clay will actually be grey at this point, so consider that in when you are mixing for your desired color. The grey will turn white as it dries and the water content evaporates. (It will also become a lot lighter weight — amazing how much water weighs). For a colorant, use acrylic or tempera paint. Technically you can also use oil paints or food coloring, but both make a really big mess, so I advise steering clear of those. Looking for terra cotta? DAS has that option
- Polymer Clay — Start with a block of colored clay or two or three colors mixed to get your desired background color. It is possible to use alcohol ink as a colorant for either white or translucent polymer clay.
TIP: Polymer clay is available in a myriad of different colors, if you are new to this, try to start with a single color block and start mixing colors on your next project.
CAUTION: If you choose to use an oil-based paint or food coloring for your colorant, be sure to wear gloves and have your work surface well protected! (just saying ????)
Work on a clean, flat, smooth surface like a tile, or a thick piece of glass.
With your acrylic roller or dedicated rolling pin — or just your fingers patting it out and rubbing it smooth — spread your clay to your desired thickness.
TIP: to get an even thickness lay parallel sticks of wood of the same thickness on each side of the clay and roll your along these guides
If you are using polymer clay, you can take a break here, but if you are using air-dry clay, you want to proceed quickly so your clay doesn’t start drying. Lay a piece of plastic wrap over your clay while you gather the necessary supplies for the screen printing.
Step 2) Silk Screen Your Clay —
This is the fun part!!!
Make sure your work surface is covered.
Have your tray or bowl of water next to your work.
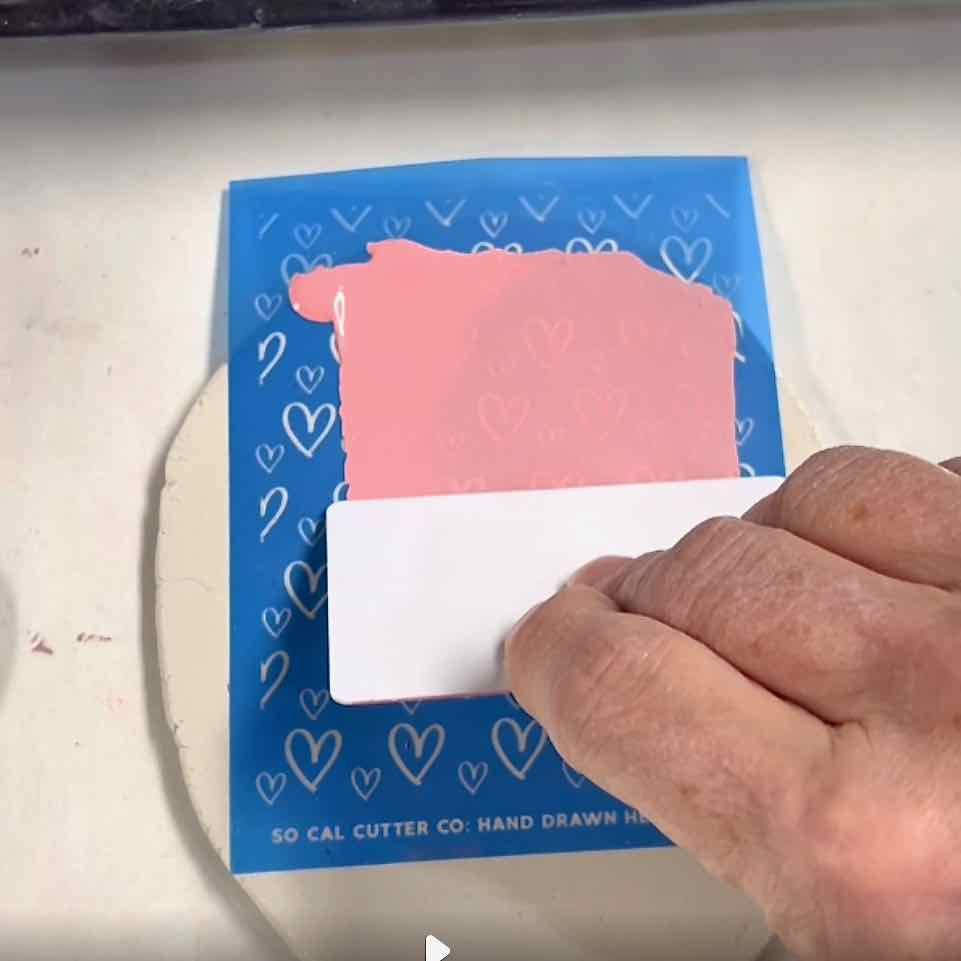
You’ll need a squeegee card like I used or something like an old credit card or library card will do.
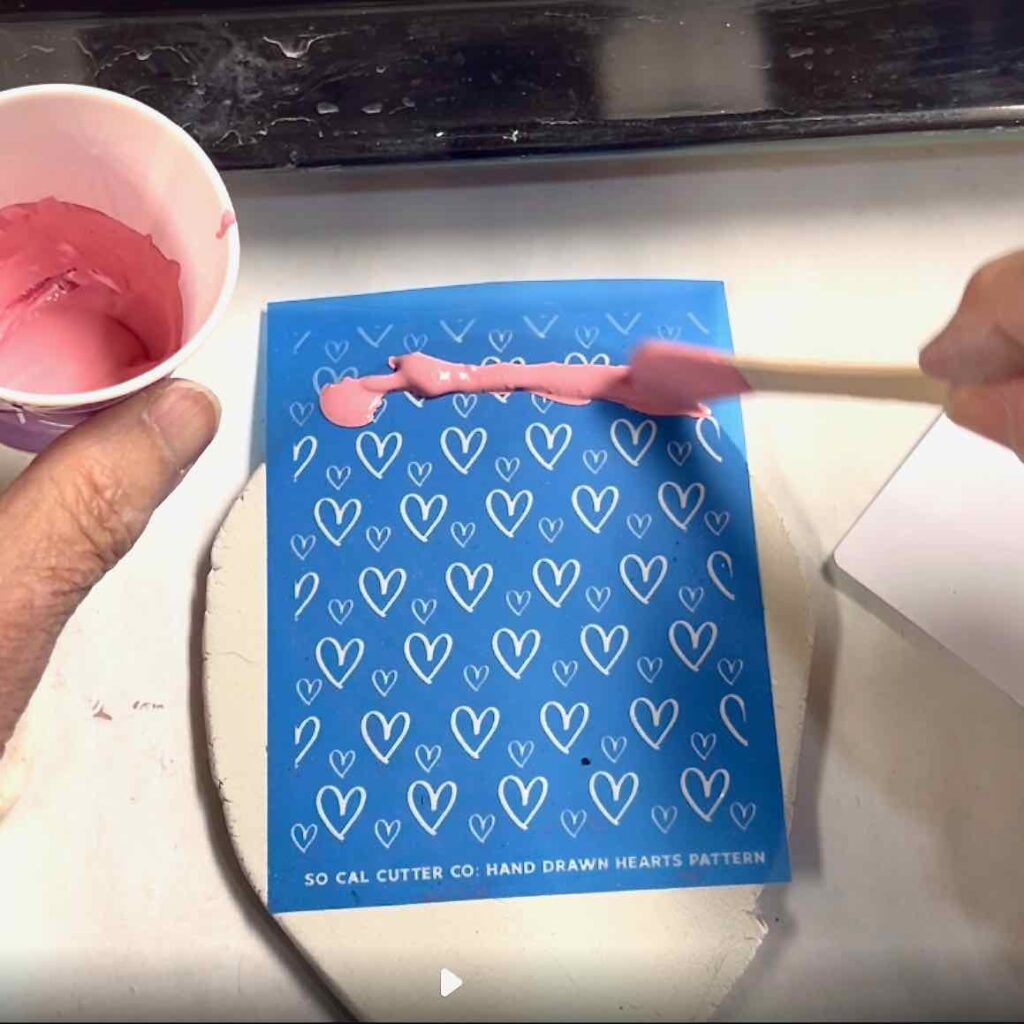
Grab your chosen paint. Make sure it is good and thick. If it is thin and runny it can smear. If in doubt, try a corner of the screen on a thin scrap of clay. If needed, you can add a bit of gel medium.
HINT: It’s currently popular to add flour, baking soda, or Plaster of Paris to thicken paint. Works great, but NOT for this! Those also add texture and will not work with the screen and quite possibly ruin your screen.
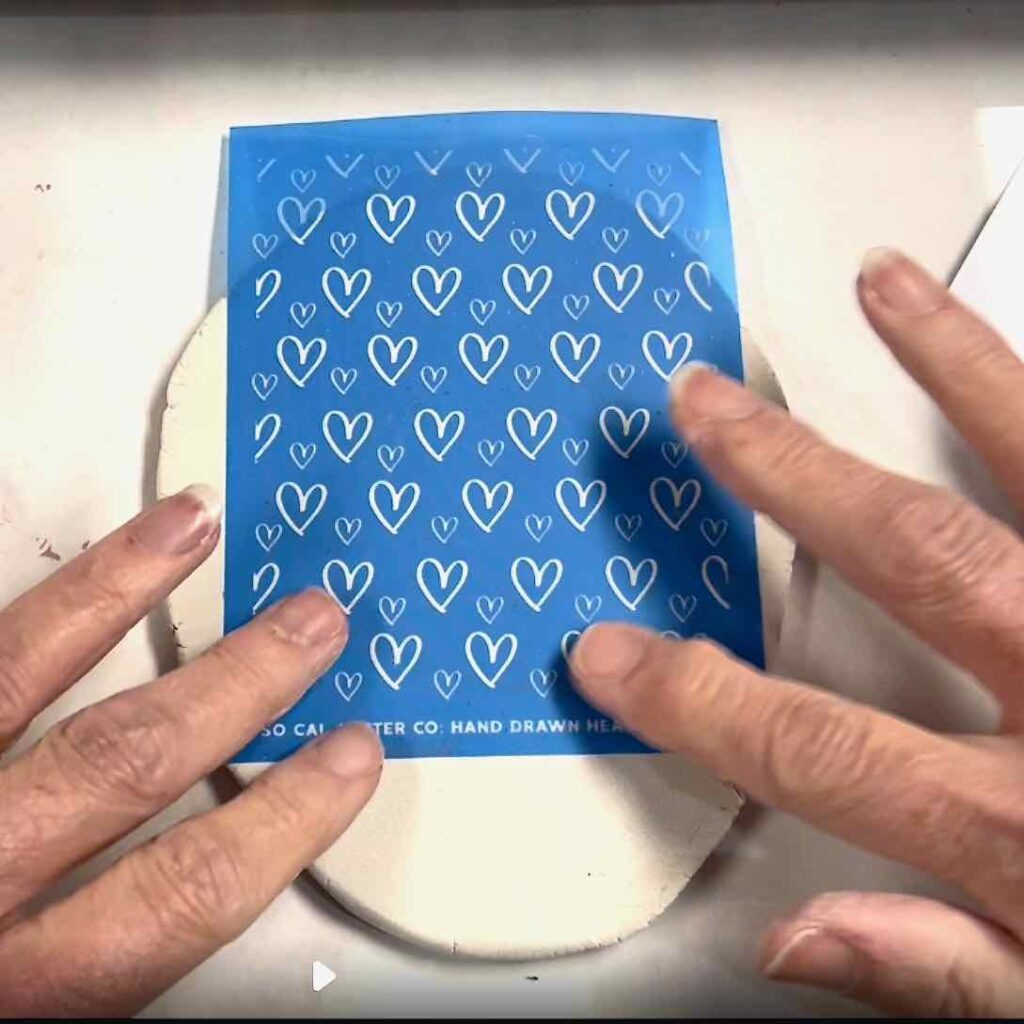
Take your screen out of its envelope and peel off the clear backer sheet. SAVE those to properly store your screen for the next project.
With the lettering at the bottom of the screen facing up, lay your screen on your clay and gently burnish it in place with your fingers.
Either squirt or apply with a disposable stick a line paint along one edge of the screen.
Slowly and with light pressure pull your squeegee card from that edge across/down the screen. Swipe a second row as needed.
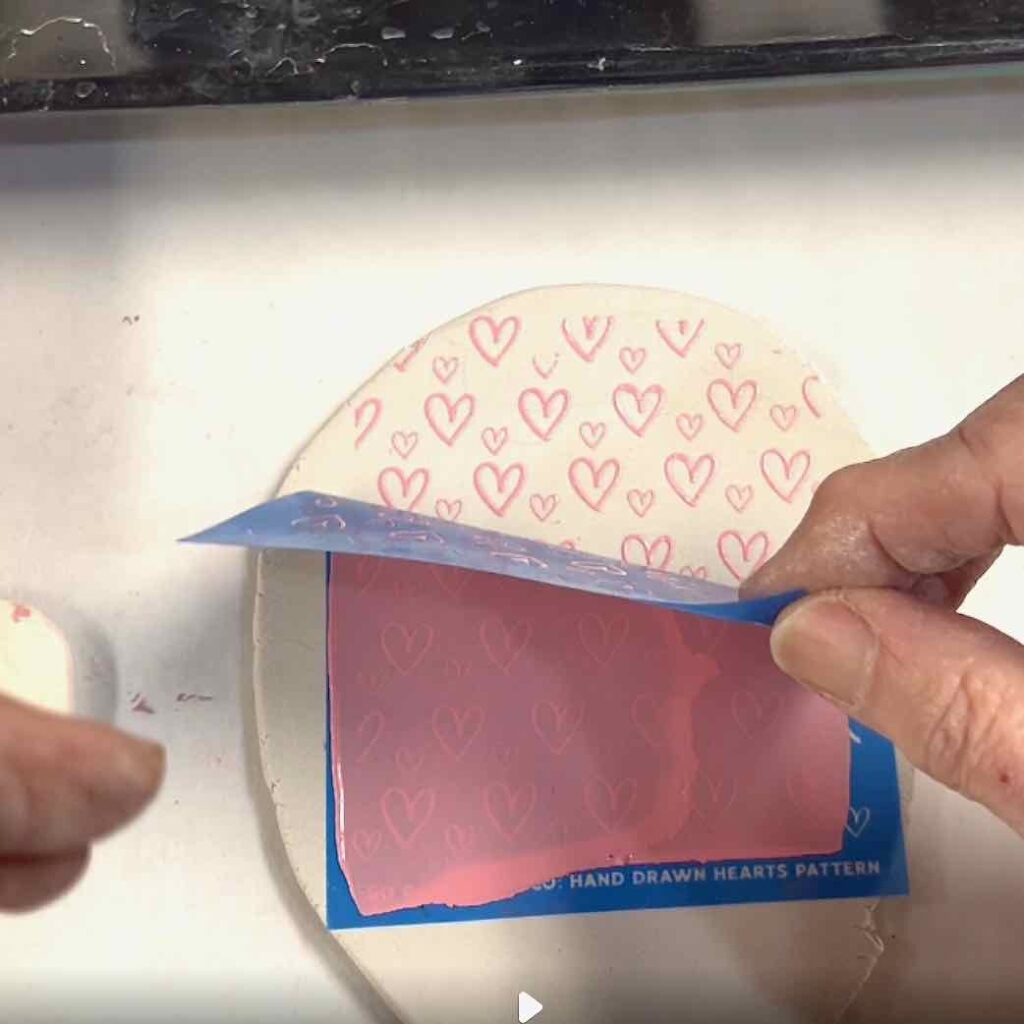
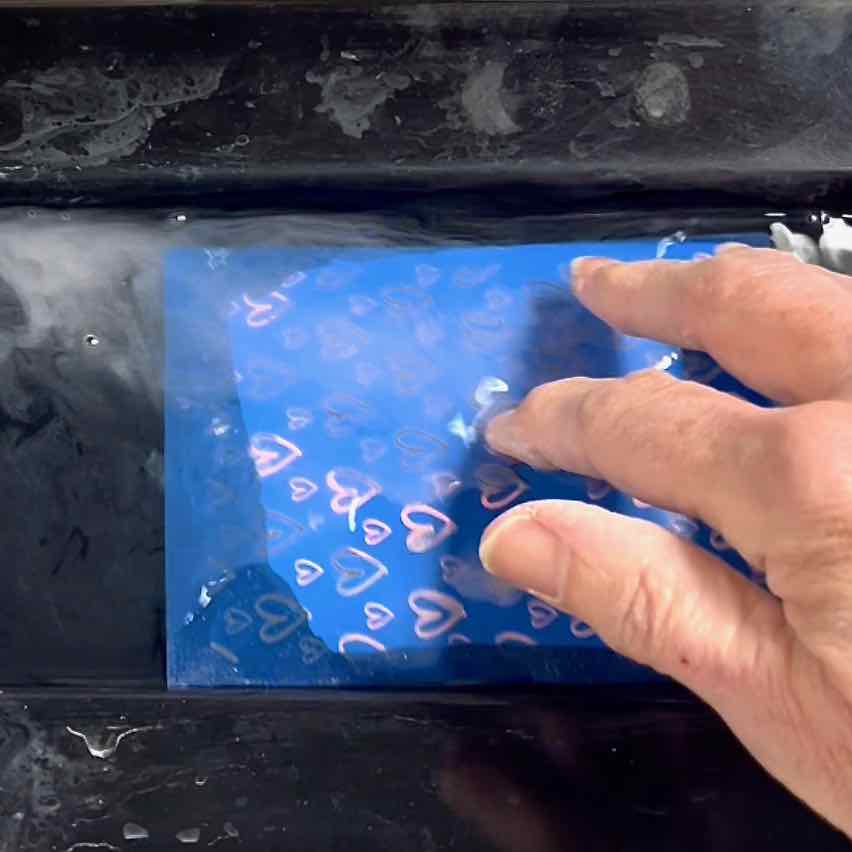
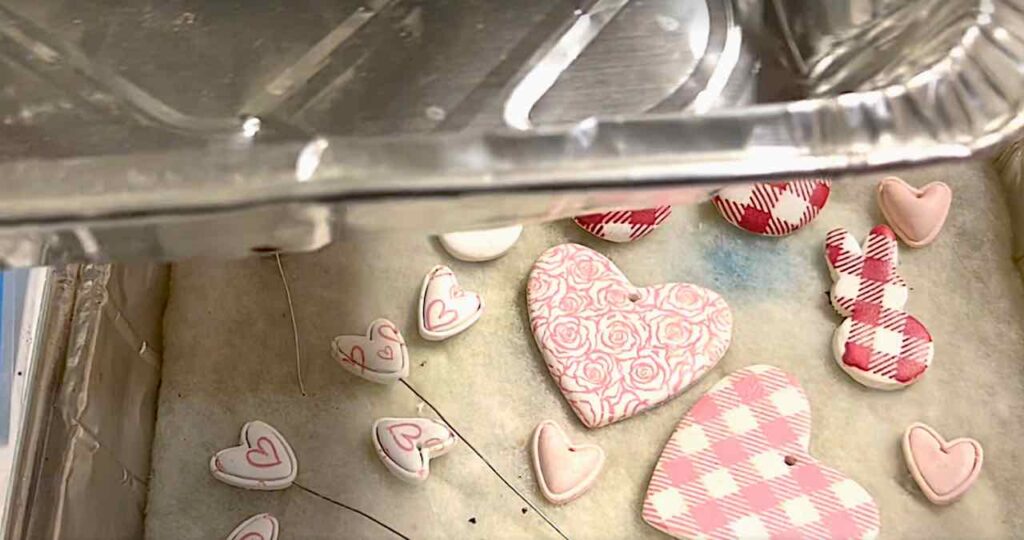
Starting on one side pull up your screen and place into the waiting water bath. Swish it and turn it over so both side are wet.
Marvel at the fine detail.
A quick pause in the action to ask if you’re enjoying this fun new take on clay? I have a lot more coming. Please consider subscribing so you don’t have to remember. You control how much is right for you:
Thanks! Now onwards —
Step 3) Let Paint Dry —
Pretty easy step, right? Butt here is where you need to watch out if you are using air dry clay.
Although the air drying process is slow, it starts immediately. For best results, you want to cut your air dry clay as soon as possible.
Otherwise the edges may get rough and cracked and you can’t sand them smooth without ruining your painted design.
TIP: If using air dry clay, watch the drying closely. Acrylic paints dry quickly and you want to cut as soon as the paint is dry to the touch.
Do you believe me now? I took way too long experimenting and documenting the process.
Have your paint and screens and all supplies ready before your start with your clay. Then cut a piece of working clay off your package, immediately seal up the remaining package. Roll out your clay, print it, let it dry a few minutes, then cut, release from work surface, smooth edges and place on parchment paper in one smooth process. And all will be good.
If life throws you a curve in the middle, when you are not actively working your slab of clay, keep it covered with some plastic wrap and that will help.
Step 4) Cut out Your Shape —
If you purchased a polymer clay cutter or two, great! Have fun with those. There are other alternatives too for larger pieces of clay:
- cookie cutters can be an ideal choice
- interesting shaped household items you can trace around with an Exacto knife
This should be easy, but a couple of precautions are good to keep in mind. The smaller the cutter and thicker the clay, the more likely the clay is to stick inside the cutter. Here are three options that reduce the chances of this happening to you
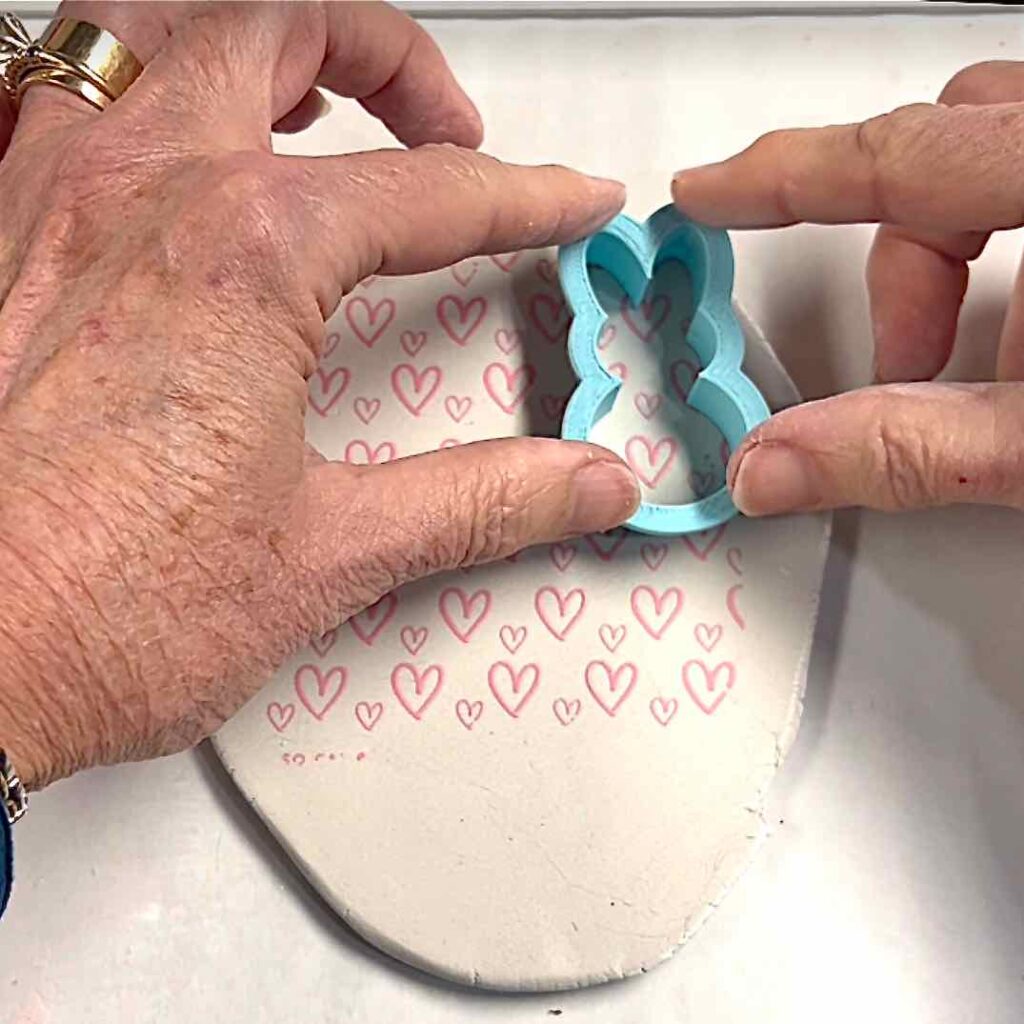
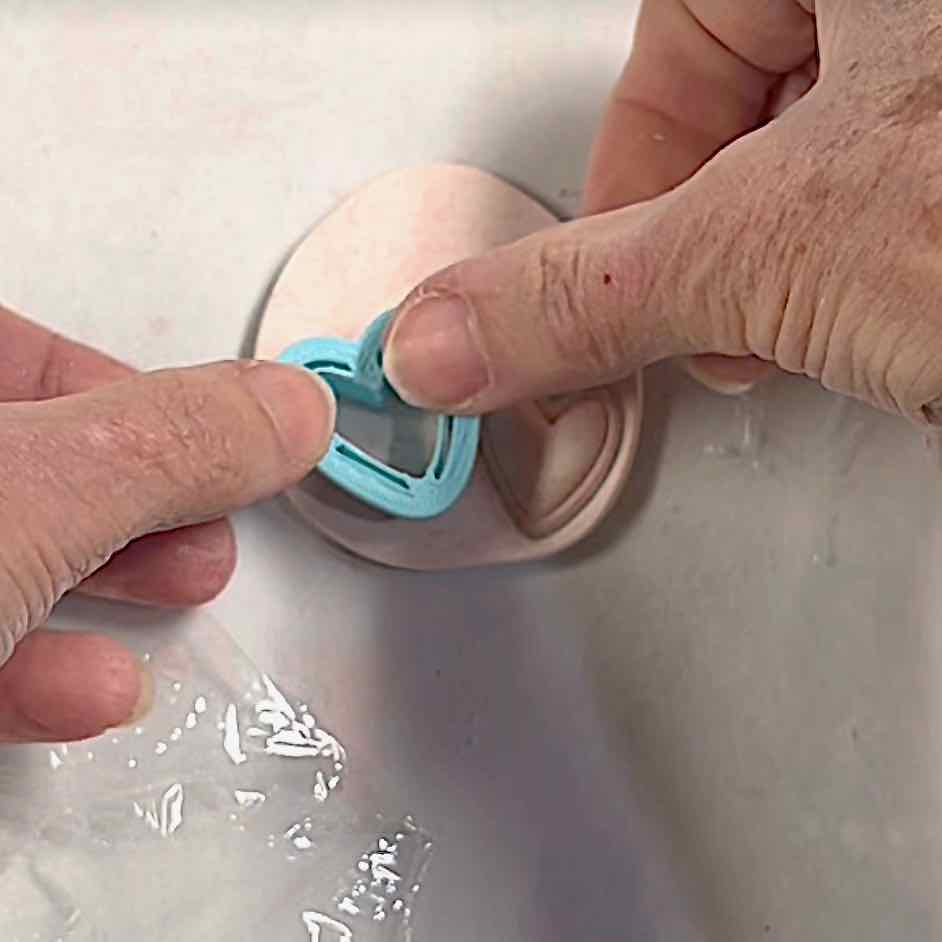
- I like the look and ease of using plastic wrap. This creates a bit of a domed effect and the edge has more of a radius to it than a sharp edge.
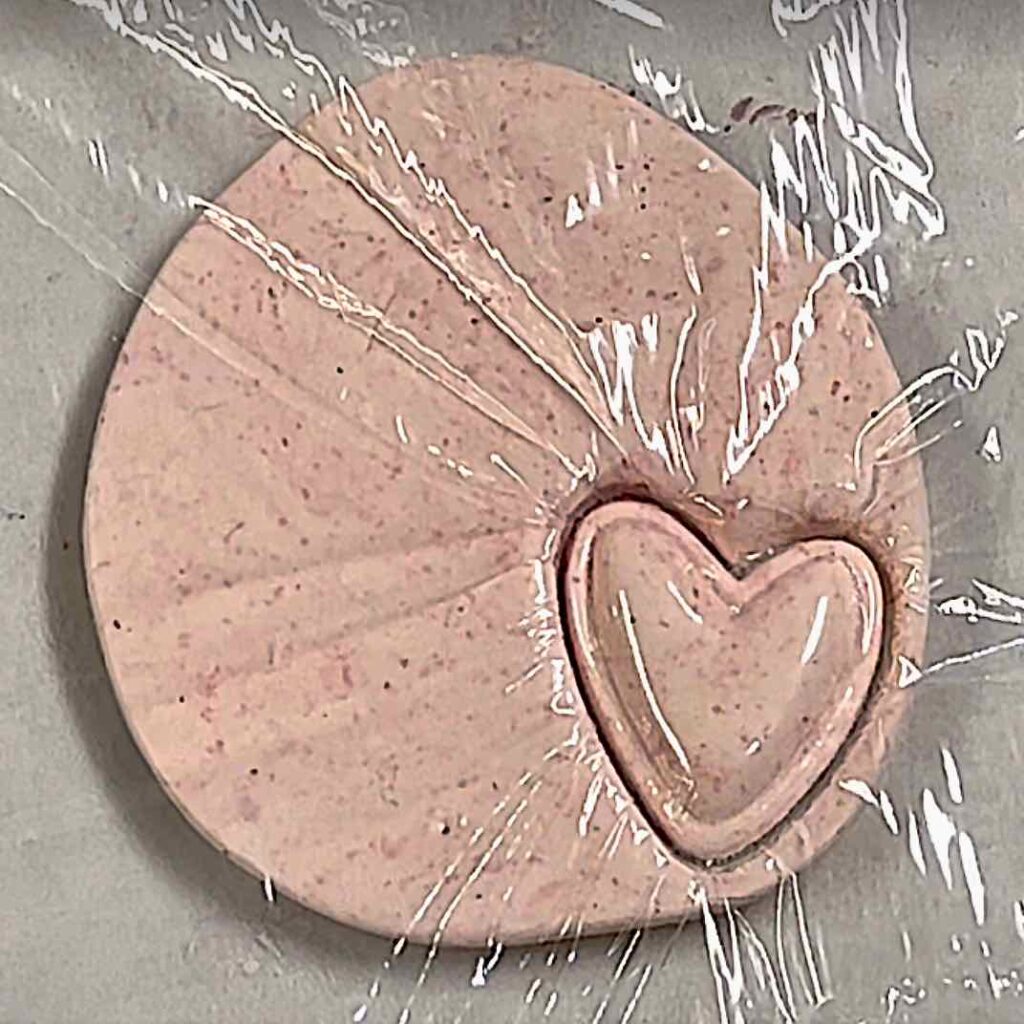
Take a small piece of plastic wrap, Saran Wrap, Glad or similar, lay it loosely over the screen-printed clay. Then determine the placement of your cutter and push straight down. Pull cutter straight up and you have your clay piece!
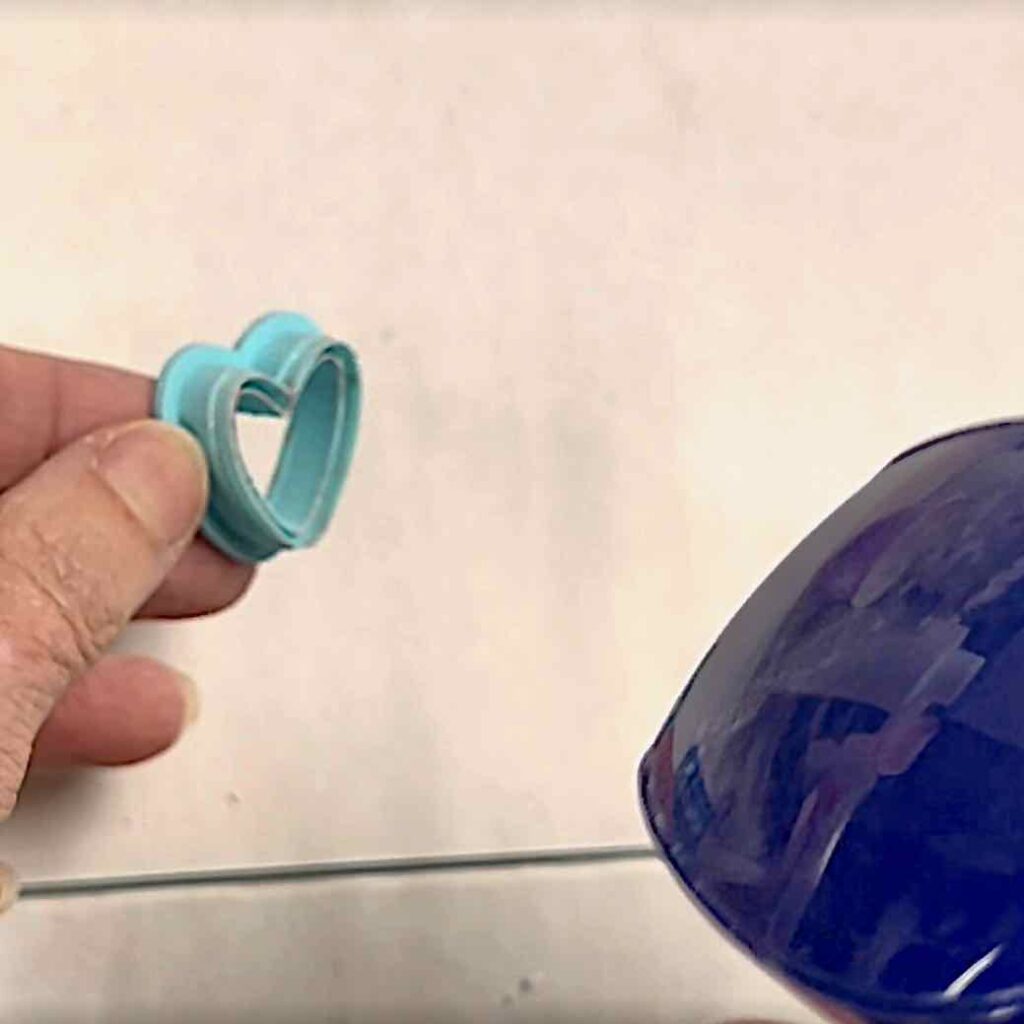
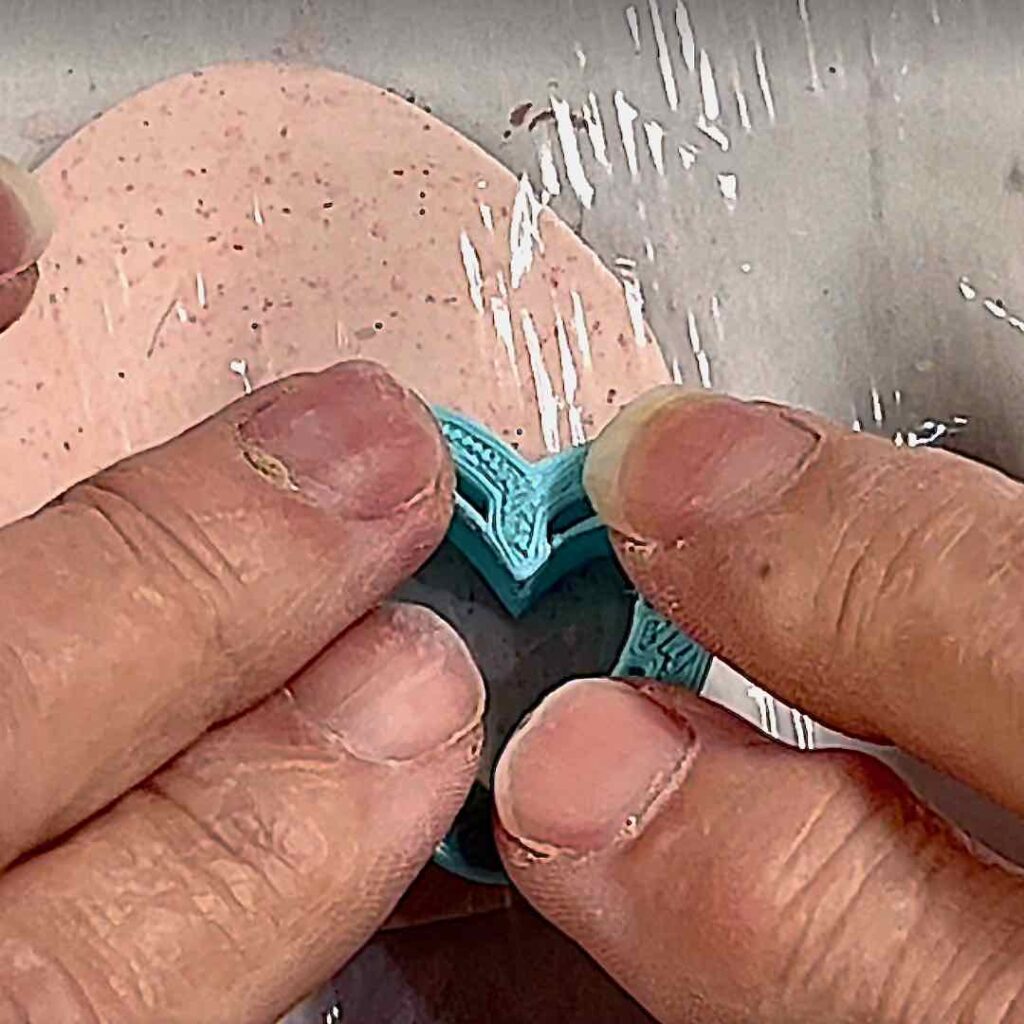
- 2. Wipe your cutter clean, mist, not spray, but a gentle mist of water inside your cutter will help the clay release.
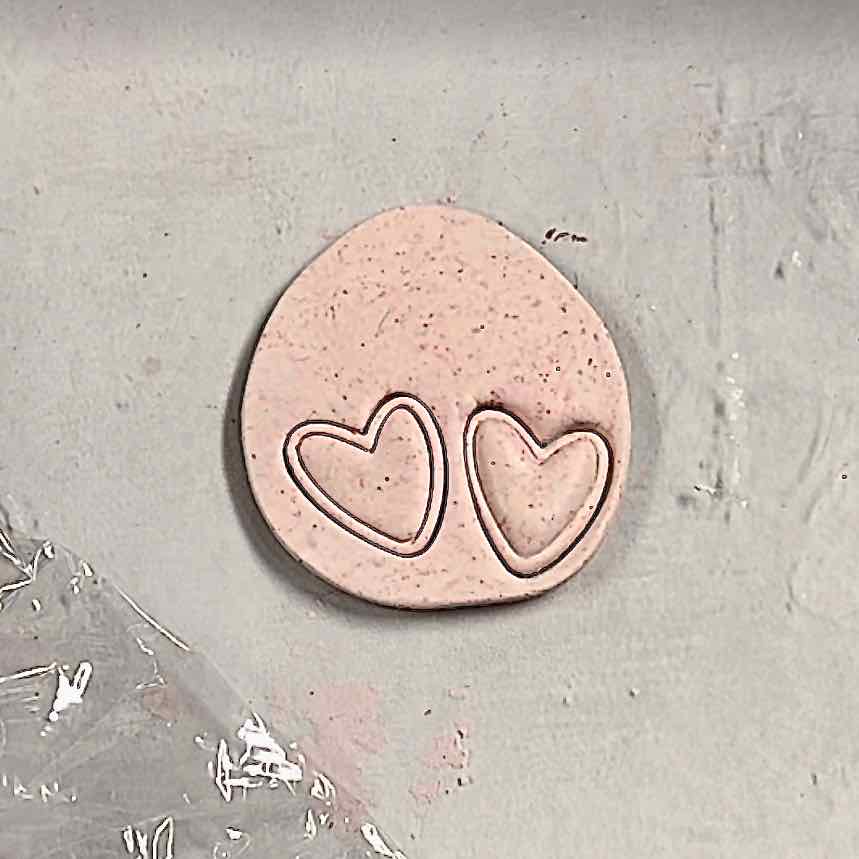
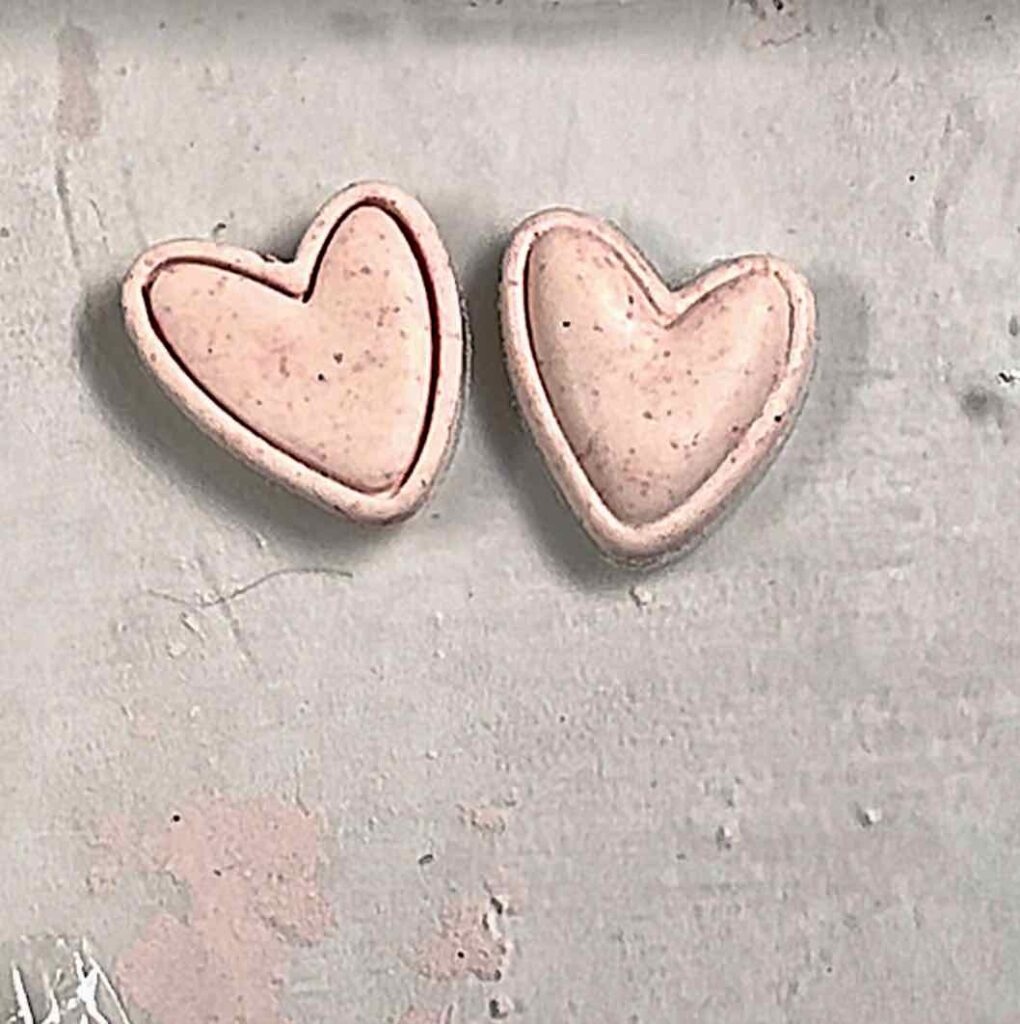
See the difference cutting with (on the right) and without (on the left) plastic wrap?
- 3. Or wipe your cutter clean and dry, then dip in a small bowl of cornstarch and cut. (not shown)
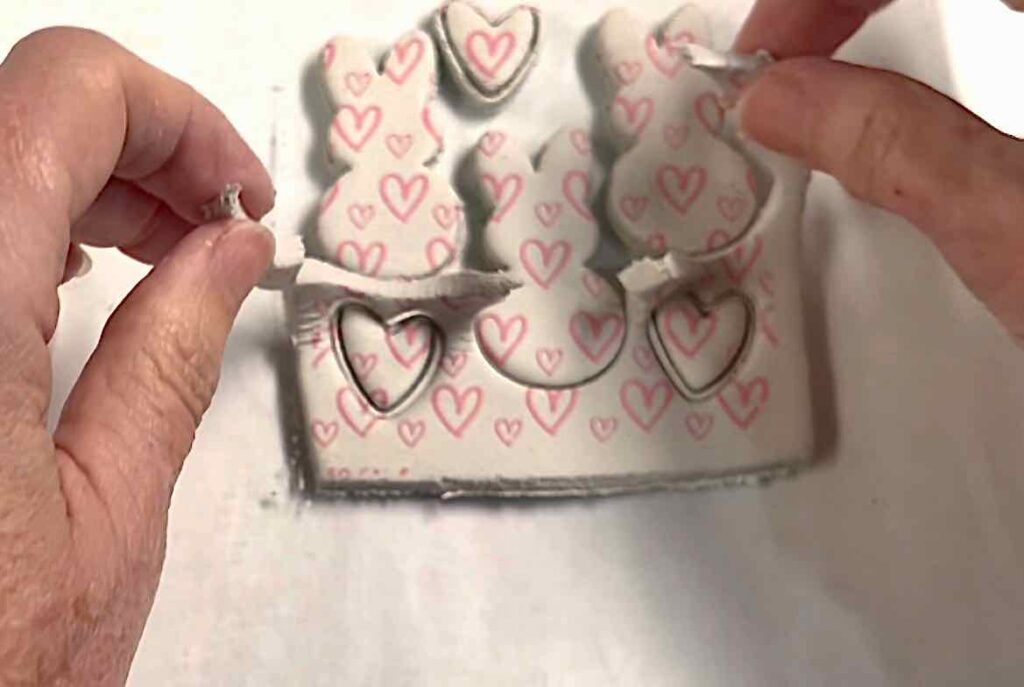
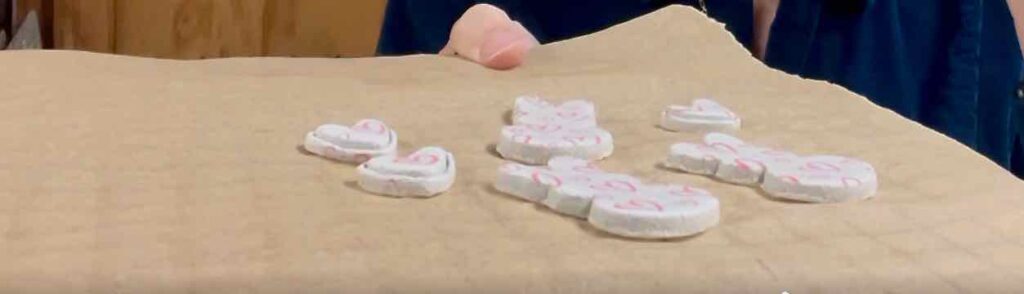
Once you have all your pieces cut, pull up the surrounding clay.
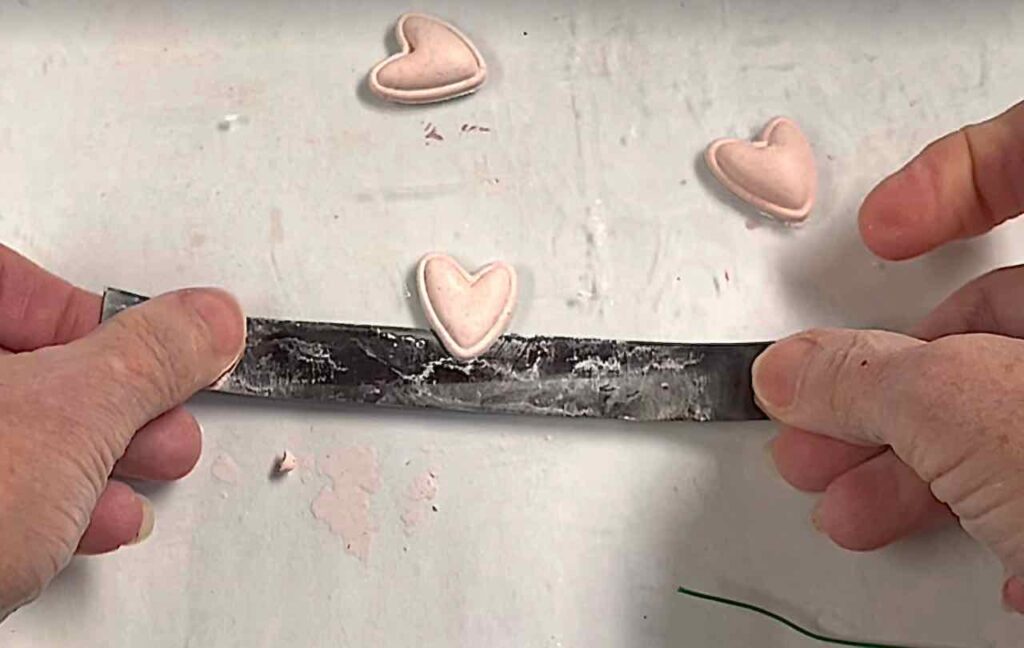
Now use a tissue blade to release each piece from the work surface and very gently smooth any rough edges with your finger tip. (Confused? No worries, you can see what I mean in the video below)
TIP: If your fingertip has too much friction try dipping it in water for air-dry clay or cornstarch for polymer clay to help it glide smoothly.
Step 5) Holes? —
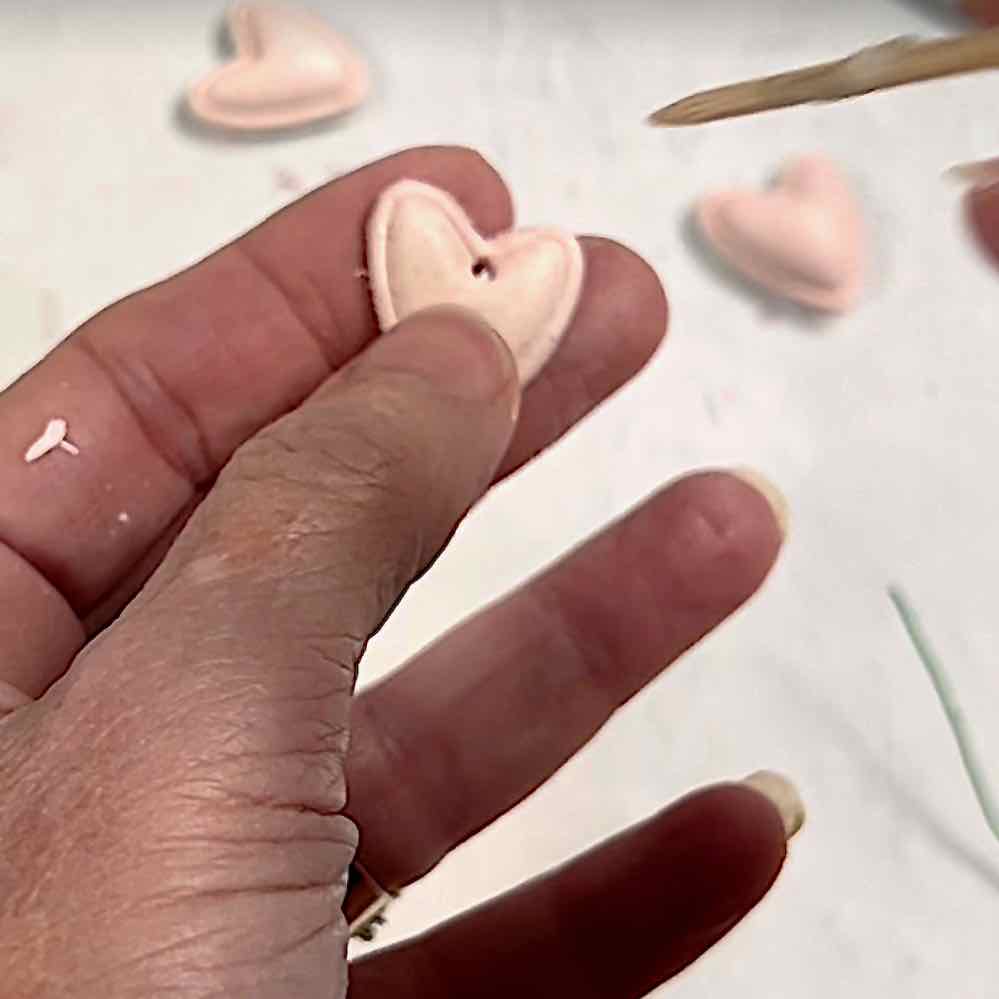
If your clay piece is for hanging, don’t forget to add a hole now, before curing!
TIP: A sturdy straw is best for making holes as they will cut and remove the clay. Bring home a few cocktail straws for narrow holes.
I did not have a thin cocktail straw on hand, so I used a skewer instead. I like the hole it makes, but the back will need to be sanded after curing because of the excess clay it pushes out
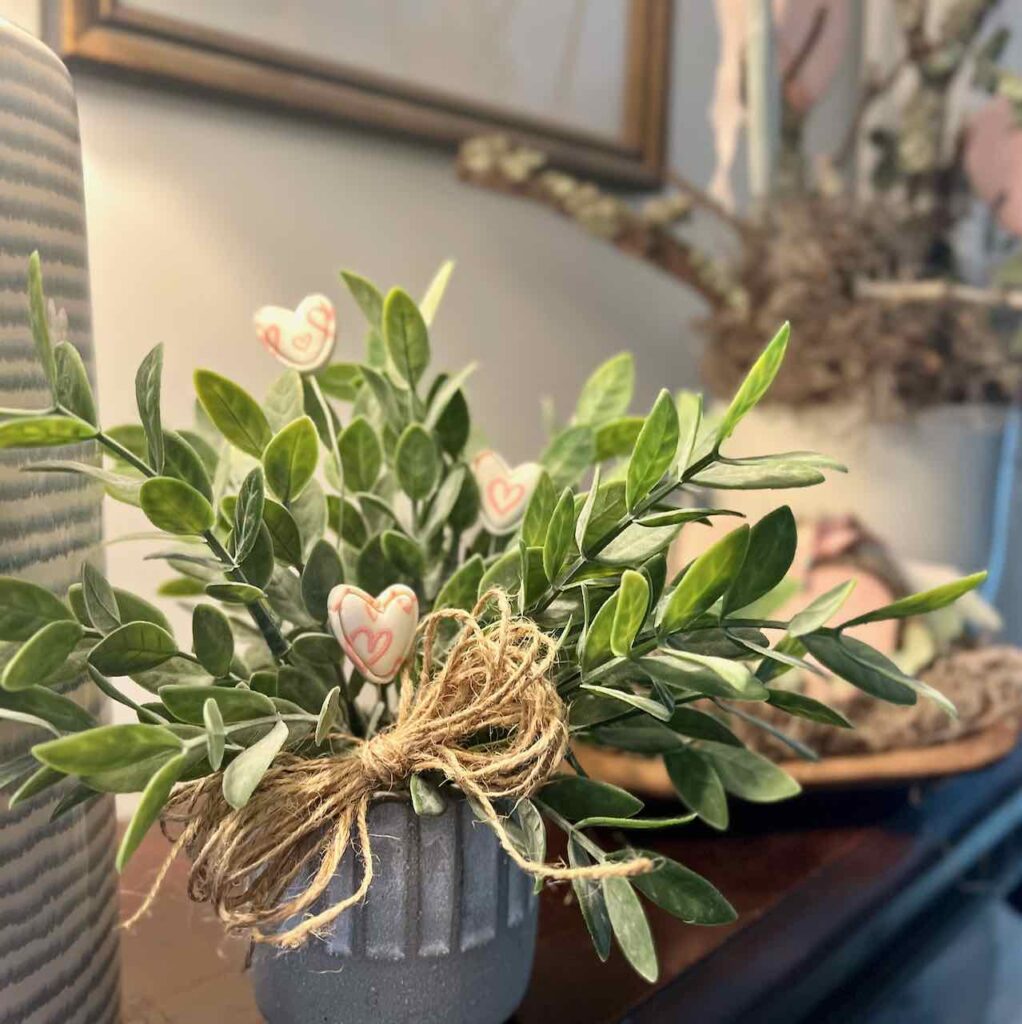
I also added some wire stems to a few of mine that I planned to use as an embellishment in a small house plant.
Step 6) Cure Your Clay —
If Polymer clay: check the directions with the clay you are using for temperature and time. Do not worry about overbaking. The bigger concern is not baking long enough. Your clay should not burn or scorch unless your oven pushes 350 degrees. So you might want to check your oven temperature before you start if you think your oven runs hot.
I place my pieces inside a pair of disposable aluminum pans I’ve been using for clay only for over 10 years now.
Place your pieces on something flat that isn’t metal. The metal surface will react with the clay and leave shiny spots where it touches, That’s why my tray is lined with batting. Now that parchment paper is a thing you can use that if your clay piece has a flat back. If it is rounded, it may develop a flat side while baking. Beads and anything rounded can be cured on a shallow layer of baking soda or batting as I use.
To cure:
- Cover with the “lid” and place in a room temperature oven.
- Then heat to the proper temperature, usually 275.
- Add the length of time it takes for your oven to preheat to the estimated curing time of the clay you are using and set a timer.
- When the timer goes off, turn off oven and let the clay pieces cool in the oven as it cools.
- Once cool, you can open and check your pieces.
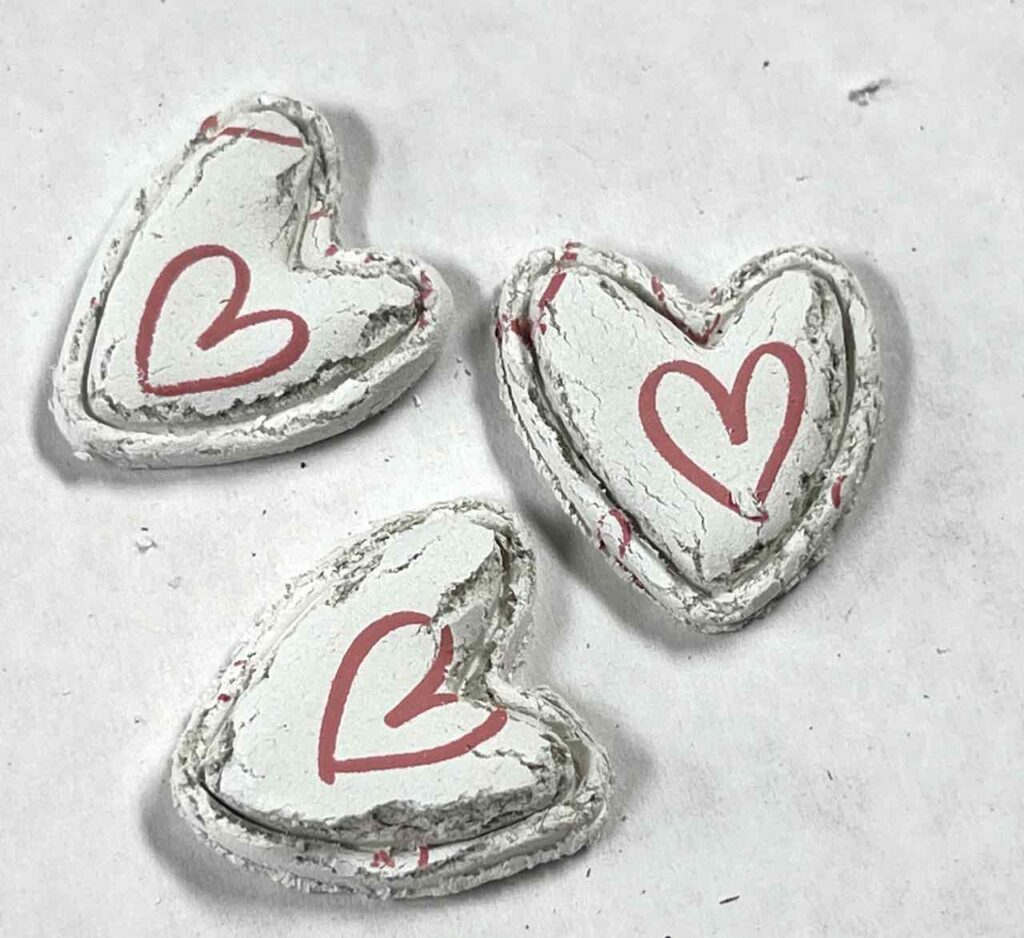
You’ll know they are fully cured when you can partially leave a tiny mark with your fingernail in the back of a piece. If too soft, not fully cured, you can repeat the curing process exactly as before with less time.
NOTE: It’s normal for thin Polymer clay pieces to be flexible and have some give.
If Air-Dry Clay: pretty straight forward, let the air it’s job of evaporating the water content of the clay. You just have to turn it periodically — like after twelve hours at first.
I dry mine on parchment on my kitchen cooling rack so air can circulate around them.
This can take a while — like 2 – 3 days. So plan ahead.
Did I hear a groan? If you’re impatient, too, there’s a BONUS at the end of this post for a tricck to speed it up a bit, but really only use it after 24 hours.
Step 7) Optionally, Seal Your Clay Creations —
There are many options for sealing:
Mod Podge is a great option and there are all kinds of sprays.
Now Let’s Take Care of Your Screens and Cutters!
The Screens —
Take your container of water and painted screens to a sink.
Run the screen under a gentle stream of clean water.
If needed, very gently use a very soft-bristle brush to clean any paint off the screen. It’s not unusual for a screen to become stained, but there should not be any paint at all on the mesh part of the screen in particular.
TIP: Hold the wet screen up to the light and look closely to make sure all are clean and open. You don’t want any paint to dry in that fine mesh.
Lay on the backer sheet to dry.
When completely dry, store in the envelope it was shipped in. It should last you many years!
The Cutters —
The cutters should be washed before storing between projects. Hand wash (no dishwasher).
If polymer clay scraps are present, rubbing alcohol will dissolve them.
Soak a swab and work over those spots.
So Cal Cutter Co cutters are made with a material that can be sanded if needed to sharpen the cutting edge. That may be true with other, I just can’t say for sure.

Please pin this (it helps me a lot)
and hopefully it will hep you remember
this fun craft!
Pin it to your clay board
your craft board
your wedding planning board
Wherever it makes sense for you!
Now How Can You Use Your Clay Pieces?
So Many Ways!
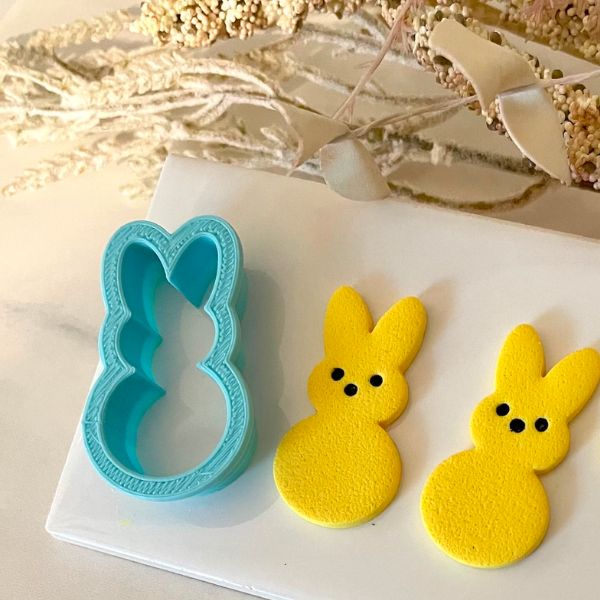
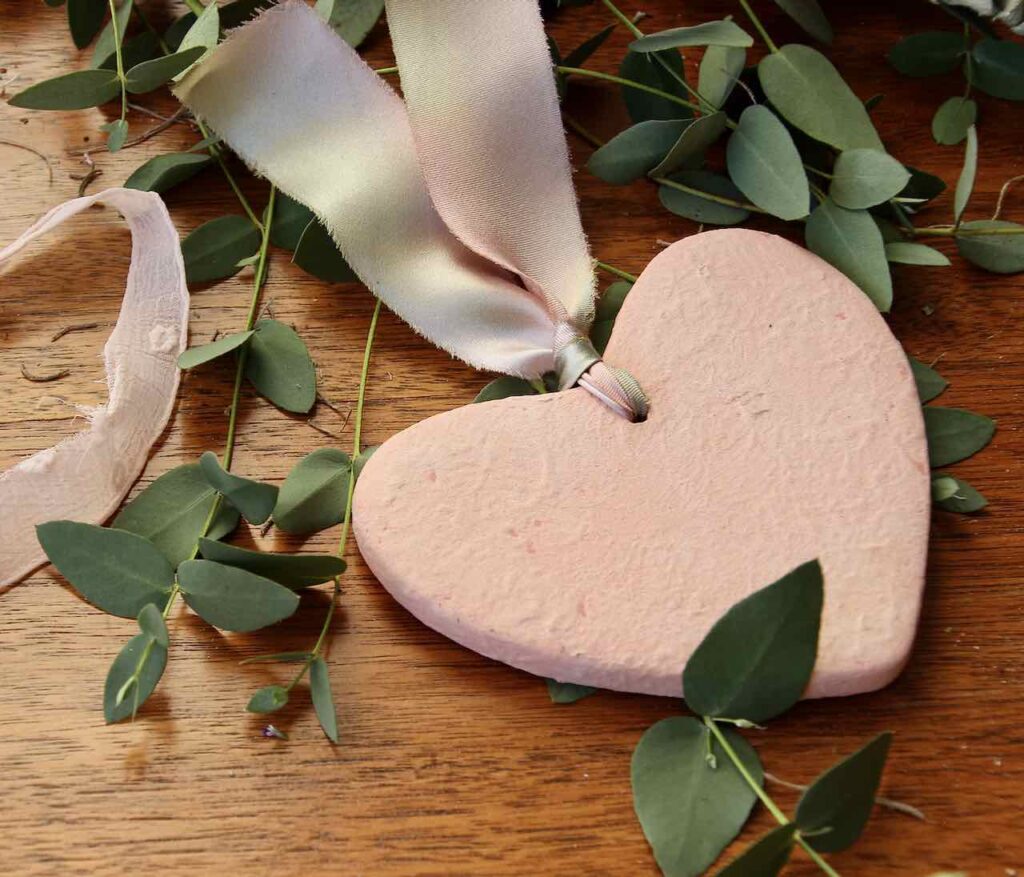
My examples are hearts and bunnies, yours may be completely different.
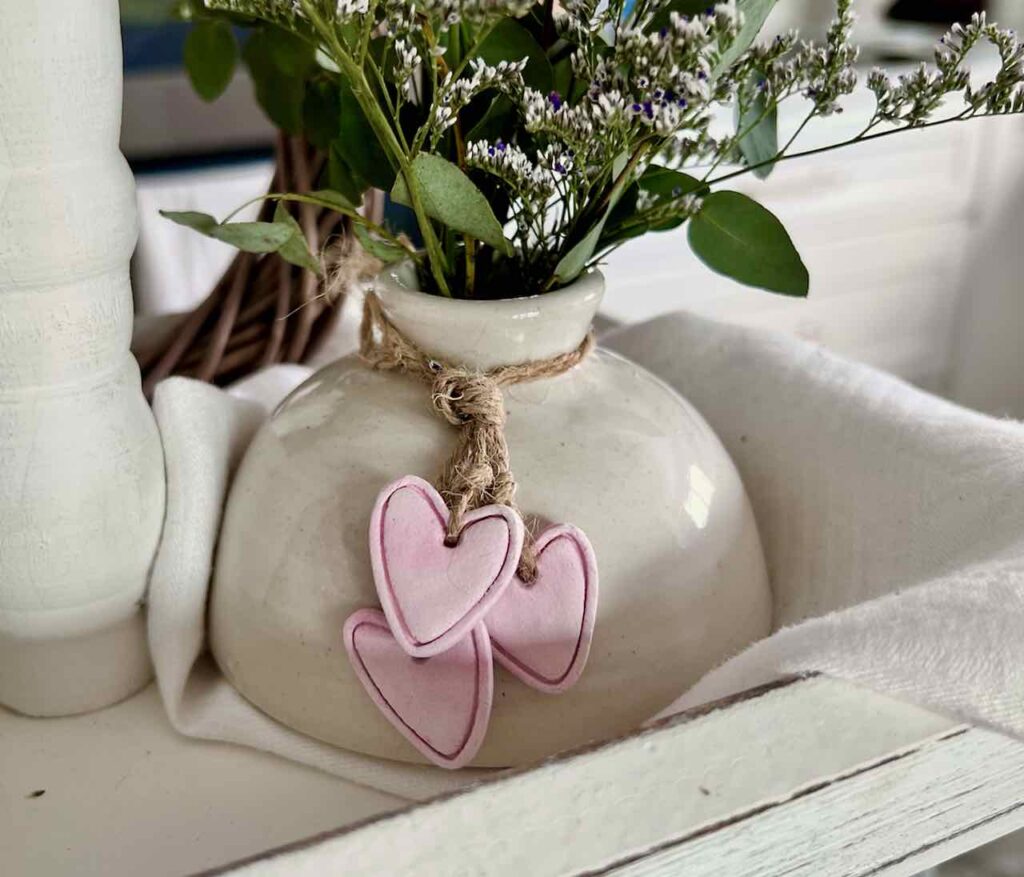
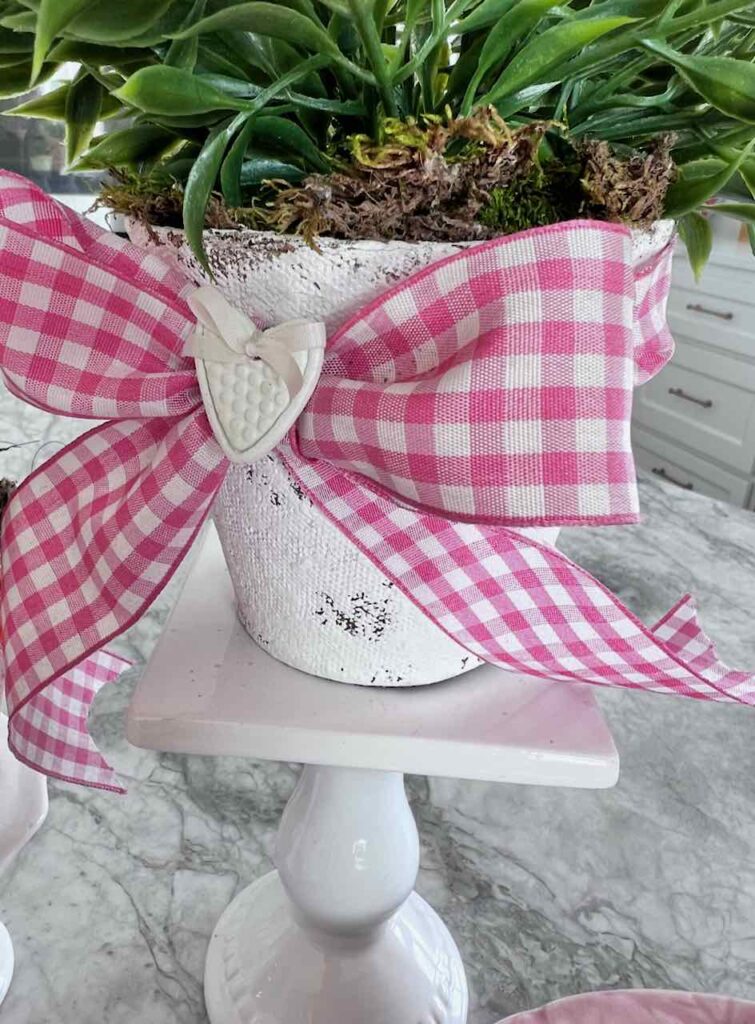
How about to embellish gift packaging:
- tied around the neck of a vase of flowers
- tied onto a box with bakers twine or jute
- Poking out of a potted plant
To Accent a Wreath:
Seasonal Accents for a Tiered Tray:
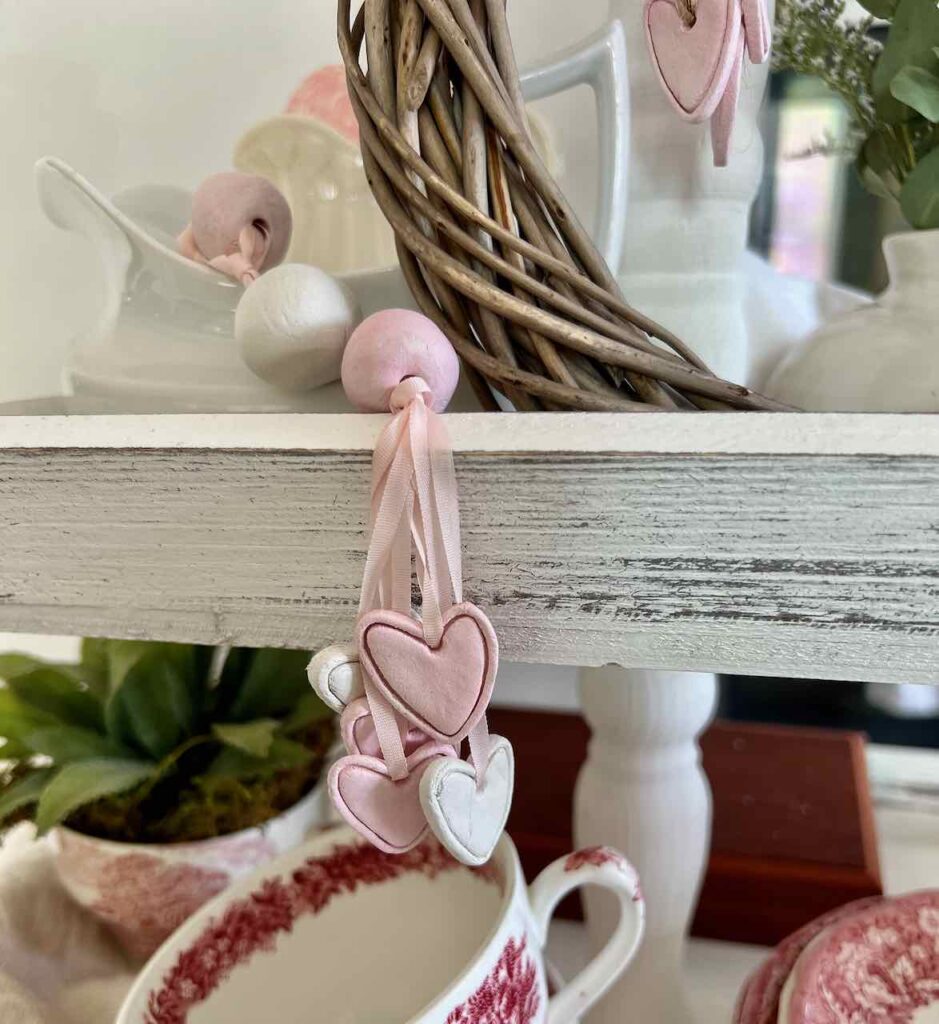
To Hang from Branches or Stick in Plants:
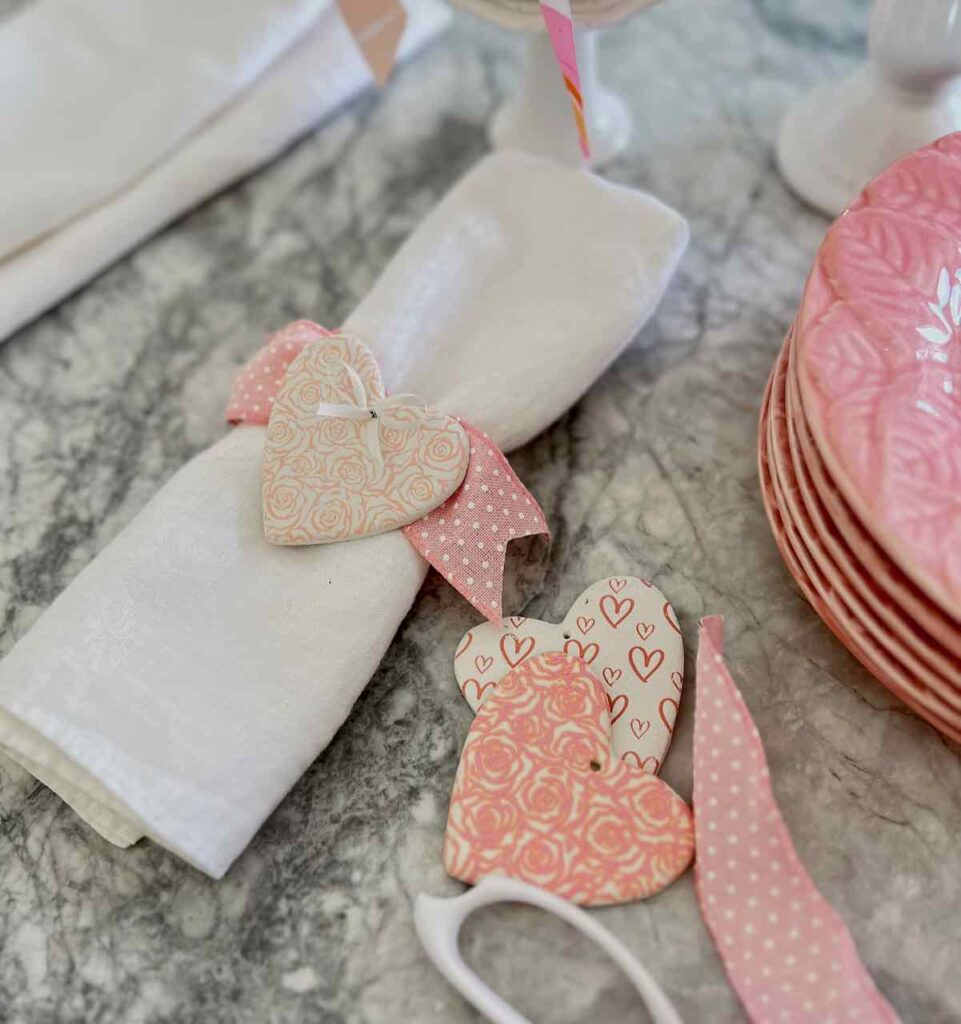
For Entertaining:
- part of a centerpiece
- napkin rings
- place cards
BONUS: How To Make Air Dry Clay Dry Faster
After your air dry clay has been drying for a day and you want to speed up the process, follow these steps:
- Turn off oven after 20 minutes
- Place them on a sheet of parchment paper on a cookie cooling rack
- Place in a cool oven
- Turn on oven to 175. Use Convection if you have it.
- Leave them to cool in the oven
Repeat as necessary.
Are you bit with the clay bug yet? If not, wait until you see this next clay craft I’m working on!!!! So much fun! Be sure to subscribe so you don’t miss it ?!
Prefer Video?
Happy to accommodate!
I hope you enjoyed this super lengthy post. They won’t all be like this – pinky promise!
Thanks for hanging in there with me. Don’t hesitate to reach out with any questions — or any projects you’d like to see me take on. I love a good challenge!!!
You Might Also Like These Posts


Super cute Diane! I love this project, You did an amazing job.
I love playing with clay – Your hearts and bunnies are adorable!
Oh my goodness! This is the perfect tutorial for a newbie like me. I really appreciate all of the tips for using both types of clay and creating a beautiful finished product. I’m definitely going to add clay to my next craft purchase! Thank you so much for sharing with us at Whimsy Home Wednesday!
Oh, I’m so glad it helped. I hope you are empowered to try silk screening on clay!
Diane, this is the cutest clay idea I have seen yet. I have to say, I have never thought to consider screen printing on clay, but I love the idea now. Thank you for sharing your inspiration with us on Whimsy Home Wednesday!
Thanks so much Cara! What a treat to be featured in your wonderful link party!
I got bit by air dry clay a 2 or 3 weeks ago. I just received my silk screens in the mail yesterday but did not know for sure if I was suppose to silk screen my clay while still wet, partially dry or what? Thank you for answer that question. I purchased this little jewel (Clay Roller Kit) which works great but I put silicone sheet on it which helps. Corn starch helps loosen the clay if you lightly dust your cutters before using them. Diane thank you so much for your article and video. I also truly lo e the bunnies and hearts. I have little yellow birds, Would love to had the hearts like yours. Looking g forward to more from you.
GINNY
Oh I’m so glad you’ve jumped on the air dry clay bandwagon. the silk screens need to be used while the clay is still wet, otherwise it slides around too much. But be sure not to wait too long to cut and possibly manipulate the clay or it may want to crack on you. I cover that a bit more in the video perhaps, so you might give it a look to see if there are any other tidbits for you. Don’t hesitate to reach out with any additional questions.