
She Thought Her Favorite Knit Dress Was a Goner – Now It’s Better Than Ever!
Before you cry over that stained knit dress — read this. Lace appliques are lightweight, flexible, and perfect for stretch knits. The results might just surprise you.
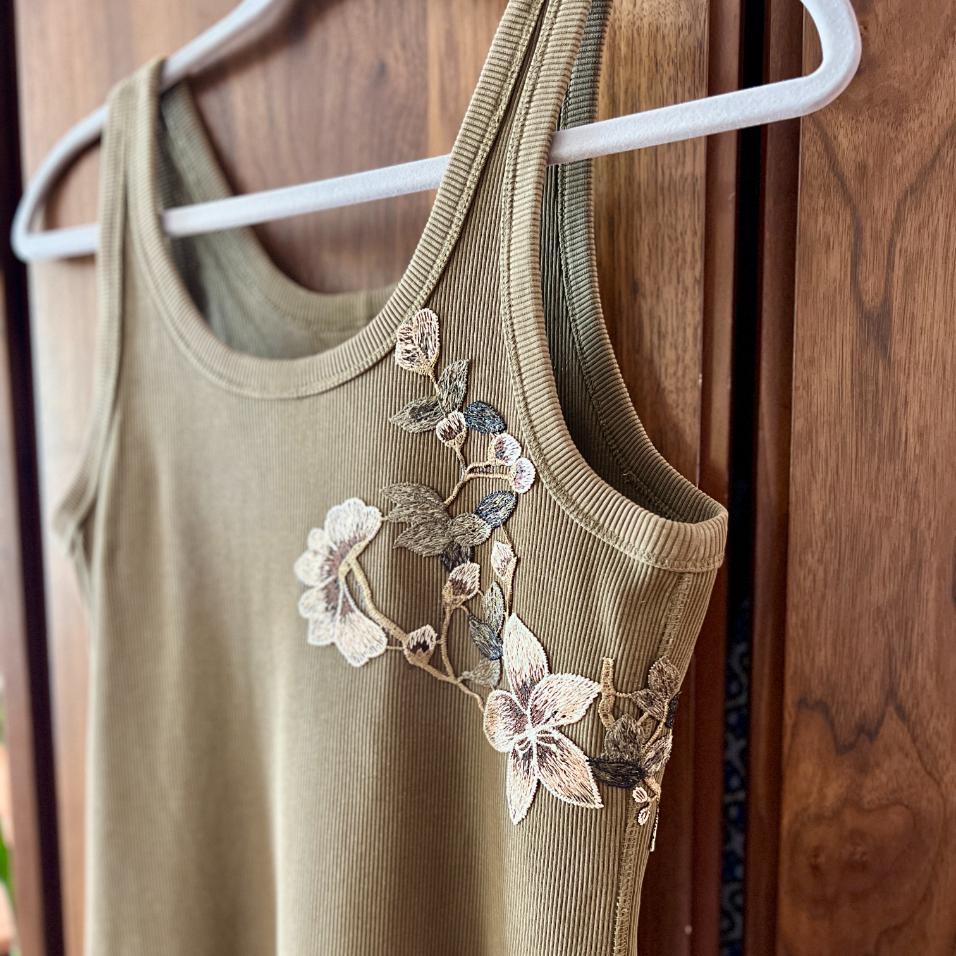
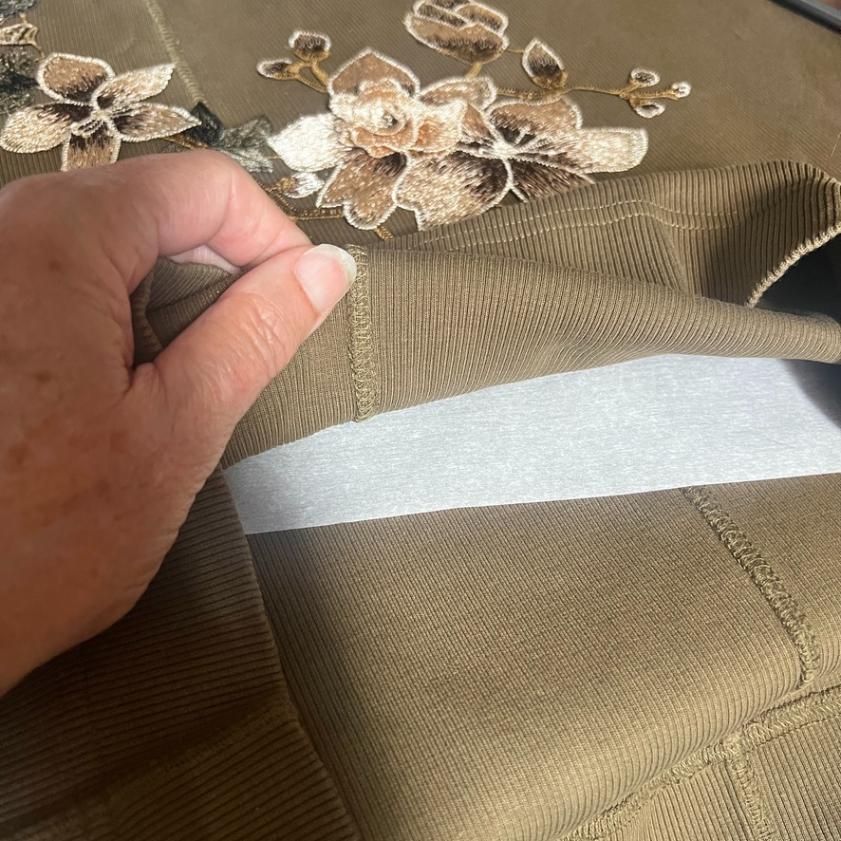
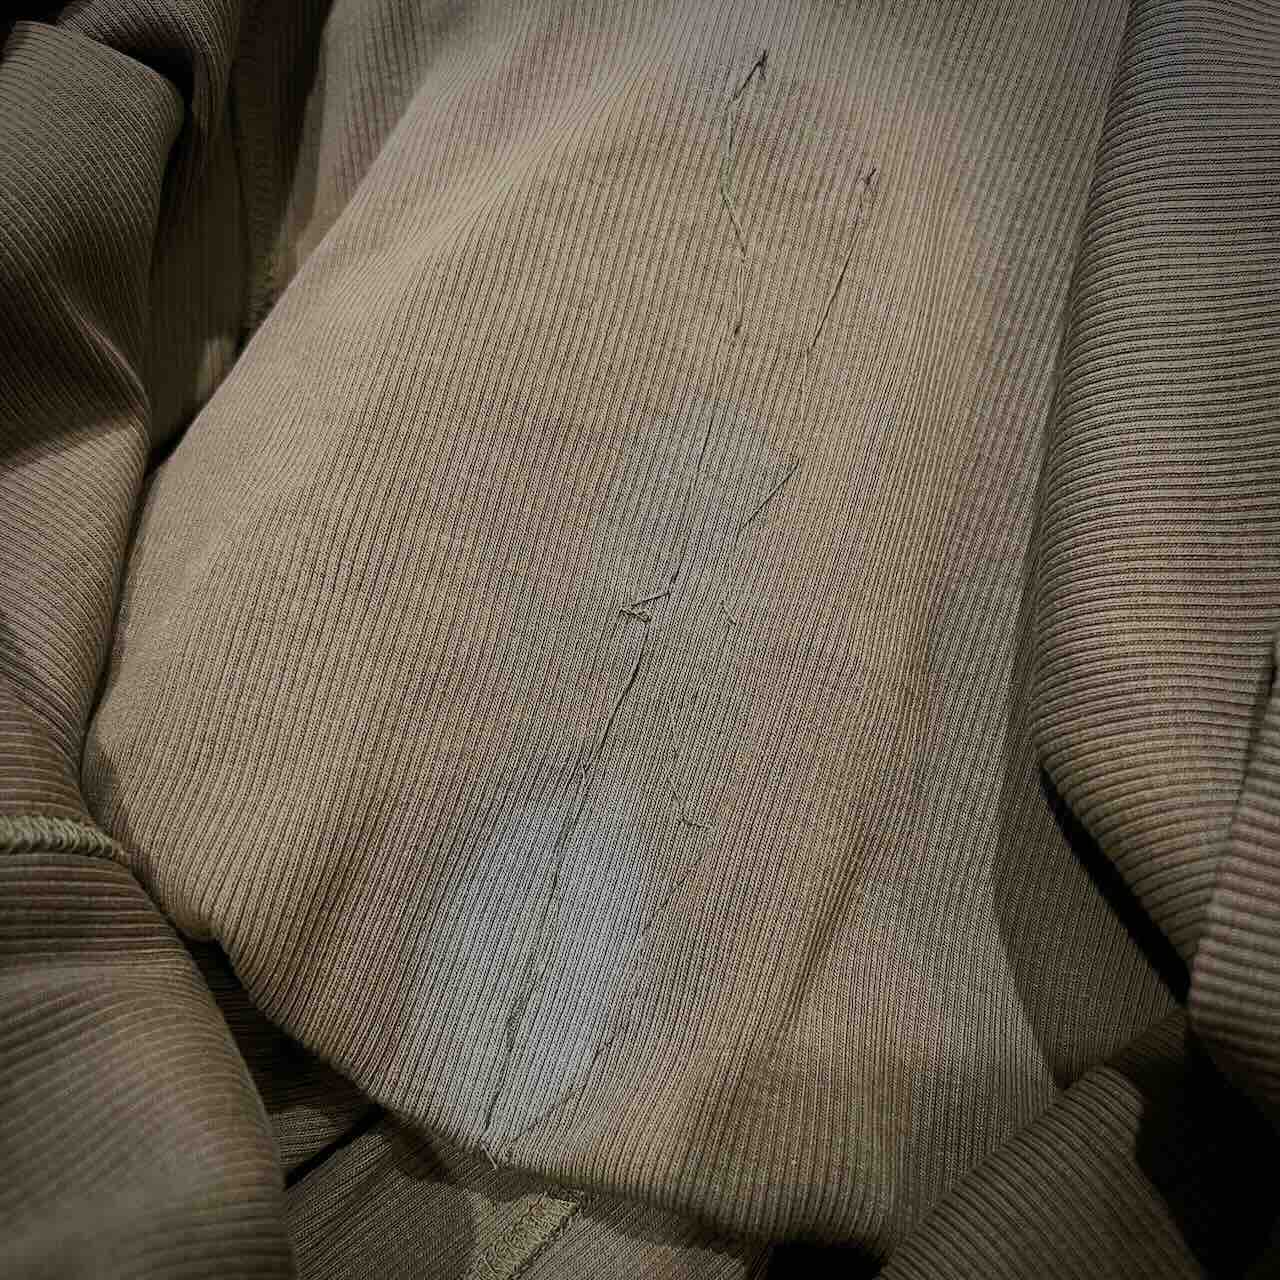
Some clothes earn a special place in your wardrobe rotation. My daughter had one of those — this olive knit dress from Everlane she wore on repeat. Then a stain happened. Then a stain treatment happened. And suddenly the stain was gone but so was a patch of color.
Into the textile recycling box it went.
But before it made its way to the Calvin Klein recycling program, we pulled it back out for one last look.
What if we could cover the damage? We started hunting for patches — but nothing felt right for a knit dress or for her style.
That search led us to appliques, and that search led us to the most perfect pair of floral lace appliques in muted greens, khaki, and cream.
Two pairs. $6.50 each. A little Aleene’s Fabric Fusion, a few hand-tacking stitches, and her favorite dress didn’t just survive — it came back better, and honestly more her, than before.
This project is my contribution to the Handcrafted Society Monthly Challenge — this month’s theme is Visible Mending & Pretty Repairs. It’s one of my favorite themes yet, because let’s be honest — we all have something in the closet that deserves a second chance. Here’s everything you need to know to give yours one.
The links in this post may include affiliate links, which means if you purchase anything using these links, you pay no extra, but I may receive a small commission that helps keep this blog running. I truly appreciate you using affiliate links whenever possible. Please know that I will never recommend a product I do not believe in!
Why Appliques Over Patches
We started with patches, and here’s why we kept looking:
Patches — especially iron-on ones — can be heavy, stiff, and thick. On a knit that needs to move and stretch with the body, that’s a real problem. A rigid patch fights the fabric and can cause puckering, pulling, or just plain awkward wear.
Lace appliques solve nearly every one of those issues:
- Lightweight and flexible — they move with the fabric
- Open lacework between elements allows the knit to stretch freely
- Easier to adhere cleanly than a solid patch
- Individual elements can be separated and repositioned
- Typically more affordable than you’d expect
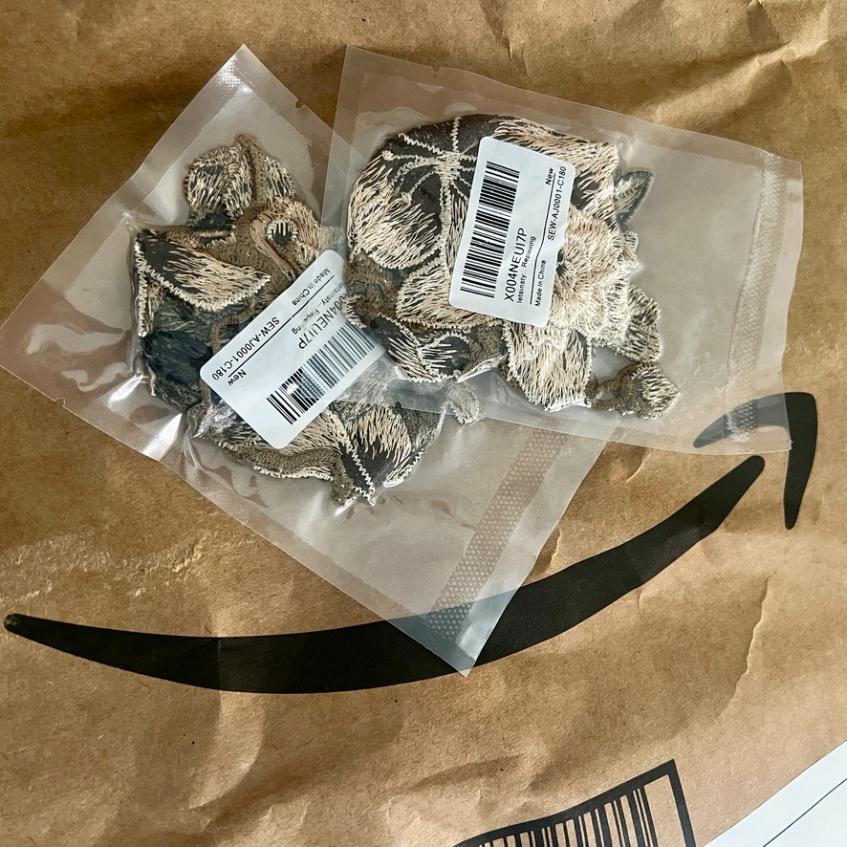
We ordered two pairs of these appliques — ended up using one full pair plus a few elements from the second.

Placement Decisions

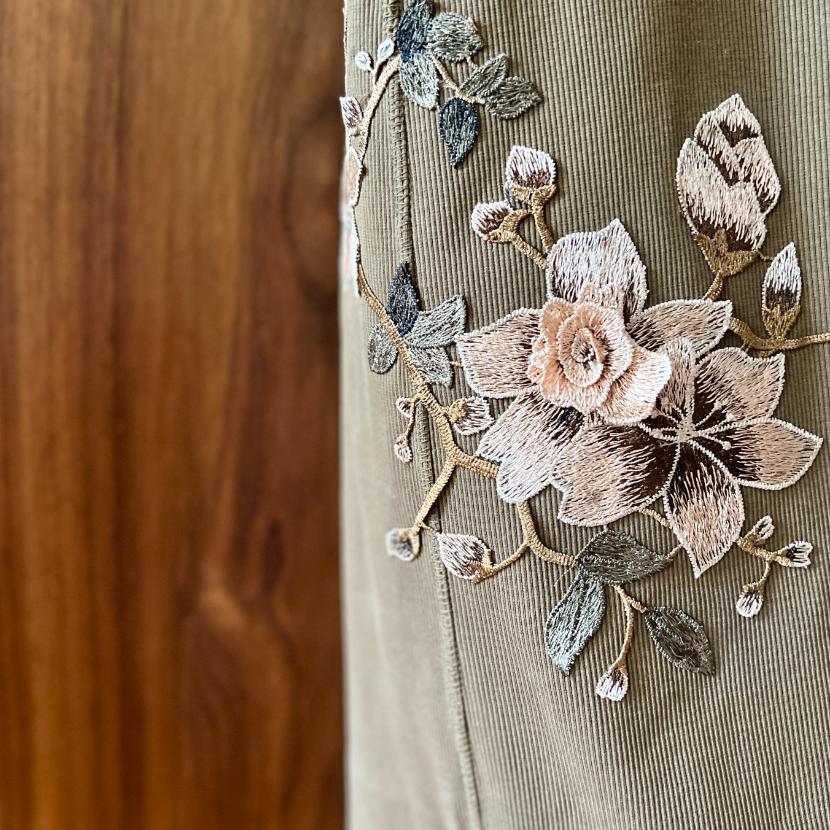
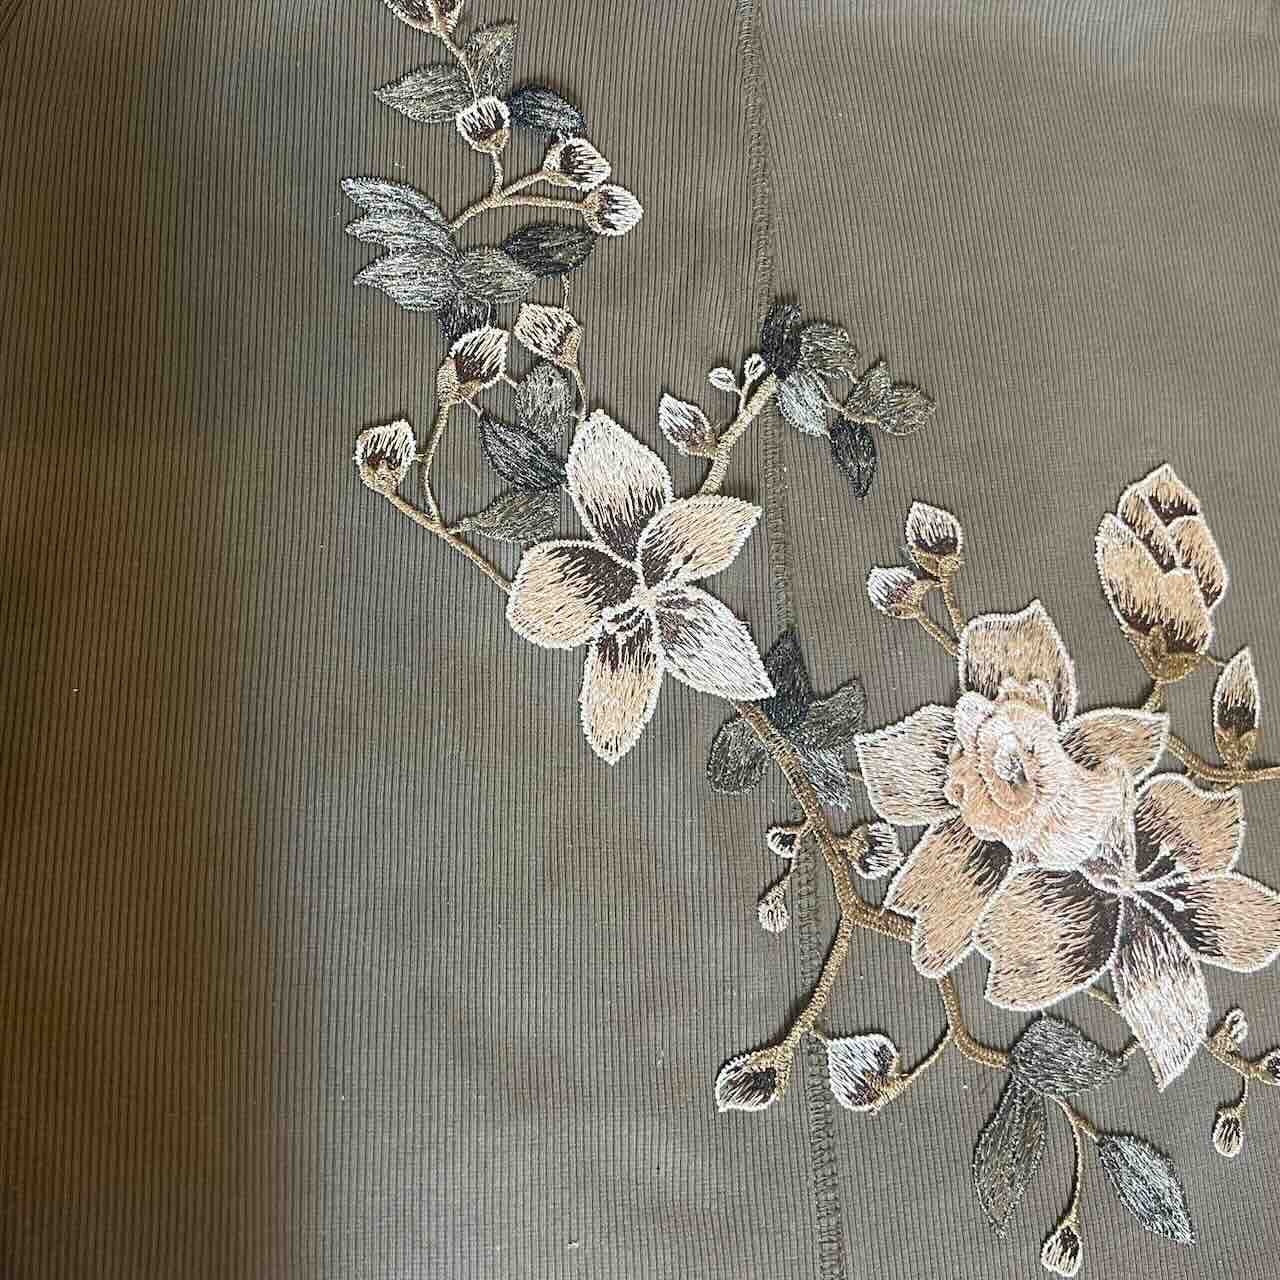
The stain was on the right side, between hip and knee. I started by laying the largest of the clusters so that one element covered the stained area. Then I worked outward from there and wrapping to the back a bit.
To balance the look, we added a second cluster to the left shoulder area. The result feels intentional, not like a repair at all.
We let both clusters curve naturally around to the back.
Ready to jump right to it?
Here’s a Quick How-To Card for Confident Crafters
If you’d rather feel like I’m right by your side, stepping you through it — no problem, keep scrolling.
How to Save a Stained Knit Dress
Lace appliques, fabric adhesive, and a few hand stitches are all it takes to turn a stained knit dress into something that looks completely intentional — and even better than before.
Materials
- Stained Knit Garment
- Aleene's Fabric Fusion
- Parchment paper, cardboard or plastic sheeting
Tools
- Scissors
- Needle and thread
Instructions
- Iron appliques flat, twisting any vines or leaves so all elements are right-side up.
- Slip parchment paper between fabric layers to prevent glue bleed-through.
- Arrange appliques on the garment, trim or reposition individual elements as needed, and photograph your layout for reference.
- Gently stretch the knit fabric side to side, then glue appliques into place using Aleene's Fabric Fusion, starting with your anchor element and working outward.
- After glue is dry, hand-tack applique edges using separate vertical columns of thread — knot and cut between each column so no thread runs horizontally across the fabric.
Notes
For All the Details, Tips & Hints, Keep Scrolling
Detailed How-To With All my Applique Hints and Tips:
Step 1) Prep your appliques–
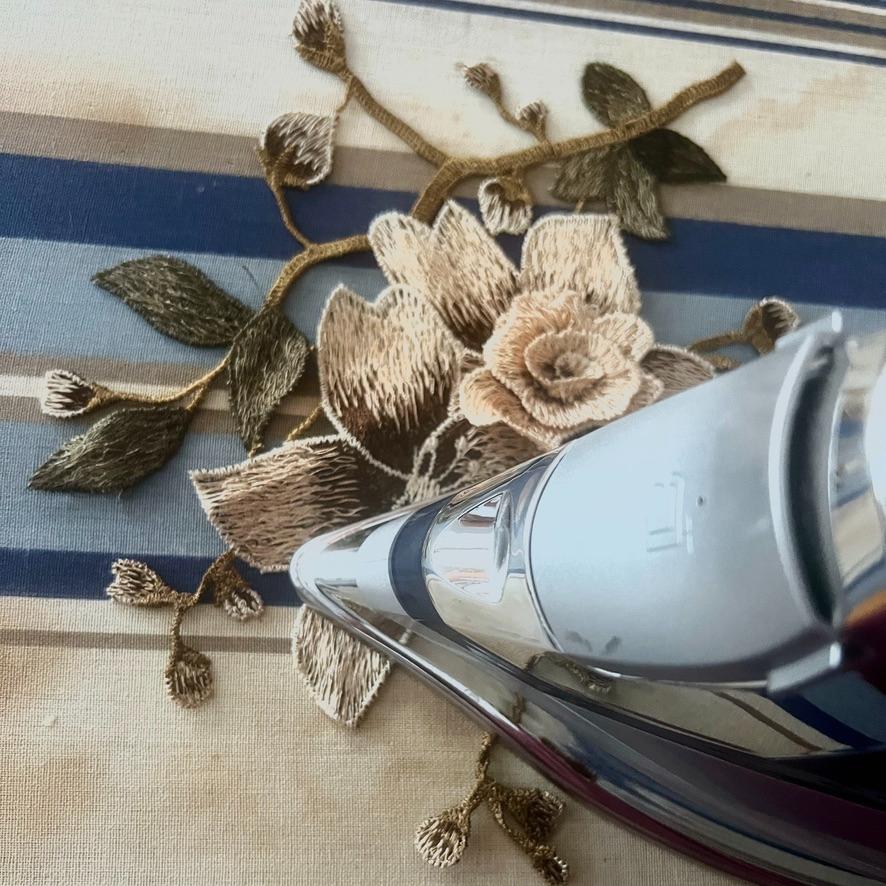
Iron them flat before you do anything else. As you press, twist any vines or leaves that have flipped so every element is right-side up.
Step 2) Protect the fabric layers–
Slip a piece of parchment paper between the layers of your garment wherever you’ll be working. This keeps glue from seeping through to the back side.
3. Lay out and edit your clusters–
Arrange the appliques on the garment and decide what stays, what moves, and what gets trimmed.
You can separate individual elements — just be precise about where you cut. Snip only the threads connecting pieces together, never the outline threads of a leaf, flower, or vine.
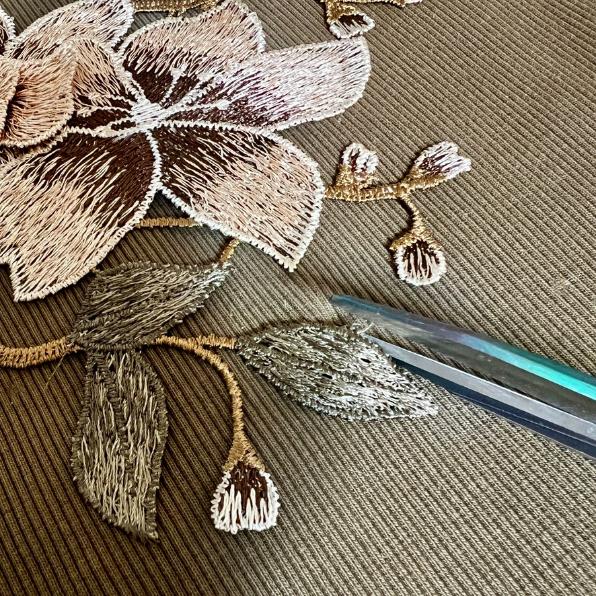
In my case, I cut across a stem rather than through any element itself.
Snap a photo on your phone before you start gluing. You’ll thank yourself later.
4. Stretch and glue–
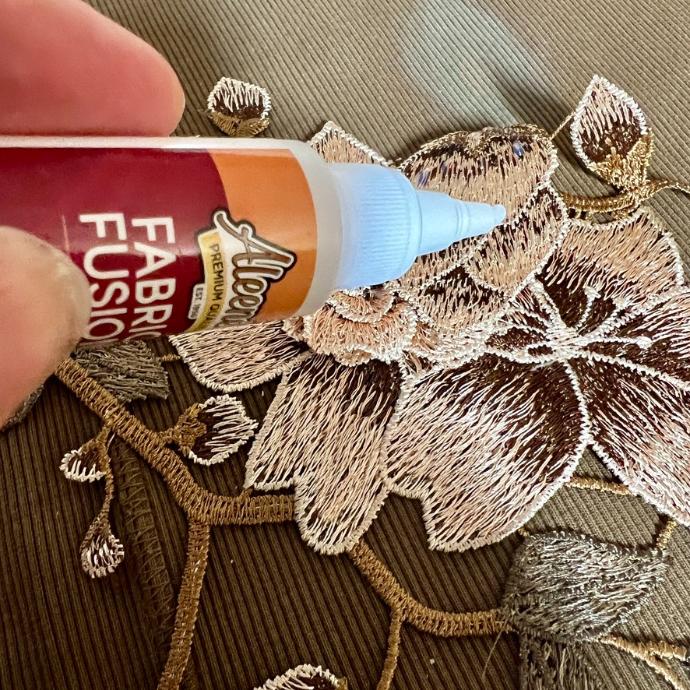
Gently spread the knit fabric side to side before applying any adhesive — you want it slightly stretched so the applique adheres in a relaxed position.
Using Aleene’s Fabric Fusion (tip: ), glue down your anchor element first — in my case, the flower covering the stain — then work outward. For the shoulder cluster, I glued all elements and flipped the whole cluster into place at once. Both methods work; just know that the larger the cluster, the trickier it is to flip and land perfectly.
PRO TIP: cut the bottle tip at an angle and keep the opening as small as possible for control
Keep glue only under the appliques. Fabric Fusion dries clear, but it can leave small marks on exposed fabric.
Step 5) Add hand-tacking stitches (optional but recommended) –
Once the glue is dry, go back and tack the applique edges down with a few hand stitches.
On stretch knits, thread direction matters.
Use a separate length of thread for each vertical column of tacking — knot and cut completely before starting the next column. No thread should ever run horizontally across the fabric. Horizontal thread restricts the stretch and can cause pulling or breaking — not to mention uncomfortable.
Conclusion
A stained dress, two lace appliques, and less than two hours of actual hands-on time — that’s really all it took. No sewing machine, no special skills, just a little patience and the right adhesive.
And that’s exactly what I love about this month’s Handcrafted Society Challenge. Visible mending isn’t about hiding damage — it’s about being creative with it. My daughter’s dress doesn’t just look repaired. It looks intentional. Custom. Like it was always meant to be that way.
Be sure to check out what these Handcrafted Society girls made this month, below.
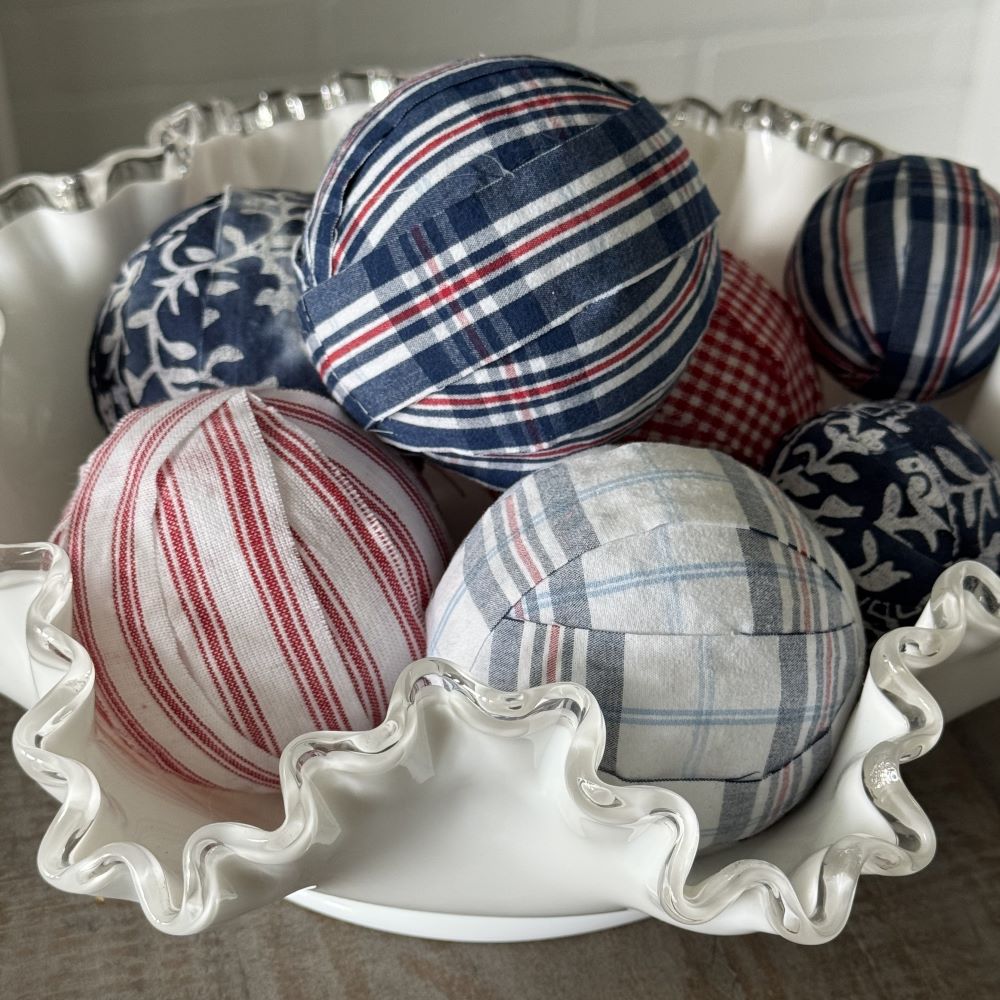
Donna @ An Organized Season
Donna is sharing how worn fabric can become something beautiful again by upcycling a pair of my husband’s old shorts and coordinating fabric pieces into DIY fabric orbs for home decor.
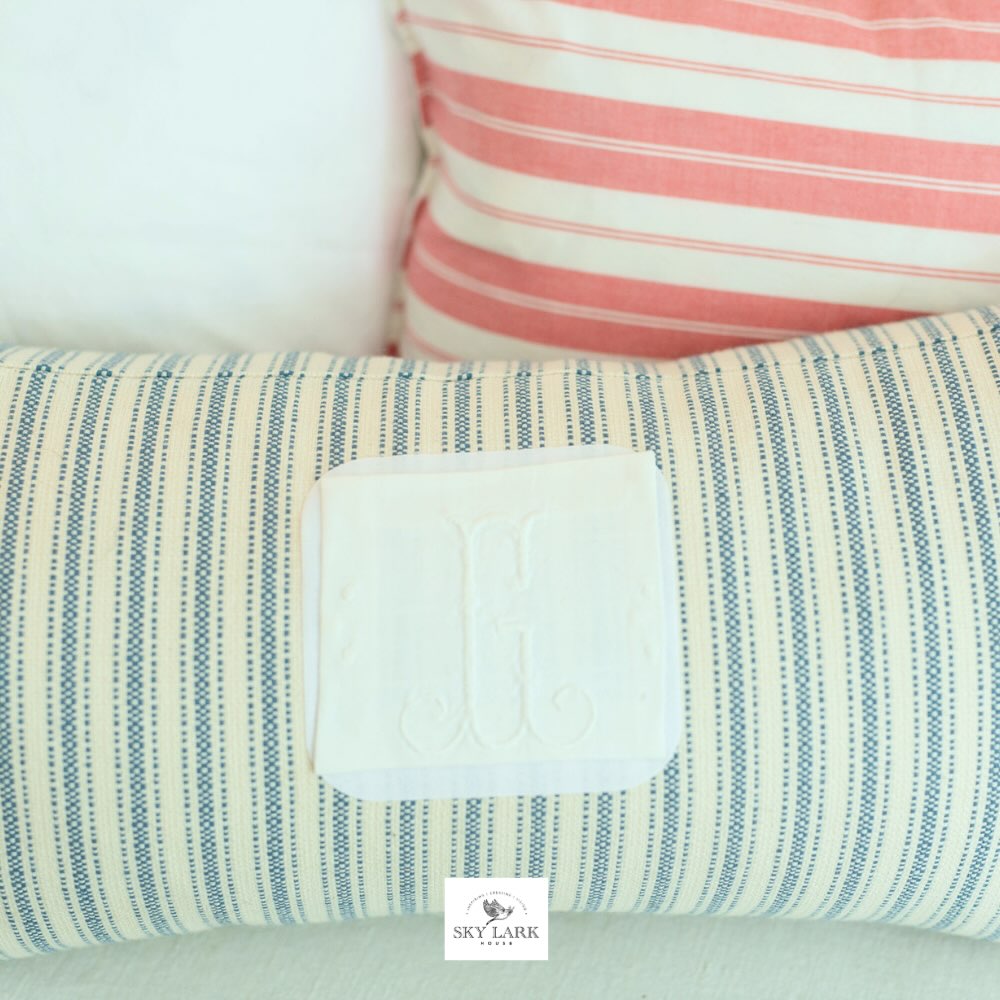
Anna @ Sky Lark House
Anna always has the loveliest upcycles. And this post is not exception! Ever wonder what to do with monograms from vintage linens? Me too! I’m so glad Anna has shared this project with us.
I have a feeling we’re all going to make you look at your “lost cause” pile a little differently.

More Projects to Enjoy
Hi Diane! What a fabulous idea! That applique is gorgeous, and it looks like it was made especially for her dress! I know she’s thrilled to have such a talented and creative mom! Great job!
Darling applique idea Diane! I love how you solved a problem, and made your dress a one-of-a-kind fashion statement! Bravo!