Love the Wrapping Paper? Love it More as Christmas Artwork
See how one gorgeous sheet of wrapping paper became the inspiration for my Ralph Lauren–style Christmas decor. Easy, affordable artwork idea!
You know those moments when inspiration just smacks you in the face?
Mine arrived in the Spring when with a few of my blogging buddies we took a field trip to JSH Essentials adorable store in Kansas City.
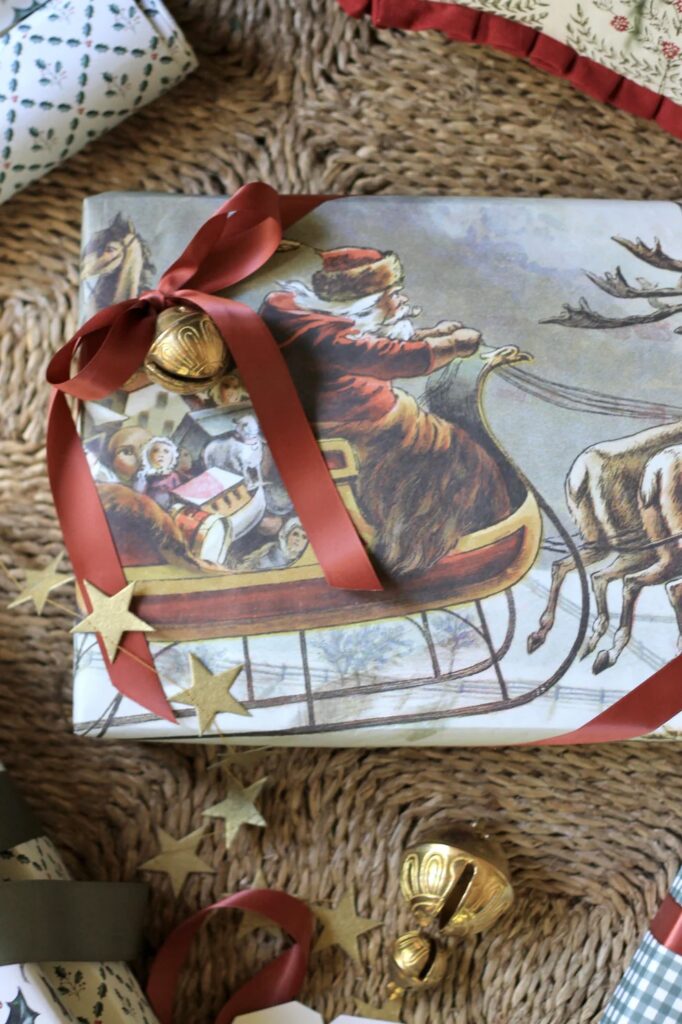
There, I found in the corner, a leftover piece of this fabulous wrapping paper I had been eyeing. Just $2 for the one piece. It’s a classic, so it is available again this year.


And because I’m me — a chronic repurposer, upcycler, and general creative alchemist — I didn’t plan to use the paper to wrap anything.
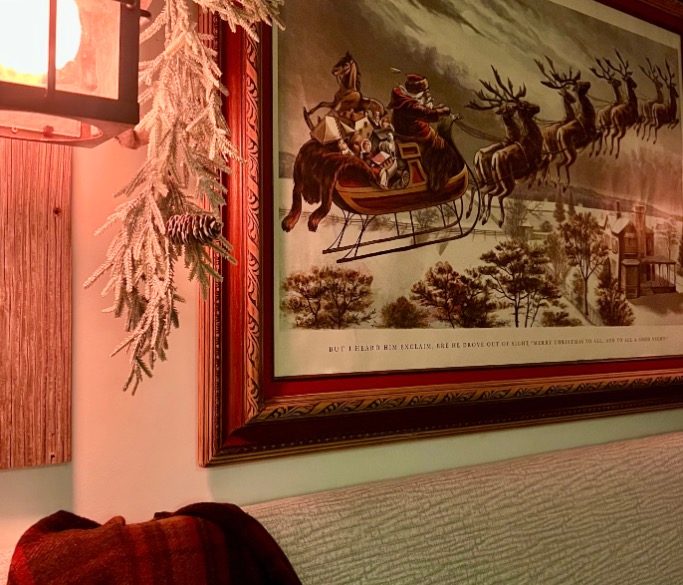
I planned to frame it.
And just like that… my whole Christmas decor direction snapped into place.
It had that unmistakable RL vibe: equestrian meets old-world library meets winter lodge.
I knew instantly it was going above the dining table. (Because when a piece of paper tells you where it wants to live, you listen.)

Once I popped it into a frame, it looked like expensive art. Honestly, if I told people I found it at an estate sale in Connecticut, no one would question it.
That framed “art” became the anchor for the entire dining-area palette — the vintage reds and the saddle-brown leather touches, the vintage brass, the plaid textiles, all of it. Ralph Lauren on a thrift-store-friendly budget. What’s not to love?
And be sure not to miss my Ralph Lauren knock off Leather napkin rings: Their’s? $125 for 4!!! Mine? $7 for 60!!!!!!!!
TABLE OF CONTENTS:
The links in this post may include affiliate links, which means if you purchase anything using these links, you pay no extra, but I may receive a small commission that helps keep this blog running. I truly appreciate you using affiliate links whenever possible. Please know that I will never recommend a product I do not believe in!
Quick How-To Card For My Confident Crafters

Turn Wrapping Paper Into Statement Art
Inspiring a whole room’s Christmas color palette and vibe!
Materials
- Inspiring Paper
- Thrifted Frame
- Spray Adhesive
- Backer Board (if your frame does not come with one)
- Mat Board (optional)
- Craft Paint (optional)
Tools
- Micro sander and sandpaper (optional)
- Flat artist paint brush (optional)
Instructions
- Choose the Perfect Paper – What inspires you? Matches the personality of your home and family?
- Flatten It – If it's been rolled, reverse the roll direction, and/or press it flat under a stack of books.
- Frame It – Use a large thrifted frame (as I did) or a poster frame.
- Does it need a mat? Order or make a mat to accent the image.
- Hang It as Your Focal Point – Over a dining table or mantel works beautifully!
- Pull Your Palette – Echo the artwork in textiles, ribbon, centerpiece elements, and accent layers.
Notes
More specifics and tips are in the detailed steps below.
Step-By-Step Turning Wrapping Paper
into Beautiful Framed Artwork
Step 1) Find the Perfect Paper –
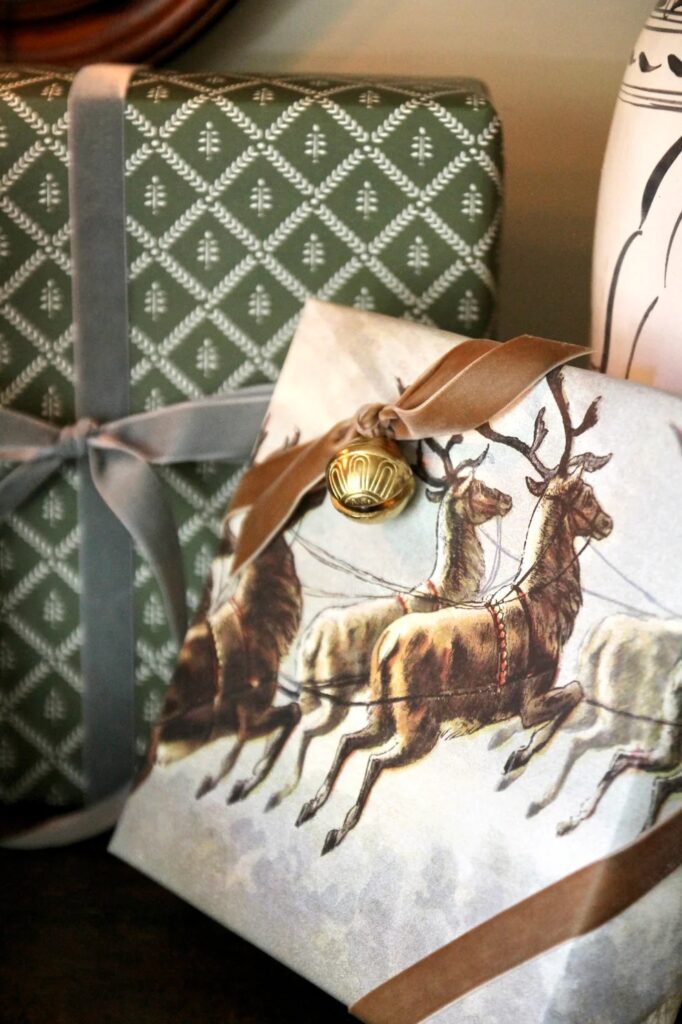
This is THE paper I fell for and used. But there are other options. I found these at Etsy that you can order printed and shipped to you.
And if you just aren’t up for finding a frame and all, some can be ordered to ship already framed!!!
Scroll Left to See More Options
PRO TIP: When considering wrapping paper to frame as art, look for matte paper. It’s usually thicker and definitely does not look like wrapping paper.
Step 2) Flatten It and Back It–

If it’s been rolled, reverse the roll direction, and/or press it flat under a stack of books.
I attached the paper to the face of the painted canvas with Gorilla Spray Adhesive — my favorite kind.
I only suggest this if the canvas is very tightly stretched. Otherwise, adhere it to a backer board of some kind, even if it foam core or heavy cardboard.
Step 3) Frame It –

Use a large thrifted frame (as I did) or a poster frame.
With thrifted frames you can save quite a bit of money and end up with something more unique if that’s what you’re going for. But I get it, thrifting is hit-and-miss.
My paper was 24 X 36. Several months later, I came across that exact size carved wood frame at my favorite thrift store. It was holding an original painting (not at all my style) at the time.
PRO TIP: Keep an ongoing list on your phone of things you are looking for with your size requirements.
I liked the size, scale and detailing on the frame, but I needed to do something with the dark shiny 1990’s finish.

I wasn’t sure exactly, but I knew I needed to start by sanding off the finish as best I could. This was the perfect job for my micro sander I am always raving about.
Dipping my toe in, I started with the fluted outside edge. That went really smooth and easy. Next I went for the fluting just next to the linen mat . . . . smooth sailing.
With my confidence building I decided to see what would happen with the large engraved section. Wow, that went better than I dared to hope for. I was looking for some irregularity to give the suggestion of wear and fading. With that little bit of extra success, I decided to also sand off the small edging of raised dots.
All that was left were the large smooth concave section and the small beveled piece between the painting and the mat. I just did a very light wipe over with 220 grit to knock down the shine a bit.
And that’s it. No stain. No sealer.. Maybe an hour all together. And a bit of sandpaper I already had on hand.
Step 4) Does it need a mat, optional–

Order or make a mat to accent the image.
My frame came with a linen mat, but the color was too close to the paper color, so I gave it two quick coats of craft paint I custom mixed from the colors loitering in my craft stash.
What a difference that one touch made. Just over 45 minutes for two coats of craft paint, back to back.
I didn’t even take the time to tape it off. Just keep a damp paper towel wrapped over the tip of a palette knife (or a screwdriver) handy. If a bit of paint wanders onto the wood, a quick swipe and all is good.
Step 5) Hang It as Your Focal Point –

Over a dining table or mantel works beautifully!
Really any place you want to amp the festive meter, but not with another wreath.
Step 6) Pull Your Palette –
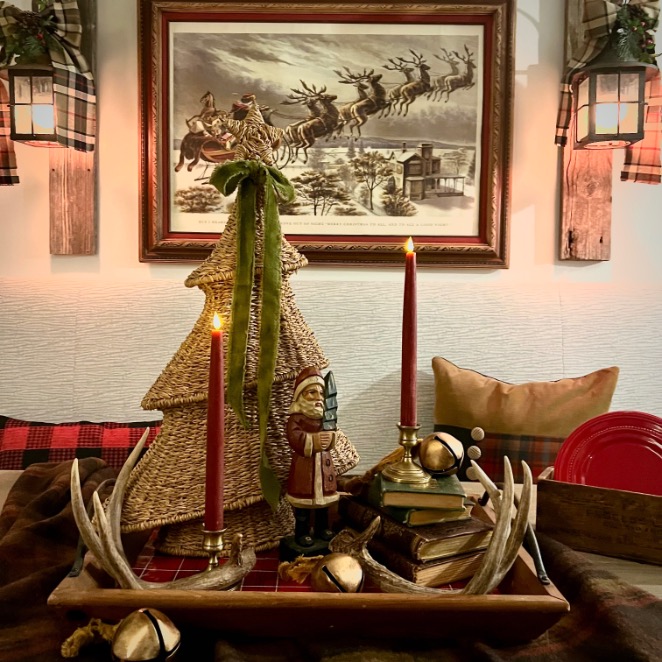
Echo the artwork in textiles, ribbon, centerpiece elements, and accent layers.
See my space in its full Christmas cozy.
Don’t miss how I extended the display to fill the large space above our banquette. Those lamp posts were a DIY using two lanterns salvaged from a neighbor hung on two reclaim boards mounted on the wall. They used to have feet and brightened our mantel. But this year, they are brightening the meals and conversations shared along our huge table and banquette.
Aren’t we lucky to live in a time where we don’t have to pull wire in the walls to add accent lighting?
Those lanterns have these amazing new battery light bulbs held in place with magnets. I am NOT kidding.
Those bulbs have only been charged once. They have been up for two weeks now, using them most evenings for an hour or two. We have yet to recharge them — in fact we are still using them on the second lowest light level.
Have you enjoyed this project? Please consider subscriber for more day’s, crafts, entertaining and home decor ideas and tips:
Many Thanks!
Why This Works So Well
Turning wrapping paper into artwork hits the design trifecta:
- Budget-friendly
- Super Easy
- High-impact
- Instant color direction
It’s also completely on-brand for the Ralph Lauren look — the man himself layers personal artifacts, textiles, and prints like it’s a sport. You’re simply doing the same… with a much smaller price tag.
And in a season when we all want our homes to feel intentional and collected, starting with one “hero” piece makes everything else fall into place with less second-guessing.
Please don’t forget to pin and share this project — your friends will appreciate you as much as I do: