

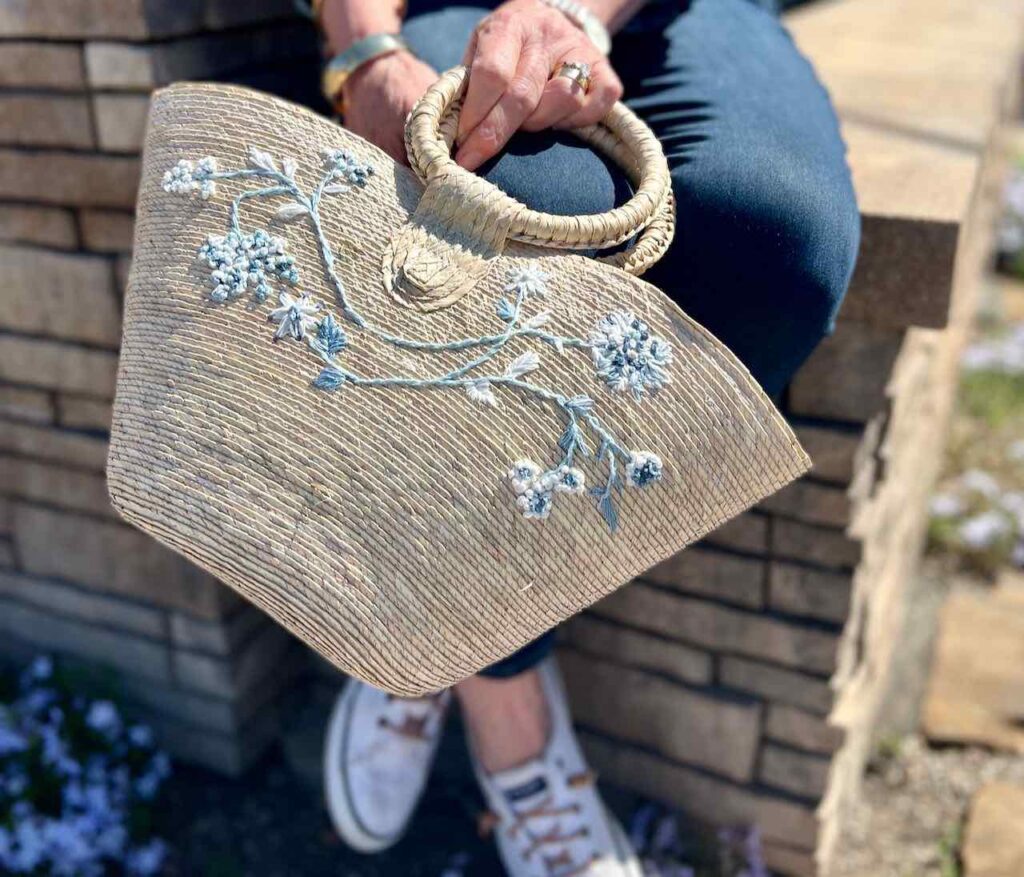
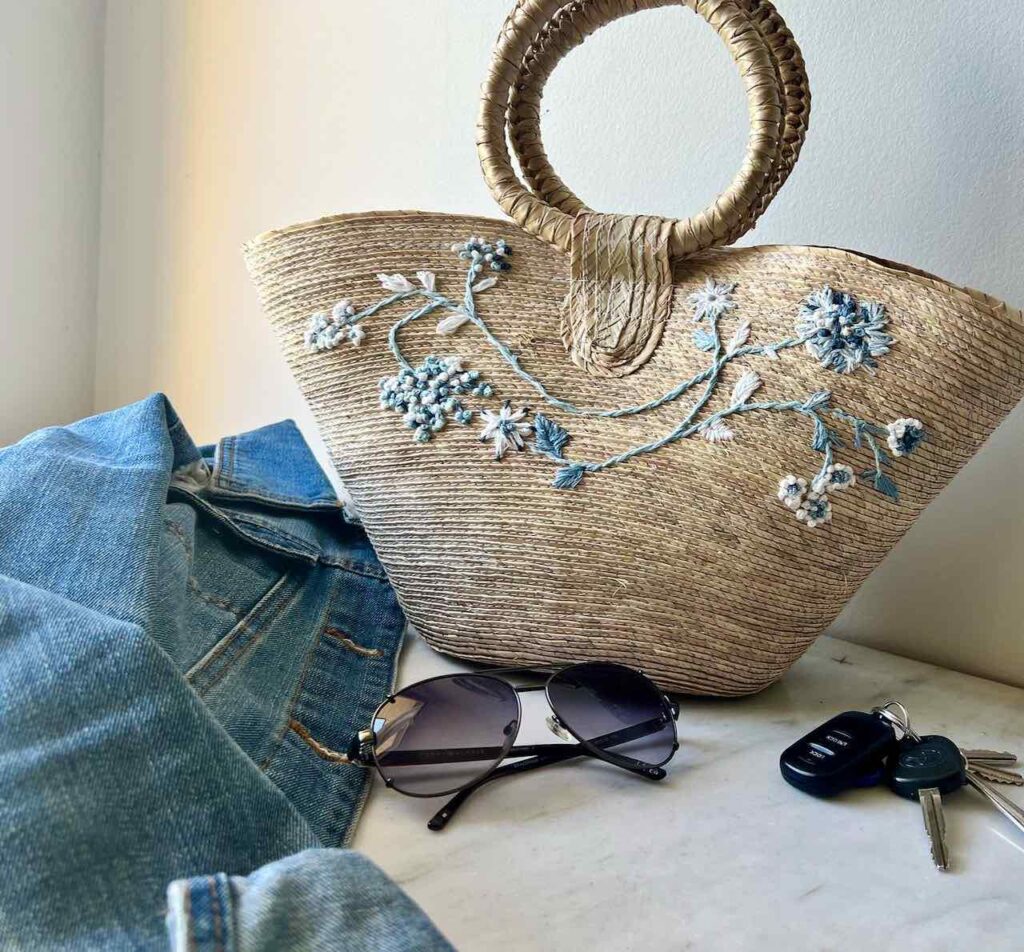
Simple hand embroidered flowers can really add style and attitude to an otherwise boring straw basket or bag.
Summer is coming, and straw bags and baskets are everywhere, but what if yours stood out? If it said, “Look, it’s Summer and I’m feeling the vacay vibes!”
Today, we’re taking a trip to easy-town with some flower embroidery.
Using your favorite colors of embroidery floss, and beginner friendly stitches like the lazy daisy stitch and the cute little French knot, we’ll transform your bag into a blooming masterpiece.
It’s easier than you think, and the results are adorable!
And I’m not the only one arming you with inspiration. Today is the April meeting of The Handcrafted Society. And you guessed it, our medium is yarn, embroidery floss and such.
My eleven handcrafting partners are all linked at the bottom of this post. I hope you jump over each one and pick up a tip or perhaps a full project at every stop.
TABLE OF CONTENTS:
Let’s Embroider a Straw Bag (or Basket)
Honestly! Truth be told: this is like the first embroidery project I’ve ever completed!
Oh, I’ve picked up a project here and there, but I think I always got discouraged or overwhelmed because they were too advanced for my skill level, too detailed for the my time and attention, or just too slow.
Truth be told: this is the first embroidery project I’ve ever completed, and certainly ever really enjoyed.
Now? Now I have a whole list of embroidery projects I’d like to try!
The links in this post may include affiliate links, which means if you purchase anything using these links, you pay no extra, but I may receive a small commission that helps keep this blog running. I truly appreciate you using affiliate links whenever possible. Please know that I will never recommend a product I do not believe in!
Materials and Supplies:
- Your base bag or basket to be embellished. *see NOTE below
- Embroidery floss or yarn or raffia, in your choice of colors
- Tapestry needles
- Thread snips
- Air eraser marker, optional (this is the one I use — always test on your fabric first)
- Practice mat (like a straw placement from the Dollar Tree)
I lucked into my bag at my favorite thrift store. But here are some bags and baskets that would work great:

A Few Easy Stitches Are All You Need
Like I said, I haven’t had the best history with embroidery. So my criteria for this project is simplicity and flexibility.
I challenged myself — and now you — to embellish a bag or basket with just a few simple stitches in whatever style is calling your name.
Maybe a multitude of bright colors in 2 or 3 large blooms. Maybe a whole row of even spaced beautiful pastel flowers. Or maybe the same lazy daisy flower scattered everywhere.
You do you!
Lazy Daisy Stitch-

Creates a simple daisy-like flower with minimal effort.
But this basic stitch has a multitude of personalities and uses when you add simple tweaks.
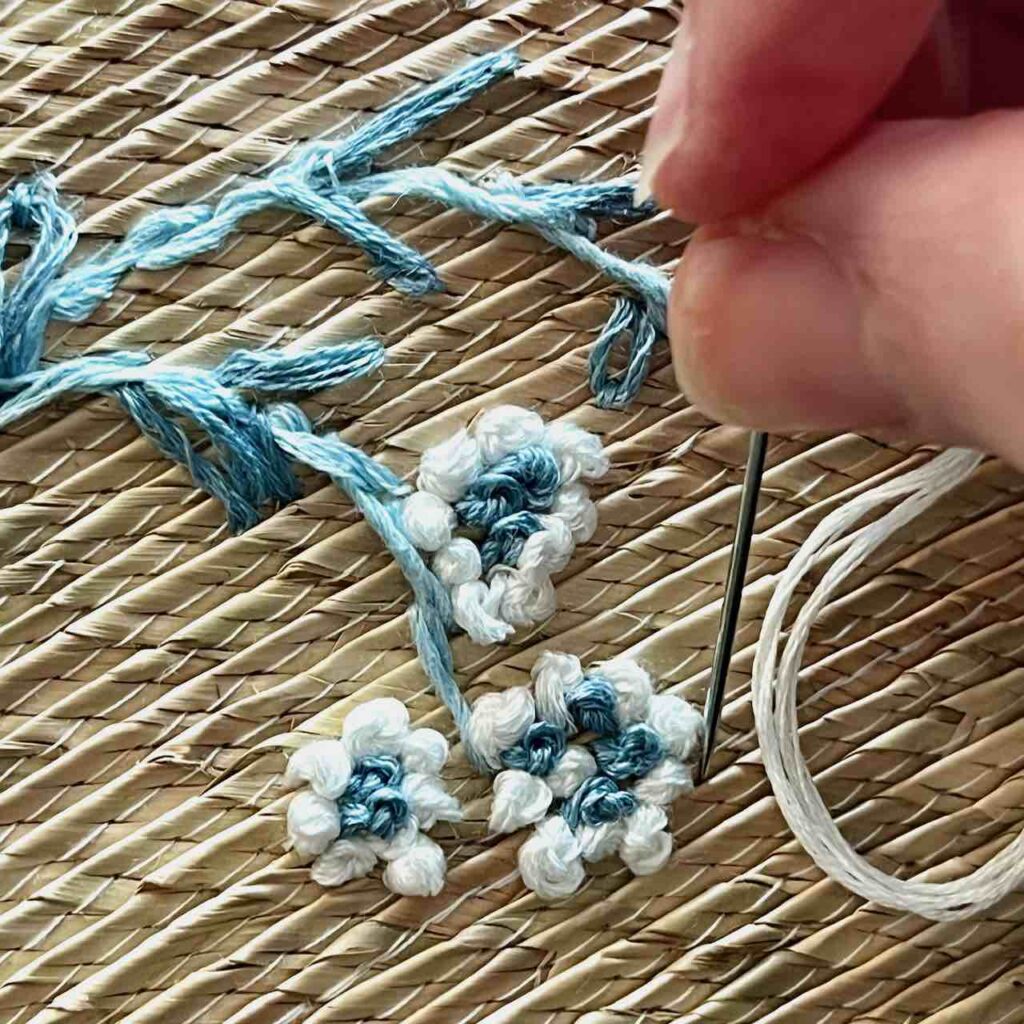
If you want petal tips in a different color, stitch those little “tip” loops first, then add the larger petal loops, threading the needle through the little loop, There’s two or three videos of this on the Pinterest board I curated for this project. More on that in the bonus section below.
French Knot-
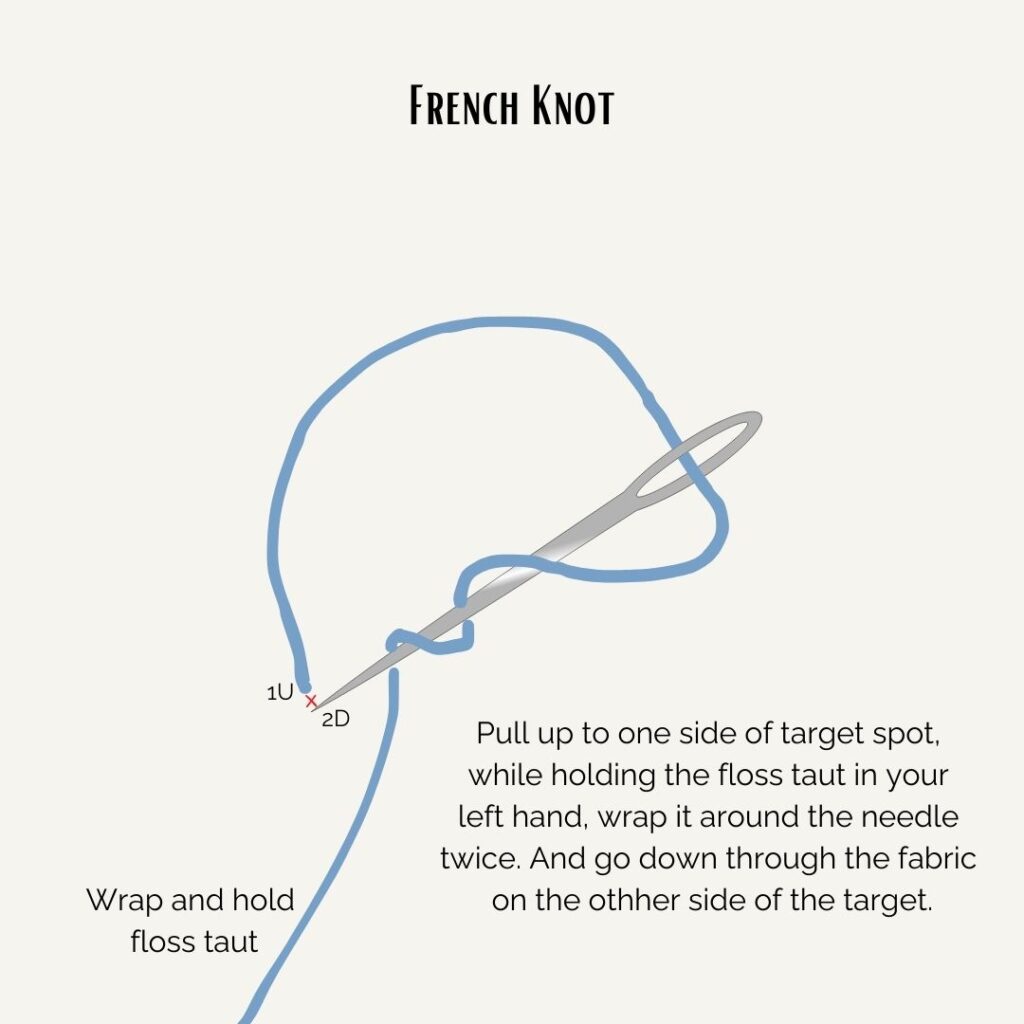
These charming little nuggets are Ideal for adding small details like the flower centers or seed pods.
Make them with double strand or single strands of floss. Wrap the needle two or three times.
Outline Stitch-
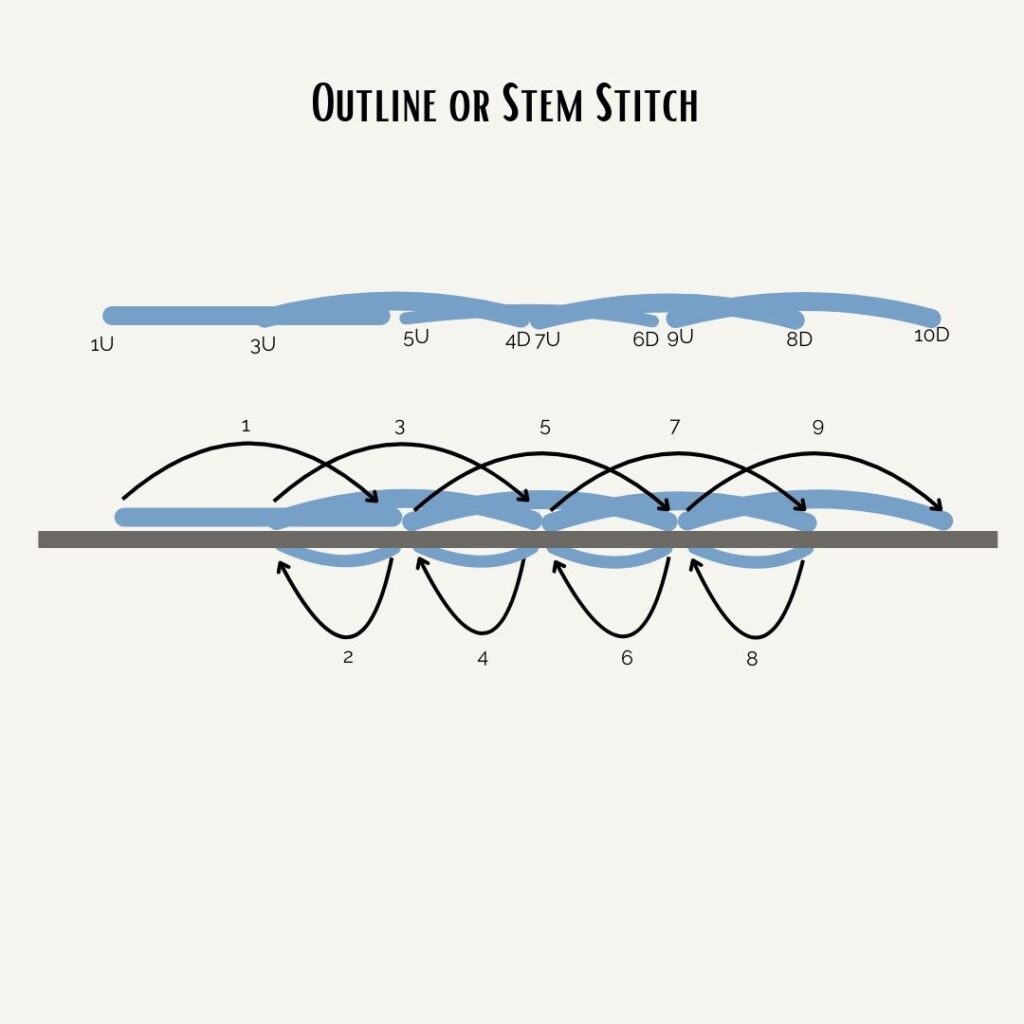
Let’s start with some clarification. There is one specific stitch called Outline Stitch. But there are many stitches that can be used for outlining.
Because this is a free spirited project done for fun, not for framing or judging, I used several different versions of what I might call outline stitches.
TIP: Pick a side, then as you bring the needle up to the right side, always stay on that same side and you’ll have a cool, kind of twisted outline.
Alternatively, you can even create a line of daisy stitches to use for outlining — or for stems.
Satin Stitch-
Is a well-known stitch, and very popular. But between you and I, kind of like Nancy Long in 5th grade, I never have figured out where the popularity came from.
To me the satin stitch is lovely, but only when done to perfection. And there lies the rub. It seems to have been made to make my stitches feel inferior, just like Middle School you-know-who.
My hand embroidery is far from accomplished, so I’m steering clear of the satin Nancy Long stitch . . . . . for now.
Fishbone Stitch-
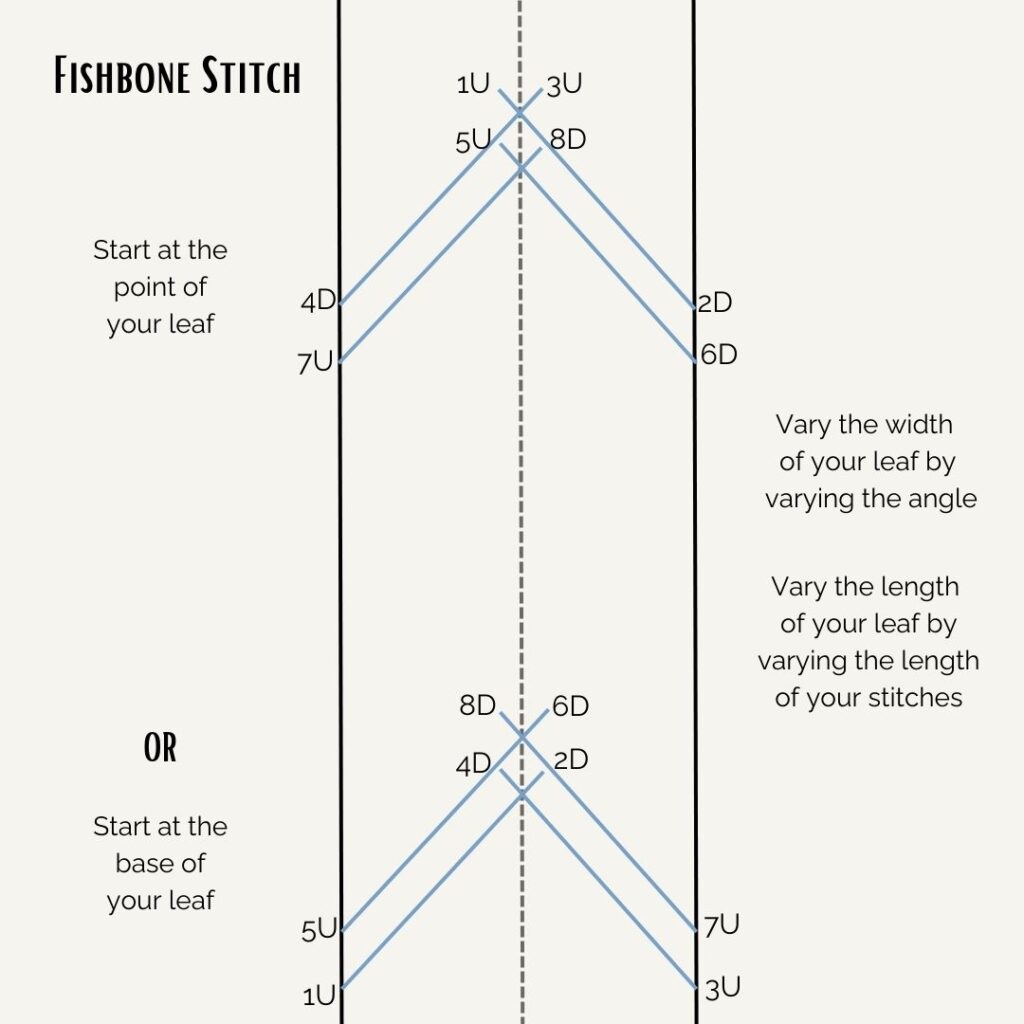
This is my chosen replacement for if I want a filled leaf beyond using Lazy Daisy stitches. It’s just a series of slanted stitches that overlap slightly up the spine (or center) of the leaf shape.
To mimic a leaf with a serrated edge, simple alternate how far out the stitches end on the sides.
BONUS: How-To’s–
I have created and curated a Pinterest board with Beginner Embroidery Stitches and Projects. Be sure to hop over, it is filled with only the best beginner stitch pins so you won’t get overwhelmed. And you won’t waste a lot of time digging through pins that lead nowhere or do not do a good job showing or teaching.
Each one of these stitches has at least one closeup video of the stitch so you can follow along.
REMEMBER: This project is for fun, getting us ready for the warm days ahead. So don’t stress about complicated stitches. With just the first three stitches, you should be able to make a fun basket for Summer decor or a bag for vacay mode!
Embellishing Our Bags (or Baskets)
Starting and Stopping-
When embroidering fabric, you do not knot your thread when you start and finish. That causes lumps in your fabric. You secure your thread by the other stitches crossing over it on the back of the fabric. There are a couple of different ways of making that happen.
But for this project, we’re embroidering on a straw base, so our knots won’t show. Plus we’re beginners, or we just want to treat ourselves to a beginner level project, so feel free to start with a knot in the end of your floss, yarn or raffia.
When you are ready to finish that run, thread your needle through a few loops on the back and snip your thread.
To start the next run, either knot your floss, or if you’re close to some other stitching, thread it through some stitches on the back and then proceed.
Trial Run of Each Stitch-
To get started, grab a straw placemat. It’s a similar texture to a bag or basket, but it’s flat so a bit easier to start on.
Do several of each of the beginner stitches I diagrammed above. If you need to see a video of each one, remember, hop over to my Pinterest Board
Pay attention to how big you can make each simple flower to achieve the look you like.
How many threads of floss do you want for the stitches to get the look you like? Do you like using a double strand (both ends knotted together) or do you like each stitch with a single thread (whether it be 1, 2, 3 or even six ply thick).
Now that you are “experienced”, time to get to work on your bag/basket!
A quick pause to ask: are you enjoying this post? Would you like more – plus exclusives and more? Consider subscribing to join in ALL the fun!
Oodles of thanks! Now back to our bags:
Floral Designing-
Just like nature, embroidery is filled with endless thread colors and a feast of textures, so it’s no wonder floral designs are the most popular things you’ll see embroidery techniques used for.
Option 1: Planning Your Flower Bed-
Feeling like a meticulous gardener? Here’s how to plan your floral masterpiece:
- Find inspiration: Browse for an online floral free pattern or sketch your own embroidery flowers.
- Transfer your design: Lightly trace or sketch your chosen pattern onto the straw material using a fabric pencil.
- Pick your stitches: Decide which embroidery stitch (lazy daisy, french knot, outline stitch, fishbone) will work best for each element (flower petals, centers, stems).
Option 2: Freestyle Blooms-
Embrace the carefree spirit! Let your creativity flow with this spontaneous approach:
- Start with a single bloom: Using your chosen stitch, begin embroidering a single flower anywhere on the basket.
- Build from your base: Let the first flower inspire the placement and style of the next bloom, leaves and stems. Use a mix of stitches to create variety and dimension.
- See where it takes you! There’s no wrong turn – enjoy the process of watching your unique floral design emerge.
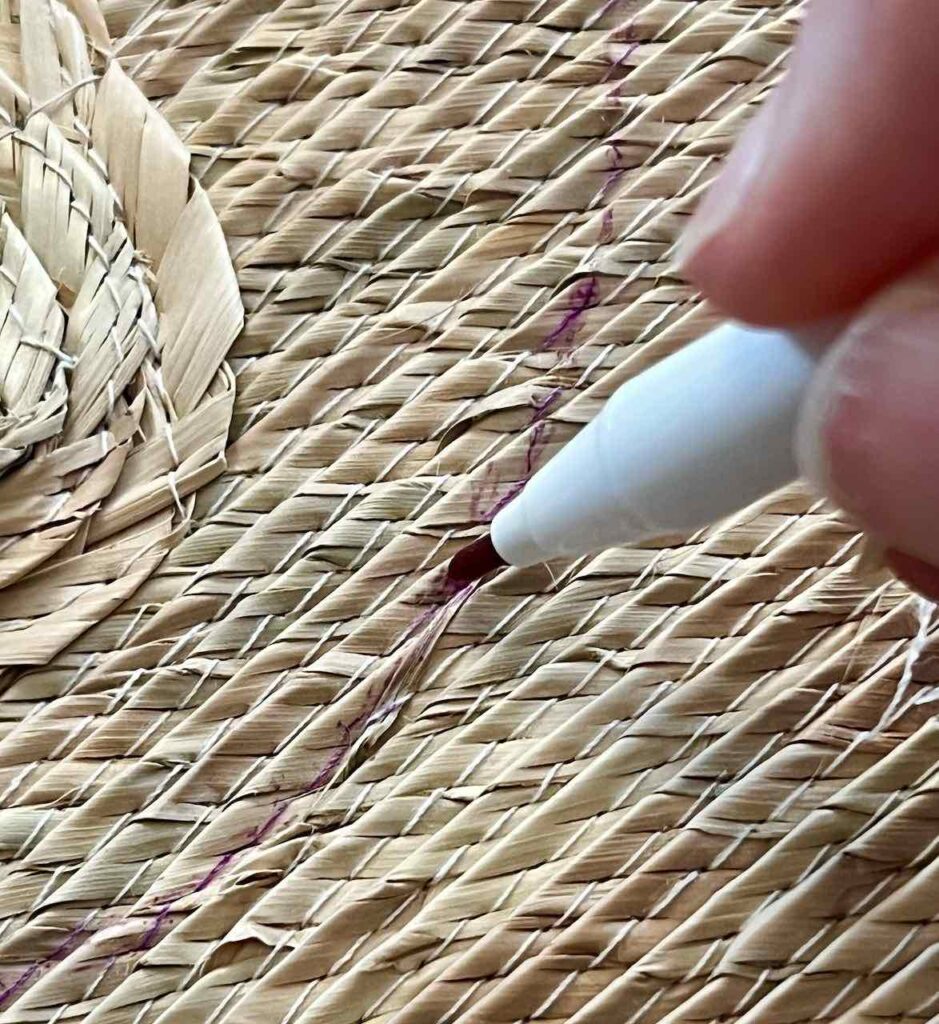
If it makes you more comfortable, use an air erase marker to draw out your starting lines (that’s what I did) and then improvise from there.
Need Some Inspiration?
I gathered quite a variety of embroidered bags to serve as inspiration. I hope they’ll help feed your imagination.
Click on any image to see the bag larger
And yes, these are all available online. Many are quite pricey and some very, very reasonable.
Final Detail-
My bag looks a bit ragged inside, so I’m going to tack a fun blue and white lining inside and no one will be the wiser! Sshhh! You can keep a secret, right?
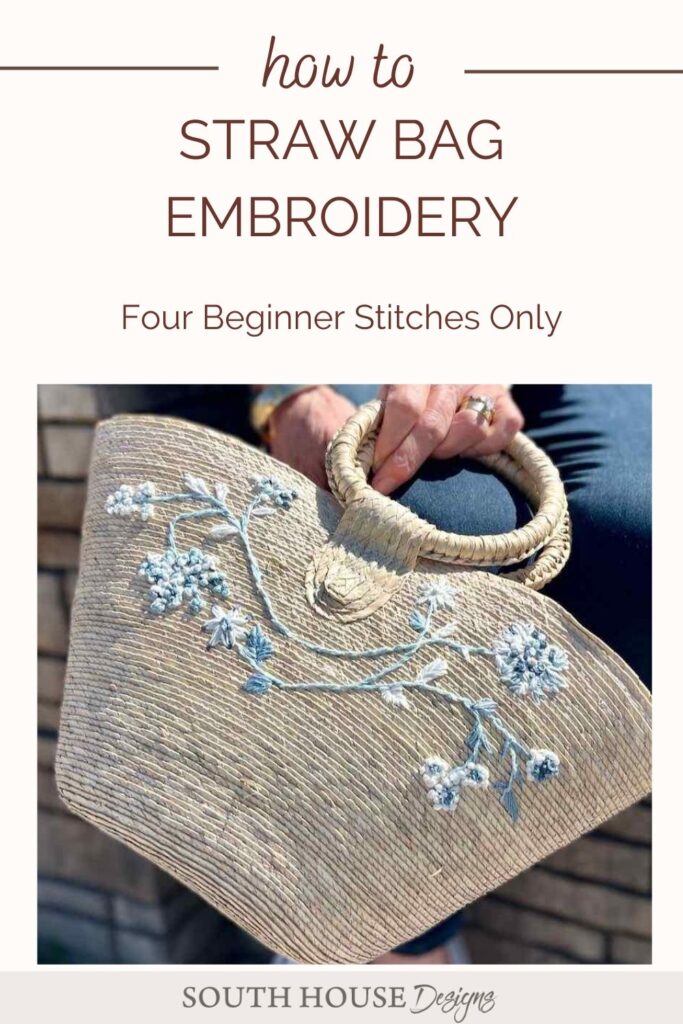
Don’t forget: Pin it to Remember it!
Now don’t forget to go visit my handcrafting buddies. We all have such different styles, it’s amazing the projects we come up with just given a common medium.
Tell them “Hi!” for me.
I hope you enjoyed this even half as much as I did. And don’t be surprised when you start seeing quite a few more fun embroidery projects coming from here!
As always please do not hesitate with questions, suggestions and comments.


")


This bag is gorgeous Diane! I love that you pushed yourself to finally learn how to embroider things too. I did the same thing! This bag feels like the perfect way to celebrate the season and I love that you can easily gift it to family and friends as well. It’s beautiful! Hugs, CoCo
This bag is gorgeous! You might find something like this in a chi-chi boutique with a made to match pricetag! I love the thread colors you use and the end result is stunning! Beautiful! Pinned!
Oh Missy, how sweet of you! Did you see the price tags on many of the inspiration bags — Wowsers!
Wendy, I love this!! The blue and white on the basket bag are a match made in heaven. I’m pinning for sure!
Thanks bunches Kelly! I love blue & white and thought it would go with most of my Summer clothes. Plus, I can set a plant in it for Summer decor in our family room.
Diane, your bag is stunning! I am with Missy, you would find these in a boutique with a big price tag! Embroidery is fun and much easier to do than people realize.
Tammy, that is so kind of you!!! Did you see the price tag on many of the inspiration bags — holy moly!!! And you’re right is surprised me how easy it is. But I do think the straw adds to that. Imperfect stitches don’t seem to show much and there’s non issue with tension — and you don’t even need a hoop!
Hi Diane! I can’t believe this is the first time you’ve finished an embroidery project! Your bag is so pretty, I thought you’d been doing it for a long time! I’ve wanted a straw bag for a while now and you’ve convinced me I need one! I’ll pin this so I can try embroidery someday!
You do NEED one Donna! And thanks for your kind words. I decided embroidering on straw is the best way to start. It’s not all prim and perfect, so I’m declaring that all imperfections just add to the charm!😂🤪🤭
Diane, your bag sure came out beautiful and was such a creative idea. My apologies for the late response, I was buried in the garden for the past two weeks