The Pool Noodle Trick That Makes Mailbox Decorating So Easy
If you’ve been around South House Designs for a while, you already know that my little lake community doesn’t exactly do a quiet Fourth of July.
Our 4th of July is not just a Norman Rockwell painting — it’s an entire mural, stretching over five glorious days. It’s one of my favorite things about living here.
We bought our pretty new mailbox and built her a post she deserved this past winter.
After that amazing transformation, it only seemed right that she get her own Norman Rockwell treatment — a patriotic mailbox swag that would carry us all the way from Memorial Day through the Fourth without looking tired halfway through.
And here’s where it gets fun.
The secret to making a mailbox swag that actually stays put — especially in the kind of unpredictable Midwest weather we get — is something you probably have leftover from last summer. A pool noodle!
Yes, really. It’s the perfect base: lightweight, easy to work with, and it won’t scratch your mailbox. And did I mention cheap and readily available?
Once I show you this trick, you’re going to wonder “Why haven’t I been decorating my mailbox?”
The links in this post may include affiliate links, which means if you purchase anything using these links, you pay no extra, but I may receive a small commission that helps keep this blog running. I truly appreciate you using affiliate links whenever possible. Please know that I will never recommend a product I do not believe in!

Ready to jump right to it?
Here’s a Quick How-To Card for Confident Crafters
If you’d rather feel like I’m right by your side, stepping you through it — no problem, keep scrolling.
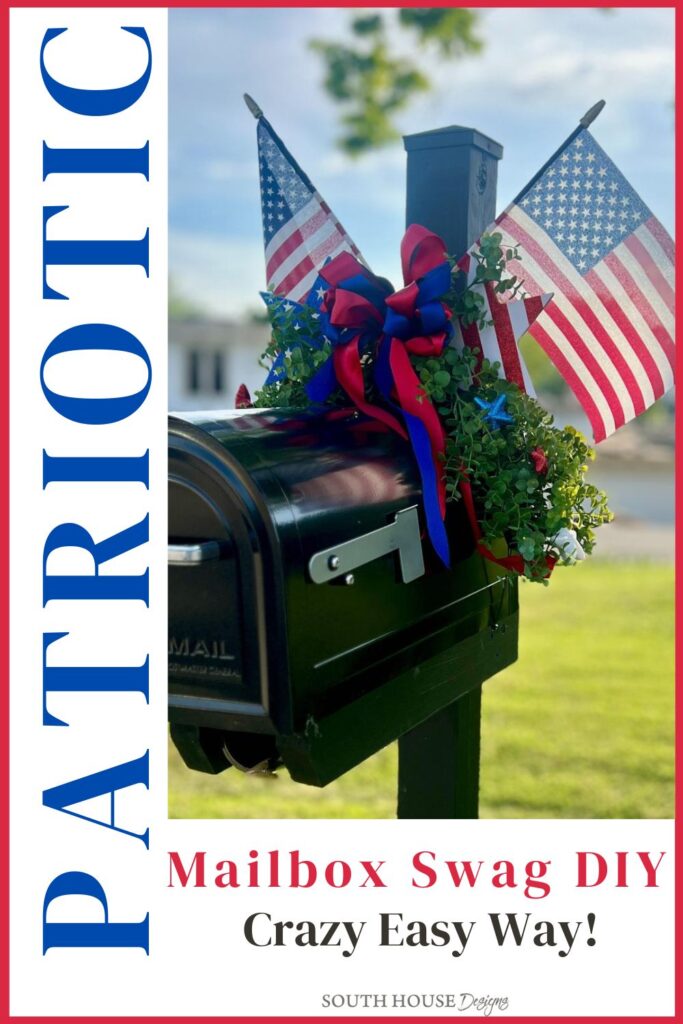
Patriotic Mailbox Swag
Materials
- Pool noodle (cut to 24")
- Spray paint — black or white to match mailbox
- 3–4 zip ties, 14" (black or white)
- Faux greenery
- 2 flags, 12×18"
- Flat Wooden stars
- Glitter 3D foam stars + skewers
- Red satin ribbon (wide)
- Blue grosgrain ribbon
- Florist wire or coated wired
Tools
- Scissors
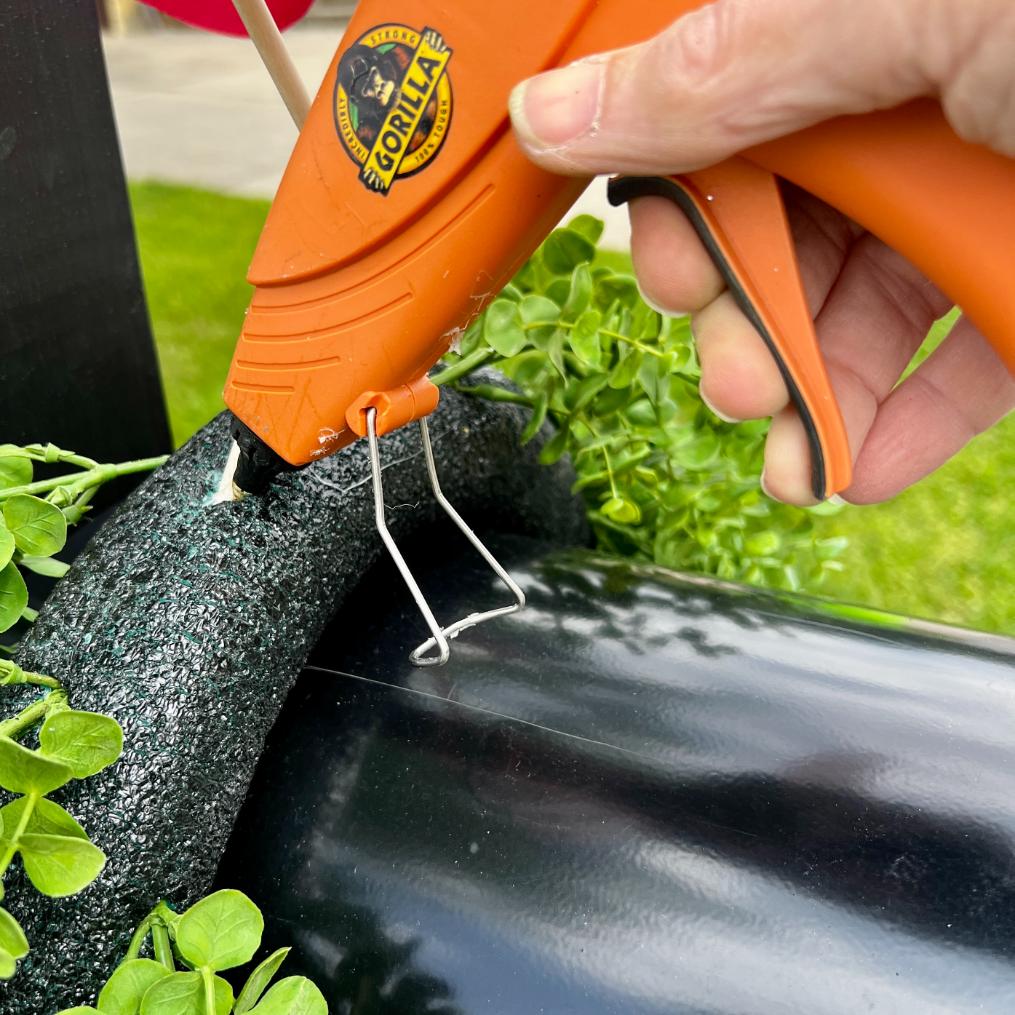
- Hot Glue gun, with low setting + glue sticks
Instructions
- Cut pool noodle to 24" and spray paint to match your mailbox. Let dry completely.Black for black mailboxes, white for white.
- Join two zip ties end-to-end and thread through the hollow center of the noodle, leaving both heads poking out at each end.
- Set noodle on top of mailbox and daisy-chain remaining zip ties around the mailbox and crossbeam to lock it in place. Pull tight and trim all tails.Most mailboxes need 3–4 zip ties total to complete the loop.
- Push greenery stems directly into the noodle to build your base.Thin stems hold without hot glue and won't leave big holes.
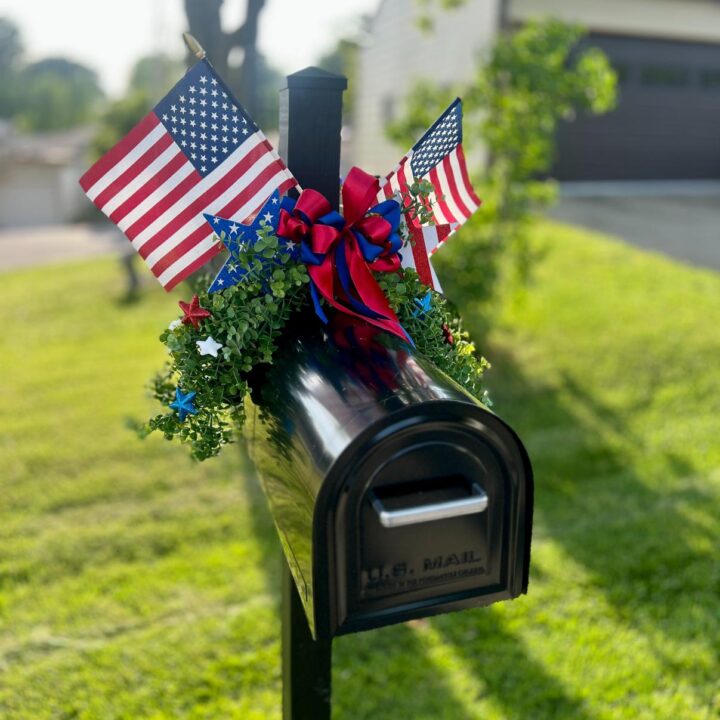
- Hot glue flag edges around their poles to cover the staples. Cross both flags and push poles deep into the noodle at an angle. Secure with hot glue and wire at the crossing point.Don't trim the poles — their length anchors them safely through the noodle.
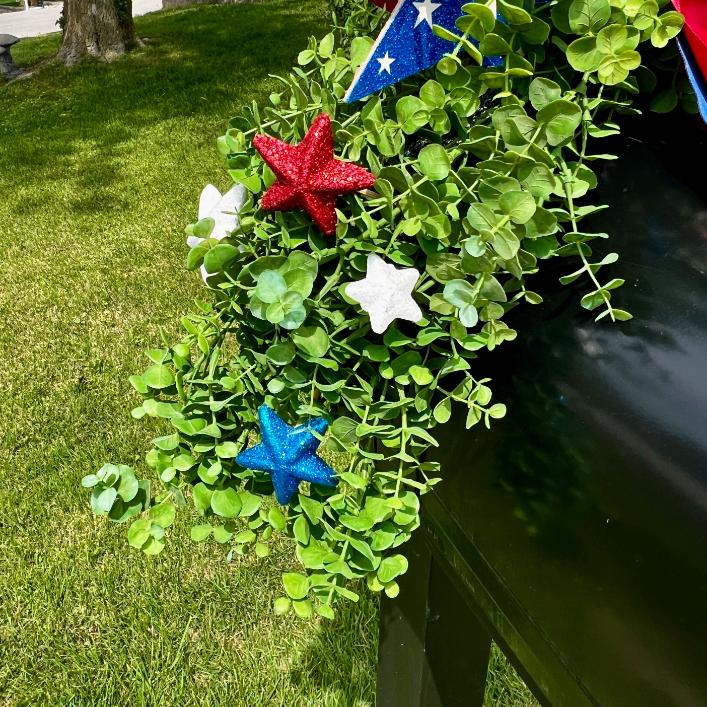
- Add wooden stars by hot-gluing one point into the noodle on each side of center, tilted at different angles.
- Hot glue a skewer to the back of each glitter star, then push skewers into the noodle so stars float above the greenery.Arrange so greenery naturally hides the skewers.
- Layer red satin and blue grosgrain into a multi-loop bow with 4 streamers. Tie around the flag pole crossing with a shorter length of red ribbon.
Notes
For all the details and tips, keep scrolling. I've got ya!
Detailed How-To
With All my Mailbox Decorating Hints and Tips
Materials & Supplies Notes:
12 x 18-inch flags can be a bit troublesome to find. Here are the ones I used and am so happy with them — especially the gold finial on top. Our flag deserves that treatment!
Step 1: Cut and paint your pool noodle–
Cut your pool noodle to 24 inches. Spray paint it to match your mailbox — black for a black mailbox, white for white.
This keeps it from peeking through your arrangement and looking out of place. S
et it aside and let it dry completely before moving on.
Step 2: Thread the inner zip ties–
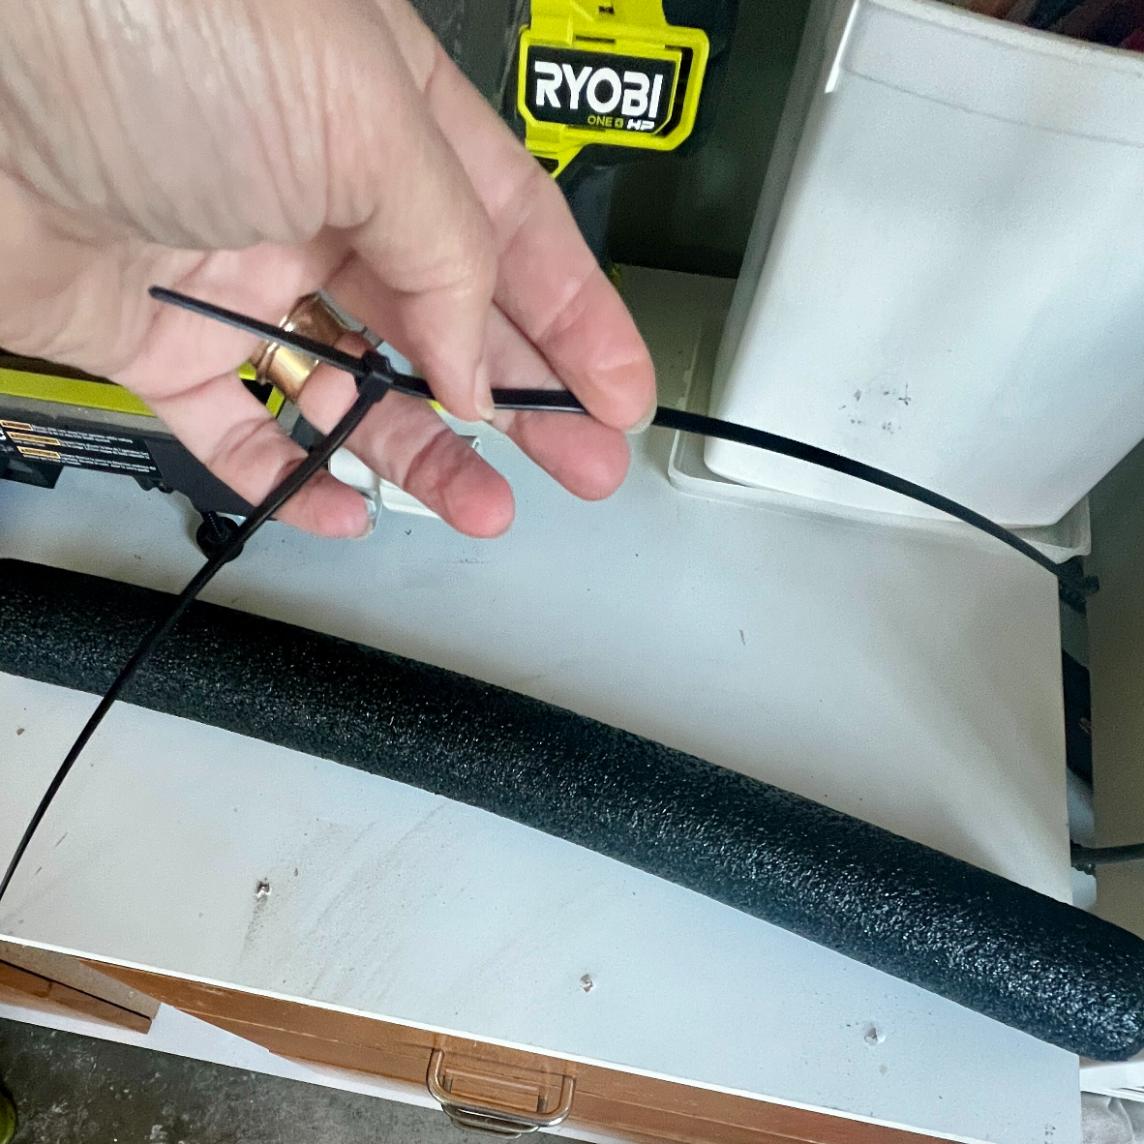
Take two 14-inch zip ties and connect them end-to-end.
Thread this joined pair through the hollow center channel of the noodle, leaving both connector heads poking out at each end.
These are your anchors — everything else connects to them.
Step 3: Mount the noodle on the mailbox–
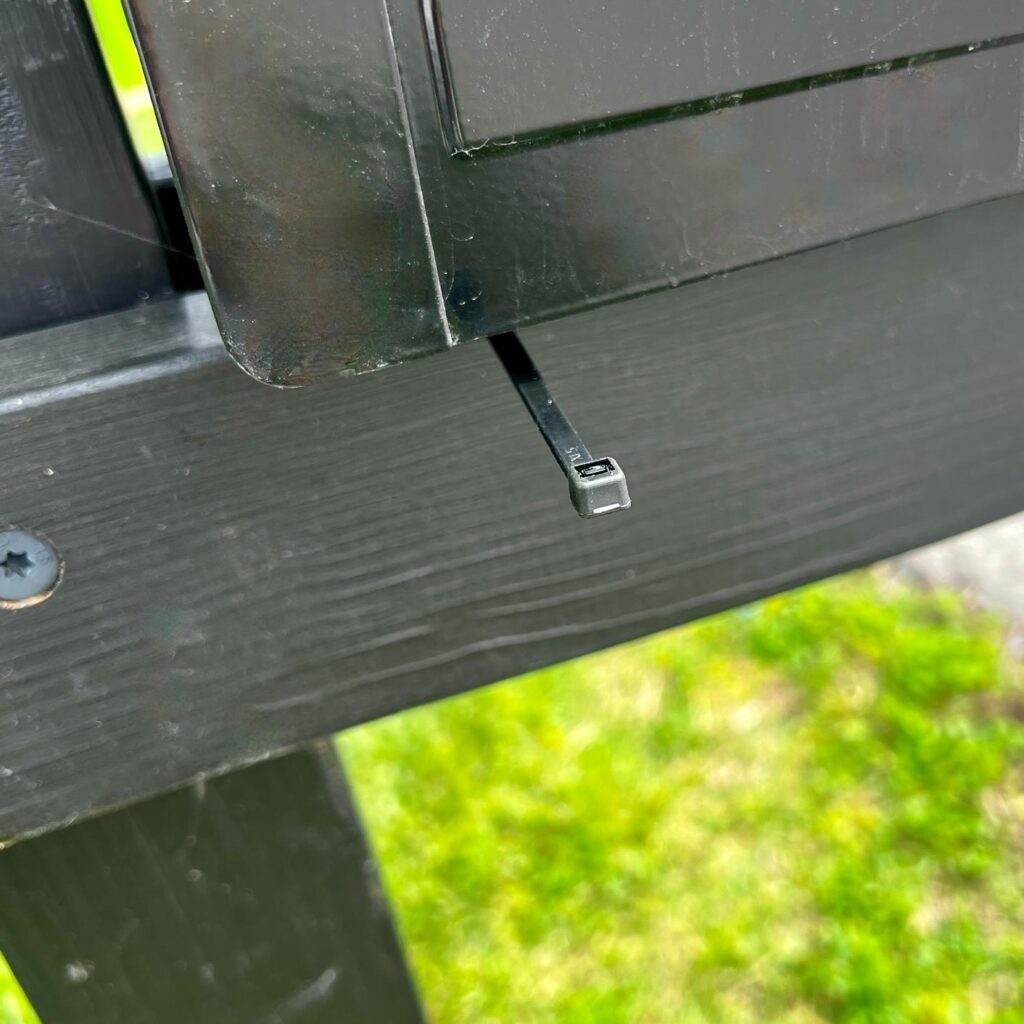
Set the painted noodle on top of your mailbox, centered where you want your swag to sit. Now it’s time to lock it down with your remaining zip ties.
- Slide a third zip tie thru the gap between the bottom of the mailbox and the crossbeam of the post. Zip its head to the tail coming out of the noodle.
- If you have a smaller mailbox, the third zip tie’s tail may reach the head of noodle zip on the other side of the mailbox. If not connect, connect a fourth zip tie between them, completing the circle.
- Pull that last connection good and tight — you want zero wiggle. Clip the excess tails close.
HINT: A smaller mailbox may only need 3 zip ties total. I needed 4 to reach all the way around mine. Don’t be afraid to daisy-chain as many as you need.
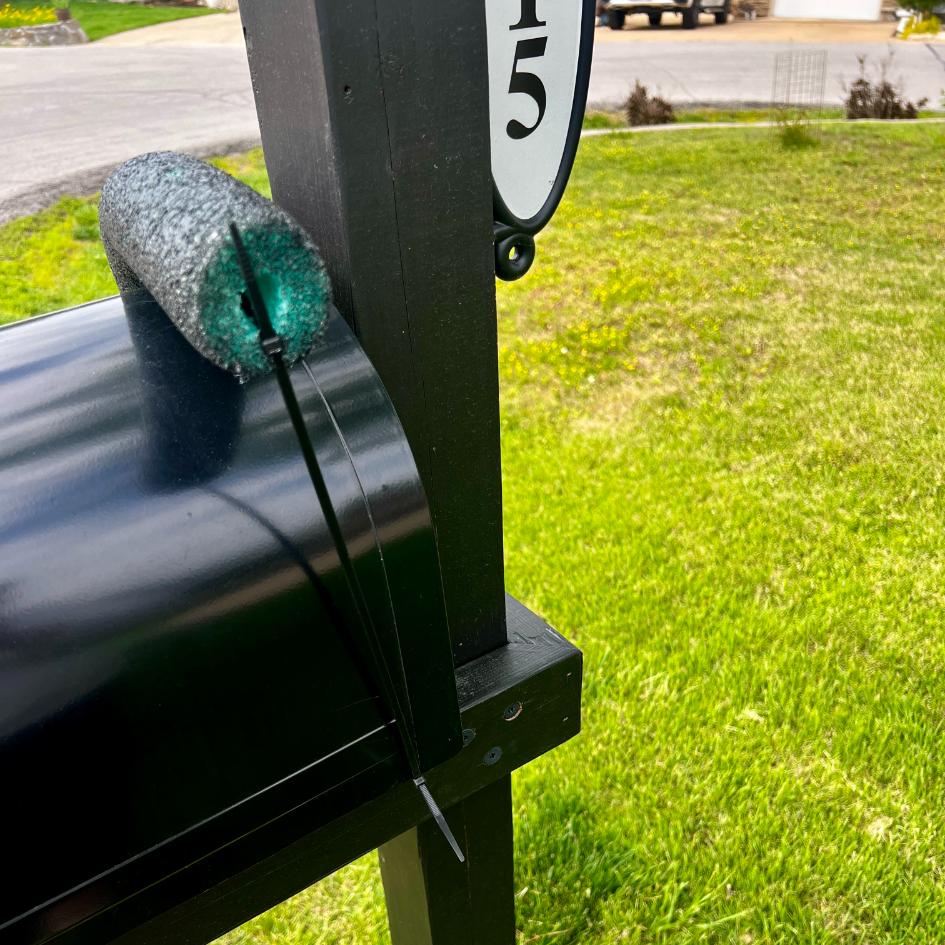
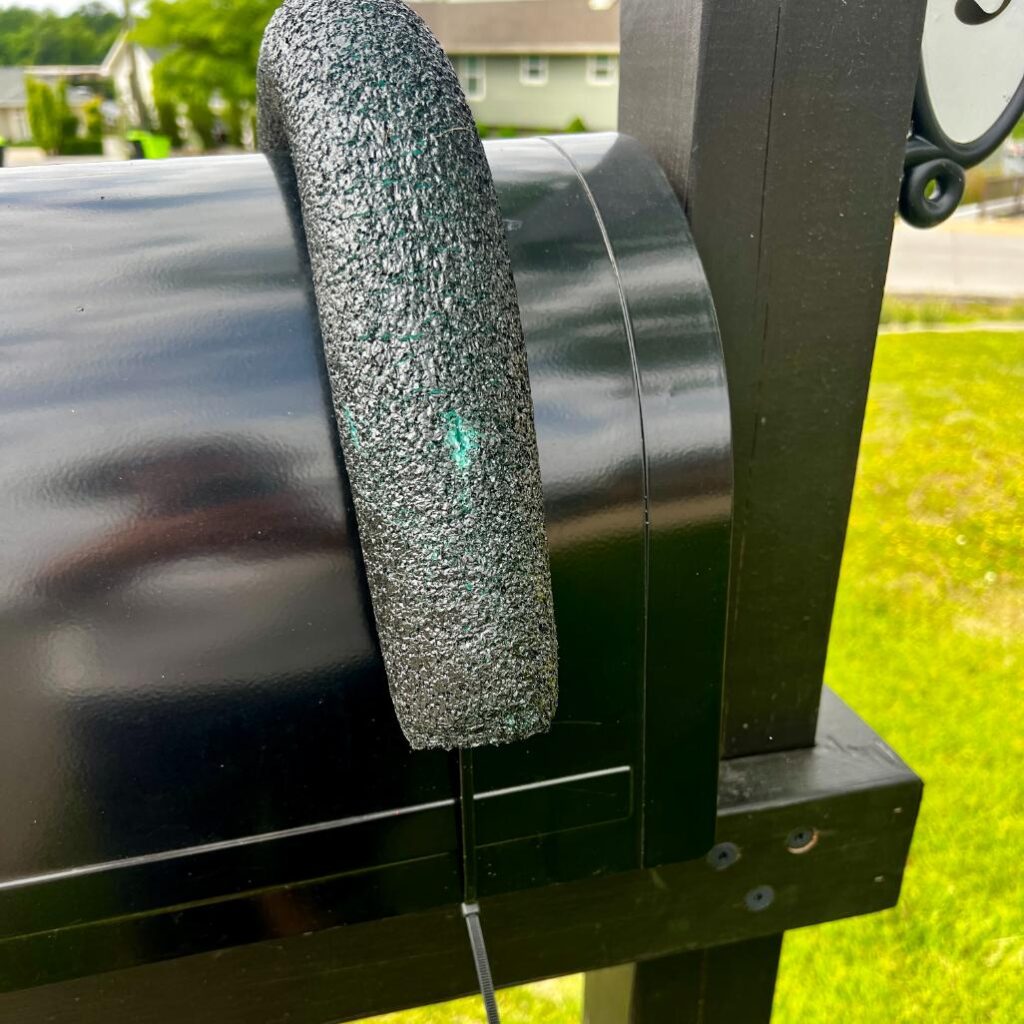
Step 4: Add your greenery–

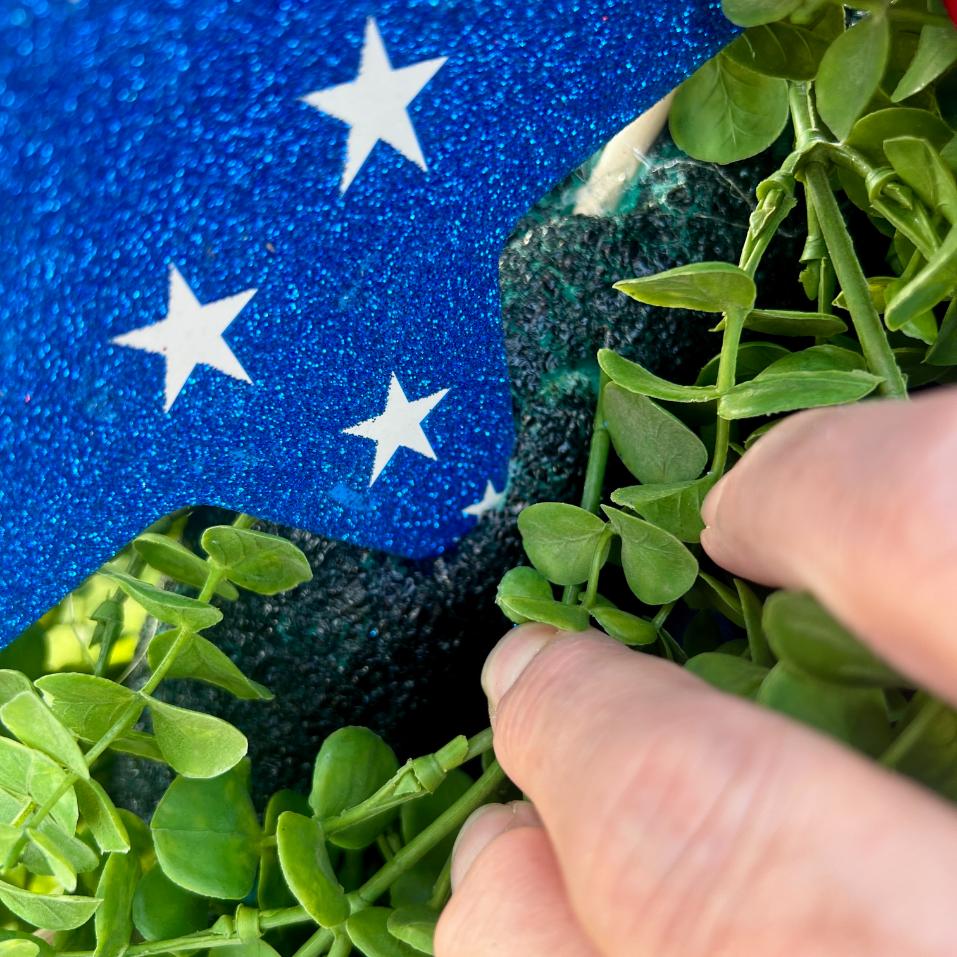
Push your greenery stems directly into the noodle to build your base. If the stems are long and thin enough, no hot glue needed — they’ll hold on their own, and you won’t end up with gaping holes in your noodle. Arrange until you’re happy with the coverage, keeping in mind you’ll be layering decor on top.
Step 5: Prep and place your flags–
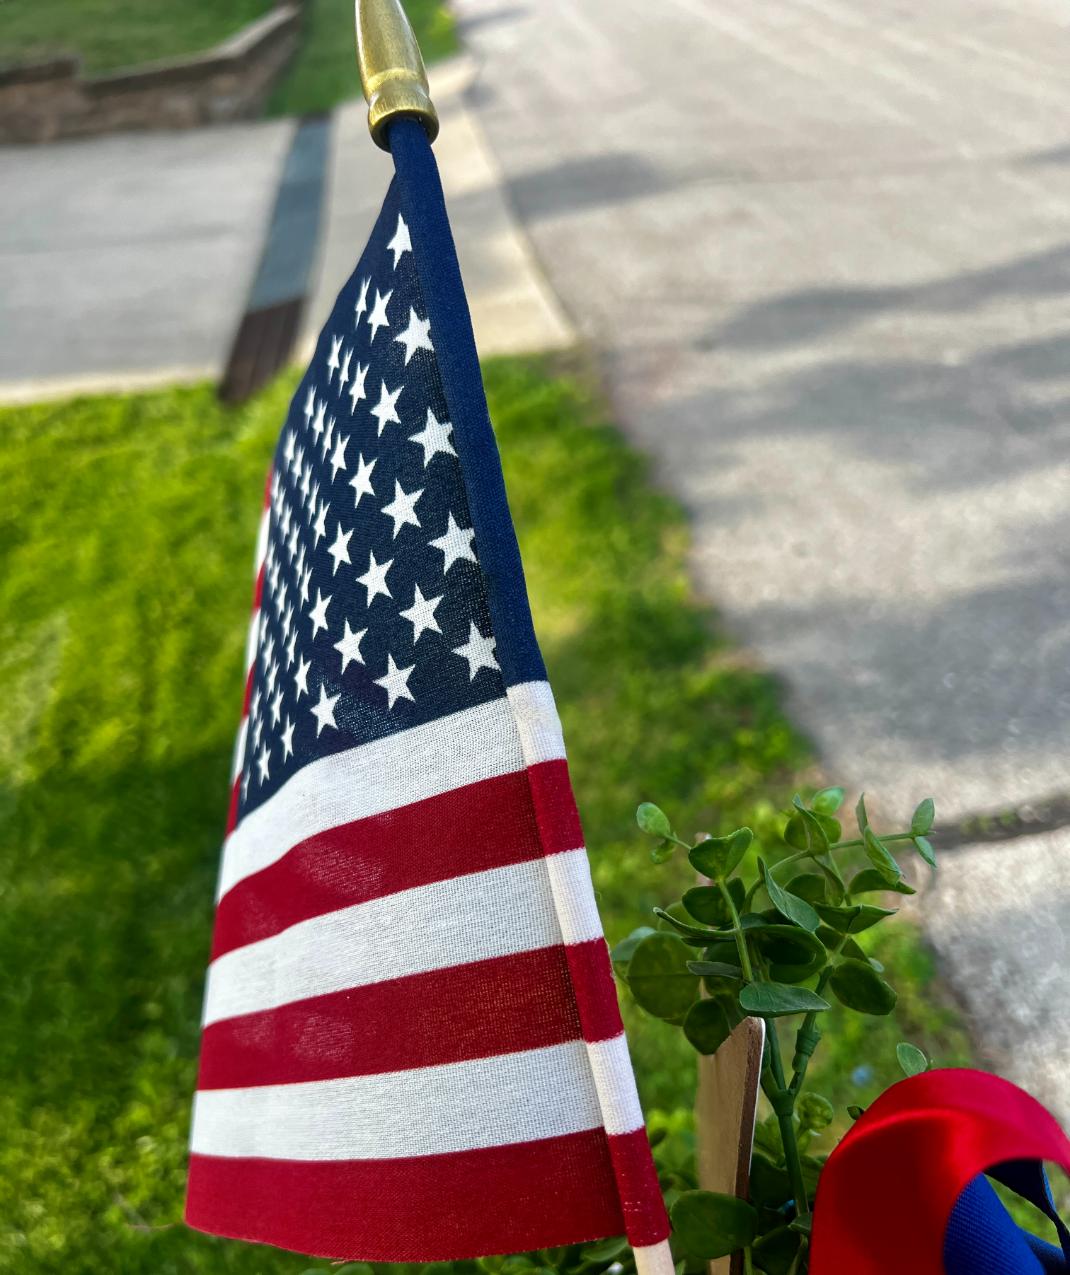
PRO TIP: before you start: Most small flags are attached to their pole with just two staples, which looks surprisingly cheap up close. Here’s the easy fix — and it works for all your July 4th flags.
- Run a thin line of hot glue down the staple edge of the flag
- Press it firmly against the pole
- Run another thin line of hot glue right over that glued edge
- Wrap the flag over it so the pole is completely encased — just like a real flag wraps its pole. Use your glue gun on low heat setting (if it has one). Be careful pressing the flag edge — it’s easy to burn your fingers.
Now for placement: resist the urge to trim those flag poles down — they’re longer than they look for a reason.
Push each pole into the noodle at an angle so it runs down through the center of the noodle without ever hitting the mailbox underneath. Cross the two flags at the center.
Because flag poles make fairly large holes, add a generous glob of hot glue into each hole before inserting.
Add another glob on the poles where they cross, and wrap a small piece of wire around the crossing point for extra security.
Step 6: Add the wooden stars–
Push one star point-first into the noodle on each side of center, tilting them at slightly different angles so they feel natural rather than symmetrical. Add a dab of hot glue to the point before inserting — these are holding up to some seriously blustery Midwest wind, so don’t skip the glue.
Step 7: Mount the glitter stars on skewers–

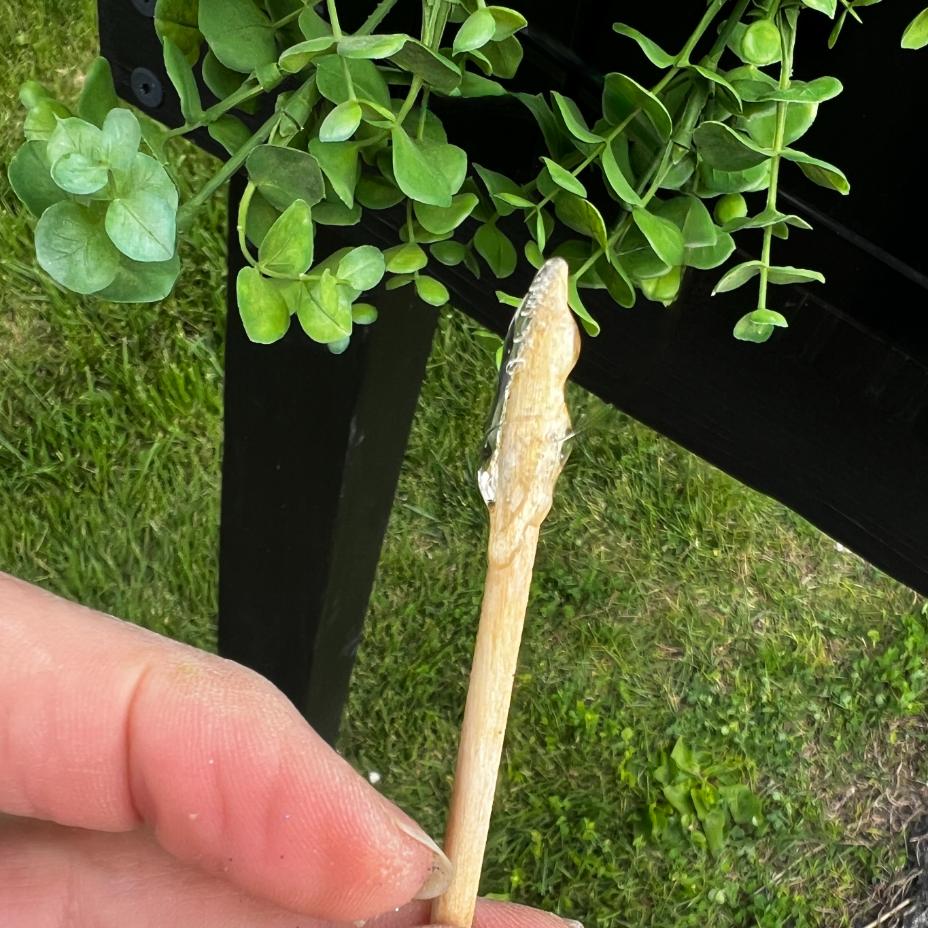
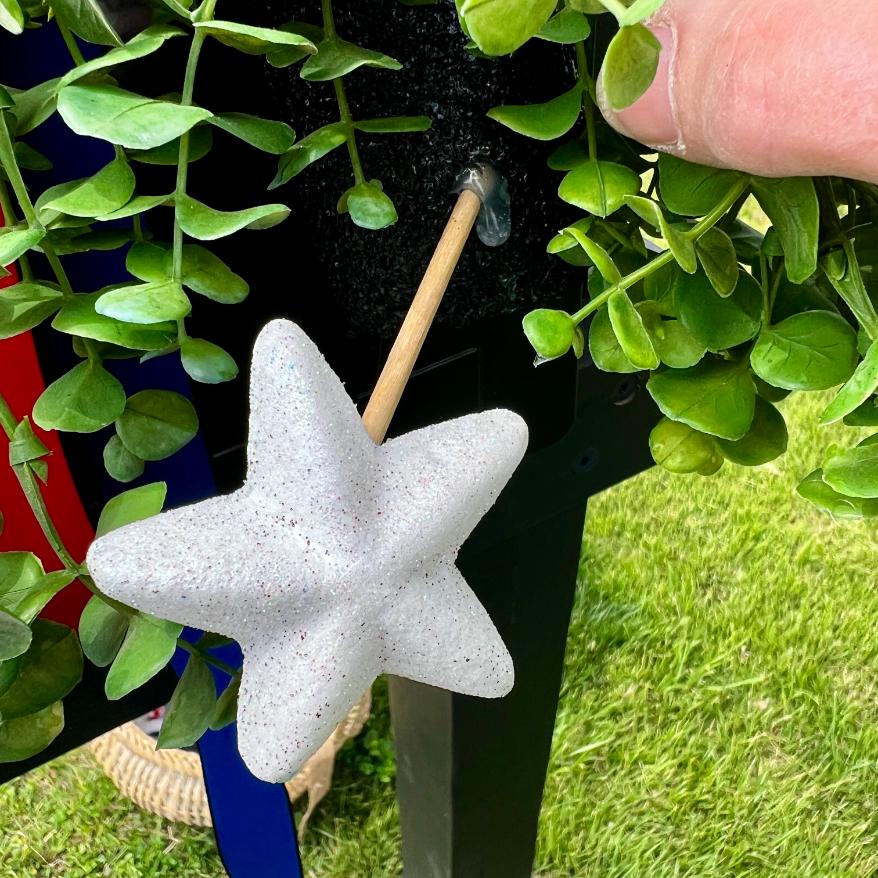
For each glitter star, apply a glob of hot glue to one end of a skewer and press it into the back of the star, aiming for the thickest middle section and angling slightly.
Once set, add a glob of hot glue to the sharp skewer tip and push it into the noodle.
Don’t push them all the way in — you want the stars to float above the greenery. Tuck the skewers so the greenery mostly hides them.
Step 8: Make and attach your bow–
Layer a wide double-sided red satin ribbon and a blue grosgrain ribbon together and make a multi-loop bow with four streamers. Those streamers will flutter beautifully in the breeze and add great movement to the finished swag.
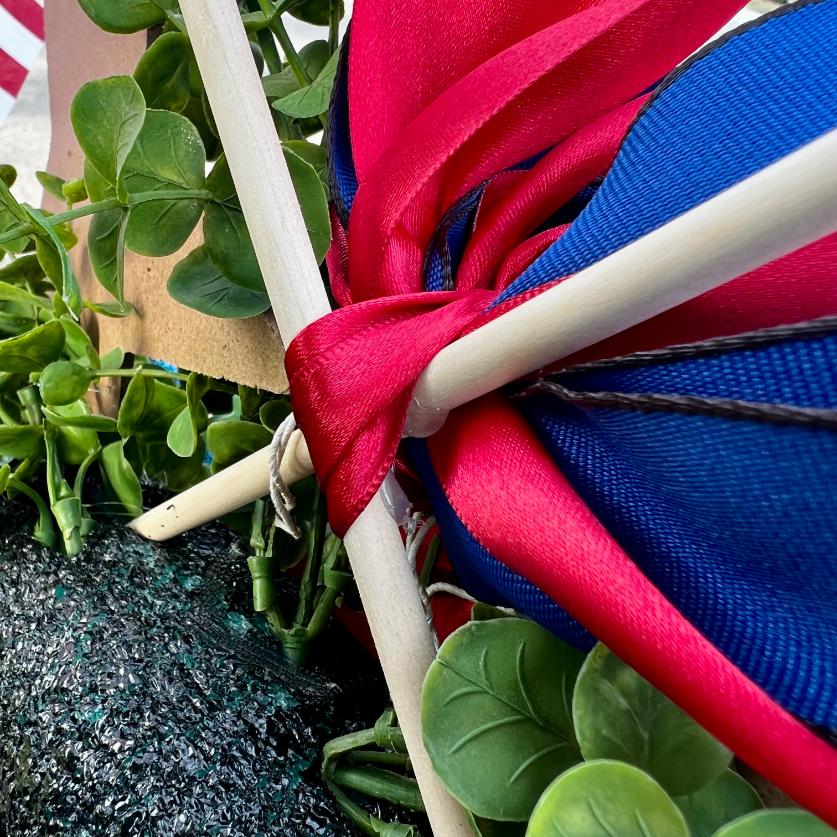
Use a shorter length of the red ribbon to tie the bow directly around the cross point of the flag poles, anchoring it right at the center of the arrangement.

Are you enjoying this project? Want more? Be sure to subscribe to not miss a one and all my subscriber exclusives:
Thanks bunches! Now back to our mailboxes:
Decorating Your Mailbox But Making It Your Own
Unless you’ve been living under a rock, we all know this year is a pretty big deal — America’s 250th birthday. So why not spell it out? Large 3D wood numbers painted and glittered (if that’s how you roll) make a fantastic addition, poked into the noodle with a pair of skewers on each so they don’t spin in the wind.
The pool noodle base works with just about any decor you can poke, glue, or tuck in. Here are a few more ideas to spark your creativity:
- Oversized fireworks picks — burst them upward and outward from center for serious wow factor
- Uncle Sam hat — as a centerpiece pick or a single oversized statement piece
- Patriotic sunflowers — red, white and blue silk versions are everywhere this season
- Pinwheels — colorful, fun, and they actually spin in the breeze
- Bandana or buffalo check ribbon — swap out the satin and grosgrain for a more farmhouse vibe
- “America” or “Freedom” wood word cutouts — tuck them into the greenery or let them stand tall
- Red, white and blue florals — hydrangeas, roses, or daisies in patriotic colors feel lush and classic
- Patriotic gnome pick — if you’re in the gnome game, you know gnomes make everything better
Not feeling the DIY this time around? No judgment here — sometimes you just want the look without the glue gun.
I’ve rounded up some of my favorite patriotic mailbox wraps and magnets from Etsy that are genuinely cute and ready to go in about thirty seconds flat.
There’s something so satisfying about a decorated mailbox — it’s the very first thing guests see when they pull up, and honestly, it sets the tone for everything that follows.
A little patriotic flair goes a long way, and with a pool noodle doing all the heavy lifting, there’s really no reason not to.
Whether you’re decorating for Memorial Day, Flag Day, or going all out for the Fourth, I hope this gives you the confidence to give it a try.
And when you do — I would absolutely love to see it! Drop a photo in the comments or tag me on social. Nothing makes my day quite like seeing your versions of a South House project out in the wild.
Happy 250!!!

More Patriotic Projects to Enjoy

That is BRILLIANT Diane!! What a great idea! If I had a mailbox, I’d be right there! But maybe I can find somewhere else to put it. It’s a fabulous idea. Thanks for always being so inspiring!
Thanks so much Barbara!!! No mailbox (pooh!) but how about an arch over an exterior door, maybe an arched transom? Around a light fixture on a stone post? An arched garden trellis?
What a fabulous idea, Diane! Such a fun way to celebrate the 250th! I’ll be sharing this post in our Seasonal Sentiments Rewind newsletter on the last day of the month! Here’s to a fabulous summer!
Thanks so much Donna! I really appreciate you!