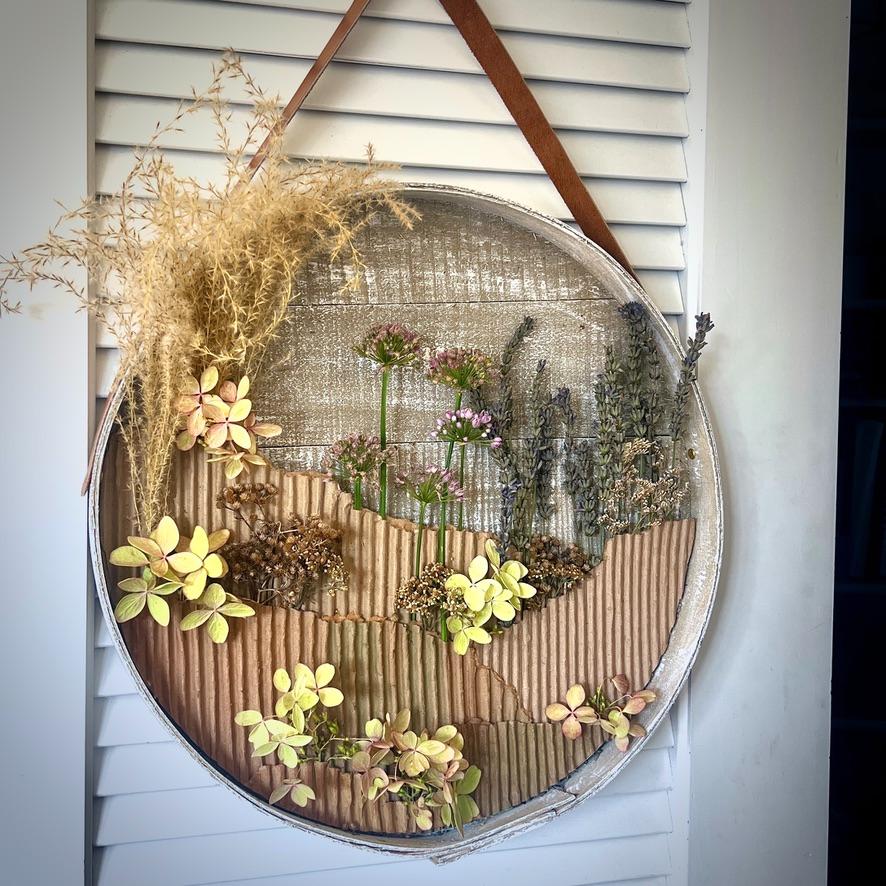
Turns Out the Prettiest Fall Texture Is Free — Hiding in Cardboard Flaps
What’s hiding under a smooth piece of cardboard? Tiny vases, it turns out — and the coziest project I’ve made all
Store windows called it weeks ago. A stroll through the shopping district this past weekend — dragging, really, in 100-degree heat — turned up mannequins in full cable-knit commitment, totally oblivious to the heat dome outside.
Boots, corduroy, and sweaters in every cozy, earthy tone fall’s ever owned, worn by plastic people who clearly don’t sweat.
Meanwhile the calendar and the thermometer were having a very different conversation.
And the thermometer was winning.
Here’s the fall workaround: texture and color don’t care what the thermometer says. Bring those earthy fall tones into your home now, and save the sweaters and boots for whenever the heat dome finally taps out.
That’s exactly where this wreath alternative starts.
Some grass plumes, lavender, hydrangea, allium, and yarrow had been doing their thing out in the garden — drying in place, patiently waiting for a project to come find them.
Meanwhile, a stack of flattened boxes sat by the back door, headed straight for the recycle bin.
Peel back one layer, though, and — plot twist — the most boring material in your recycling bin turns out to be living a double life. Hiding under that flat beige exterior: ridges, shadows, and more texture than a chunky knit sweater. It’s the kind of double life that makes Jason Bourne look like an amateur — a sleeper agent that’s been hiding in your recycling bin this whole time.
And I’m nominating it for best supporting actor in this month’s Handcrafted Society Challenge — foraged materials, quiet creativity, and the beauty of slowing down, all rolled into one box lid.
The links in this post may include affiliate links, which means if you purchase anything using these links, you pay no extra, but I may receive a small commission that helps keep this blog running. I truly appreciate you using affiliate links whenever possible. Please know that I will never recommend a product I do not believe in!
Step-by-Step
Free & Foraged Materials “Wreath”
Ready to jump right to it?
Here’s a Quick How-To Card for Confident Crafters
If you’d rather feel like I’m right by your side, stepping you through it — no problem, keep scrolling.
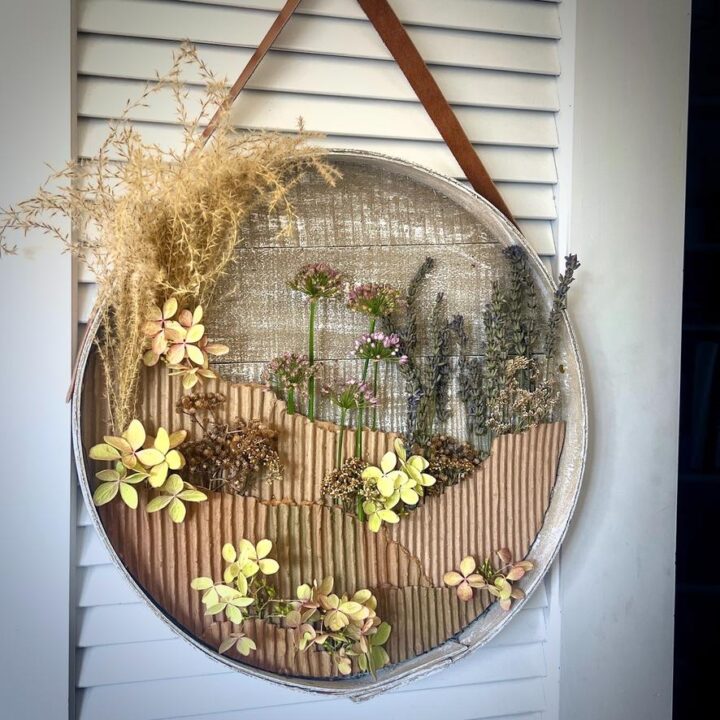
Foraged Florals & Recycled Cardboard Display
Have you thought about combining a bit of recycling with some foraged dried florals? So much potential! And look how easy it really is.
Materials
- Cheese box lid (or paper mâché lid) , ,
- Dried flowers/grasses/pods
- Heavy paper or cardboard for backing
- Corrugated cardboard pieces
- Watercolor paints, optional
- Paint or stain for the lid
- White glue
- Picture hanger or leather strip or jute rope
- Small tacks, optional
Tools
- Scissors
- Sandpaper or sanding block
- Artist paintbrush
- Paintbrush for lid finish
- Binder clips
Instructions
- Color the box lid, if desired
- Cut a heavy paper backer to fit inside the lid
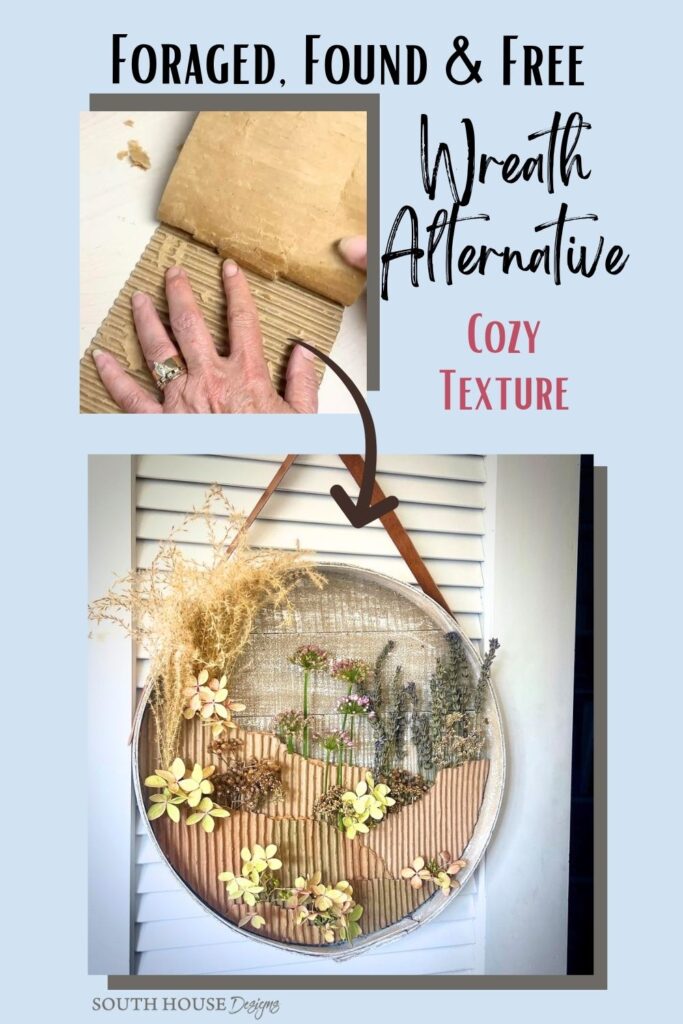
- Peel one layer off corrugated cardboard to expose the fluting
- Tear fluted pieces and arrange them over the backer, flutes vertical
- Trim each piece's outer edge to match the backer
- Add watercolor or stain to the fluting, if desired
- Glue the layered fluting pieces onto the backer
- Trim excess backing and fit the piece into the lid, securing with glue or tacks
- Attach a hanger, leather strap, or jute
- Insert dried florals
A Quick Word on Where to Find Cheese Box Lids or Alternatives:
Make friends at the deli department or a dedicated cheese store. Ask them to keep your name and phone number handy and when they get a shipment of cheese, would they please set the box and lid aside for you. It’s worked wonderfully for me. I have a small stockpile.
I think an unused frame — oval, round, or rectangular — could be quite fun too! Paint or cover the frame backing board and then proceed with step 2. Even a row of three or four square frames could be quite delightful with each frame showcasing a different dried flower variety.
Building Your Wreath Alternative
Detailed How-To With All my Hints and Tips:
Step 1) Color the Box Lid (optional) –
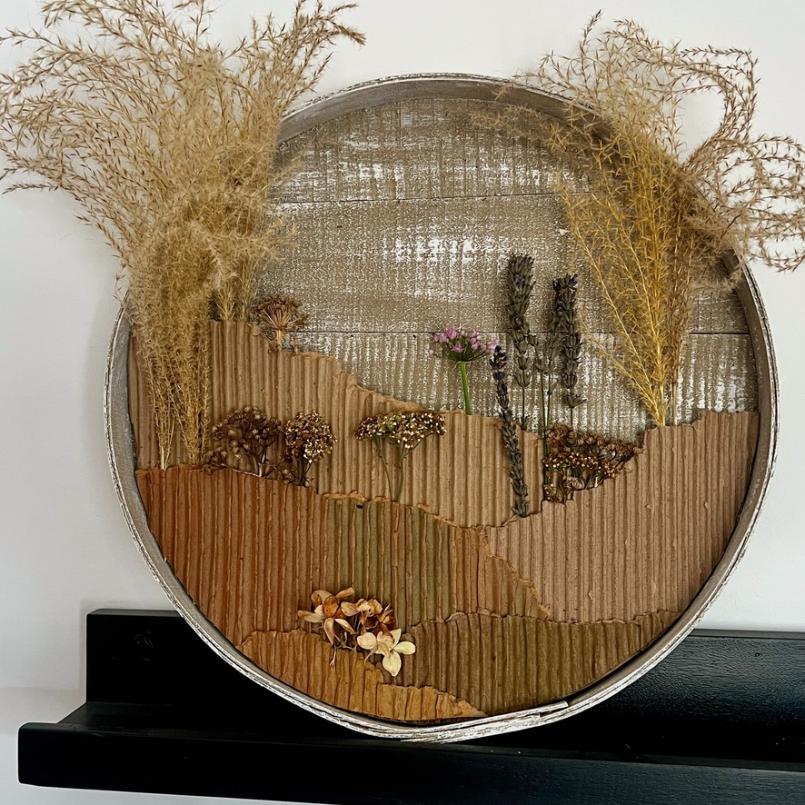
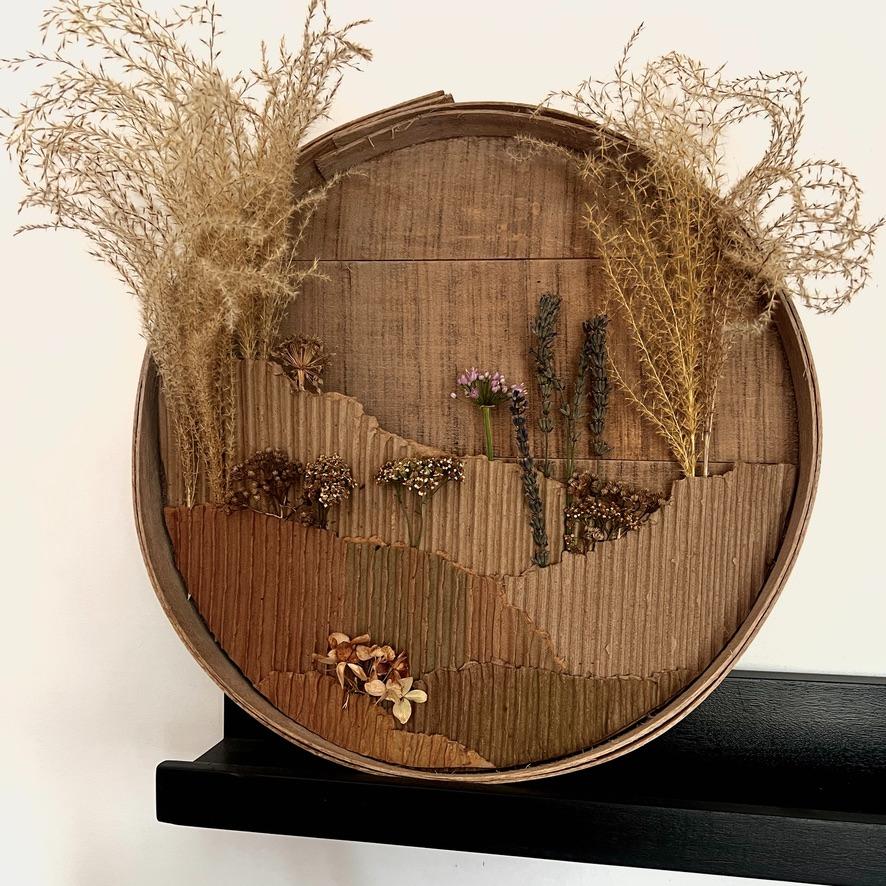
If you want your lid to read as more than “cheese box,” now’s the time to paint or stain it. I experimented a bit with a warm grey and light dry brushing, and then with a stain.
Do this first so it’s fully dry and out of your way before the fluting takes over your table.
If our home was more on the dark, moody side, I probably would have gone with the darker backing. But our house is light and bright and I wanted the dried florals to pop a but more, so I opted for the brighter lid.
Step 2) Cut Your Backer –
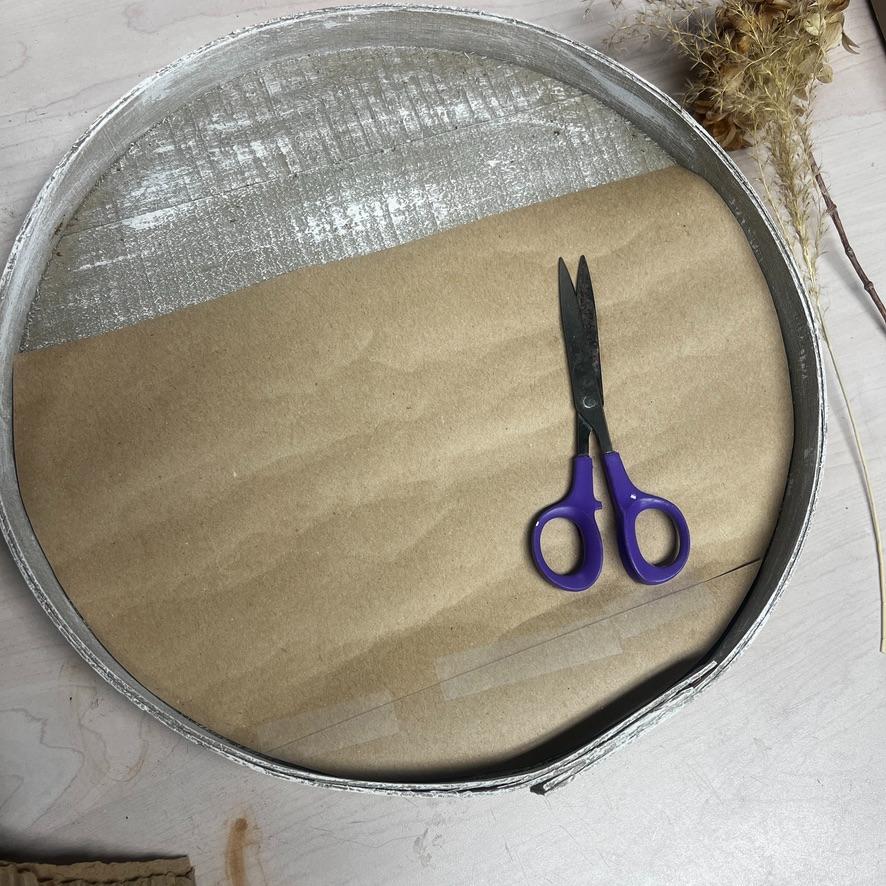
Cut heavy paper or cardboard to fit inside the lid. This is what all your fluting will attach to.
Your corrugated fluting will likely fill 40–60% of the space, so cut your backer generously — 60–75% coverage — and don’t worry about being precise. You’ll trim the extra off later, so this is not the step to overthink.
Step 3) Prepare the Corrugated Fluting –
Pull off one outside layer of your cardboard flap to reveal the fluting underneath.
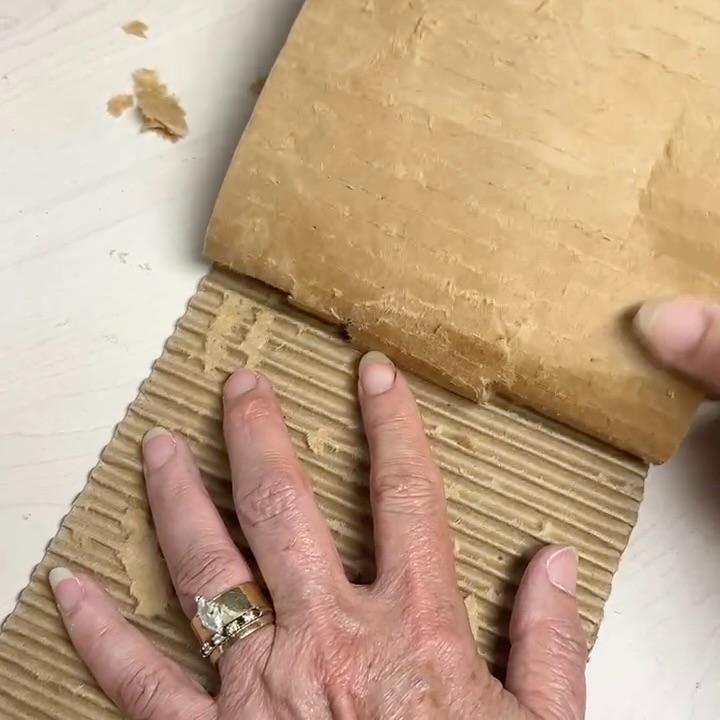
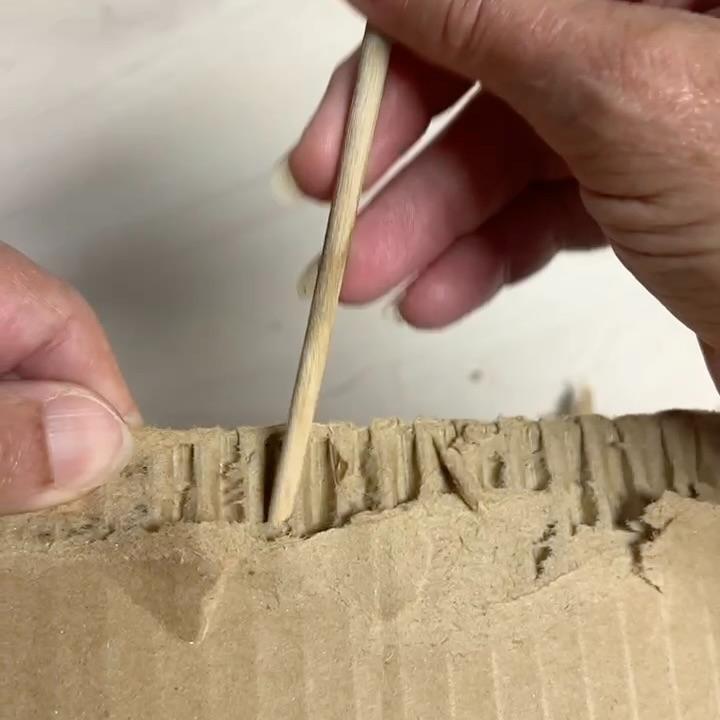
PRO TIP: Test both sides of the cardboard on a corner first — one side almost always peels easier and leaves a nicer look than the other. Let the cardboard show you which side wants to cooperate.
When you hit paper with a stubborn streak, I found it very helpful to slide a long, thin paintbrush handle down the fluted channels and pull up to break the paper. A skewer would work too.
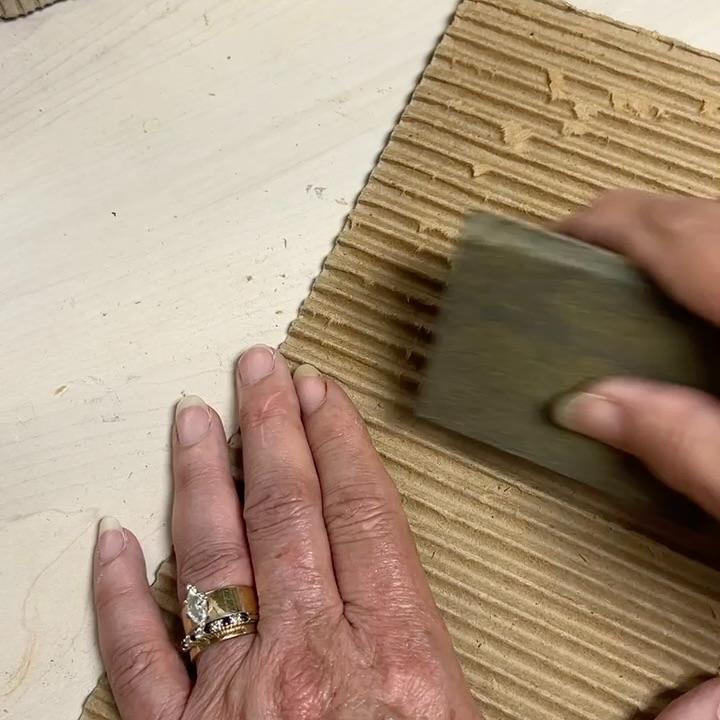
Once you’ve peeled the flap, use sandpaper to clean up any leftover paper residue — as much or as little as you like. The edge of a sanding block works great here, or fold a strip of sandpaper around a skewer and slide it through the valleys of the fluting.
Step 4) Tear Your Fluted Pieces –
Can there be too much texture? Not on my watch.
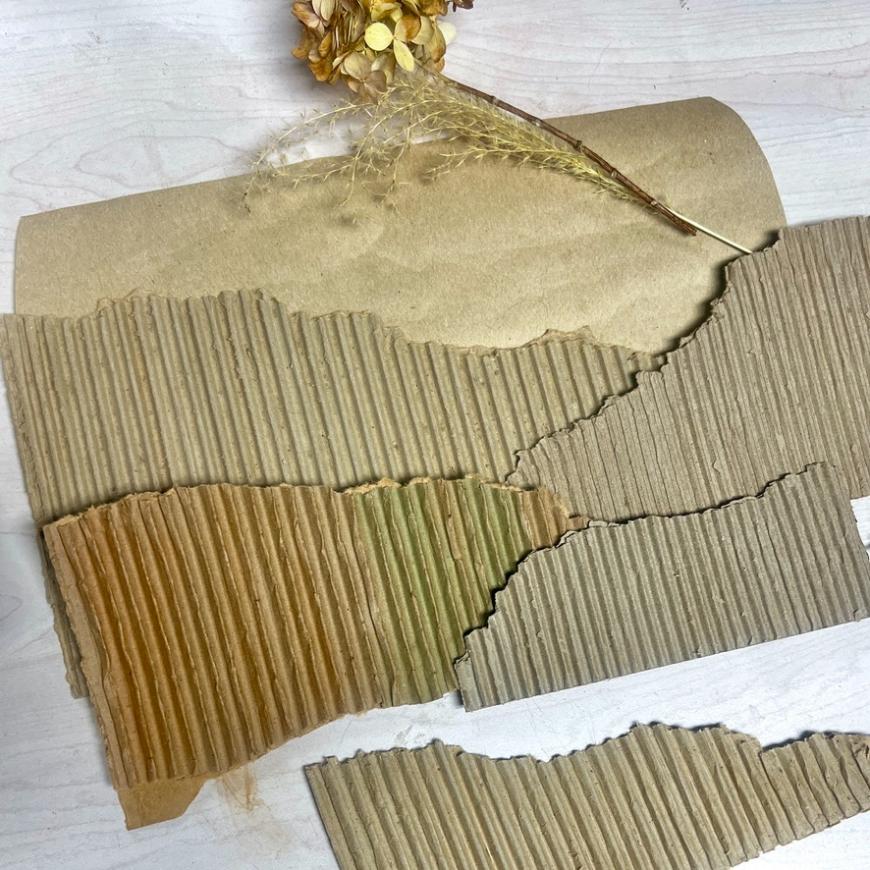
Tear your fluted pieces rather than cutting them — the torn edges add even more texture than a clean cut ever could.
Start with your biggest piece and lay it across most of your backer. Then tear a second piece with the biggest color contrast to start from the other side, overlapping the first.
Repeat with a few more smaller pieces until your backer is filled and the edges overlap where needed.
Think of it like building a landscape — start with the distant hills and bring the foreground forward.
PRO TIP: The fluting is basically doing double duty as tiny vases for your dried florals, so keep those flutes oriented vertically. Sideways fluting looks nice but won’t hold a stem.
Once your layout looks right, lightly pencil-mark the top corner of your backer pieces so you can find your way back to this exact arrangement. Reference marks at the overlaps help too, if you’re the type who likes backup.
PRO TIP: When it’s just right, snap a photo. Future-you, mid-glue-panic, will thank present-you.
Step 5) Cut the Outer Edges –
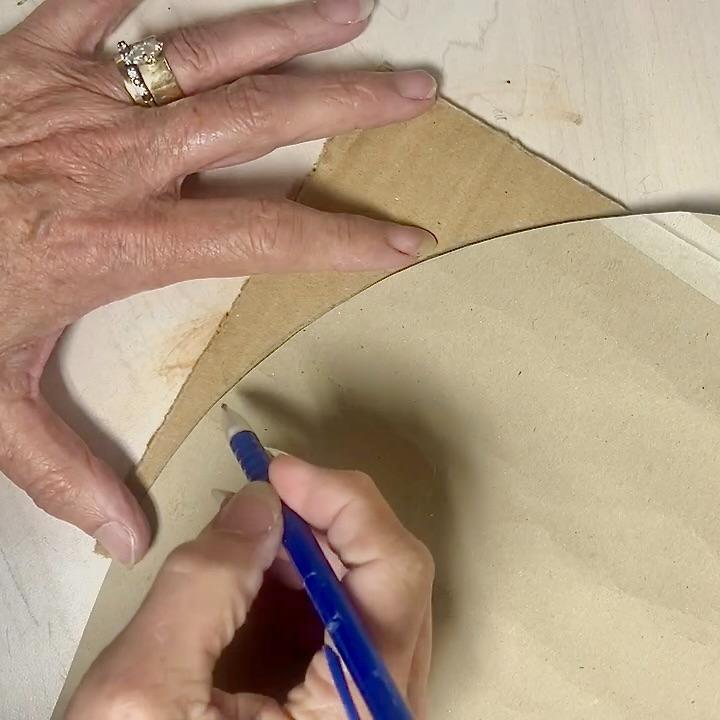
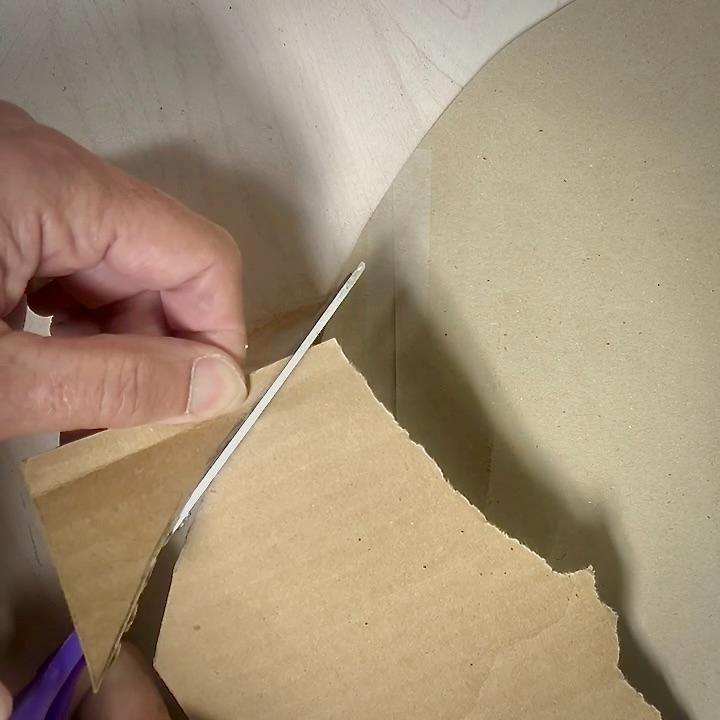
Starting with your largest, backmost fluting piece, binder-clip it to the backer in a couple of spots. Flip it over, trace the backer’s edge onto the fluting, then unclip and trim along that line.
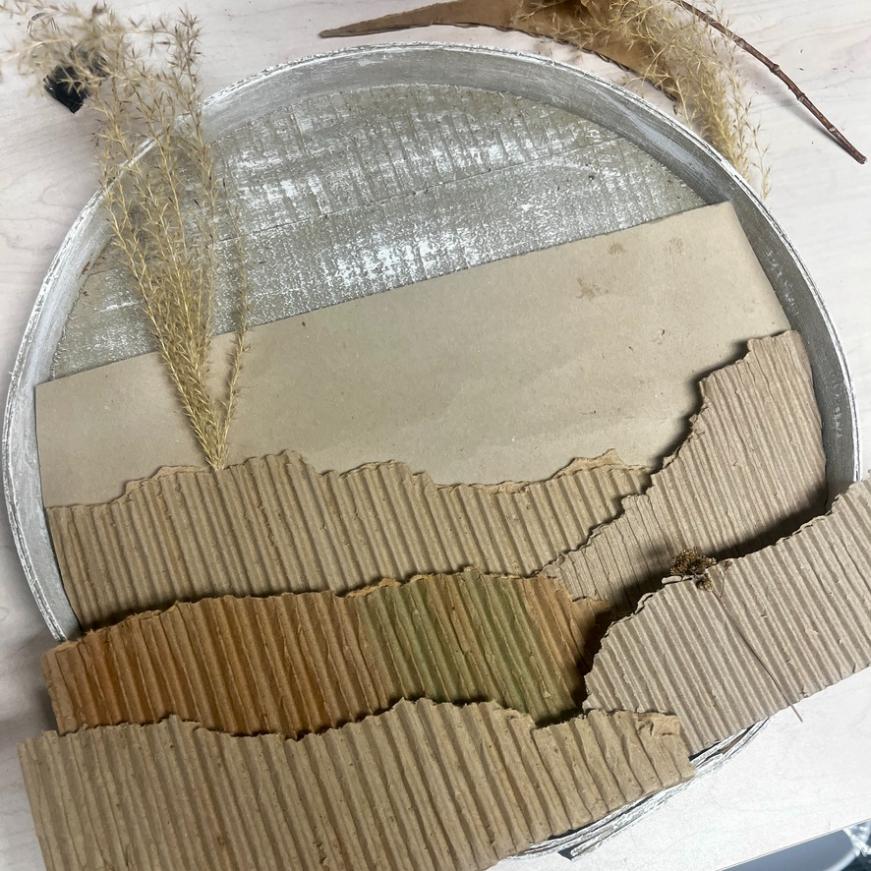
Clip it back in place and repeat with the next piece: clip, flip, trace, unclip, trim. Again and again, like your own little assembly line.
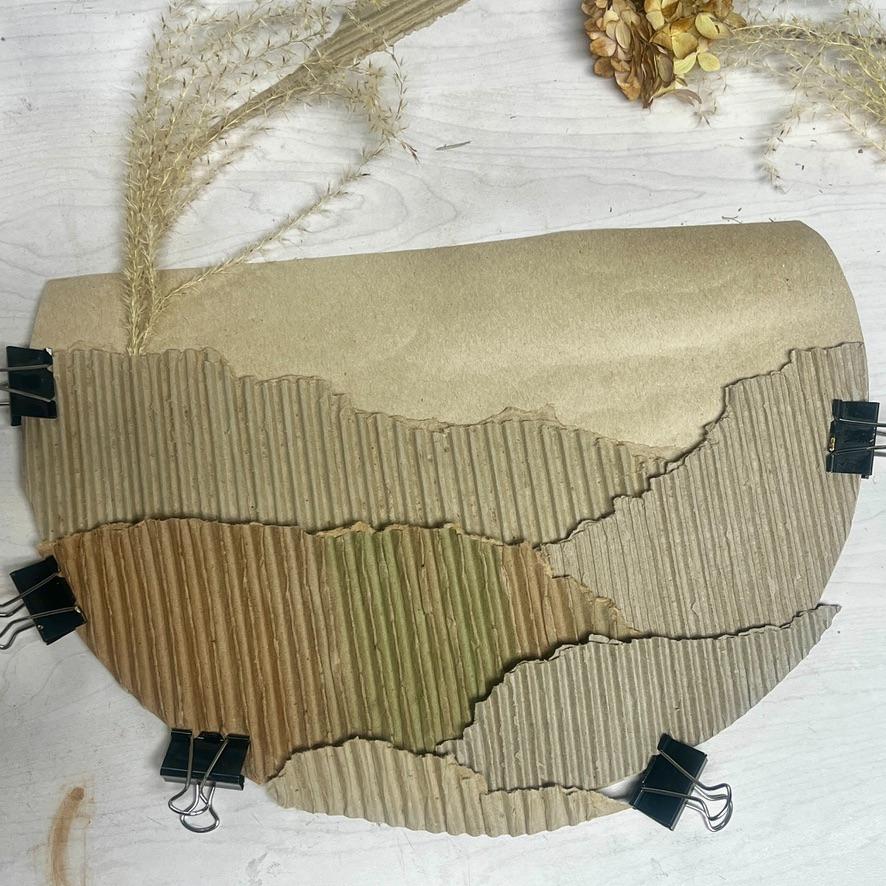
Step 6) Add Color to the Fluting (optional) –
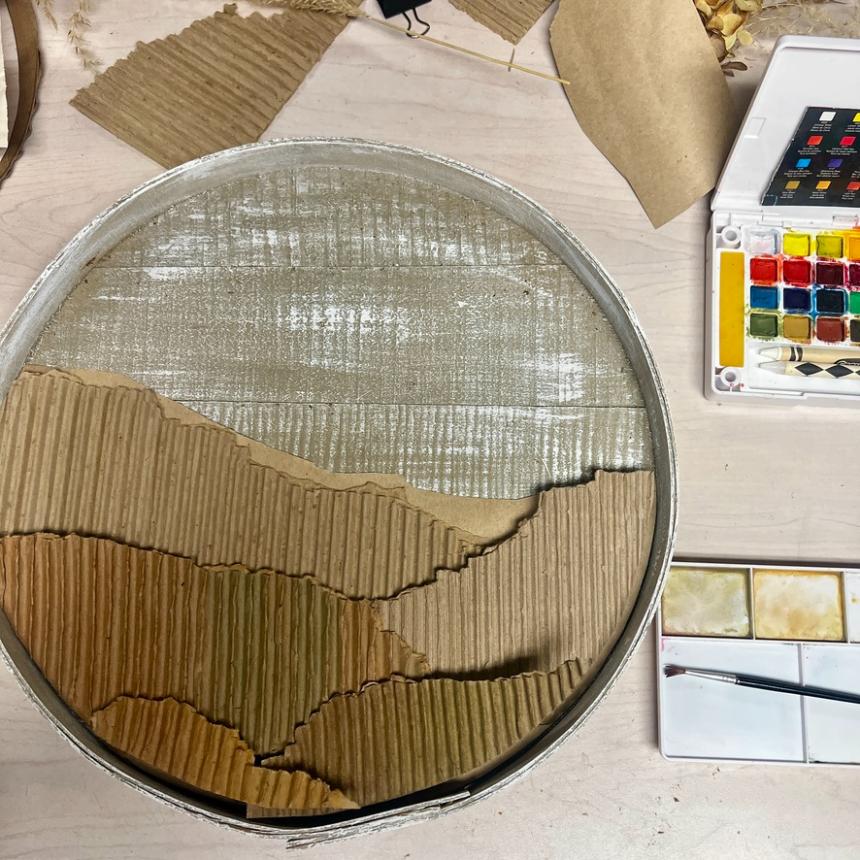
With your fluting layered together (not glued yet), decide if it wants more color.
There’s no wrong answer here — some pieces might want moody and dark, others might want just a light wash of a fall tone.
I experimented with wood stain on one end of a test piece, then tried watercolor over the same piece just to see what would happen. Turns out I liked the watercolor blend so much, that test piece — minus the stained end, became my third layer.
The two smaller front pieces got a watercolor bath too, one green and one gold.
Consider this step your permission slip to just try things on a scrap piece before committing.
Step 7) Glue the Fluting to the Backer –
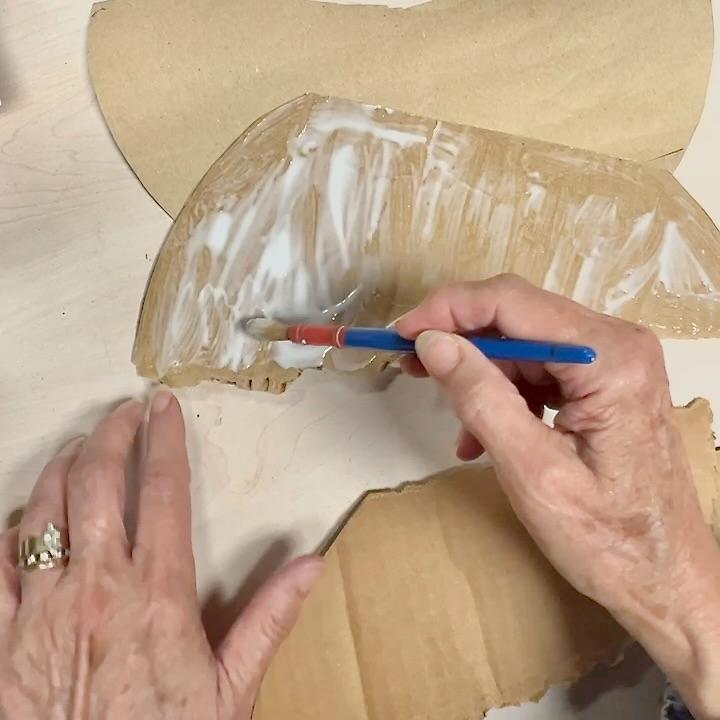
Using plain white glue, spread a thin layer across the back of your first (largest, backmost) fluting piece.
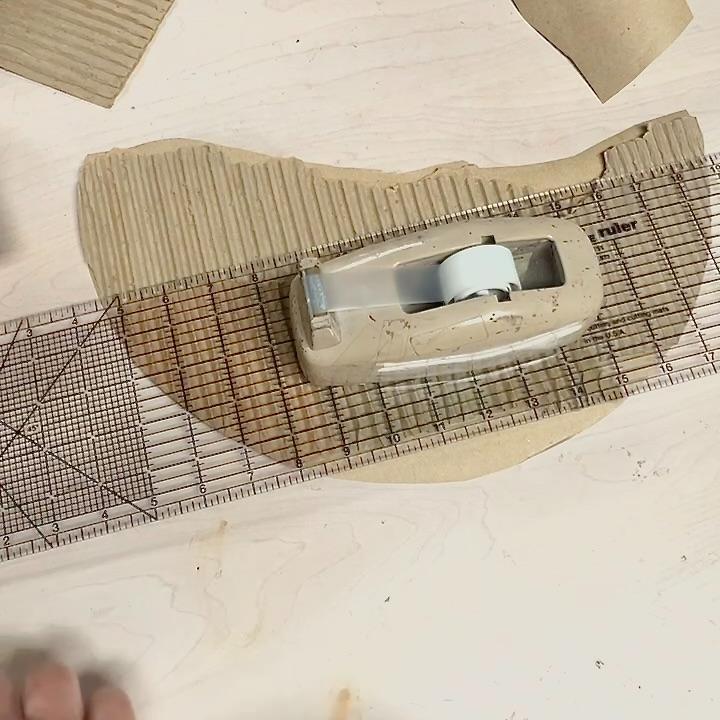
Line it up with your pencil mark and freshly cut edge, then add some evenly distributed weight on top while you prep the next layer.
Lay the next piece in place, redistribute the weight, and repeat until everything’s glued down — using your reference photo as a guide if things start to blur together.
Keep those verticals actually vertical the whole way through.
Step 8) Fit the Backer Into the Lid –
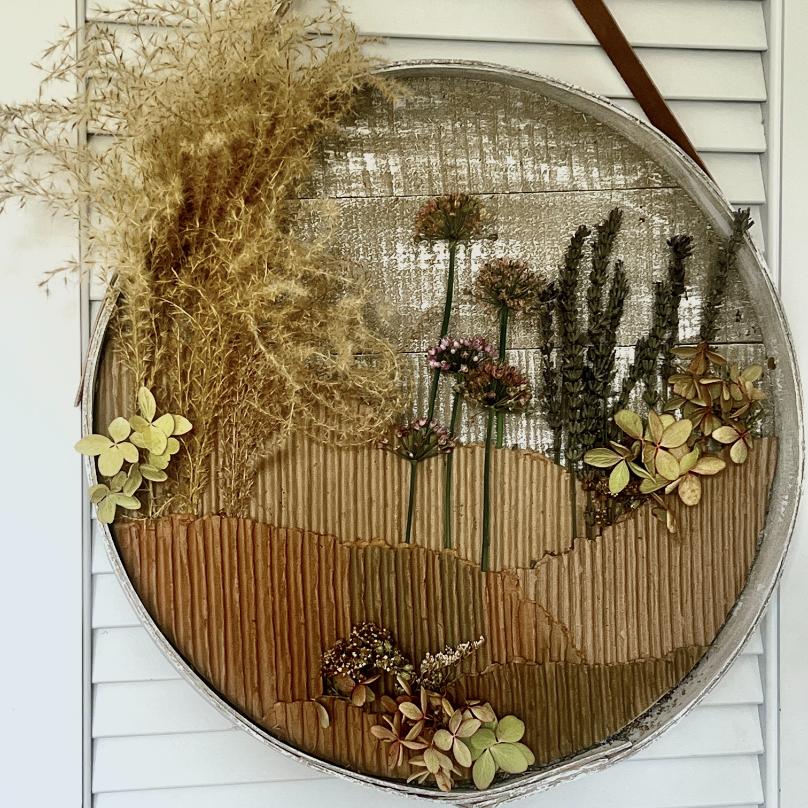
Once the glue is fully dry, it’s time to deal with any excess backing — and there should really only be excess up top, above where your torn layers end.
Tear that top excess off along the natural tear lines of the cardboard so the edge stays consistent with the rest of your torn texture.
If your backer’s too thick to tear cleanly, cut it with scissors instead, just make sure it doesn’t peek out above your torn lines.
Set the whole piece into your box lid. It will probably need some securing in place. You can use basic glue or a couple of short tacks.
CAUTION: If you go the tack route, measure first — a tack that’s too long for your lid’s depth will poke straight through the back and out the other side.
Simple math on tack length versus lid depth, nothing more. I used very short upholstery tacks and they worked great, but check yours before you commit to more than one.
I went with tacks instead of glue here, mostly because it means I can pull this backer out down the road and reuse the lid for something else. A small thing, but future-me appreciates present-me’s restraint.
Step 9) Attach Your Hanger –
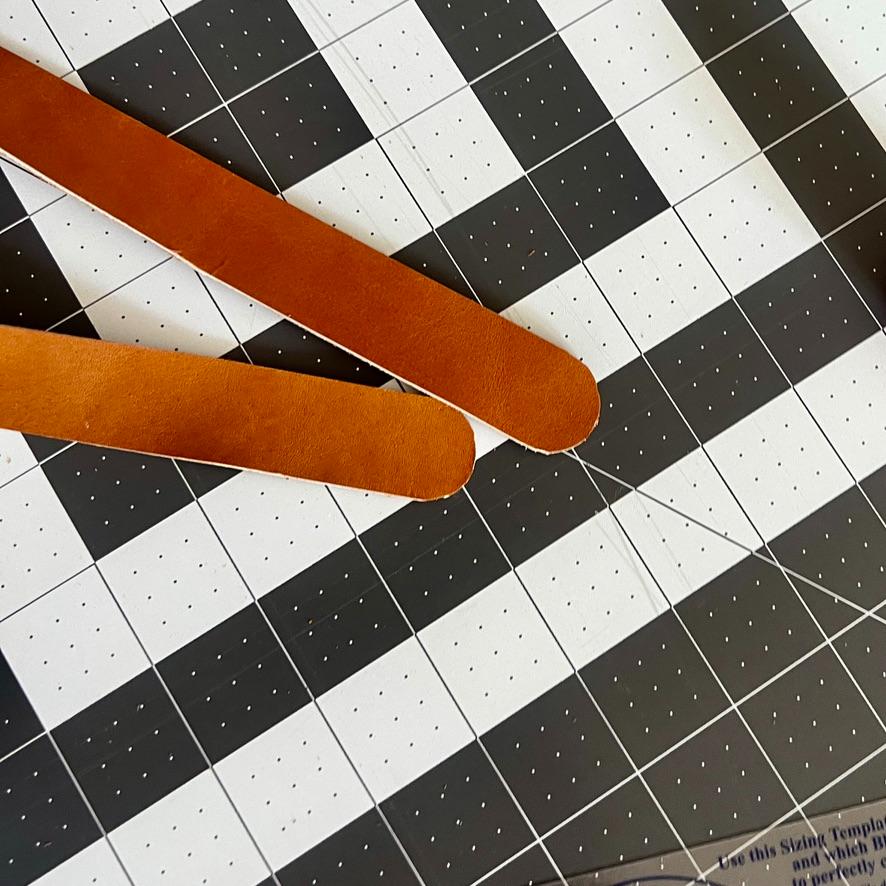
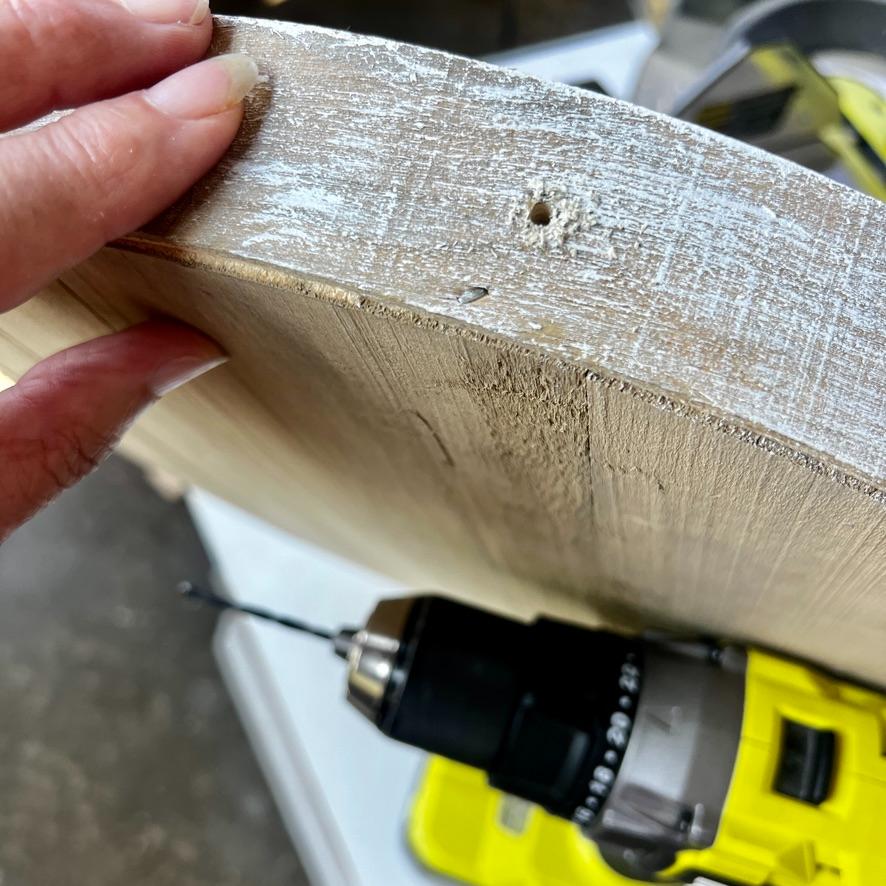
Leather strap or jute cord is my first choice for this one — it fits the handmade, foraged feel of the piece far better than hardware-store shiny ever could.
I cut my leather ¾-inch wide and 30 inches long, rounded the ends, then punched holes and drilled matching holes into the box lid edge to set rivets at each end.
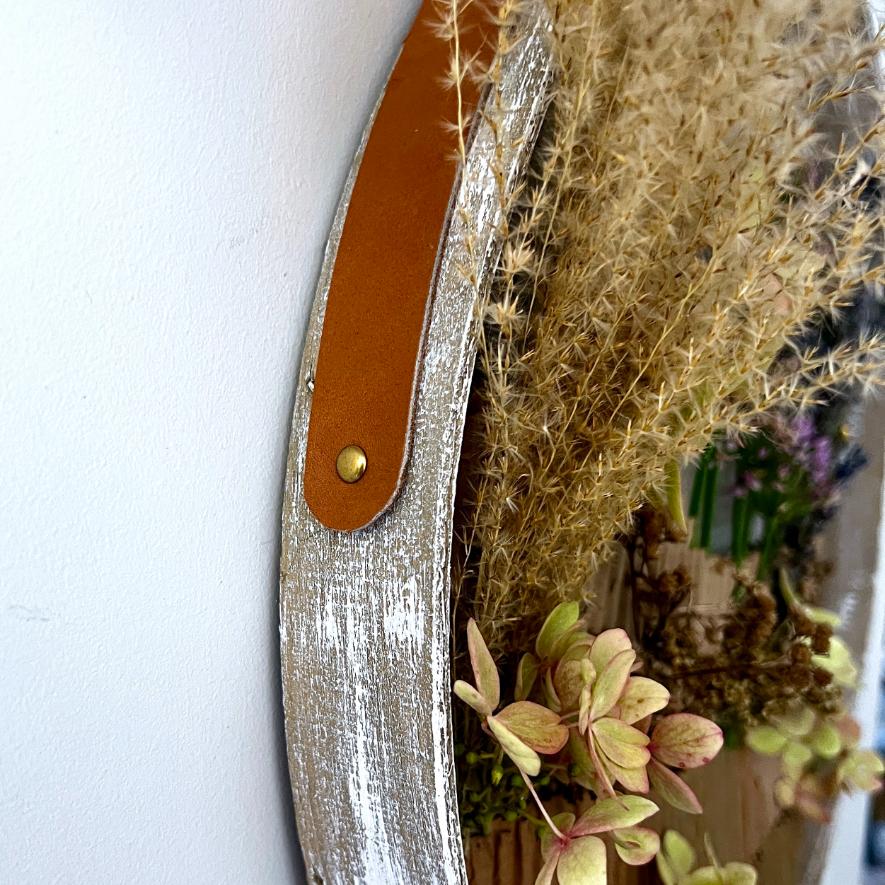
That’s it — no special hardware beyond the rivets themselves.
If you’d rather skip the rivets, a basic picture hanger glued to the back of the lid works too. Just follow your adhesive’s instructions for a secure hold.
Step 10) Insert Your Dried Florals –
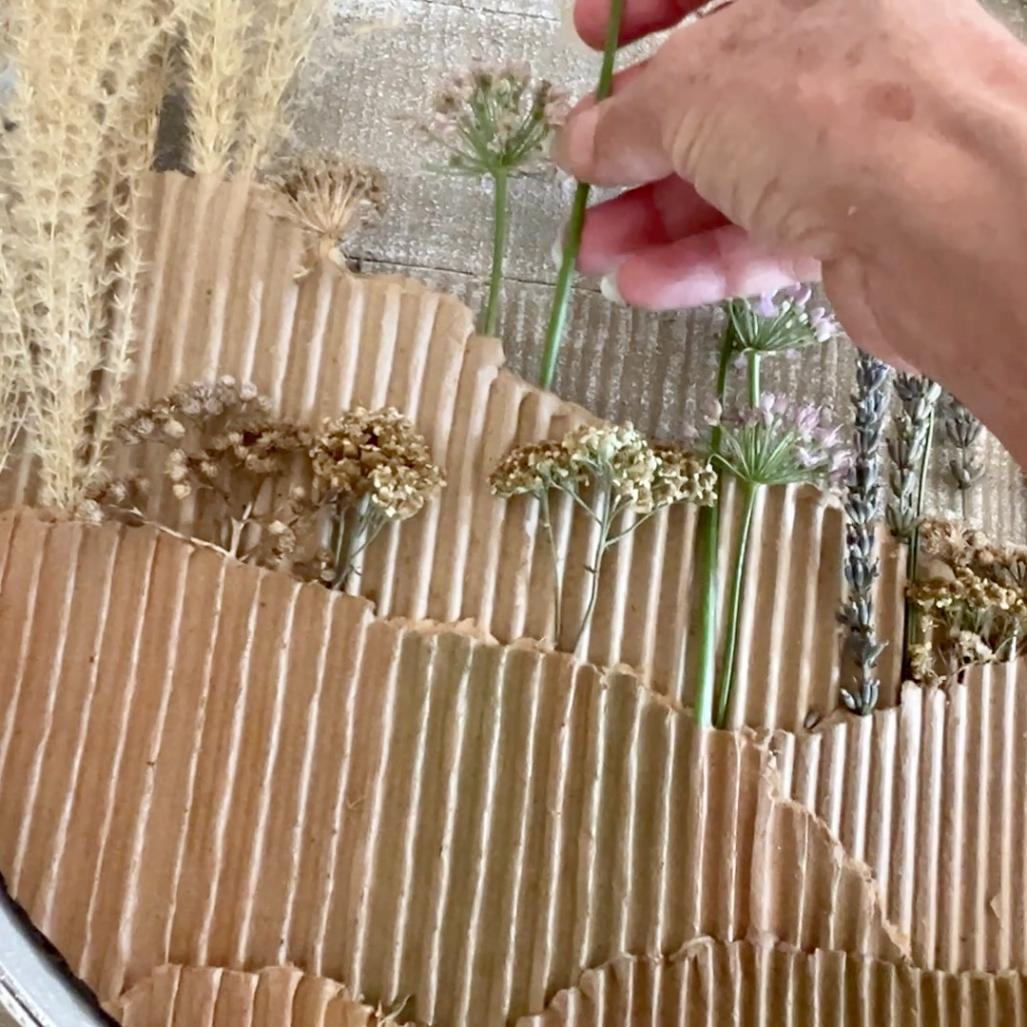
Now for the fun part — tuck your dried allium, yarrow, hydrangea, and lavender into the fluting “vases,” playing with height and color balance until it feels right.
Don’t feel locked into my list, either. Any natural material that dries well works here — whatever you find drying on your own walks, in your own yard, in your neck of the woods. That’s really the whole point of foraging: you use what’s actually around you.
A couple of things I learned along the way:
You don’t need the whole stem. My hydrangea blooms were much too big to tuck in whole, so I broke off individual blossoms instead and used those.
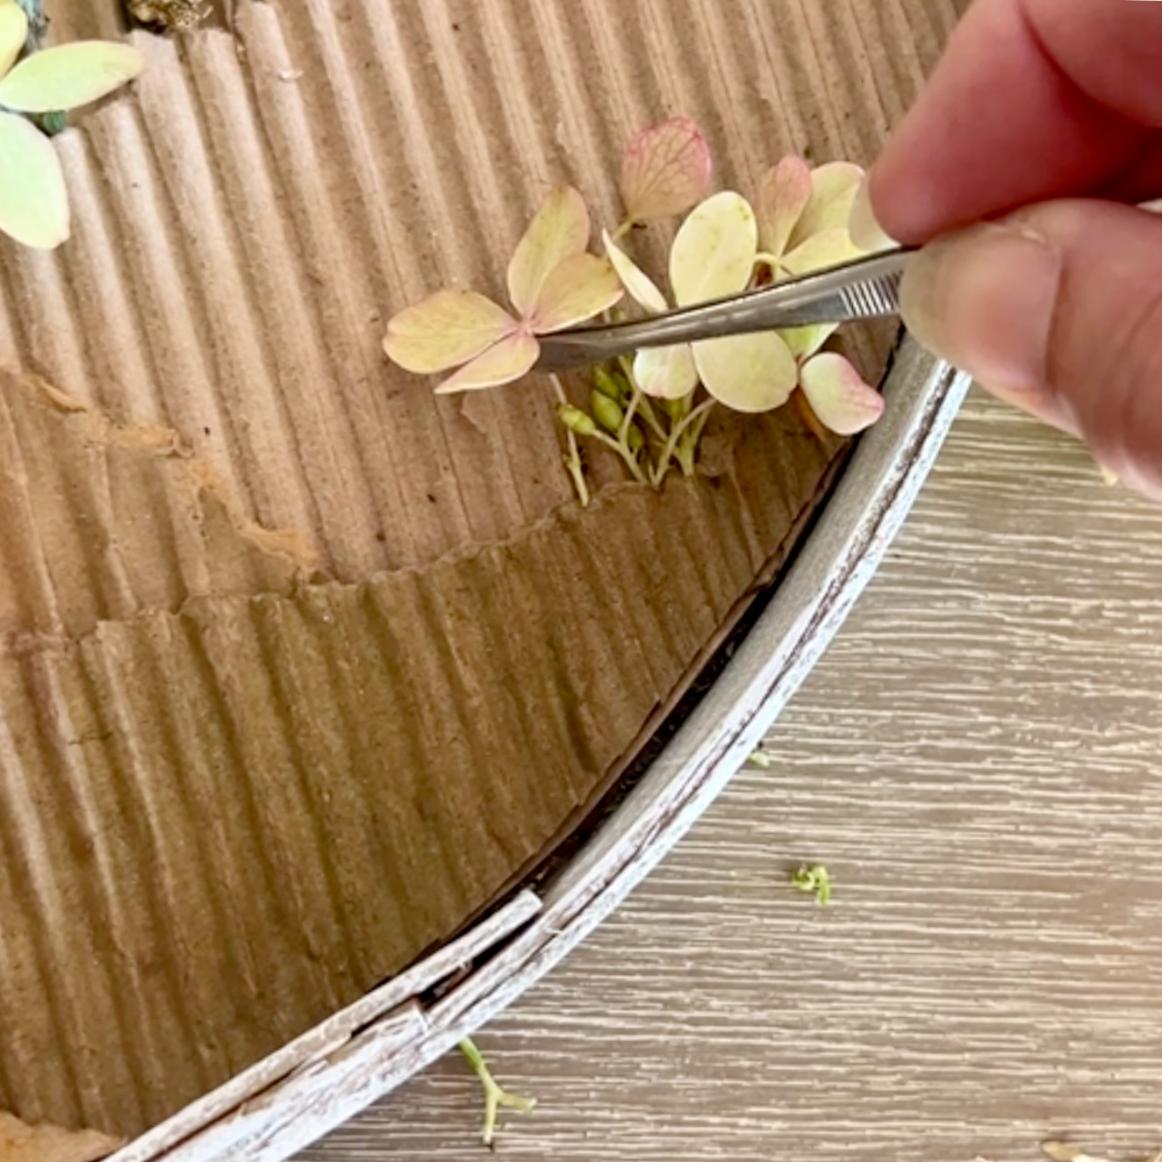
If a stem’s too thick, or has nodules running down it that won’t let it slide into your tiny tall “vases,” trim it down a bit with sandpaper or a sharp pair of florist scissors.
PRO TIP: A pair of tweezers makes it much easier to place small, delicate stems exactly where you want them rather than fumbling with fingers alone.
Styling Ideas for Your Alternate Wreath
This piece is more flexible than a traditional wreath, since it’s not locked into “door” duty. A few ways to let it live in your space:
- Wall-mounted, gallery-style — hang it among framed art or mirrors rather than alone; the texture holds its own next to flat pieces
- Leaned, not hung — prop it on a mantel or shelf against the wall for a softer, more casual look, especially nice if your leather strap has some length to spare
- Door duty — it’ll do the traditional wreath job just fine too, if that’s the spot that’s calling to you
And how you arrange the florals is up to you too. What’s your personal style?
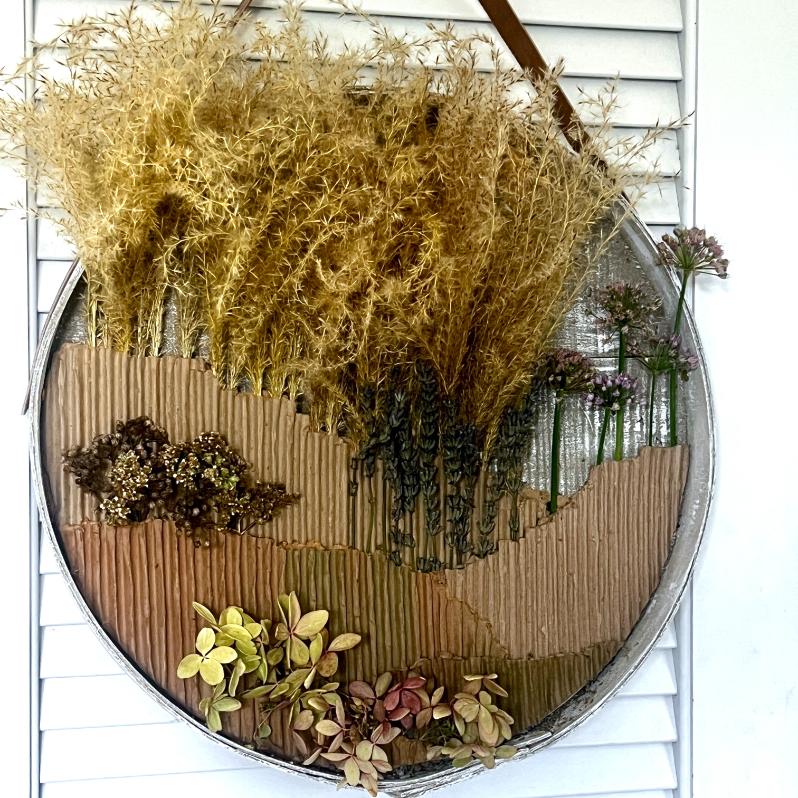
Do you prefer orderly, and grouped with each variety growing on its own hillside?
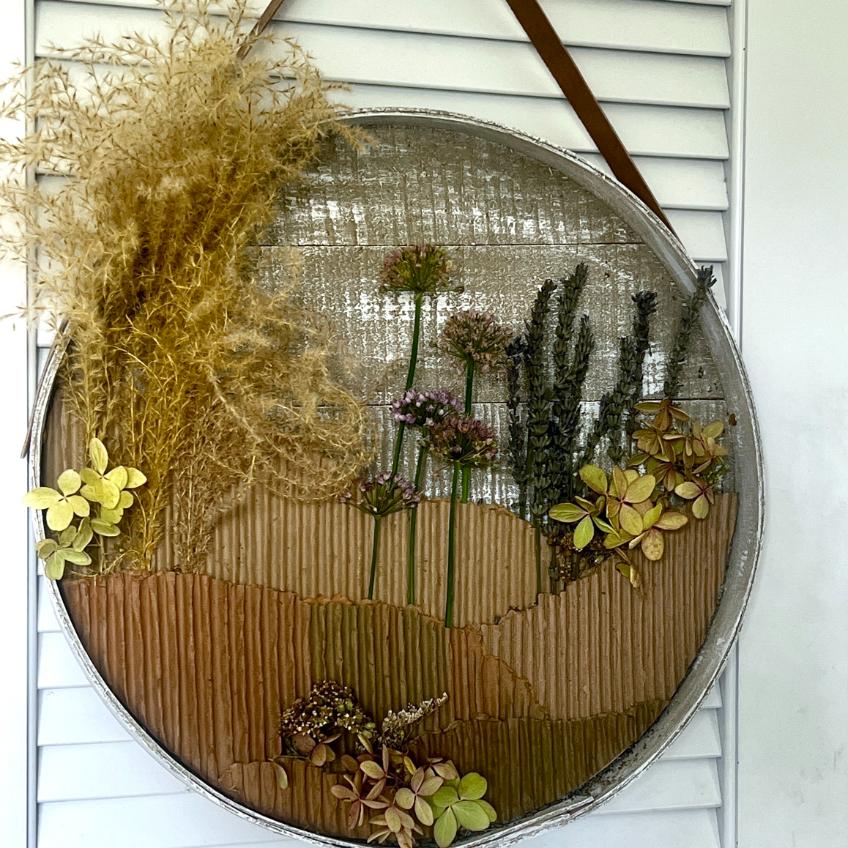
Or perhaps a bit more airy and not quite so structured with repeating hydrangea blossoms to keep the eye moving throughout?
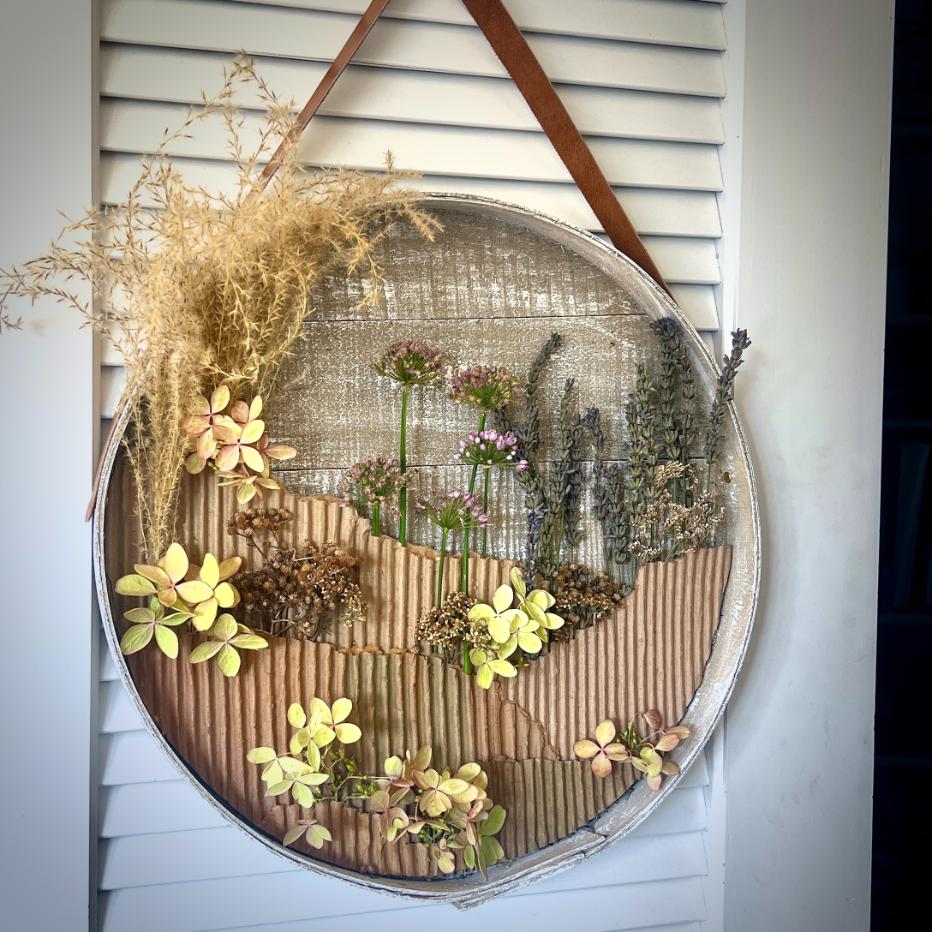
Or are you more the English garden kind, with lots of variety growing wherever the wind scatters the seeds?
Since your dried florals aren’t glued in, this is also a piece you can refresh — swap in different blooms as the seasons turn without redoing the whole base.
A Quiet Word on Foraging Florals & More
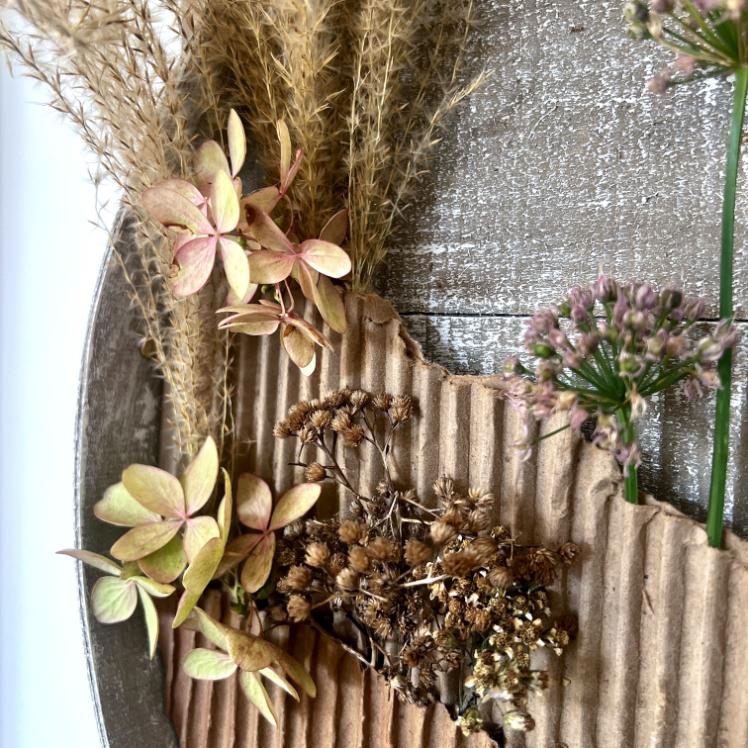
There’s something uniquely satisfying about a project built entirely from what was already around — a walk through the yard, a stack of boxes about to leave for the curb.
No shopping list, no rushing.
Just noticing what’s there and letting it become something.
Florals are just the tip of the foraging world’s beauty.
I’m a sucker for seed pods — total rebels and survivalists. Add in pine cones and berries, grass and feathers, leaves and ferns, and you quickly realize the choices are endless: different textures, different scales, even soft colors you’d never expect.
Once you start really looking at your surroundings this way, your yard becomes a supply run with scenic view rest stops along the way.

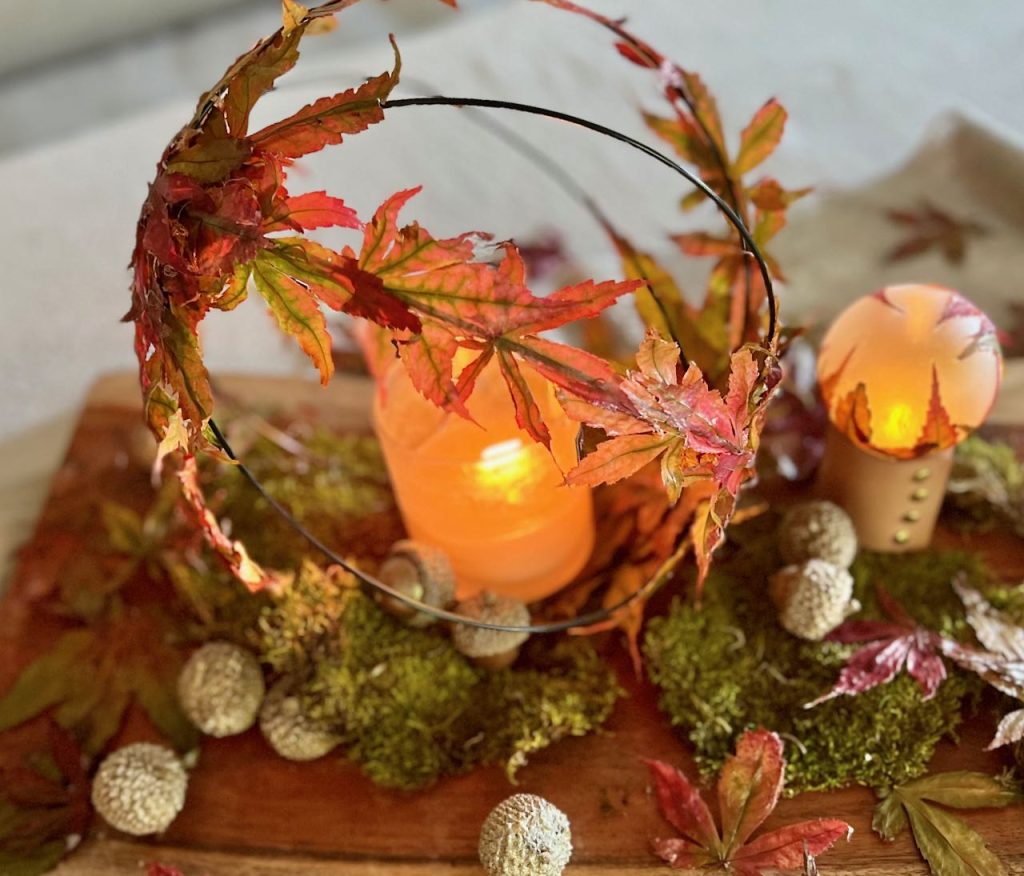
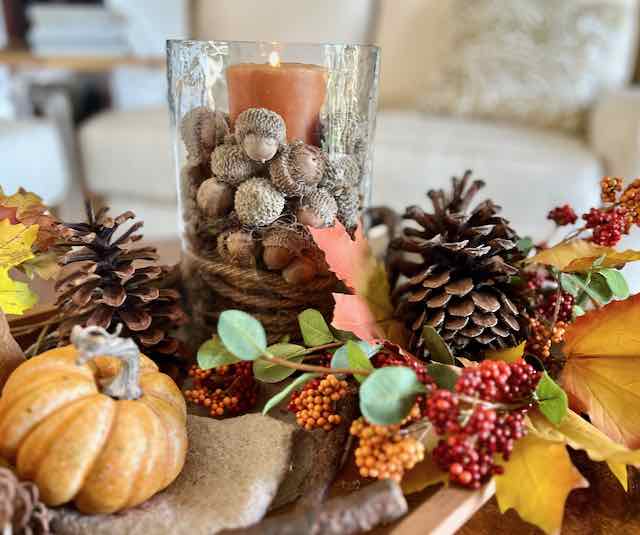
And don’t be afraid to go big with foraged florals. This entire tablescape was foraged and free! (one of my personal favorites)
That’s really the heart of this month’s Handcrafted Society Challenge, and maybe of foraged crafting in general.
The slowness is the point.
You’re not racing a supply chain or a shipping date — you’re working at the pace of what dried in your own garden, on its own schedule.
And just look at the variety of foraged projects the Handcrafted Society gals came up with:
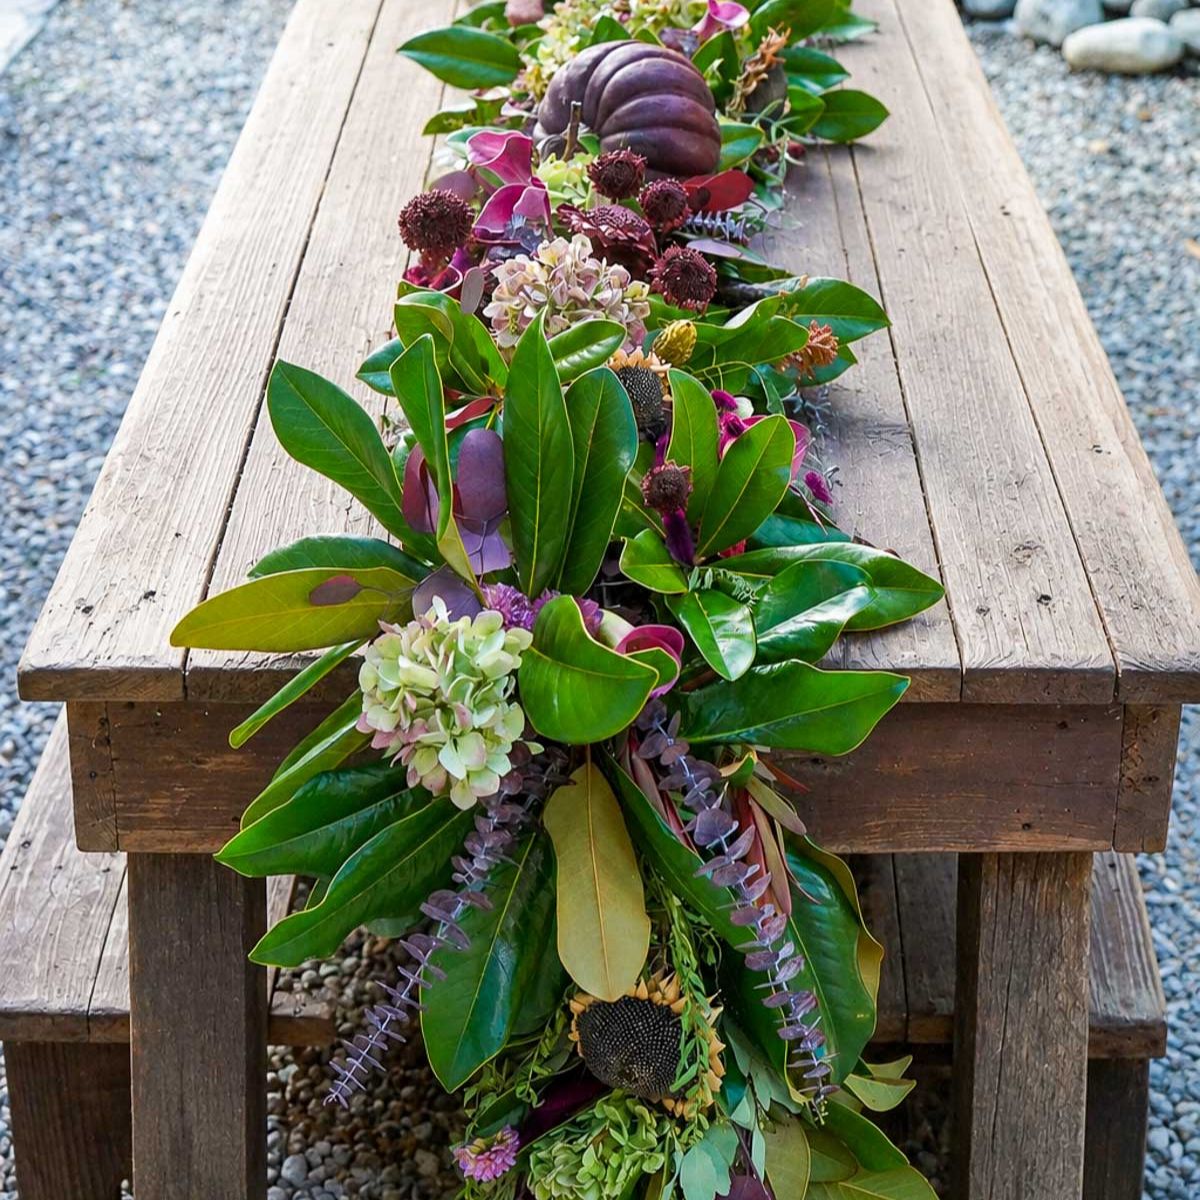
Wendy @ WM Design House
Wendy never goes small!
And this is no exception! A table runner of foraged greenery. A true showstopper.
Oh my, can you tell we live in different parts of the country?
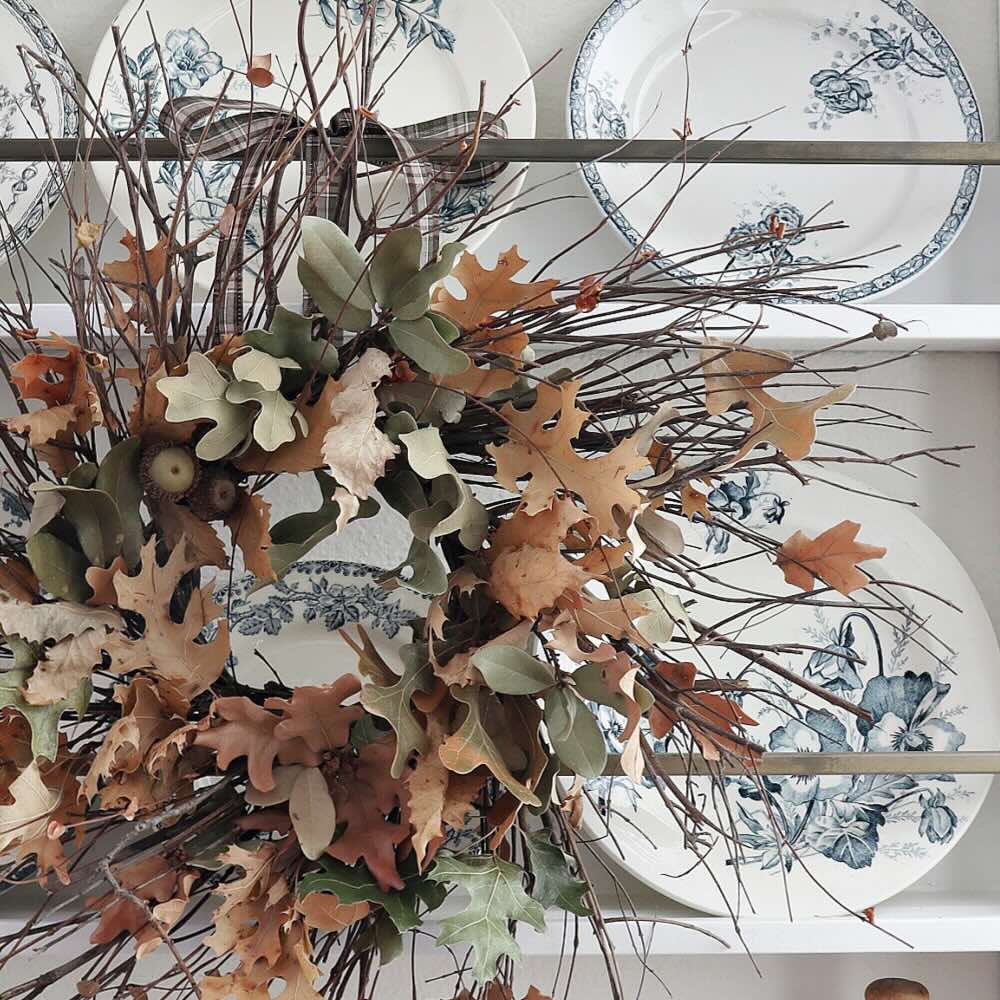
Michelle @ Thistle Key Designs
Michelle always has such a way with colors!
This wreath is just another example and foraged! Can you even believe it?
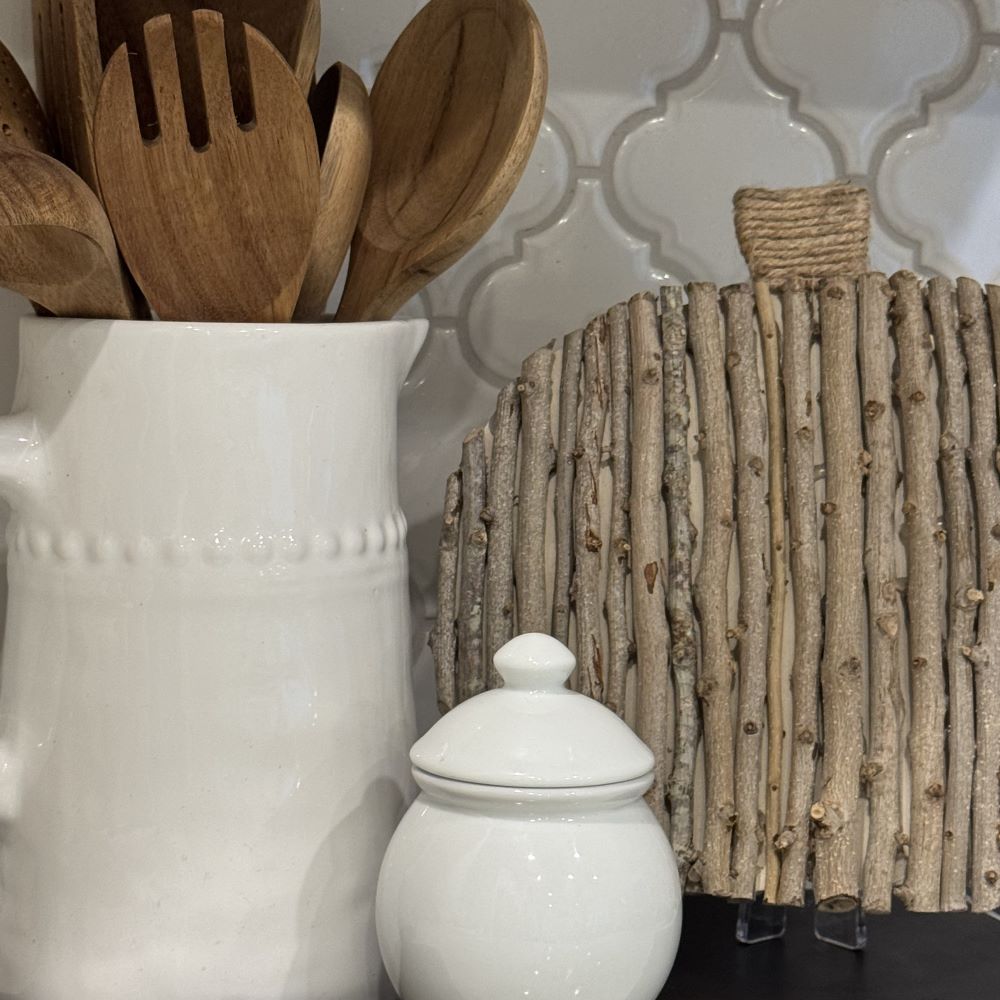
Donna @ An Organized Living
Donna shares how she created an inexpensive wood pumpkin with foraged twigs from her yard to create a textured, natural piece of fall decor.
Simplicity for the win!!!
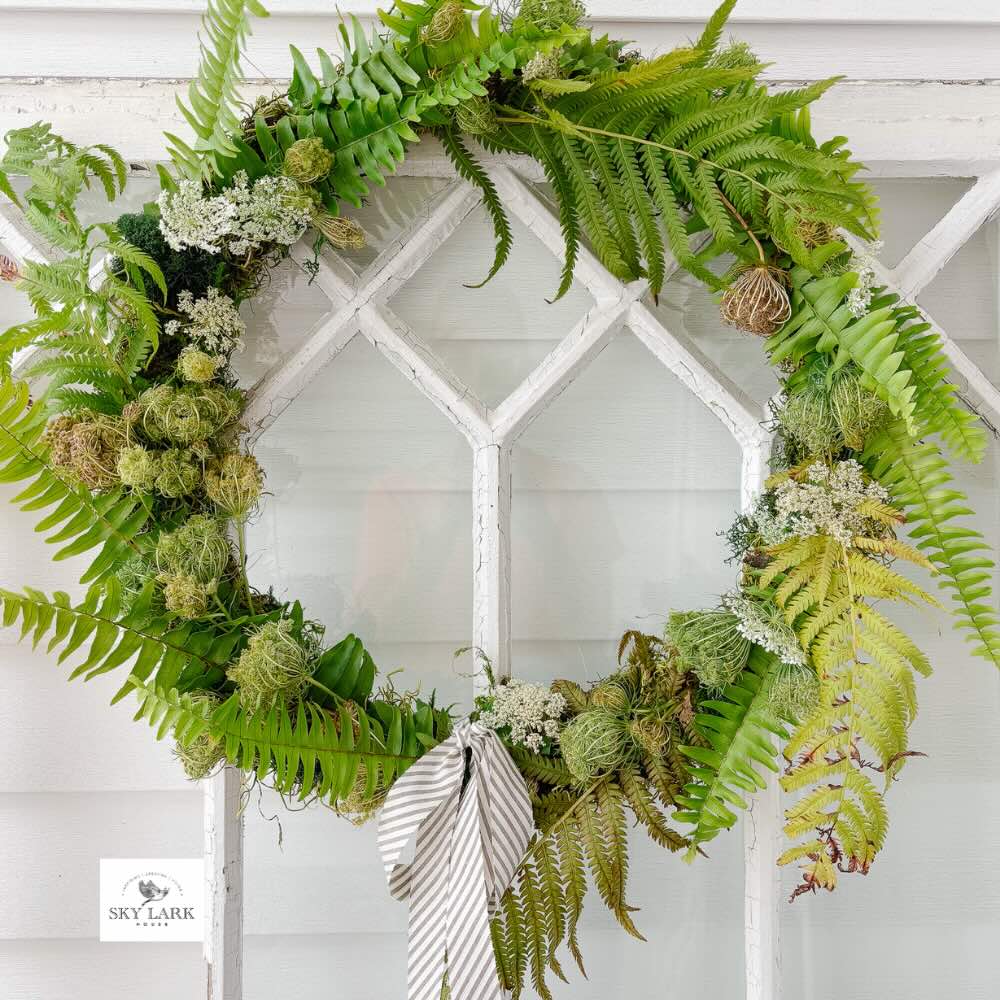
Anna @ Sky Lark
Anna shares her easy and affordable wreath that she created using foraged Queen Anne’s Lace.
I hope you are feeling inspired to take advantage of all the gifts nature provides.

More Foraged Projects to Enjoy

This is such a fun idea, Diane! So creative to use a cheese box lid as the base! I never would have thought to use cardboard like that, but it makes the perfect little mini “vases” for dried floral stems! Happy fall!
This is adorable Diane, I love how you upcycled the cardboard and added your foraged flowers, moss and greenery for the perfect touch. Using a cheese box lid was so creative.
Diane this is a fantastic project with gorgeous results! The texture created from the cardboard, and the florals you picked compliment each other so well! Thank you my friend for a wonderful tutorial and an inspiring post!
Hi Diane – I love your sense of humor and whimsy you incorporate into your writing. I chuckled at nominating cardboard for best supporting actor. The cardboard does a great job at adding texture AND securely displaying the dried florals. Your wreath alternative is a little boho x cottage style x anthropologie. Thanks for sharing another inspiring project!