
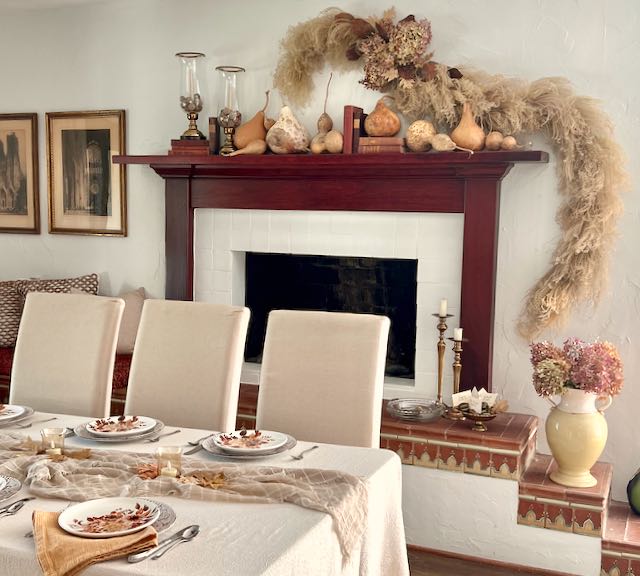
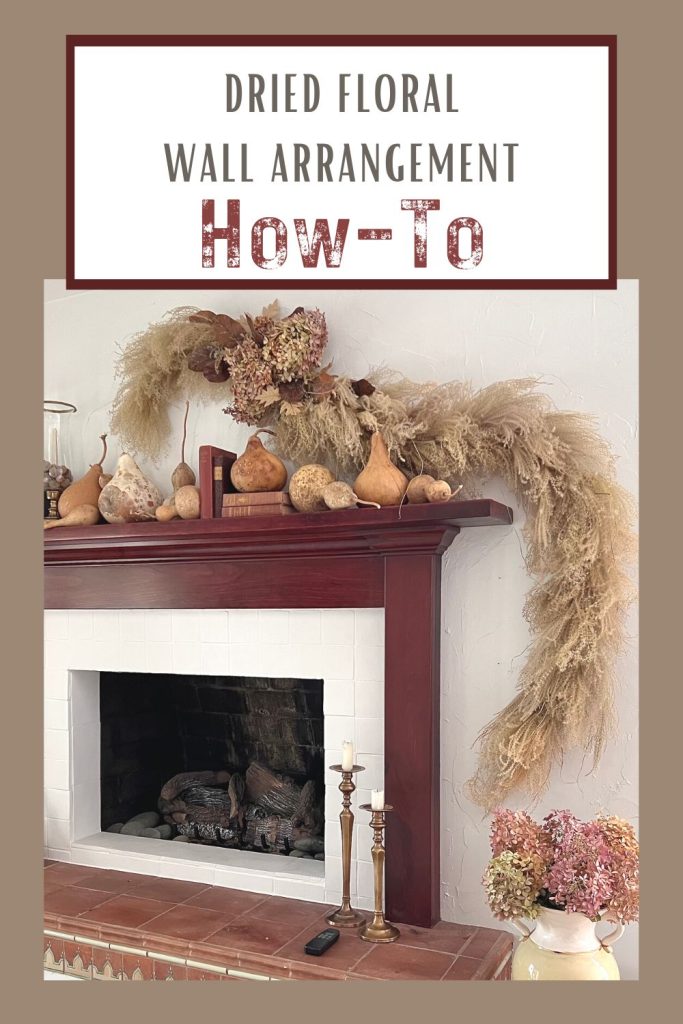
Easy to Make: A Beautiful Dried Arrangement on the Wall!
Problem: The table so full of dishes, there’s no room for a pretty centerpiece. Solution: Hang it on the wall by the table. It’s dramatic, it’s stunning — and soooo easy! Did I mention this one was FREE?
Yes, free. I foraged all the materials. What do I mean by foraged? Just that I cut and gathered the materials out in nature, mostly our yard and our friendly, generous neighbors’ yards.
You won’t believe how simple project was. I sure was surprised.
I’m so excited to share how I made my wall-hung centerpiece.
Centerpiece?
That’s right! My inspiration came out of my disappointment over no room on the Thanksgiving table for a lovely centerpiece.
To me, a stylish table is a great way to say this is a special occasion. It says we value our guests and want to celebrate our time together.
When most people think about a centerpiece, their first thought is to buy fresh flowers. I’m not like most people, because I’m actually rather cheap — and buying fresh flowers is not!
I like to use my own flowers from the garden and in the Fall that means ornamental grass flower heads, dried hydrangea blooms, and lots of dried lambs ear too.
Yes, Lambs Ear dries beautifully and it is so fun to work with. So much fun I even compiled a list of 13 charming decor items to make with Lamb’s Ear.
So when I realized I would not be able to put even a modest sized dried flower arrangement on the Thanksgiving table, I decided maybe I could hang it over the table. And if the centerpiece would now be a wall hung dried floral arrangement, I should scale it for a wall, rather than a table.
Let’s Make a Wall Hung Dried Flower Arrangement
Best thing is how quick and easy it is (just four easy steps) and uses minimal materials and almost no supplies.
Talk about a beautiful way to bring some seasonal accents to your home decor!!!
Materials and Supplies-
- Dried ornamental grasses and dried flowers and greens of your choice
- Length of chicken wire and wire cutters or needle nose pliers, or chicken wire ribbon
- Painter’s tape, optional
- Scissors
- A picture hanger or nail or two, or command strips
THAT”S IT!!!
NO need for any of the usual:
- no styrofoam or oasis
- no florist wire
- no florist pins
- no glue
- no hot glue or hot glue gun
- no floral tape
TIP: Just like when cutting flower stems, cut the grass so they have longer stems that you think you’ll need. Then cut off any excess foliage and stem length as you go.
About the Grass and Hydrangeas
Almost any ornamental grass will work for this diy project.
The grass I used is Yaku Jima. When it first blooms (usually October) here (Kansas City), it has a pinkish red hue and the plumes are silky and rather smooth.
The grass can be harvested any time after the heads have bloomed. But the best time to harvest the hydrangeas depends on the color you want, but you do need to cut them before any hard freeze when they turn brown and shrivel.
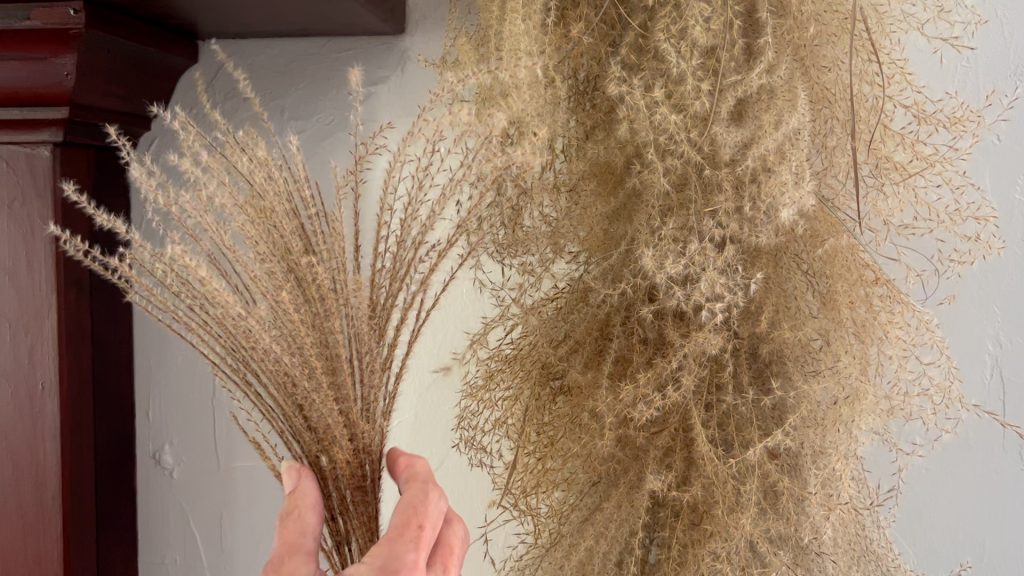
As the flower heads mature the individual plumes feather out. After they are cut and start to dry they turn more light golden in color and the plumes begin to curl a bit.
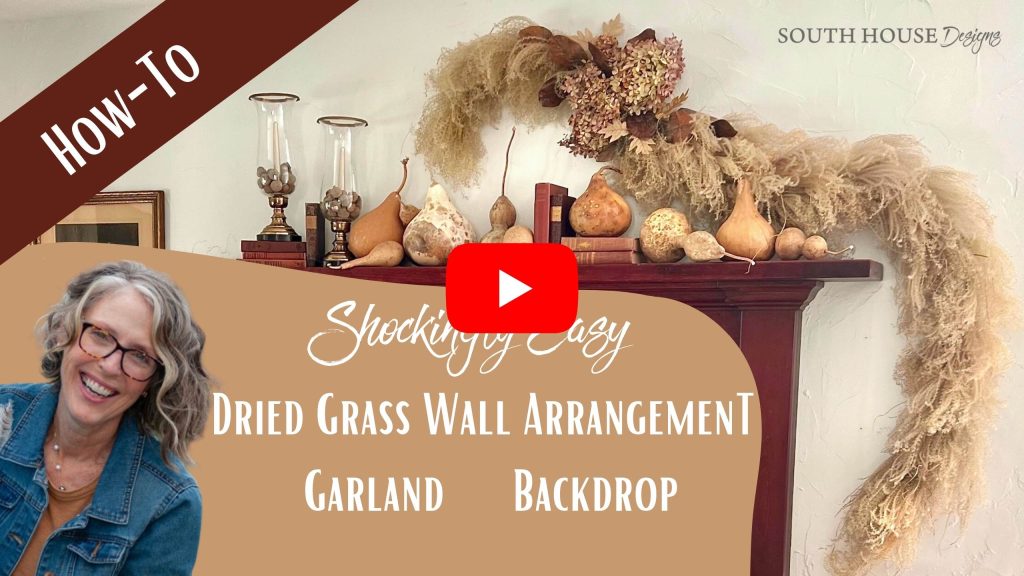
Do You Prefer Video For How-To’s?
No Worries! I’ve Got ya. Just the image below:
Step 1) Design-

Start with a general Idea of what you want in your head.
If you tend to overthink things, do as I did and use some painter’s tape to mark the general shape of your arrangement.
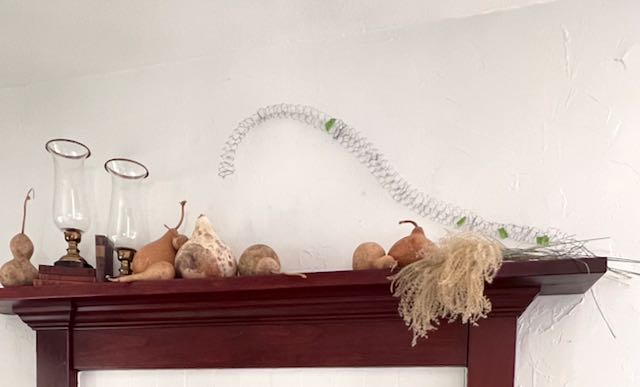
Decide where you want your focal point, centered or off to the side.
I opted for my focal point to be on the right side of the mantel, to balance the pair of hurricane candleholders on the left side.
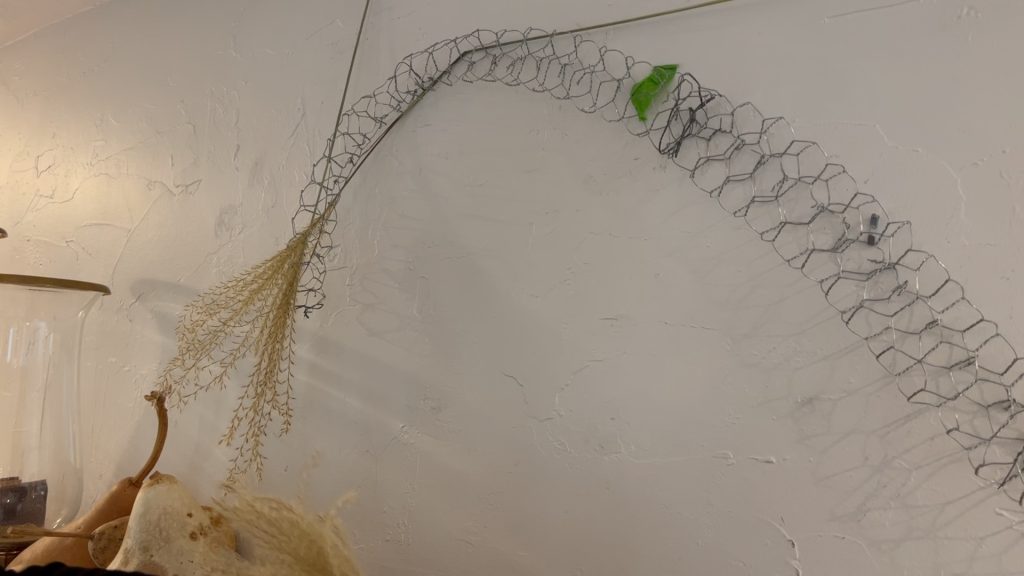
Step 2) Infrastructure-
This is the hardest part of the project. And it’s not very hard at that!
I used a piece of chicken wire that I cut in strips, connected the strips together and and then rolled into a long thin tube. I mounted this tube on the wall following the general guideline of my painters tape.
My tube is attached to the wall with two existing picture hooks and then a couple of small snippets of painters tape over a single piece of wire.
TIP: Use existing picture hooks or add a new one behind where a picture would normally hang once the arrangement comes down or command strip hooks.
Your entire arrangement does not have much weight to it.
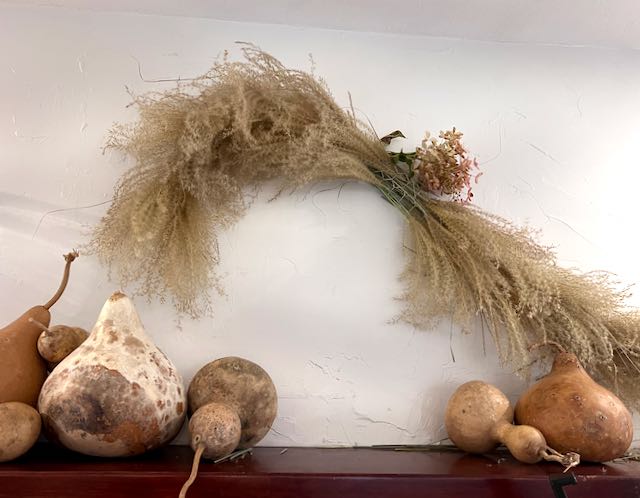
Step 3) Creating the Dried Grass Garland-
Start at one end, insert the stems of a couple of pieces of grass into the tube. Once you have several pieces placed they tend to link together and none fall out. then you can start arranging in small bunches of two or three stems.
Don’t worry about the length of the stems. Insert a bunch and then go back and snip off any stem that is sticking out too far. As you work your way along the tube, the grass heads will cover the stems of the previous ones.
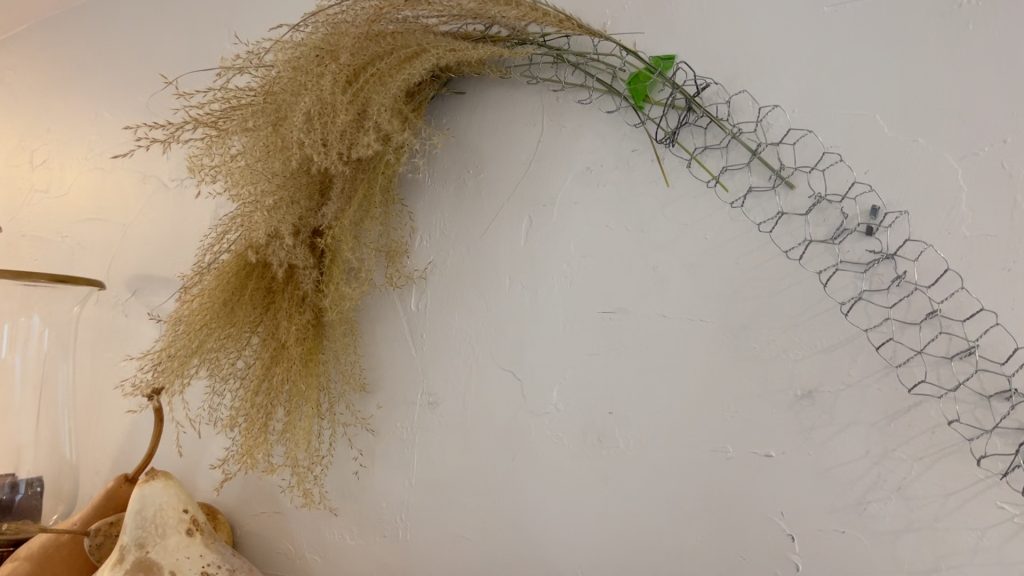
Continue this way, over and over. Periodically, stop and clip any stems that stick out. And add another dried grass head or two wherever it looks a little thin.
TIP: If you need a stem to follow a curve, squeeze the stem between your thumb and index finger and pull along the length of the stem to break the stiff fibers inside the stem. Now it will bend as you need it to.
Once you reach your intended focal point. stop and begin go to the other end of your chicken wire tube and start this end the same as the first.
Continue until the stems meet in the middle.
A quick pause: Are you enjoying this? Would you like more great “makin'” projects? Please subscribe to be up on all the fun, plus 24/7 access to my Printable Library:
Many thanks! Now on to our focal point:
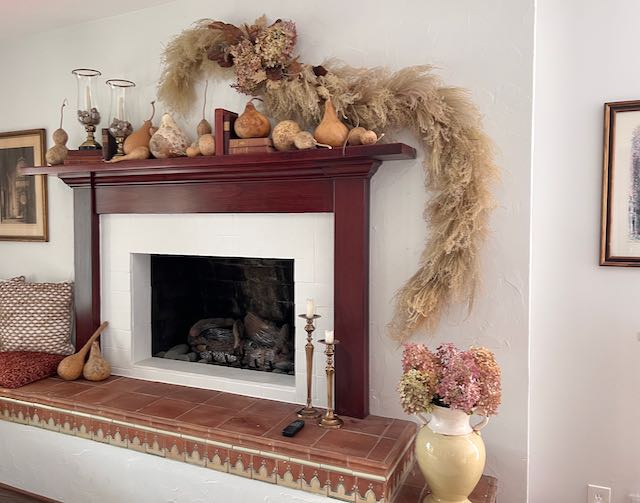
Step 4) Finishing With the Focal Point-
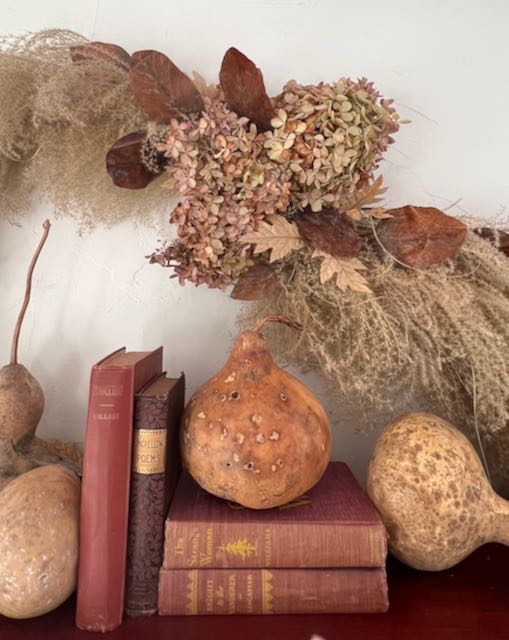
I used dried hydrangea blooms, a few neutral colored faux leaves and some dried magnolia leaves for my focal point.
I chose these because they brought in various textures that were all different form the grasses. And they carried the color scheme of the books and gourds up onto the wall-hung arrangement.
Choose items that work with your style, match your event or that you have on hand. There are lots of options for your focal point:
- gorgeous ribbon
- large shells
- interesting weathered piece of wood
- Herbs, such as rosemary and lavender
- seed pods
- small gourds
- large leaves
- pinecones
- interesting ornaments or bulbs of natural type materials
Other flowers can work, but I would recommend larger flowers to provide contrast to the delicate wispy grass heads. I’m not sure that dried straw flowers, yarrow or statice will provide the contrast to the grass you may want. However, they are great dried flowers for all kinds of arrangements.
For my focal point, I stuck the stems of the dried hydrangeas into the chicken wire just like the grass. The short stems of the leaves were enough to tuck them into the grass.
Depending on what you use, you may need to wrap wire around them to create a substitute stem to tuck into the chicken wire. Or twist wire through the tube and then around the object.
HINT: If your object has much weight to it, you may need a picture hanger at the focal point.
Not quite sure about my method? I get it. I like to explore many options also. My good friend Wendy [WM Design House} also made a wall hung dried arrangement. You might want to check out her’s too.
When to Use a Dried Floral Garland?
This has to be one of my favorite projects!
I conceived this as an alternative centerpiece. But I think a beautiful dried arrangement on a wall would be a great option for:
- a wedding backdrop
- a reception backdrop
- a backdrop for photo shoots
- a boho selfie station
- an event entrance
- a party backdrop
- seasonal display
How Long Will the Dried Flowers and Grass Last?
Provided they are out of direct sunlight and in a dry place, the grass and dry flowers will last a long time!
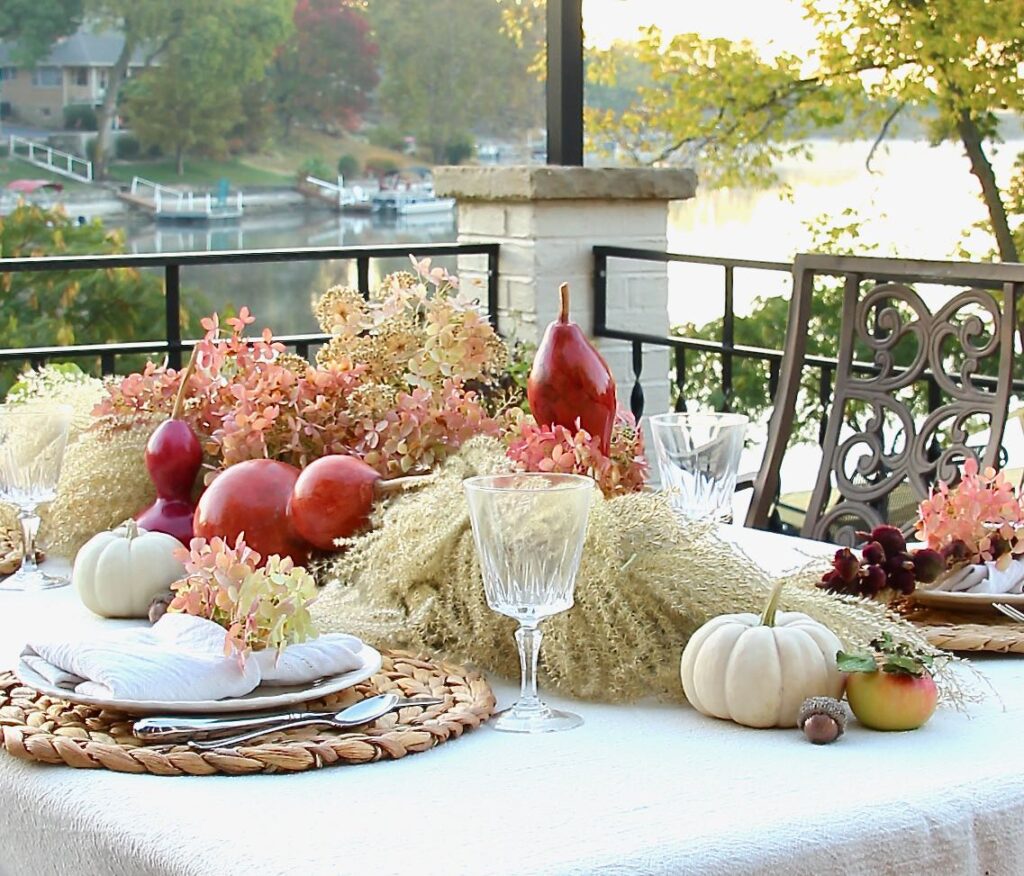
At least a third of the grass I used in my arrangement was held over from this foraged tablescape I did last Fall used used them earlier this Fall for this faux leaf and rope table decor.
Some of the dried hydrangeas are more than two years old.
HINT: When I dismantle dried arrangements, I save any materials I can into tubs in my hobby room. I use them over and over again.
TIP: a good dousing of cheap hairspray on delicate blooms like hydrangeas and grasses that tend to shed help to extend their life.
I am sooo excited about this project. I hope you are too. (It actually looks better in person.)
The Hubs doesn’t want me to take it down until after Christmas. He’s trying to convince me to change my plans for the Christmas tree that will be by this fireplace so the garland fits in with it.
It’s kind of late for me to be changing plans, but we’ll see. I love his enthusiasm and really want to respect and reward it.
Stay tuned for how this works out.
The happiest of Thanksgivings to you and yours,

2 Comments