Adding a Little Whimsy & Playfulness with X and O Drawer Pulls
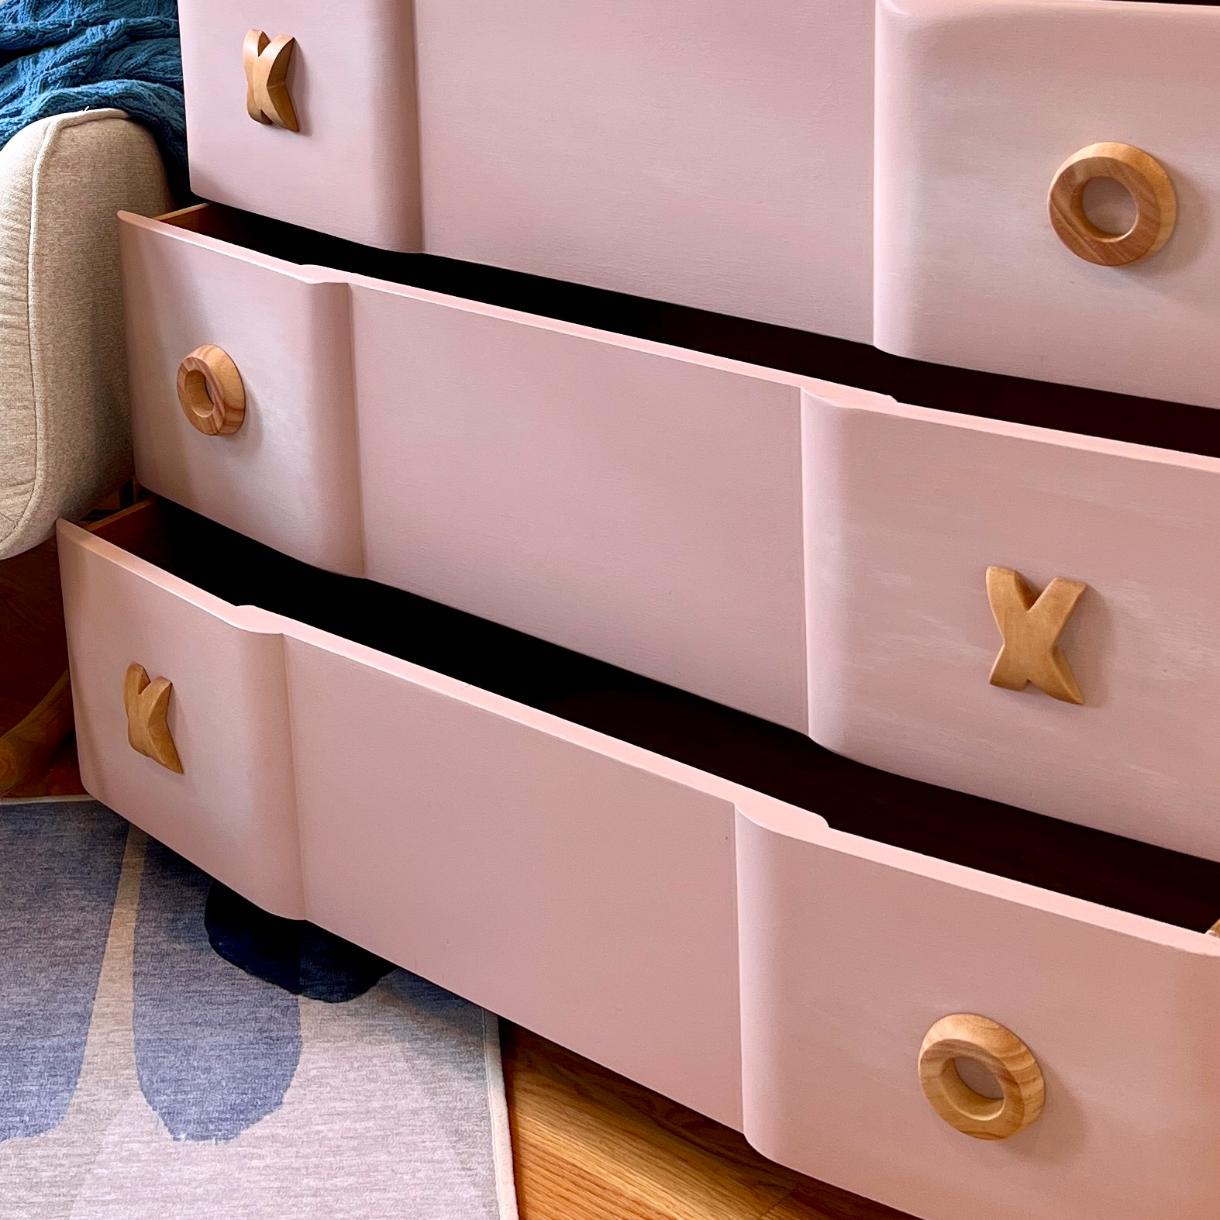
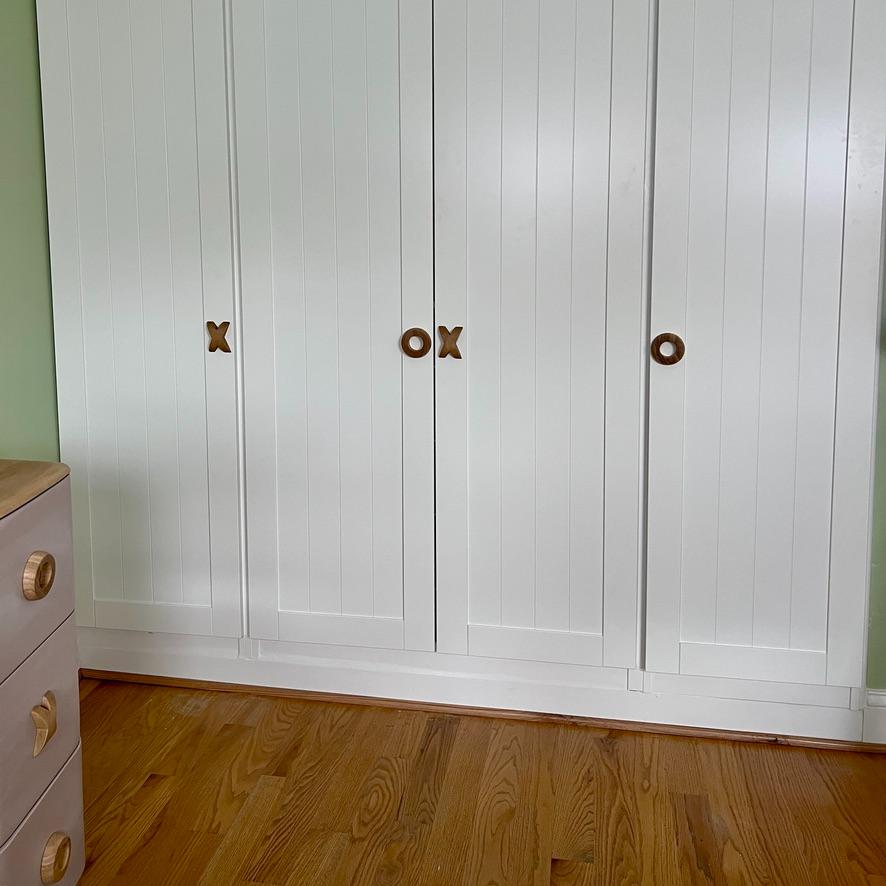
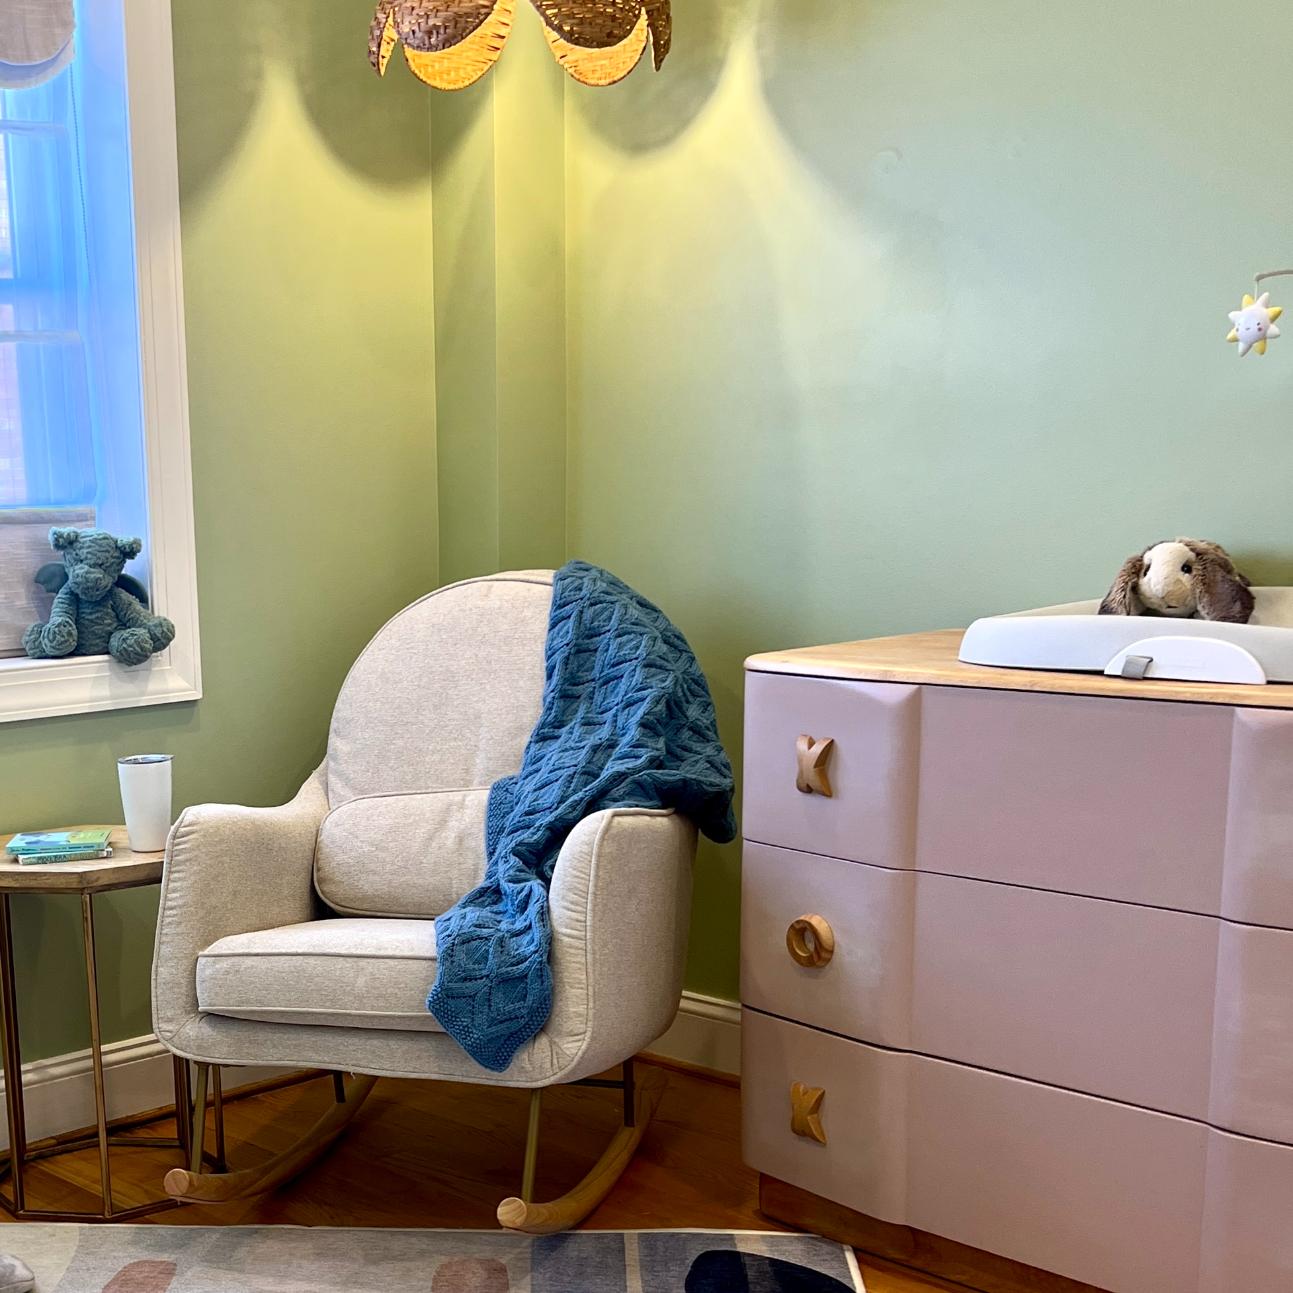
The X’s were hiding in plain sight on a 60-year-old dresser. Turn them vertical, add a handmade O, and suddenly the hardware is playing a game and spreading love.
Tic-tac-toe.
Hugs and kisses.
That’s pretty much my whole X-and-O vocabulary growing up — one the most classic game there is (never mind that our newest Grand is years away from playing it), and the other charming code for hugs and kisses from every birthday card since forever.
Playful and loved-up! Yep, those are two of the feelings we were chasing in Episode 1, right alongside whimsical, imaginative, and soothing.
Guess X’s and O’s had been the plan all along, I just hadn’t figured it out yet.
I didn’t set out to make that connection. It found me.
If you’re just dropping in, we’re turning a home gym into a nursery for my newest granddaughter, and in Episode 5 an MCM dresser became a changing table. Gorgeous, sure. But I wanted playful, imaginative. So I stenciled the drawer sides, for a bit of Peek-a-boo. All that’s left are the drawer pulls.
When I removed the original pulls off my MCM dresser and dropped them in a bag. That’s the first it hit me. Previously, they were horizontal and read as a decorative criss-cross — a shape, not a letter. But when I saw one vertically, suddenly I wasn’t looking at MCM drawer pulls. I was looking at X’s. Real, honest-to-goodness letter X’s.
And once I saw it, I couldn’t unsee it — which meant there was only one thing left to do: give them some an O’s to play with.
The links in this post may include affiliate links, which means if you purchase anything using these links, you pay no extra, but I may receive a small commission that helps keep this blog running. I truly appreciate you using affiliate links whenever possible. Please know that I will never recommend a product I do not believe in!
Home Gym to Sweet Nursery Series:
- The Plan — planning the transformation
- IKEA Pax Closet Wall — turning wasted closet space into real storage
- Mini Attic Storage Space — claiming the space most people leave empty
- Decal + Paint Accent Wall — adding a playful “watercolor” touch to a simple decal
- MCM Dresser to Changing Table — a vintage dresser gets new purpose
- Peekaboo Stenciled Drawers — a surprise hiding inside the changing table
- X & O Drawer Pulls — (you are here) oversized, playful, and made by hand
- Scalloped Roman Shades — solving light and privacy in style
- The Nursery Reveal — the whole room, start to finish
Products & Supplies for DIY Drawer Pulls
PRO TIP: Before you refinish anything, check where your drawer holes will land. An O gets screwed in near its top edge, not its middle, so an existing center hole leaves the O sitting off-center. Move holes while the wood is bare, not after. (Learn from my detour in Step 8!)
Shaping the O’s
- 3″ half-dome wood balls (pack of six)
- Plastic food container that fits the dome, or clear bendable vinyl/styrene (1 1/2″ x 9 1/2″)
- Paper and an Exacto knife or utility knife
- Scrap board (mine was 3/8″ thick)
- 1″ #6 wood screws
- Clamps
Drilling
- Drill with 7/64″, 7/32″, and 17/64″ bits
- 1 1/2″ hole saw bit
- Flathead screwdriver or awl
Sanding
- Rotary sander with 60-grit velcro sandpaper
- Sandpaper in 120 and 220 or 300 grit
- Dremel with sanding tip (or a dowel or fat Sharpie wrapped in sandpaper)
- Detail sander with paper from 60 to 300 grit
Stripping the X’s
- Citristrip
- Respirator mask and gloves
- Plastic trash bag, a cheap chip brush, and an old plastic card
Finishing
- Pre-stain conditioner
- Gator Hide
Moving drawer holes (if needed)
- Wood putty
- Tea Rose and Magnolia Mineral Chalk paint,
- sanding sponge
Attaching
- Painter’s tape and screws to fit your drawer fronts
- Wood screws sized for the thickness of your drawer front or door
- Brad nailer with 1″ brads
- Clamps (for the closet doors)
Step 2) Marking Dead Center —
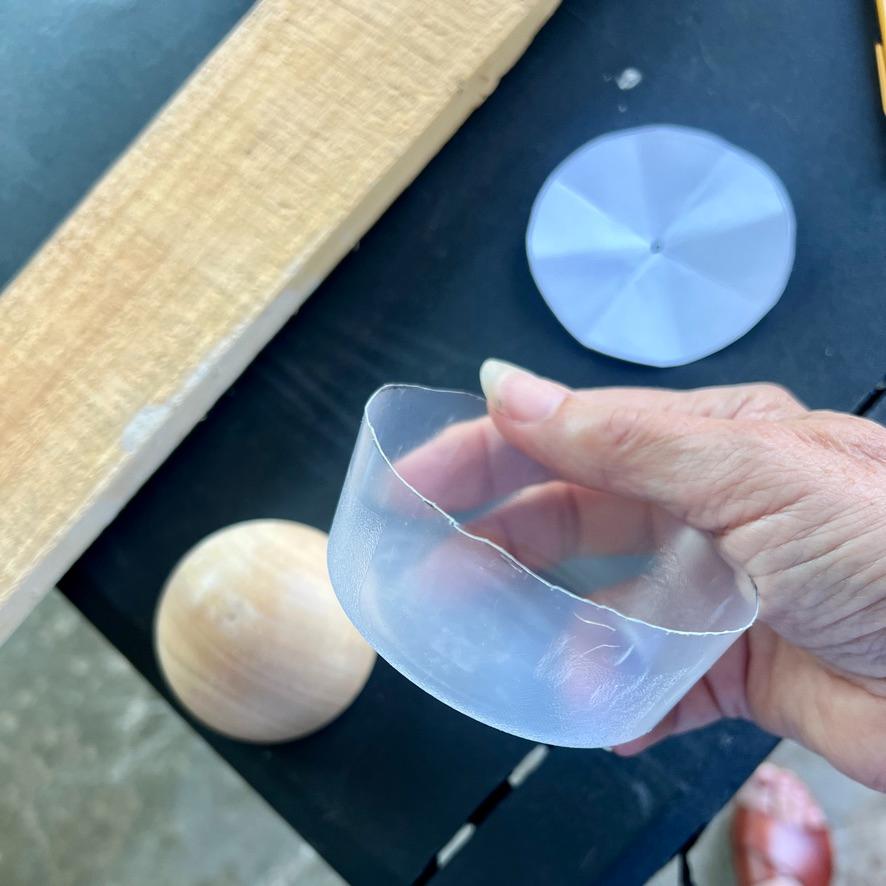
This was the trickiest part, because a slick dome just doesn’t hand you a center point.
But I came up with a process that worked great.
Here’s my hack: A 3-inch dome fits perfectly in a plastic food container I happened to have. Trim the container with an Exacto knife to 1 1/2″ tall, so its rim lines up with the top of the dome. Trace the rim on paper, cut out the circle, fold it in half, then in quarters, and snip the tiniest tip off the center.
Unfold it, lay it flat on the container, and mark the center through the hole. Once the guide exists, marking all six domes takes seconds.
No container that fits? Trace the dome’s base on paper and make the same folded-and-snipped pattern. Then cut a 1 1/2″ x 9 1/2″ strip of clear, bendable vinyl or styrene, stand it around the dome’s base, and tape it snug. Lay your paper on top and mark away.
One warning: do not eyeball it!!!
A center can look dead-on on a rounded dome, then the dome gets flattened and the drift shows. Only one of my six ended up truly centered. But I was close enough that they work.
PRO TIP: Plan to mount each O with its thickest side facing down, just like artwork and their mats often are thicker at the bottom. Any drift will look like a design choice, especially since my X’s have their own natural variation in thickness.
Step 2) Marking Dead Center —
This was the trickiest part, because a slick dome just doesn’t hand you a center point.
But I came up with a process that worked great.
Here’s my hack: A 3-inch dome fits perfectly in a plastic food container I happened to have. Trim the container with an Exacto knife to 1 1/2″ tall, so its rim lines up with the top of the dome. Trace the rim on paper, cut out the circle, fold it in half, then in quarters, and snip the tiniest tip off the center.
Unfold it, lay it flat on the container, and mark the center through the hole. Once the guide exists, marking all six domes takes seconds.
No container that fits? Trace the dome’s base on paper and make the same folded-and-snipped pattern. Then cut a 1 1/2″ x 9 1/2″ strip of clear, bendable vinyl or styrene, stand it around the dome’s base, and tape it snug. Lay your paper on top and mark away.
One warning: do not eyeball it!!!
A center can look dead-on on a rounded dome, then the dome gets flattened and the drift shows. Only one of my six ended up truly centered. But I was close enough that they work.
PRO TIP: Plan to mount each O with its thickest side facing down, just like artwork and their mats often are thicker at the bottom. Any drift will look like a design choice, especially since my X’s have their own natural variation in thickness.
Step 3) Mounting the Domes for Drilling —
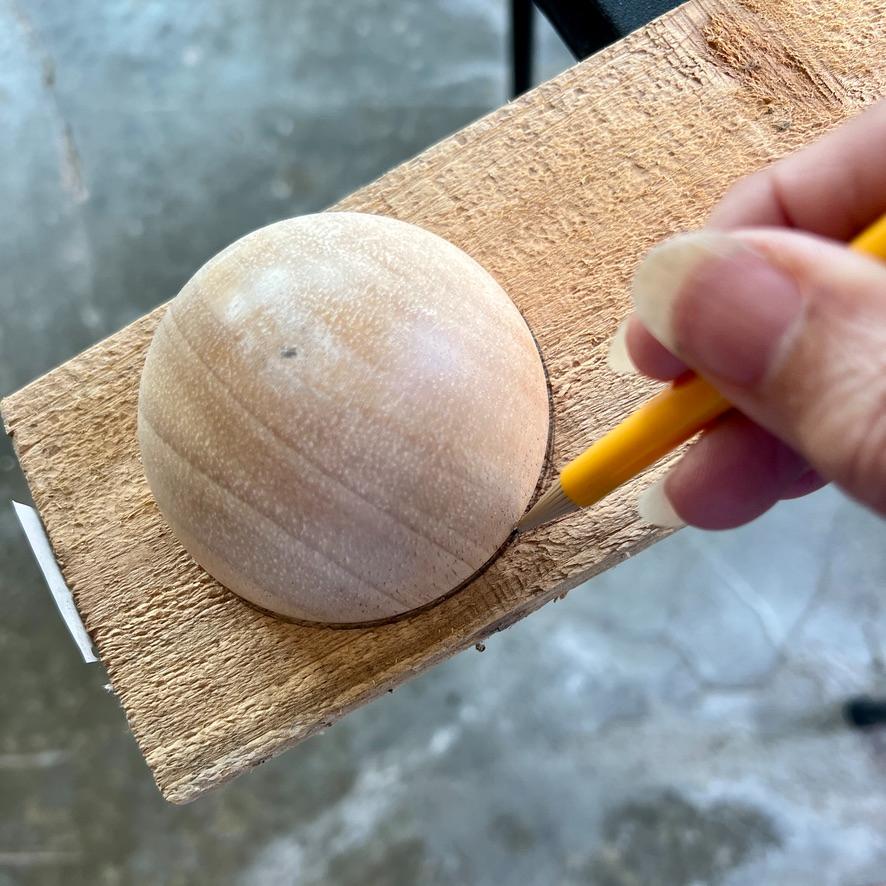
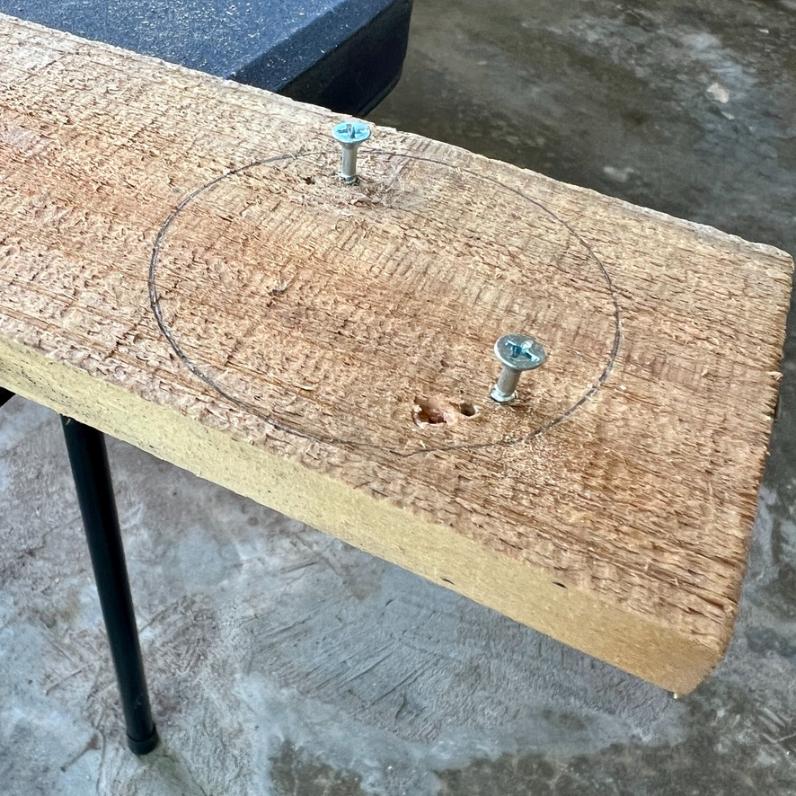
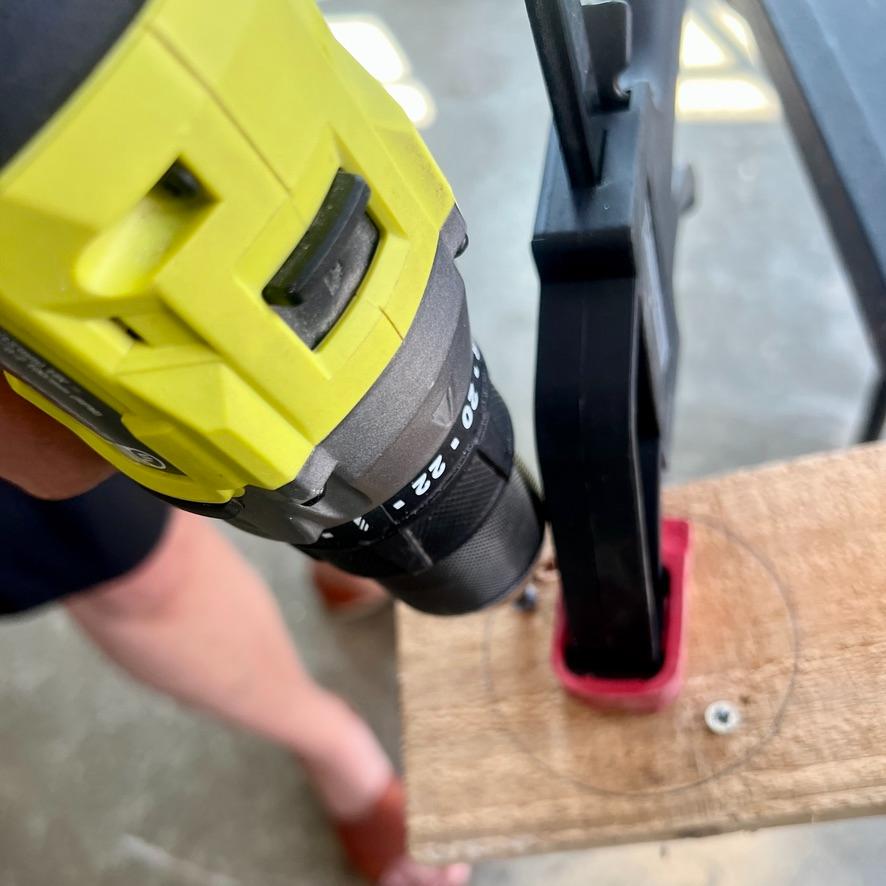
A dome that shifts mid-drill is a project-ending problem. So let’s pin it down securely!
- Set a marked dome about 1 inch in from the edge of your scrap board and trace around it. Hang onto that 1-inch measurement. Set the dome aside.
- Drive two 1″ #6 screws up through the scrap board, about 3/8″ inside the traced circle. Stop when the tips just peek through.
- Flip the board. The circle is now hidden underneath, but your 1-inch measurement tells you where it starts. Line up the dome and clamp it down. Check where the screw tips sit relative to the dome’s rim. Too close, and a tip could go through the side.
- Happy with the placement? Flip it back over, screw heads up, and drive them in until snug, not all the way. My board was only 3/8″ thick, and full-depth 1″ screws would push right through the top of the dome.
- Flip once more so the dome faces up, then clamp the scrap board to your worktable. It’s not going anywhere now
Step 4: Drilling the Center Plug
My domes were polished and slick, so I predrilled a pilot hole about 3/4″ deep, going 7/64″, then 7/32″, then 17/64″. That gives your hole saw’s center bit a nice grippy spot to settle into.
Slip the hole saw’s center drill into that pilot hole, hold it vertical, and start slow.
Build speed gradually, use light pressure, and let the drill do the work. If the bit catches as it gets deeper, stop, reverse a little, then ease back to forward.
You’ll hear the sound change when the bit finishes the dome and starts into the scrap board. That’s your cue to stop and reverse the hole bit out. The plug rides along inside the bit.
SAFETY TIP: The bit will be very, very hot when it comes out. Give it a minute before you touch it.
To free the plug, gently pry it out through the bit’s side relief slot with a flathead screwdriver or awl.
Step 5: Sanding Down to Match the X’s
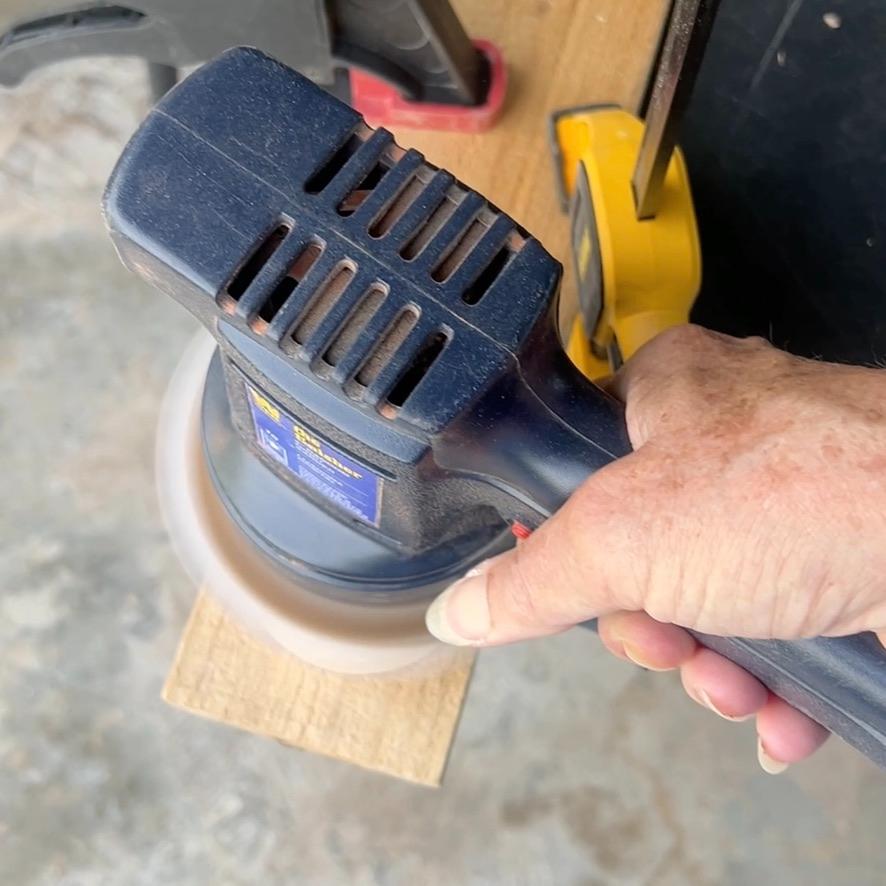
With the dome still secured to the scrap board, and the board secured to the table, use the rotary sander with 60-grit paper to bring the top down. You’re aiming for a final depth of 3/4″ to 1″, which takes roughly 15 minutes per dome.
Try to keep the sander level, but don’t stress over small unevenness. Sanding can shift things slightly off-center too, and you already know the save for that.
The O’s don’t have to match each other, or the X’s, exactly. A little variety is part of the charm.
Next, hand-sand the polished sides so the finish takes evenly. I pulled out my trusty Dremel with a cone-shaped sanding tip to smooth the bottom edge and inside the center hole. No Dremel? Wrap sandpaper around a dowel or a fat Sharpie for similar results.
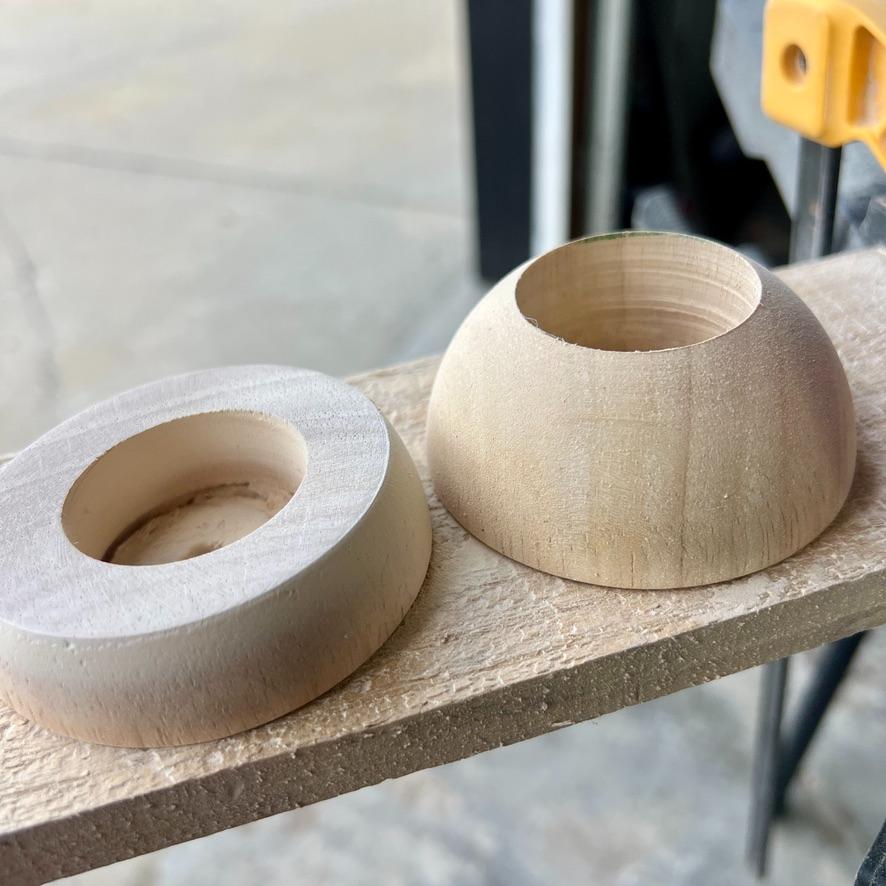
Once all your O’s are the right height, switch to 120 grit and lightly go over the tops again, just a few seconds each, then wipe clean. Repeat with 220 or 300 grit, wipe away all the dust, and they’re ready for conditioner and sealer.
A quick pause in the action to ask if you are enjoying this post. Please consider subscribing to more and exclusives:
Thanks bunches!!! Now back to our O’s:
Step 6) Stripping the X’s Original Finish —
The X’s have deep crevices where the arms meet, plus a very old factory finish. Sanding that by hand is a recipe for tears, so I let Citristrip do the heavy lifting.
SAFETY TIP: Work in a well-ventilated space, wear a respirator and gloves (gloves are a must), and plan how you’ll dispose of the used stripper before you start.
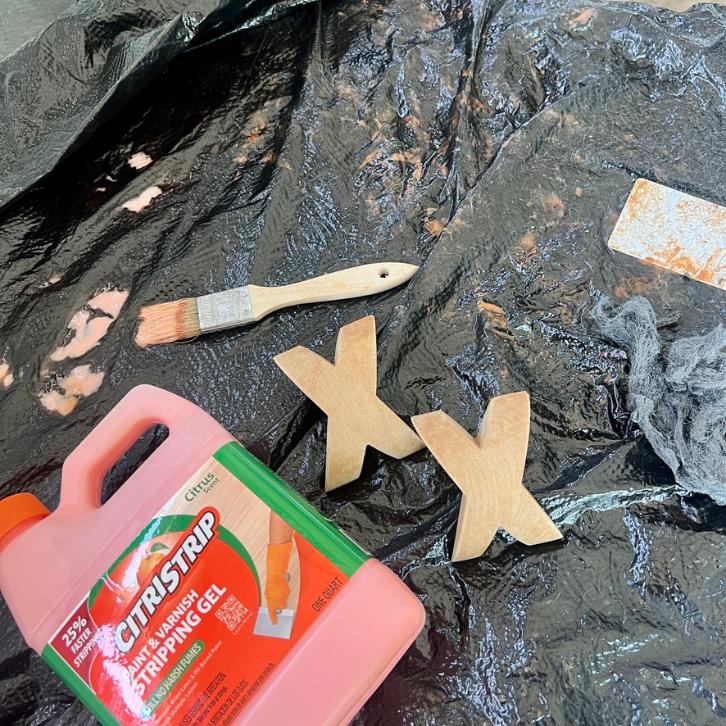
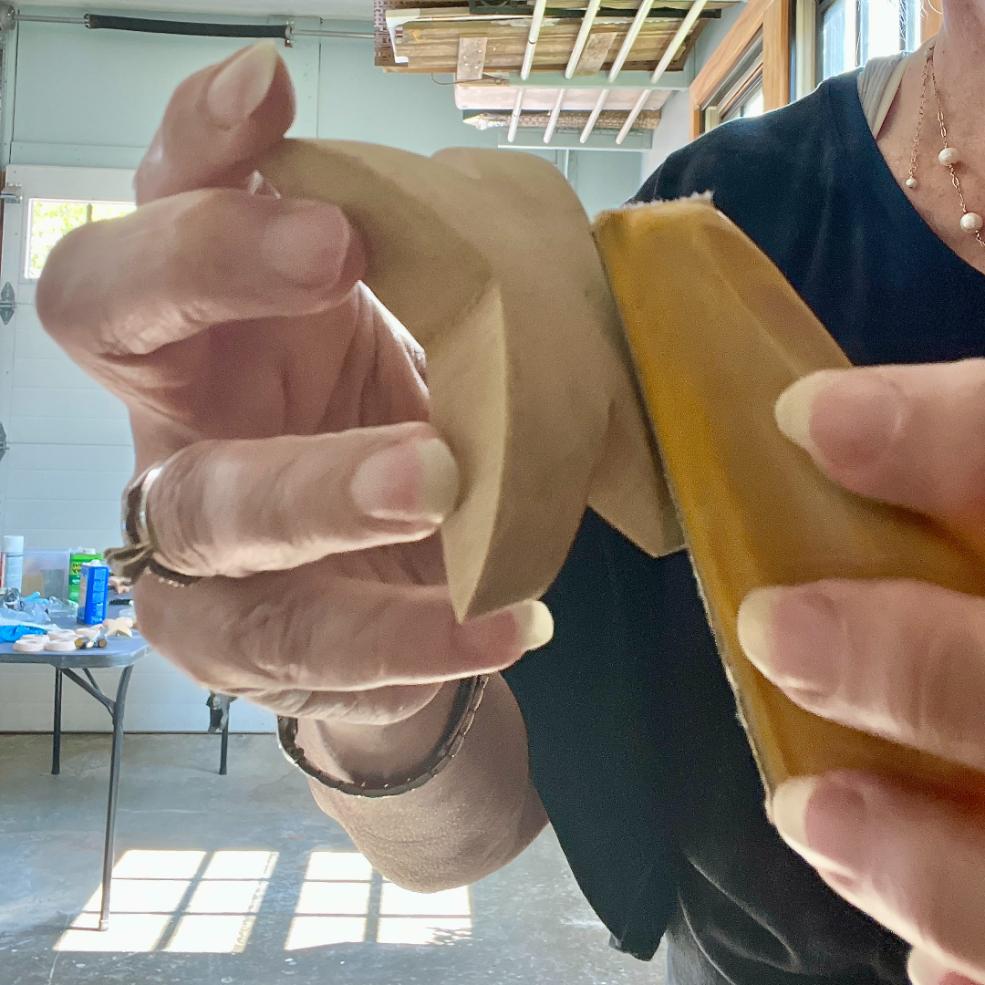
- Lay a plastic trash bag open on your worktable.
- Brush on a heavy coat with a cheap chip brush, into every edge and valley. Use one you’re happy to toss, because you won’t want to clean it.
- Loosely fold half the bag over the X’s. This keeps the stripper wet longer, so it works longer. I left mine overnight.
- In the morning, scrape off the gunk with an old plastic card. A spot or two on each X needed a second dab.
- Sand with a small, cushy detail sander, working from 60 grit up to 220 or 300.
Leave the puddles on the bag until they go from pink to rusty. Then it’s safe to roll everything up and toss it.
Step 7) Conditioning and Sealing the X’s and O’s —
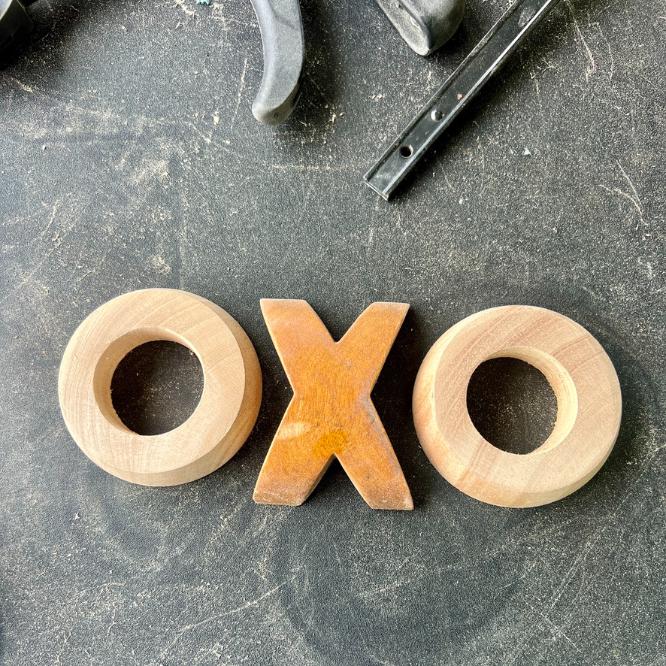
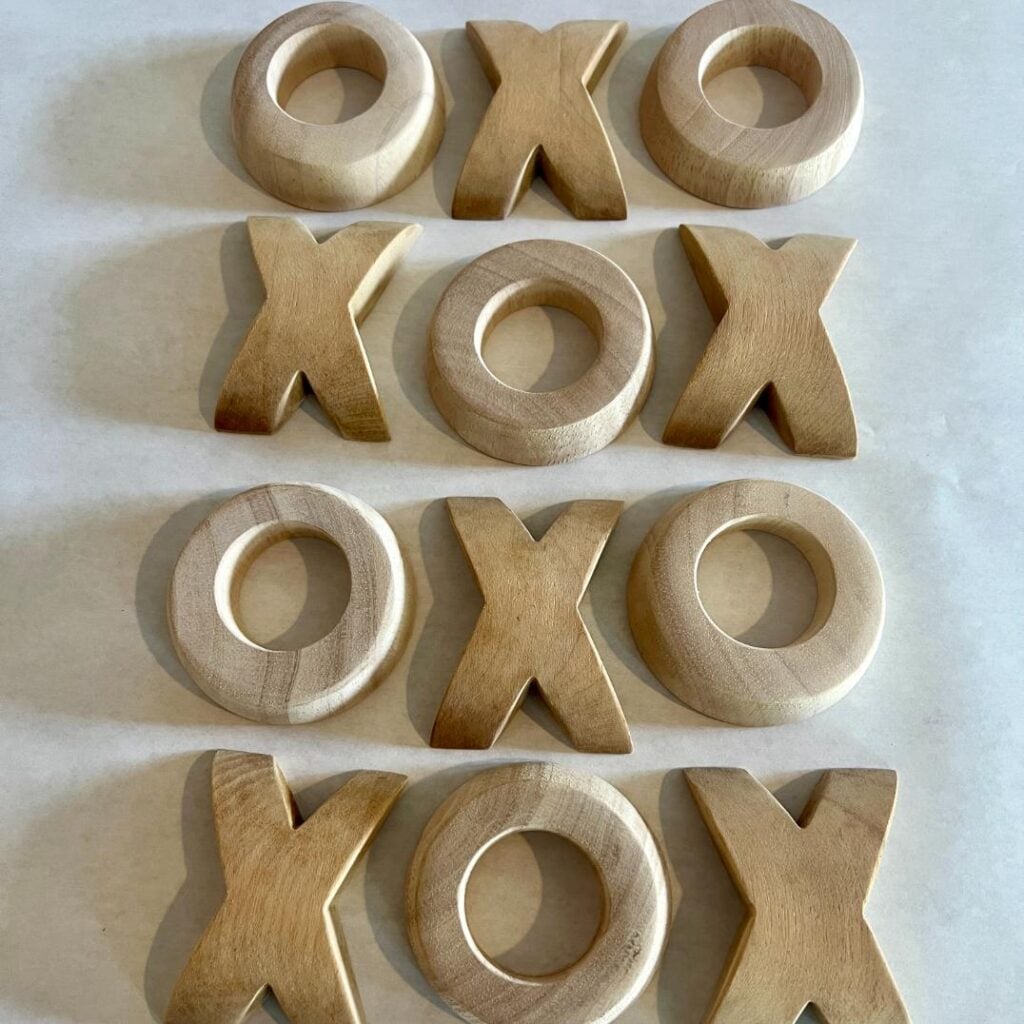
The pulls got the same treatment as the dresser top and sides: pre-stain conditioner, then Gator Hide.
If you read Episode 5 , you’ve met this pair already. Conditioner is oil-based and Gator Hide is water-based, which is the reverse of the usual order, so it’s picky about manners. On the dresser, a change of plans put them together, and following Dixie Belle’s guidance peace reigned.
The pulls were a different story.
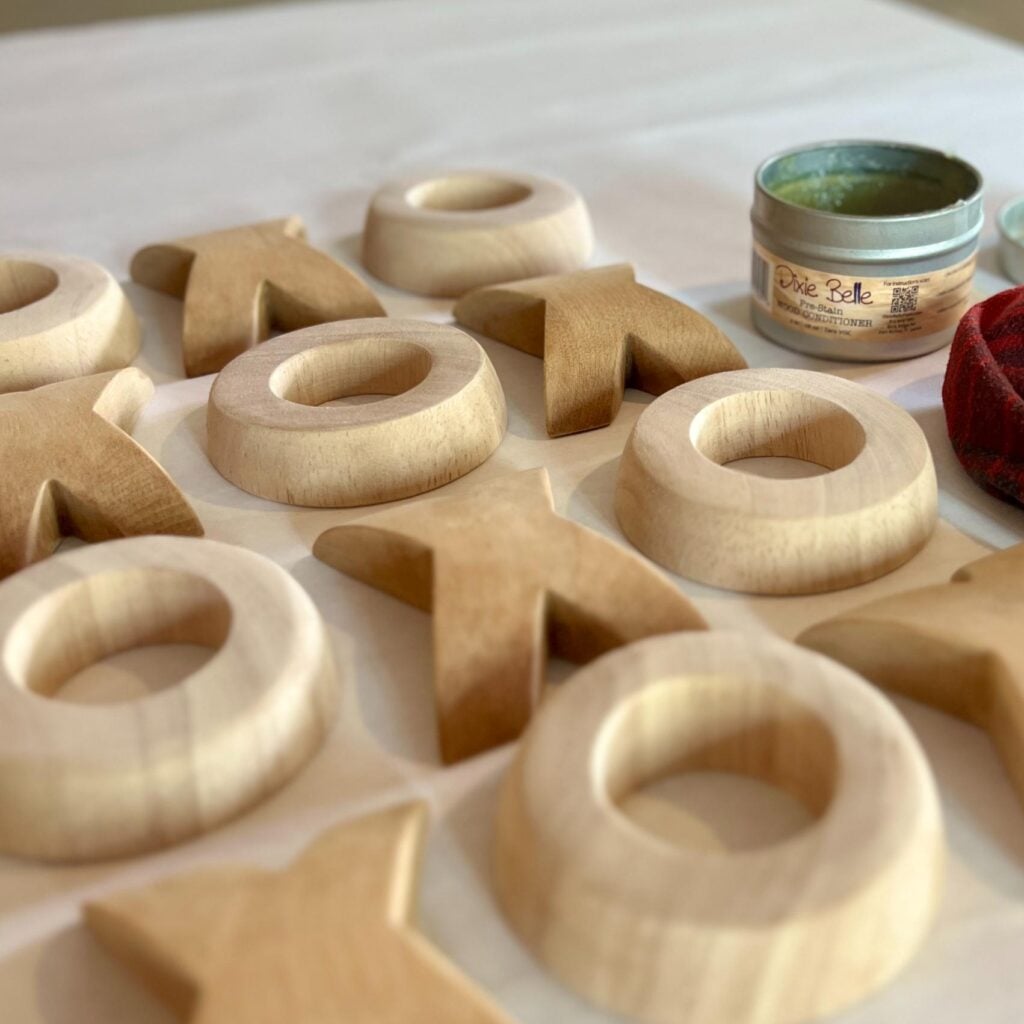
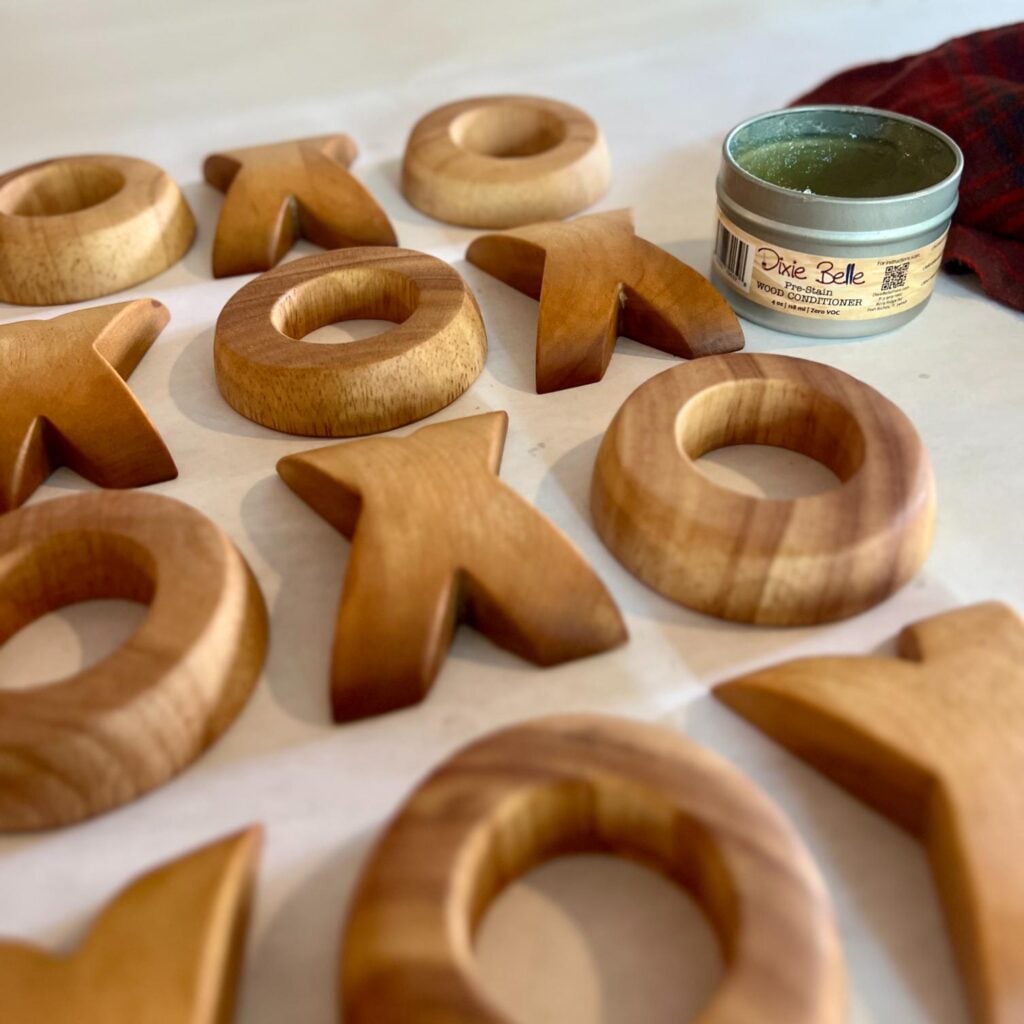
I gave both the X’s and O’s a “quick” coat of conditioner in KC, but “quick” turned out to be heavy-handed, and I didn’t wipe it back enough. Dixie Belle recommends at least 72 hours of cure time. Dixie Belle recommends at least 72 hours of cure time.
My X’s and O’s had 5 days, but a good portion of that was spent sealed in a bag for travel. Plus with a coat that thick, it wasn’t enough, and they still felt a little oily when I sealed them.
Ugh, I ignored that feeling, added a moderate coat of Gator Hide, trapping oil under water. Within 24 hours the sealer failed and the oil had fought its way back to the top.
PRO TIP: Go light on conditioner, wipe it back well, and do a touch test before sealing. If the wood still feels oily or sticky, it isn’t ready. The clock helps, but your fingertips have the final say.
The remedy was easy, because these were ten little pulls and not a long tabletop where every flaw shows.
- I grabbed my detail sander and sanded off the blotchy sealer and leftover conditioner, about 45 minutes for all ten.
- I skipped more conditioner, since plenty had already soaked in.
- Once they felt dry and clean, I still waited three more days. (Okay, the pulls waited on me while I wrapped up another piece of the nursery.) Then I recoated them and gave them a day to rest before they went on the furniture.

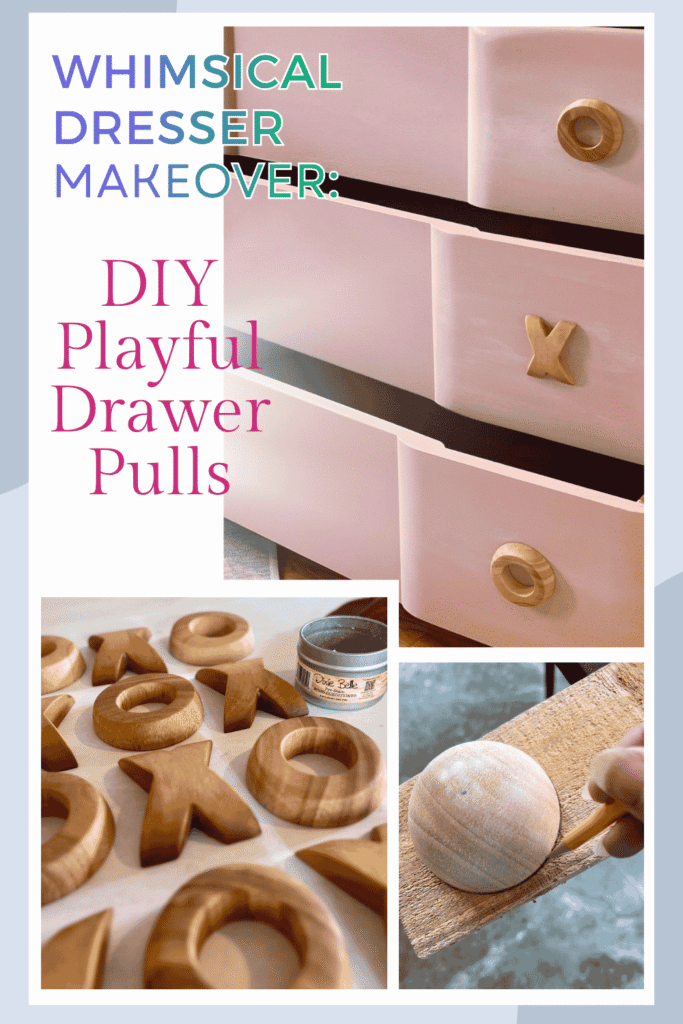
Step 8, if needed) Moving the Drawer Pull Holes —
Think of hanging a wreath: the nail goes at the top and gravity does the rest. Anchor the O the same way.
Skip this one if your holes already line up. Mine didn’t.
The X-and-O idea hit after the drawers were finished, so I had to patch and move holes on finished drawers. I know! Duhh, right?
It sounds scary, but it isn’t: the old hole won’t be used again, and the O’s shadows hide most of them. So a simple wall putty is fine, no requirement for something like Bondo.
Each drawer gets one X and one O, alternating. I flagged the drawers that needed a new hole with painter’s tape so I wouldn’t get turned around.
- Sand around the old hole.
- Add putty in three passes, two from the back and one from the front, letting it dry between each.
- Sand the front smooth, along with the inside of the drawer.
- Touch up with Tea Rose Mineral Chalk paint and let it dry.
- Wipe with a sanding sponge. Dry brush a smidge of Magnolia, mist, and wipe to blend with the original highlighting.
Now, measure for the new hole. The screw needs to land in the middle of the O’s top band, so I raised mine 1 1/8 inches. That’s half the center hole (3/4″) plus half the band (3/8″). If your O’s proportions differ, adjust the math to match.
The closet doors needed the same math, so the X’s and O’s line up there too.
Step 9) Attaching the X’s and O’s —
I used wood screws rather than machine screws like our hardware today does.
- Calculate the length of the screws you need for attaching the X’s and O’s — err on the short side. You definitely do not want the screw to poke through the top of the O.
- Drill a very shallow screw hole into the back of the O’s top band, centered in the band, with a bit sized for your screw.
- Drill narrow pilot hole through the drawer front at your marked spot. Next drive the screw through the hole until just the tip appears. Line the shallow hole in the back of the O with the tip of the screw. Clamp or secure with plenty of painter’s tape.
- Slowly drive the screw in for a snug tight bond, but stop well short of the front surface
PRO TIP: Worried about making the hole too deep? Wrap painter’s tape 1/4 inch from the tip of the bit. When the tape touches the back of the O, stop drilling.
Closet doors: Pax doors are smooth and slick, and my pulls spun every time the doors opened.
- I saw it coming and had my brad nailer at hand, loaded with 1″ brads.
- After attaching in place, make sure they are hanging perfectly straight and hold it with clamps.
- Then, from the back, measure twice, mark, and fire once. The brad holds it plumb.
Remember: thickest side down. That’s what makes any drift look intentional instead of accidental.
No Vintage X’s? No Problem
Okay, real talk: odds are your dresser didn’t come with a set of 60-year-old X pulls. Mine was a lucky break. But the X-and-O idea works with a store-bought letters, too.
Here are a couple of Etsy shops that will happily make them for you. The only down side is that they are flat. But you’ll only need to sand, finish and install them.
- This Etsy shop has a variety of sizes and thicknesses and many fonts to choose from.
- Here’s another Etsy shop that promises to ship with 24 hours. They can cut letters up to 1/2-inch thick. And if you jump to 4″ letters, you can have them 3/4-inch thick!
FAQ’s
Can I use a planer instead of sanding?
Absolutely. If you have one, shaving off the top 1/2″ is the straightforward route. I didn’t, so I sanded.
Can I skip the Citristrip?
My X’s had tight valleys and a 60-70-year-old finish, so for me it was the sanity-saver. Sanding that detail by hand would have been a long afternoon.
Why do I need the pilot holes before the hole saw?
Polished domes are slick and slippery. The pilot hole gives the hole saw’s center bit something to grab, so you can start steady and level.
What if my O’s aren’t perfectly centered?
Mount them with the thickest side down. they’ll look intentional.
Wrapping Up
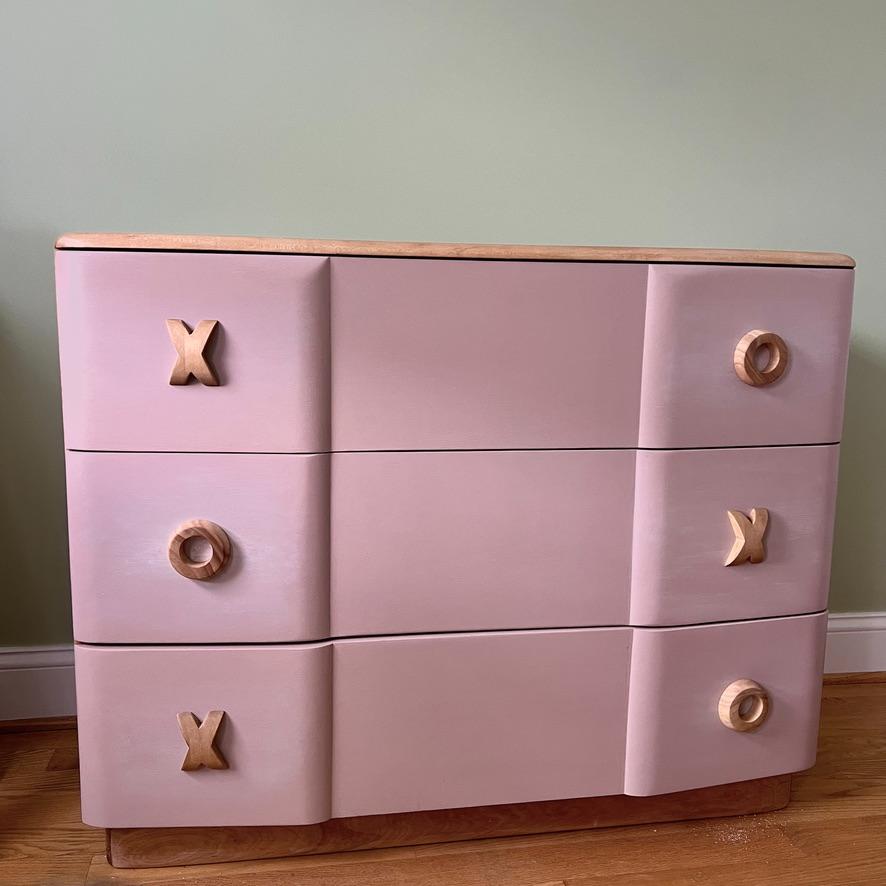
And there you have it: tic-tac-toe, hugs, and kisses, ready to play on the dresser and the closet doors. Old wood meets new wood, and somehow they get along like they’ve always been a pair. Next up, we deal with a west-facing window and an alley light.

More Projects to Enjoy