
How to Make a Stylish Pet Food and Water Mat
Easy and super cheap way to add function AND fun style under your dog food or cat food bowls with these DIY pet place mats.
Are your fur babies a bit on the sloppy side? Mine is a rather messy eater. And don’t get me started with the water bowls.
Do their dishes slide around on them? Or maybe they push them around when they think dinner’s coming slower than they like. I’m looking at you, Bodhi.
I’m right there with you friend!!
In our old house, the dog food dish and water bowl sat on the wood floors that I didn’t want ruined. In this house they sit on brick floors, which are indestructible, but the grout can get really trashed and is really difficult to clean.
Sounds like a problem in need of a creative solution.
Well, I have just that — a brilliant, creative solution!!!
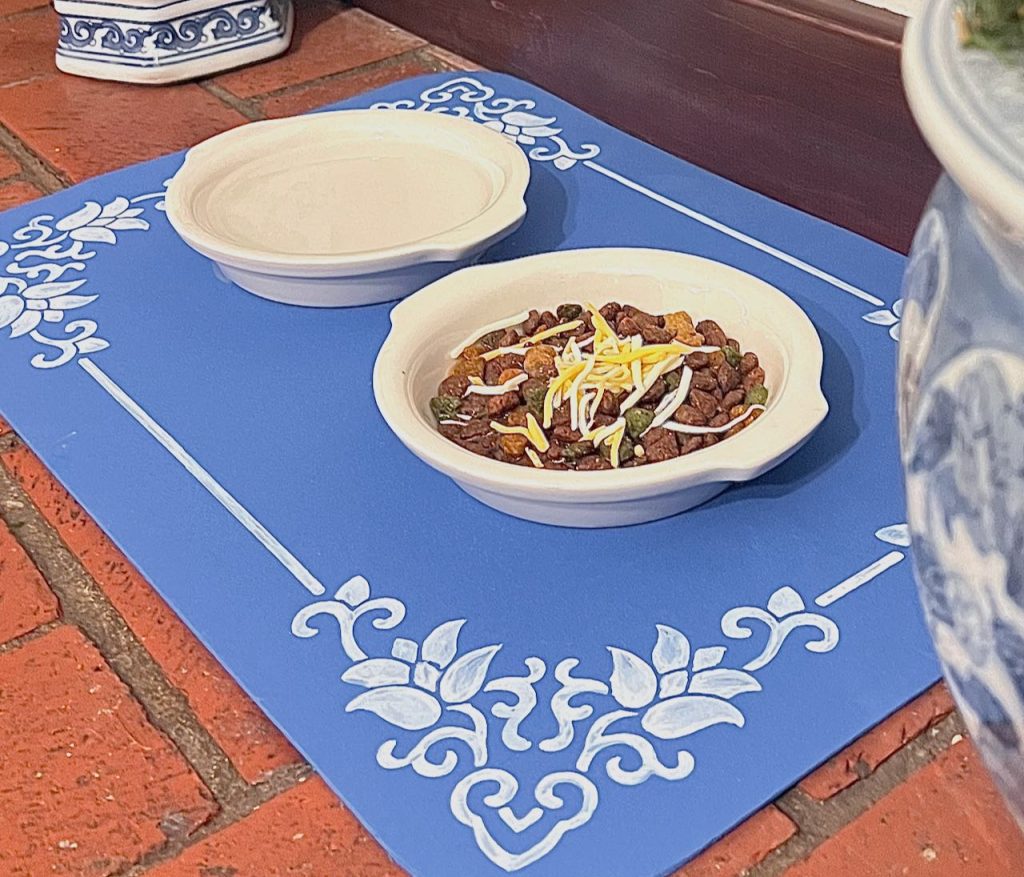
TABLE OF CONTENTS:
A Dog Placemat (or Cat)
This is a great project for a novice crafter.
- It is totally customizable
- It is as easy as you want it to be
- It’s quick.
- It’s super inexpensive, okay, downright cheap
- And no sewing machine required.
I promise! No canvas fabric, no fleece fabric, no fabric at all! No need to figure a seam allowance. No sewing tutorial involved.
BONUS: Both sides are right sides. Yep double-sided!!! And they wipe off easy peasy — practically stain proof!
You’re thinking it can’t be true, right? Oh, but it is!
Our pet placemats are made from a sheet of craft foam.
Yes, that humble foot soldier of the kid’s craft supply aisle, the kindergarten supply closet and every vacation bible school ever!
Yes, that’s it! I’ve used this for years. (12 years — our little guy’s not such a puppy any more)
You can plop this one-dollar wonder down on the floor under your dog food or cat food bowls and call it good.
But why stop there, when you can make them something special without a ton of effort, or expense?!?!
Suggestions For Decorating Pet Place Mats
I like the mat to coordinate with the room it’s in, or maybe with the pet food bowls themselves.
How about with holiday themes or seasonally? I mean we dress our pets up for Halloween, Christmas, even as an Easter bunny. Maybe our furry friends would enjoy a special dish mat for the season too. Okay, maybe we’d enjoy them having their own mats for our favorite seasons.
Or you can opt for the traditional paw print, dog bone or fish on the pet mat. Or even customize it with your pet’s name.
I have many additional ways to decorate your pet’s food mat. So keep an eye out for those.
How to Decorate A Pet Mat With Markers
Markers are a great way to bring some style to dog mat.
There are lots of ways, but this is a great starting point and what I’m focusing on in this post.
First thing, decide the perfect size for your per and your home.
The craft foam comes in two sizes, 9 x 12-inches and 12 x 18-inches. And they are readily available in many different colors. (sadly, most of them bright, but not all).
Determine the size of your dog bowl mat.
Our furry fella is a little guy, all 13 pounds (with a giant attitude). So his dog food bowl and water bowl share the same large (12 x 18-inches) mat in the kitchen. In our bedroom where he also has a water bowl, it sits on a small mat (9 x 12-inches).
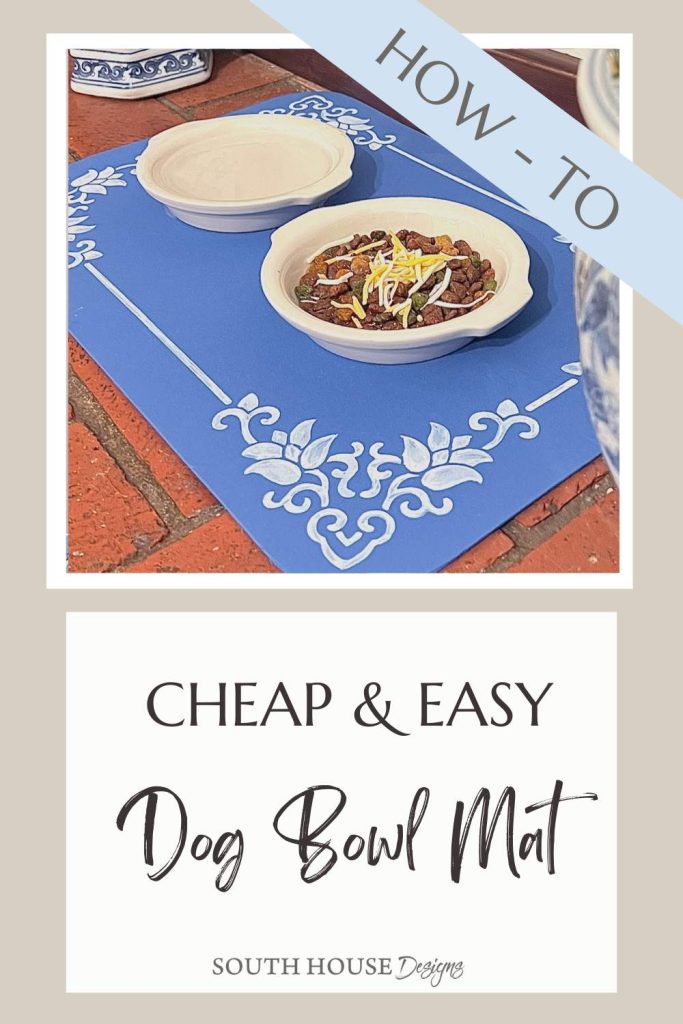
Our downstairs is blue and white. So I wanted a blue and white chinoiserie-inspired mat with Grittles’ two white dishes.
Materials and Supplies —
- Craft Foam Sheet — be sure to read my product reviews at the bottom of the post
- Permanent Markers (I found Sharpie markers worked great! Here I used this oil-based white sharpie marker)
- Scissors
- Pencil
- Cricut, or access to one
- Permanent vinyl — any color (I buy whatever might be on sale)
- 12 x 24 or 12 x 12 Standard grip mat,
- Transfer paper
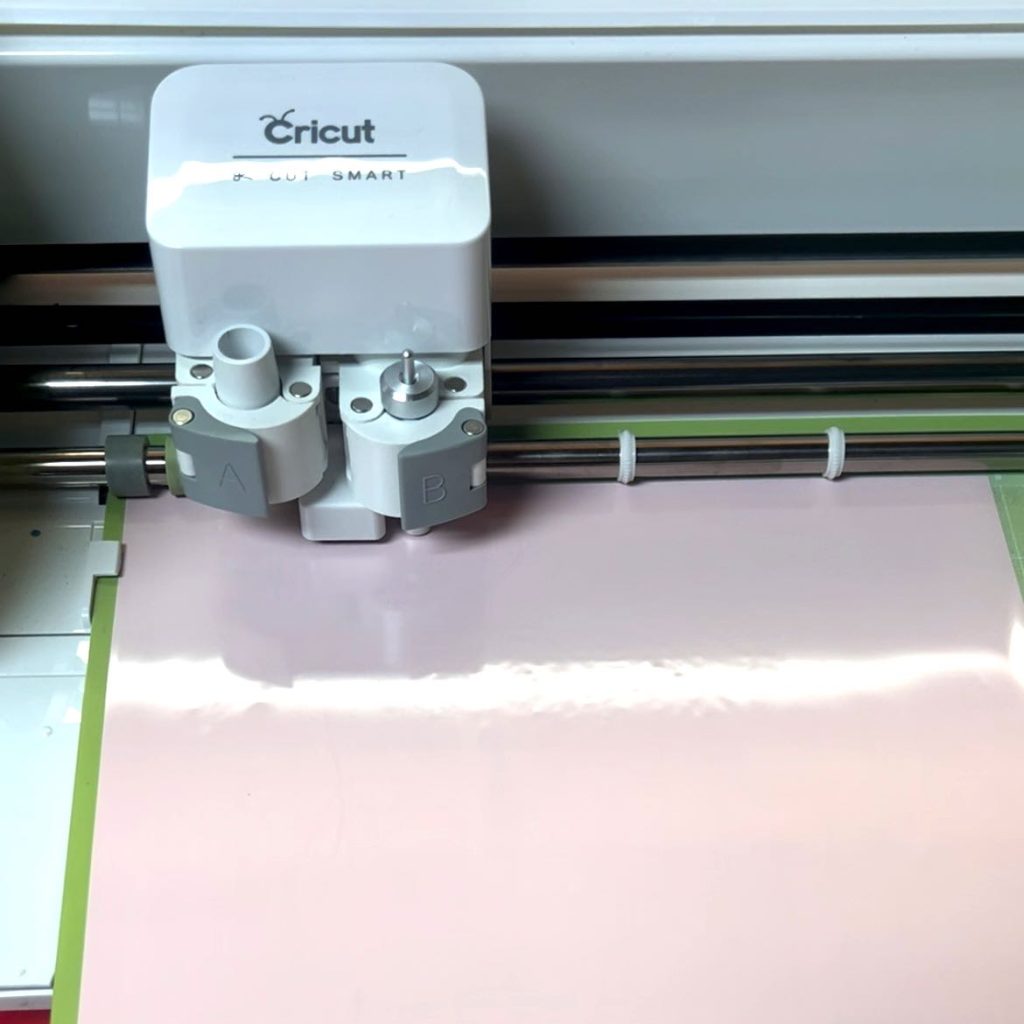
Step 1) Cut Vinyl Stencil —
My stencil is available in my Free Printables Library to all my subscribers and House Mates.
Not a member? No worries, you can sign up right here for immediate access:
Thanks bunches! Now on with How-To:
- Download the correct version — the full pattern if you have a 12 x 24 cutting mat, or the half version is you have a 12 x 12 cutting mat.
- Cut a piece of vinyl, either 12 x 18 or two 12 x 9.5-inches
- Apply the vinyl pieces to your cutting mat.
- Upload the file to Cricut Design Space, then Make New Project, click downloads, click this project then “Add to Canvas”. Resize as needed. I cutt my two 12 x 9.5 to an actual size of 11.5 X 9.3-inches.
- Click “Make it”. Follow directions to load you mat and cut the stencil(s)
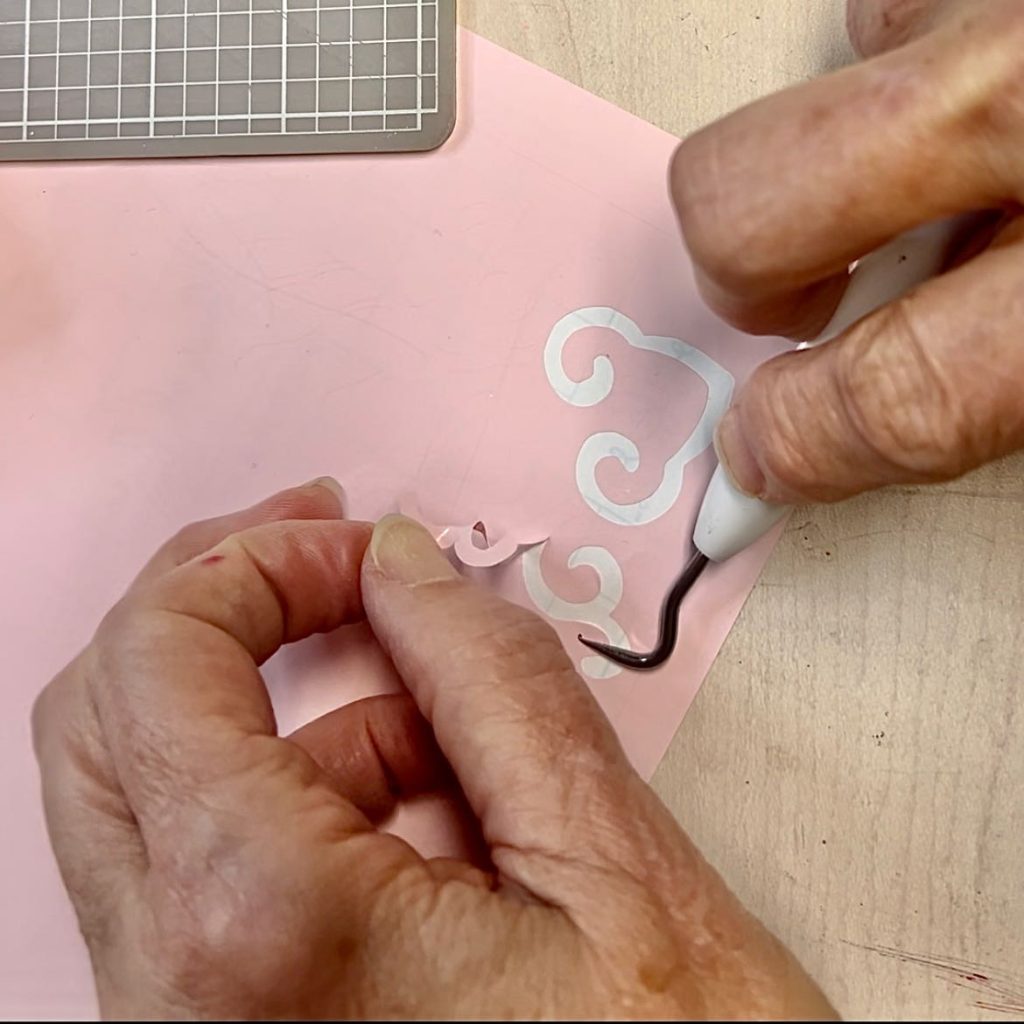
- Gently remove the vinyl from the cutting mat
- Weed the stencil — remove all the cut pieces of the design
Step 2) Apply to Craft Foam —
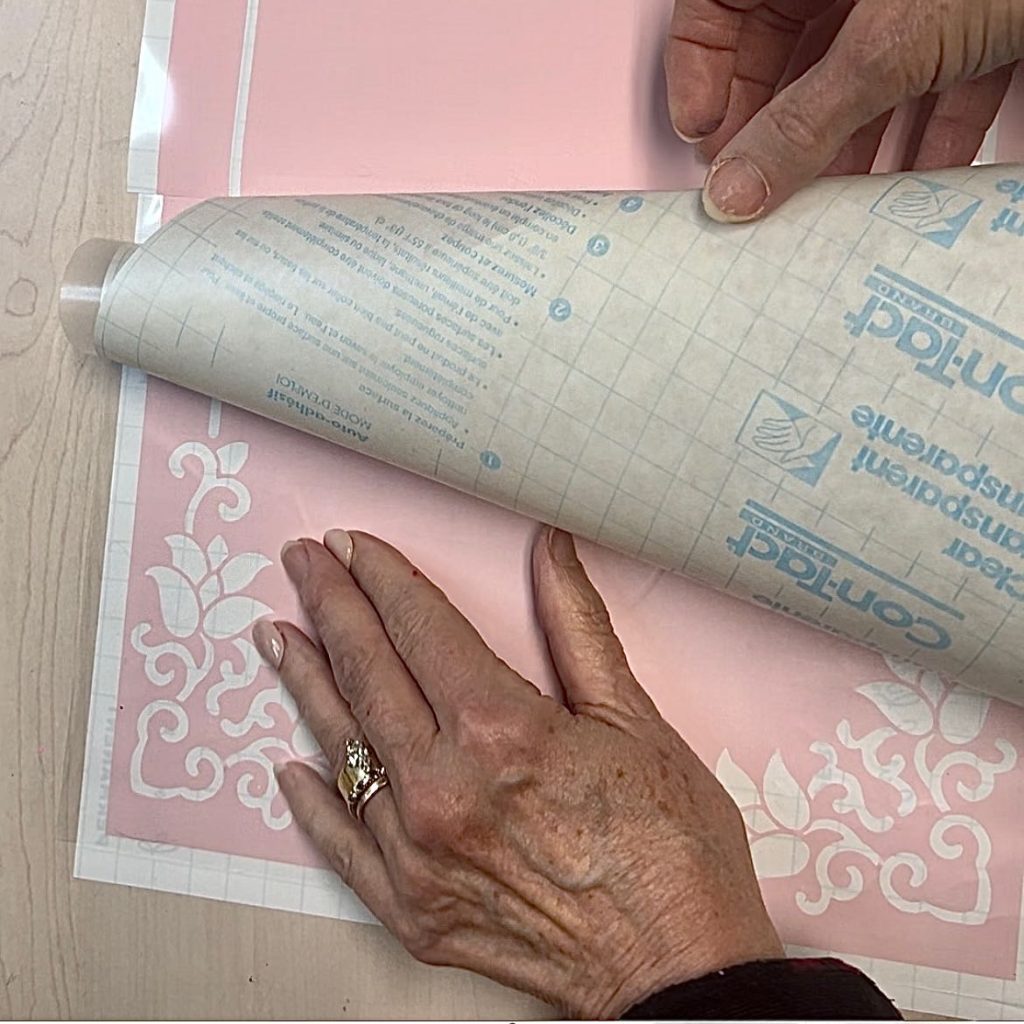

- Cover the weeded vinyl with transfer paper or clear contact paper, burnish for full contact
- Gently remove the vinyl backing
- Center on craft foam place mat
- Burnish for full contact
- Slowly remove the contact paper/transfer paper
Step 3) Color Between the Lines —
With a permanent marker, color in the open spaces of the stencil.
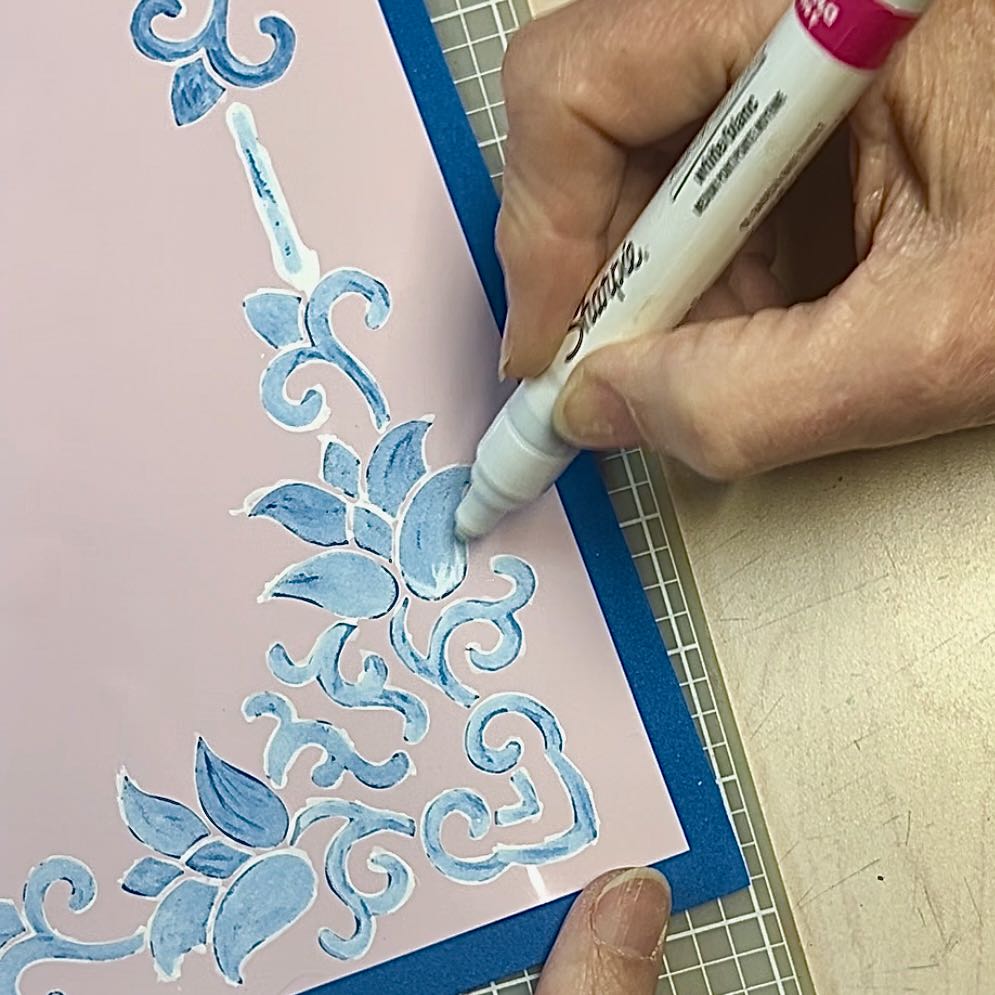
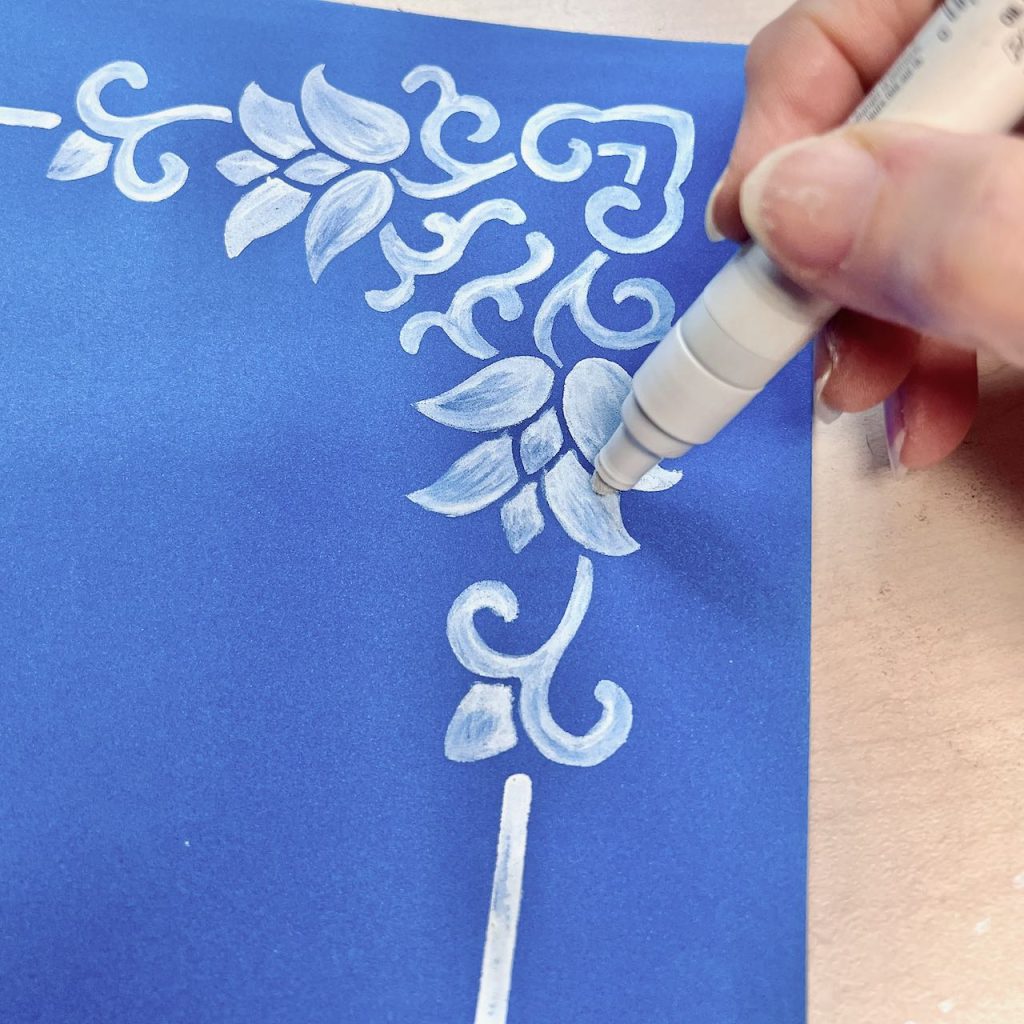
If you are using white or light colored markers, you can go for solid coverage with several passes. Or you can do as I did, building up more white with strokes to emulate a more painterly effect with varying tones of blue and white.
Yes, you can still touch them up more even after you remove the stencil!
WARNING: Water-based markers will wipe away when wet and could possibly transfer to other items.
Step 4) Round the Corners —
Once your design is done, don’t forget to round the corners!
It’s such a little thing, but makes such a difference!
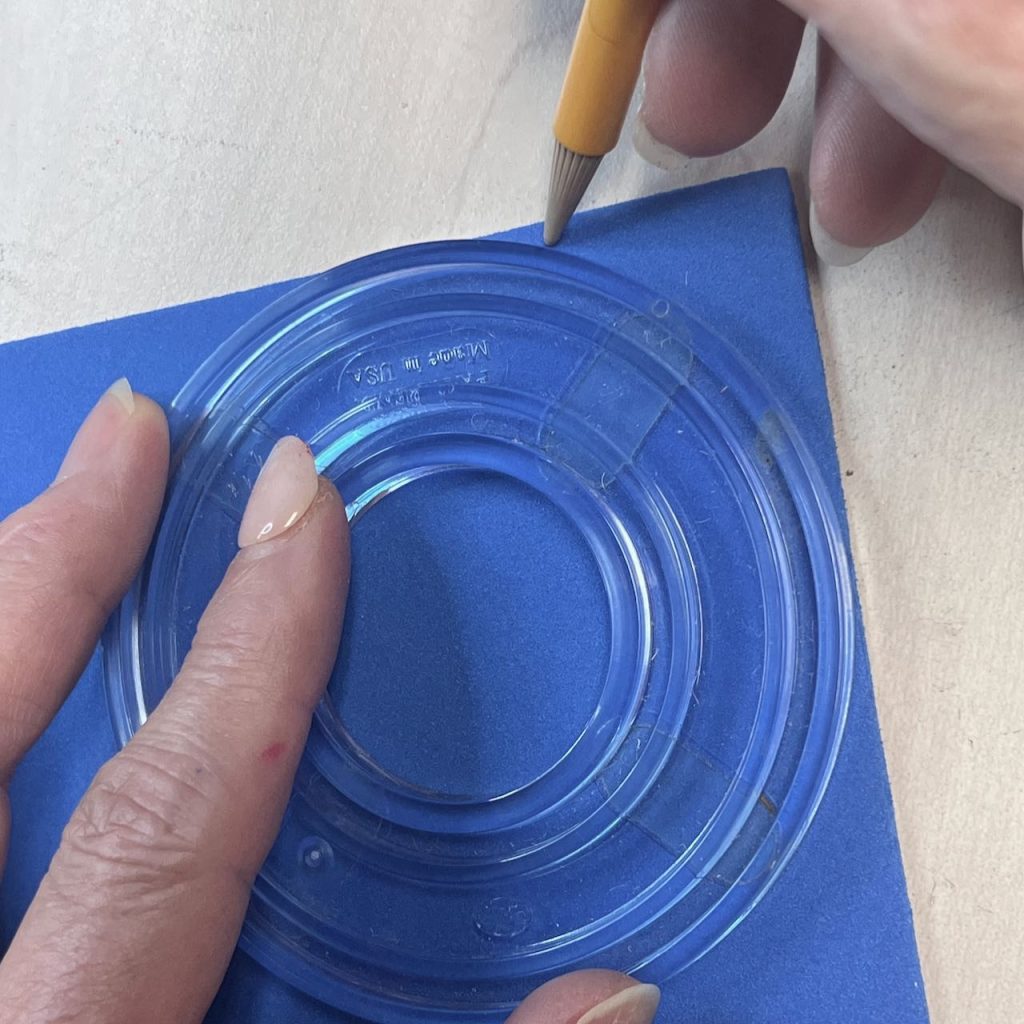
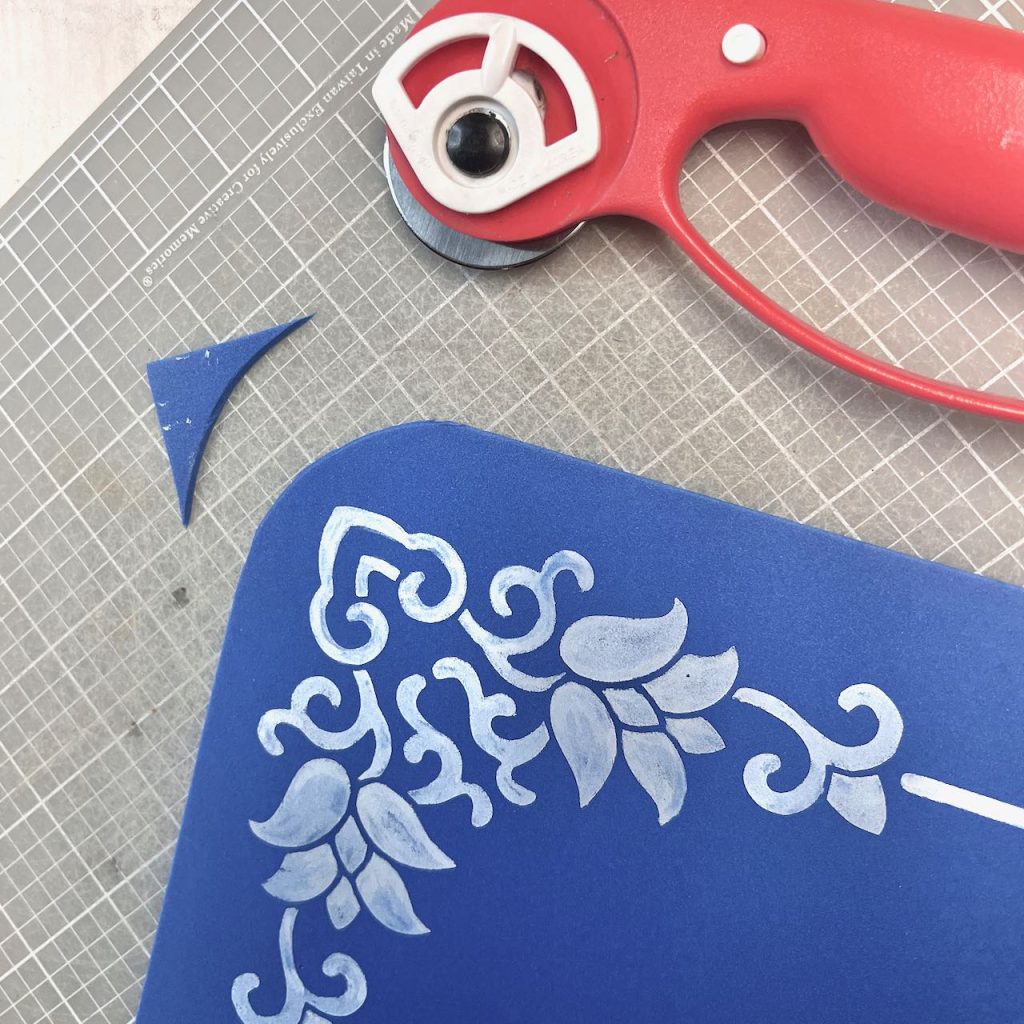
On the backside, lay something round evenly at each corner. Run a pencil along the round corner edge to score a groove in the foam. Remove the round object and cut with a rotary cutter in the groove.
This one step (#4) makes such a difference, you can certainly start by just rounding the corners of a sheet and then add some style down the road.
Lessons Learned
This is an easy project. It just wasn’t particularly easy getting here.
I started with a different pattern that had a wider border all the way around. I loved how it looked, until I tried to actually make it.
You know how sometimes projects turn out just how you imagined them on the first try — and sometimes even better? This was NOT one of those times. It took some tweaking and experimenting. But I love the final result
The original design, needed this wide border to be a solid color. I was using white paint. First coat was understandably bad. Not deterred, I added the second coat. Better, but still blotchy — and not in a good way, if blotchy is ever really good.
Third coat got the coverage, but it’s like the paint just sat on top of the mat.
And then it started to crack and I knew it would peel with any activity.
As a pet owner, we certainly know activity and food bowl go hand in hand!
PRO TIP: If you want to experiment with this process, know that paint will not work.
Okay, there is a flexible paint for cosplay costume making, but it is kind of pricey and mostly metallic colors.
Here’s another option, if you just don’t have enough time, but you are needing a pet mat. Spend aa whopping $1 to get a sheet of craft foam and trim the corners and call it good. That’s all I did for many years . . . . . until I realized how fun it is to customize a mat for the dog bowls and add a dash of style to little area of the kitchen.
Product Reviews:
Surprisingly, craft foam sheets are not all the same!!!
At Walmart, in store you have to buy this pack of twelve 12 x 18 sheets for $6 — .50 each. Great price and they measure the full 12 x 18-inches. Quality is excellent, and the colors are, well they are bold, well-saturated.
They have more options on line. Like this light blue, but then you have to buy ten of each color for $10. Still a great price if you can use multiples. I can’t speak to the quality since they are not in store.
At Hobby Lobby, this is where I discovered not all craft foam is the same. They have a better selection of colors. And you can buy individual sheets for .99. But be sure to look them over closely, they are riddled with pock marks — little divots or pits in the foam. Some colors were worse than others.
This may not bother you especially with dog bowls sitting on top, but I want you to be aware.
Both say their foam is 2mm thick, but the Walmart foam feels denser, seems to have a bit more rigidity to it.
I have not been to Michael’s yet to see how theirs look. I will update this post as soon as I can.
No Cricut? No worries! I’ve got you covered with more stylish pet food mats coming your way.
Be sure to Pin this so yu can find it again. And be sure to share it with the pet lovers in your life.
I hope this inspires you to look for creative solutions throughout your home. Please let me know if you make these. I’m anxious to see pictures, especially of your little (or big) fur baby with their food mat.

Great idea. Thanks for.
It has worked for us for sooo many years now. I hope it works for you too!
This is so clever and beautiful! I love the color too.
Yes, blue and white — always a winner! 💙💙💙