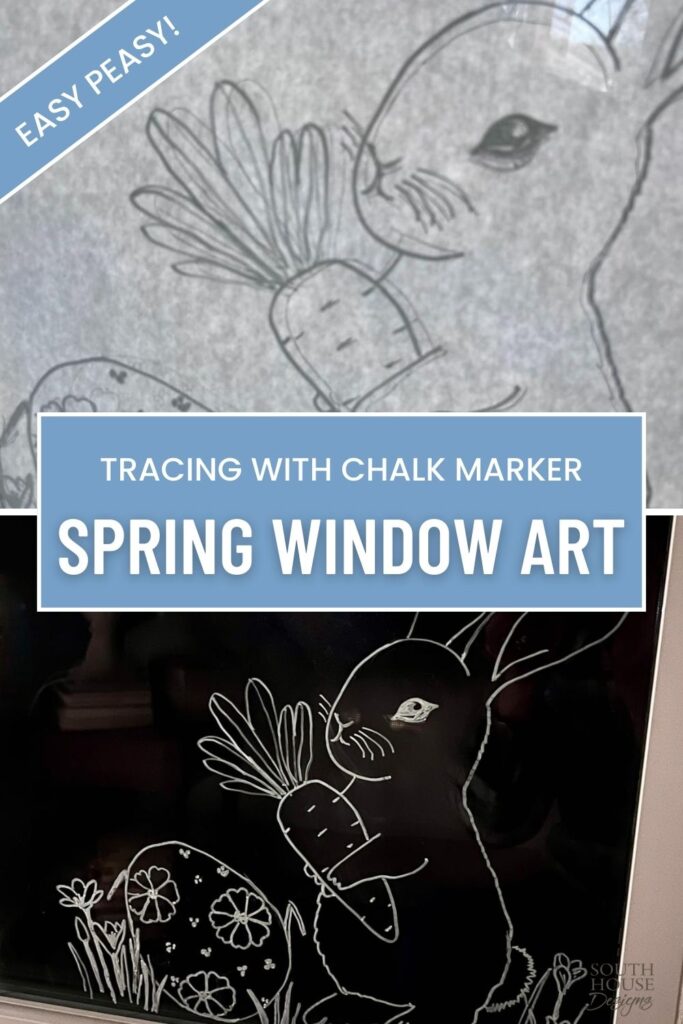
Cutest Spring Easter Window Chalk Art — Easy Tutorial + Free Templates
Grab your chalk markers and free printable templates — no drawing skills needed to add charming bunnies and blooms to your windows this season!
If you’ve been on social media the past couple of Christmases, you’ve probably spotted the trend of drawing Gingerbread villages and holiday scenes right on windows — mostly in white chalk marker.
I fell completely in love with it.
Last Christmas I did a cluster of ornaments hanging from a greenery swag above my kitchen sink window, and honestly, it was one of my favorite holiday decorating moments of the season.
That post is coming this Christmas for sure — but the whole process was so much fun that I couldn’t wait until December to do it again.
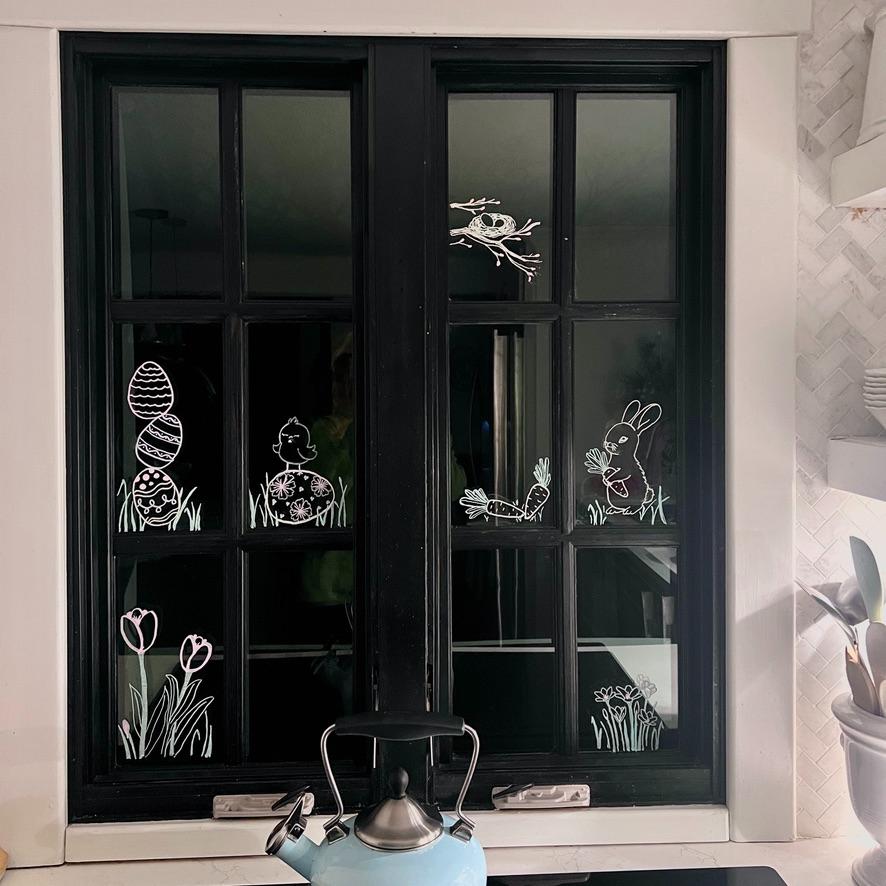
So I brought the idea into Spring and Easter, added some pastel chalk markers to the mix, and the results are just the sweetest little window scenes — bunnies, eggs, and flowers that make your windows feel fresh and happy all season long.
And here’s the best part: you don’t have to be able to draw a thing. I’ve included free printable templates in my Resource Library (free to subscribers!) that make this the easiest kind of Easter window chalk art you’ll ever try. Print, tape, trace, done. Total novice crafter territory — I promise.
What? You’re not a subscriber? No worries!!! We can take care of that right now:
Thanks bunches! Now on to your windows:
The links in this post may include affiliate links, which means if you purchase anything using these links, you pay no extra, but I may receive a small commission that helps keep this blog running. I truly appreciate you using affiliate links whenever possible. Please know that I will never recommend a product I do not believe in!
If You’re a Confident Crafter and ready to jump right in, here’s a Quick Craft Card for you.
But if a Total Novice Crafter, this is a great project to start with!
Keep scrolling and you’ll get all my tips, and hints for a successful, fun Window Chalk Art.
Fun Spring or Easter Window Art
Materials
- Spring/Easter printable templates (free in the Resource Library!)
- White chalk marker (I love Bistro Brand)
- Pastel chalk markers (optional, but so pretty!)
- Tape, I prefer painter's tape
- Clean windows
Instructions
- Print your templates — resize as needed right from your home printer.
- Wash your windows inside and out.
- Tape the template to the outside of the window.
- Trace the outlines from the inside using your chalk markers.
- Remove the paper template.
- Step back and admire your work!
Notes
Scroll down for the full tutorial, supply details, tips for customizing your scenes, and an important note about window types.

All the Details For Decorating Your Windows With Easter or Spring Chalk Art
What You’ll Need
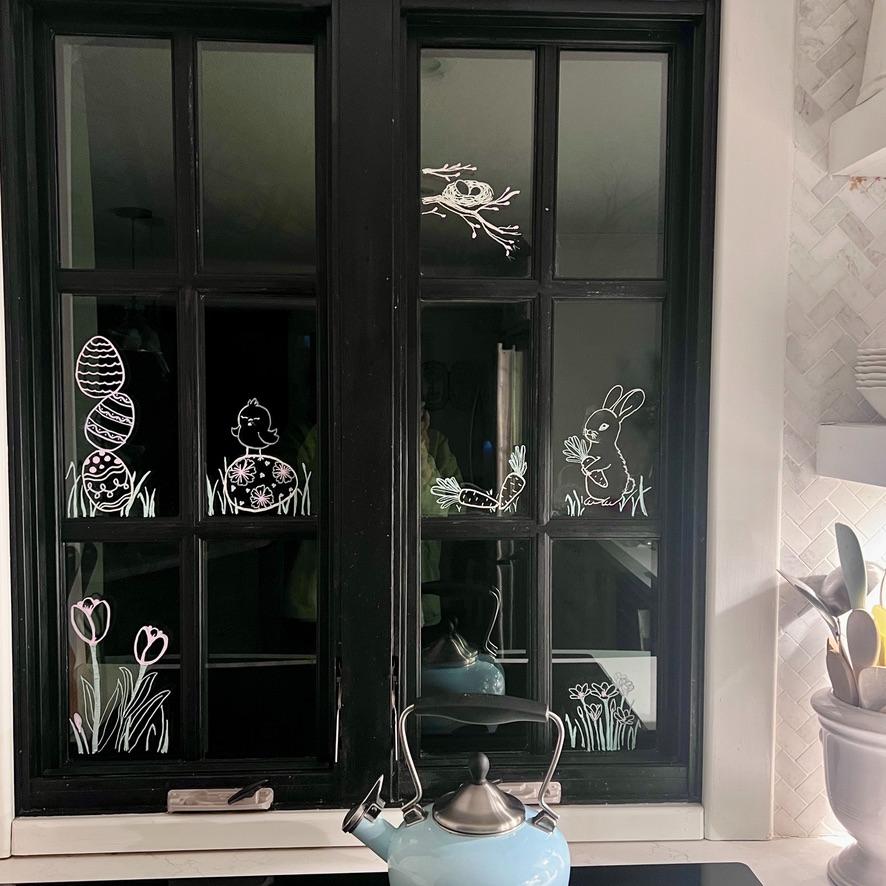
Templates Grab your free printable templates from the Resource Library! There are two options:
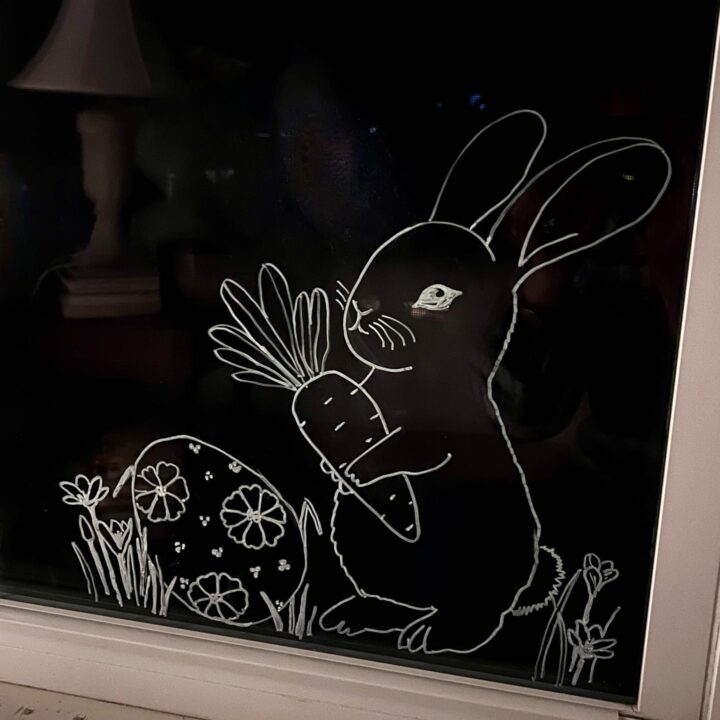
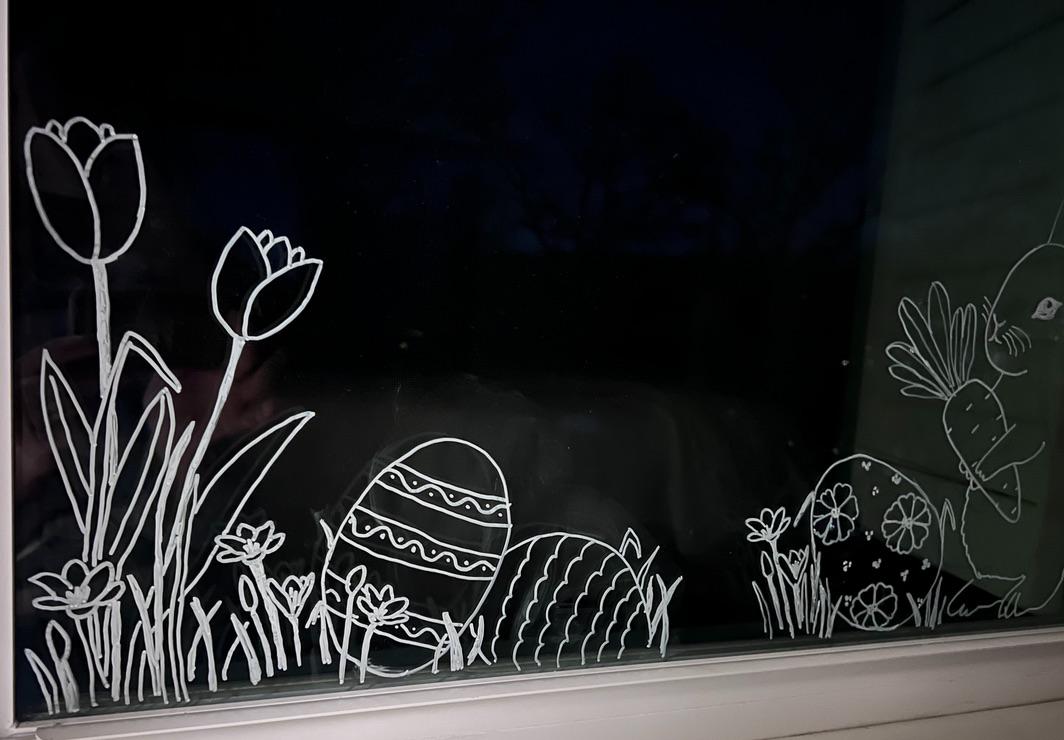
- The horizontal scene — a long bunny and eggs in the grass design, perfect for a window without mullions
- Seven smaller designs — mix and match these however you like for windows with mullions
Markers
- White chalk marker — Bistro Brand is my personal favorite
- Pastel chalk markers — optional, but they add the sweetest Spring touch
- A note on other options: Tempera paint markers also work well. Acrylic markers should clean off glass in theory, but I haven’t personally tested them so proceed with caution there.
Other Supplies
- Tape, I prefer painter’s tape
- A barely damp paper towel (trust me on this one!)
- A printer to print your templates
- Printer paper, basic paper works great, nothing fancy needed
Step 1) Choose and Print Your Templates —
Take a look at your windows first and decide which templates work best for your space.
Got a big uninterrupted window? The horizontal scene is made for you.
Working with individual panes in mullioned windows? Pick from the seven smaller designs and play around with the arrangement before you commit.
The templates are waiting for you in my Resource Library.
PRO TIP: Feel free to resize the templates right from your home printer — just adjust the print size to fit your window panes.
The horizontal scene can also be customized by cutting out some of the grass and flowers to shorten it, or by cutting between elements and spacing them apart to stretch it longer.
Step 2) Wash Your Windows —
Clean windows inside and out before you start. Chalk markers will still go on over a less-than-perfect window, but a clean surface gives you the crispest lines and the cleanest removal later.
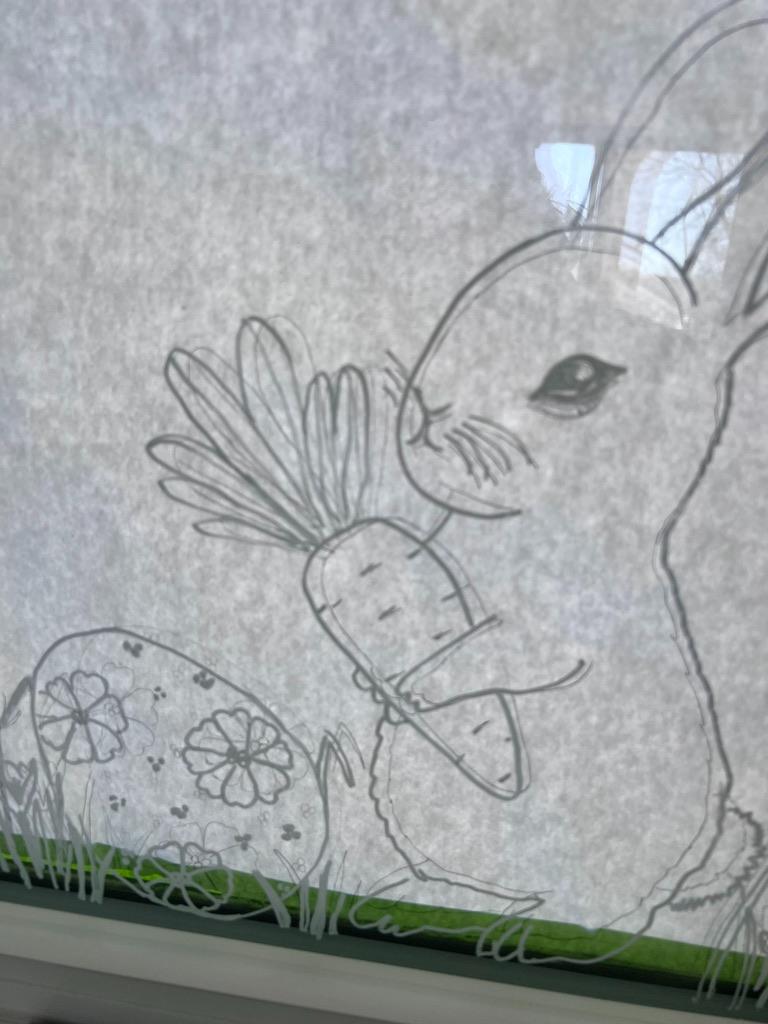
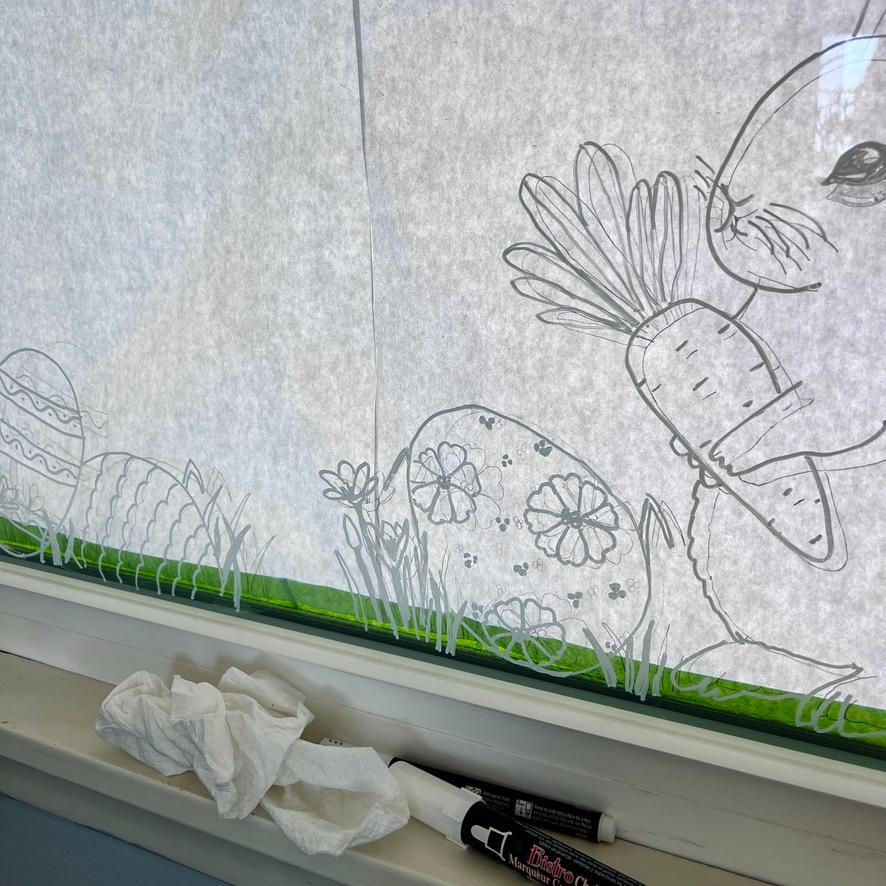
Step 3) Tape Your Template to the Outside —
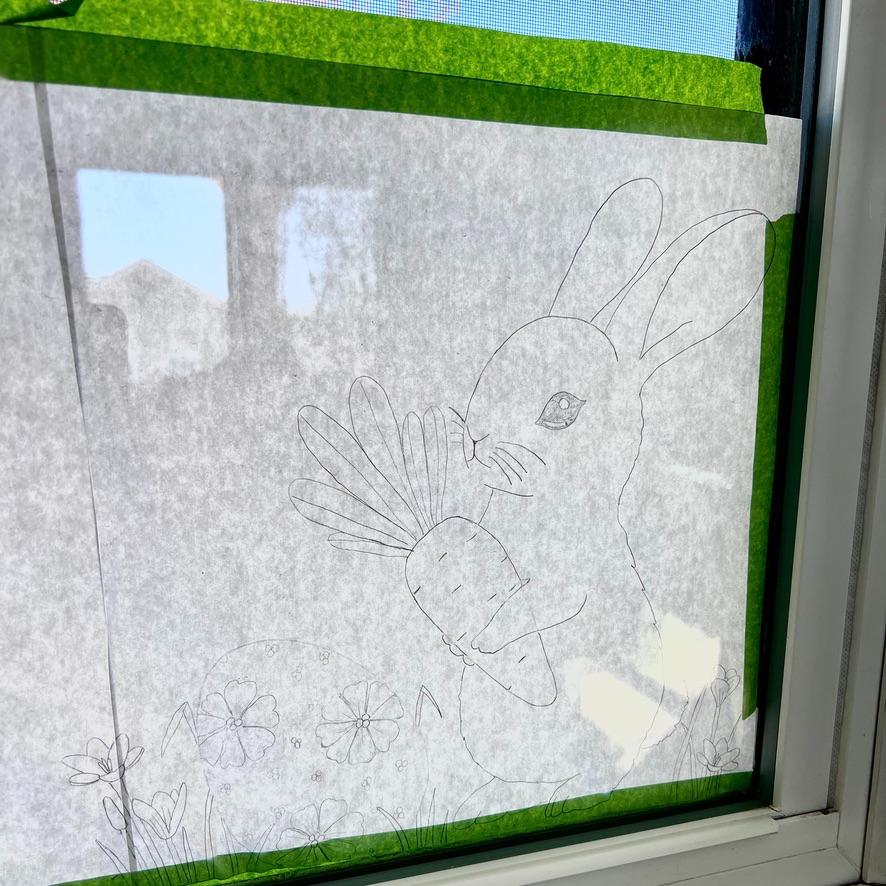
This is the magic of this whole project! Tape your printed template to the outside of the window, image facing in, so you can see it clearly from the inside while you trace.
PRO TIP : If rain is in the forecast, slip your template into a plastic page protector before taping it up. It’ll hold up just fine.
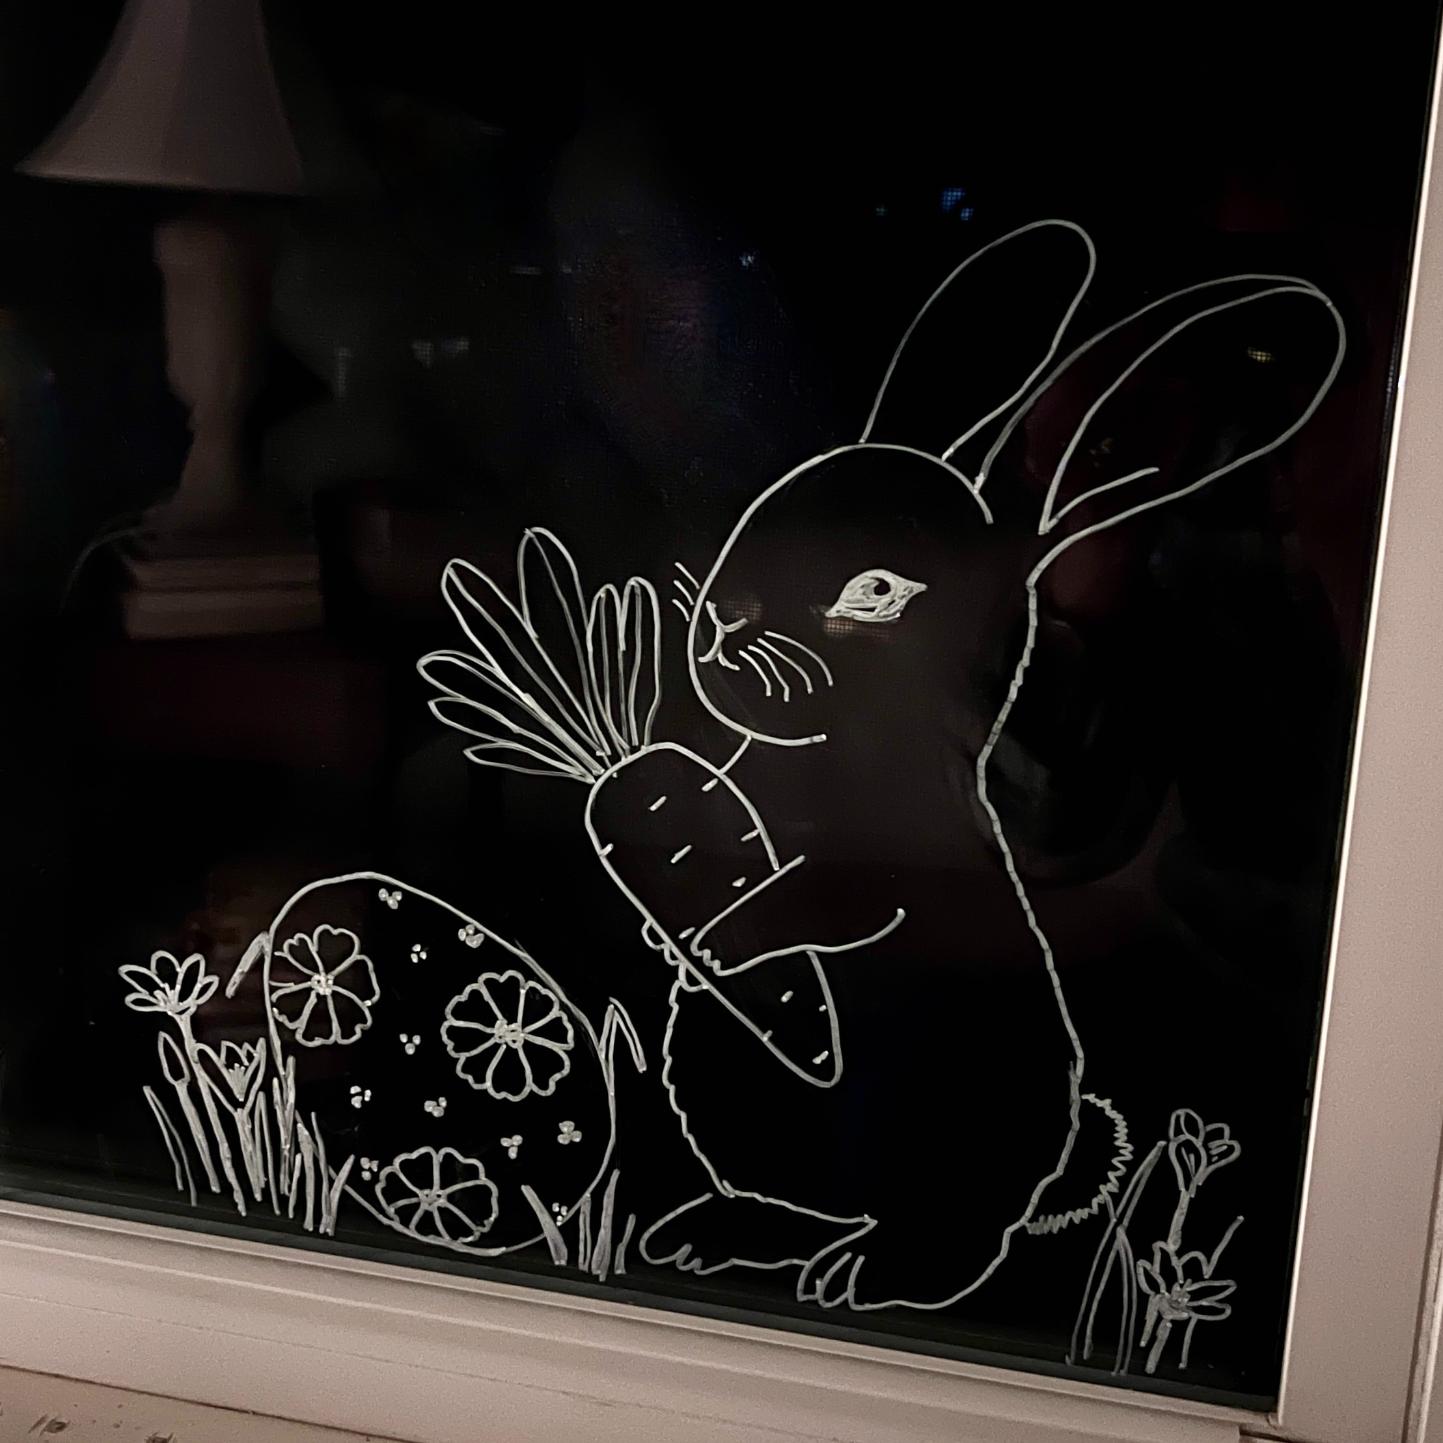
Step 4) Trace On the Inside —
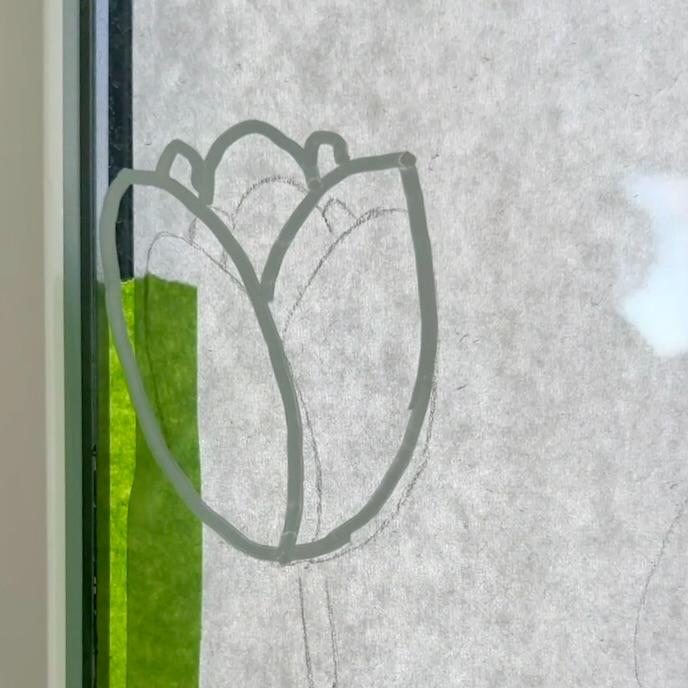
Pick up your chalk marker and start tracing the outline of your design on the inside of the window.
HINT: If you’re right-handed, start at the top left of your design. If you’re left-handed, start at the top right.
This keeps your hand moving away from lines you’ve already drawn so you don’t accidentally smear them.
Pro Tip — Double Pane Windows: If you’re working on a double pane window, you may find it tricky at first to line your marker up with the template on the other side of the glass.
The space between the panes creates just enough depth that your lines can appear to shift. Two things that help:
- Close one eye while you trace — it eliminates the depth perception confusion and makes lining up so much easier.
- Keep your eye level and straight-on with the exact spot you’re tracing at that moment. Avoid reaching too far to one side or too far up and down. Just focus on the small section right in front of you, move as you go, and trust the process.
And here’s the really good news: These are happy, charming, hand-drawn tracings — they are supposed to look a little loose and organic. Your lines do not need to be perfectly on top of the template lines. That slight imperfection is exactly what makes them look like art and not a sticker.
Not-So-Pro: Keep a barely damp paper towel right next to you while you work. Don’t like a line? Wipe it off and redo it in seconds. Easy Peasy! Note the well-used paper towel on the window sill.
Chalk marker is incredibly forgiving on glass — this is genuinely one of the most low-stress crafts you will ever do.
Step 5) Remove the Template —
Peel away the tape and remove your template from the outside of the window. Step back and take it all in!
Step 6) Touch Up if Needed —
Now that the template is gone you’ll get a clear look at your finished design. If anything bugs you, your damp paper towel is still your friend. Wipe, redo, done.
Taking It Down When You’re Ready
When Spring is over and it’s time to swap out your decor, just dampen a paper towel or use a little window cleaner and wipe your chalk art away.
Your windows will be perfectly clean and ready for whatever season comes next.
NOTE on Condensation
If your kitchen window is a single pane, be aware that the temperature difference between warm cooking smells inside and cold air outside can cause condensation — and chalk marker and moisture are not friends.
I learned this firsthand with my single pane window over my kitchen sink last Christmas!
If you have the option, choose a double pane windows for this project. I moved mine to the double pane window over my cooktop and even on an 11-degree morning with a pot of stew going, there was zero condensation issue.
If you live in a temperate climate without dramatic temperature swings, this likely won’t be a concern for you at all!
Be sure to save the pin above. And then go grab those templates and your chalk markers — your windows are waiting!
This is one of those projects that looks like you spent way more time and talent on it than you actually did, and I am completely here for that.
Tag me when yours is done because I need to see all the bunnies. 🐰
And if you love this, keep an eye out later this year when I share my Christmas version — spoiler: it involves ornaments, a greenery swag, and a whole lot of white chalk marker magic.

More Projects to Enjoy