
Want Great Table Linens? Make Them With This Easy DIY!
Can’t find great table linens in the right colors that you can afford? And you’re not an artist? Here’s an easy and fun way to make your own!
Happy First Tuesday, which means Handcrafted Society Day!
This month we are all sharing fabric projects.
Welcome to South House Designs! However you came to be here, I’m thrilled to have you. SHD is all about creative making and thinking to make our lives more joy-filled. And today’s is a super fun one!!!
Are you looking for a unique and personal way to set the table for your next special occasion? If so, you might want to consider hand-painting your own table linens.
A hand-painted table runner, table cloth, placemats and/or napkins are a great way to add a touch of personality to your tablescape.
You can choose any colors or patterns you like, and you can even add your own personal touch with a monogram or special message.
I know!!! Hand painting? That can sound intimidating to the non-artist!
Don’t panic and bolt! I have the easiest way that honestly, anyone can do. Bonus: It’s so much fun!
With a few simple supplies and a little bit of creativity, you can create beautiful and unique table linens that will be the envy of your guests.
In this blog post, I’ll show you how to hand-paint table linens in a few easy steps.
I’ll also share some tips for choosing the right colors and patterns, and for creating great-looking linens whether your style is modern, rustic, charming, or boho.
So whether you’re a seasoned crafter or a complete beginner, read on for all the information you need to get started!
Plan Your Design
As you will see very quickly, this easy way can be used in limitless ways. It will open a whole world of possibilities for you, even if your aren’t an “artist”! So we’re going to start with a basic project.
From there, you can take off with more adventurous designs, creating your own style. But for today, pick one design that will be repeated to make a decorative stripe on a placemat.
Honestly, the hardest part of hand-painting table linens this way is deciding on the design and colors.
There are so many different options to choose from, and it can be a bit overwhelming to know where to start. Here are a few tips to help you get started:
Start by brainstorming a few different design ideas.
What kind of look and feel do you want for your table linens? Do you want them to be modern and bold, or more traditional and classic? Once you have a few ideas, start sketching them out or using a design tool to create mockups
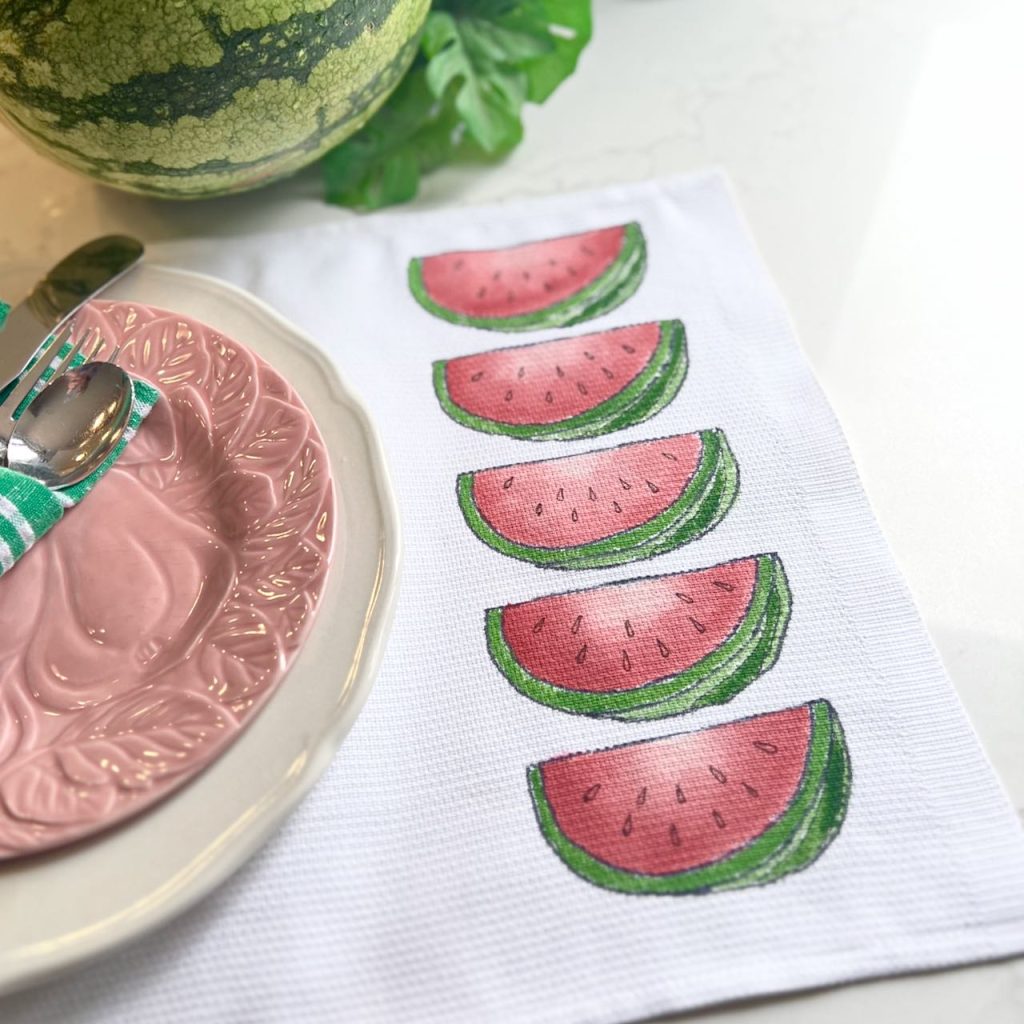
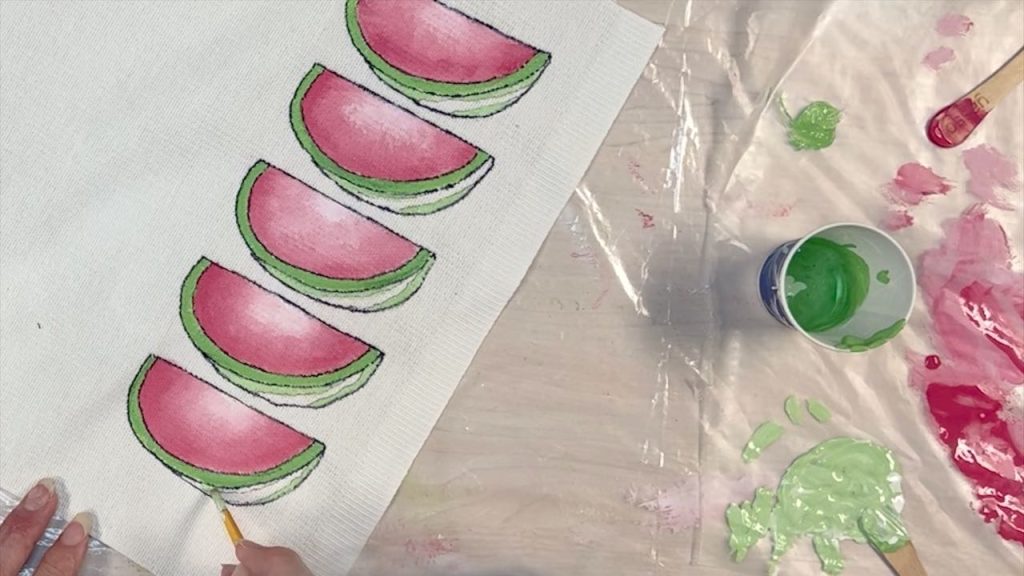
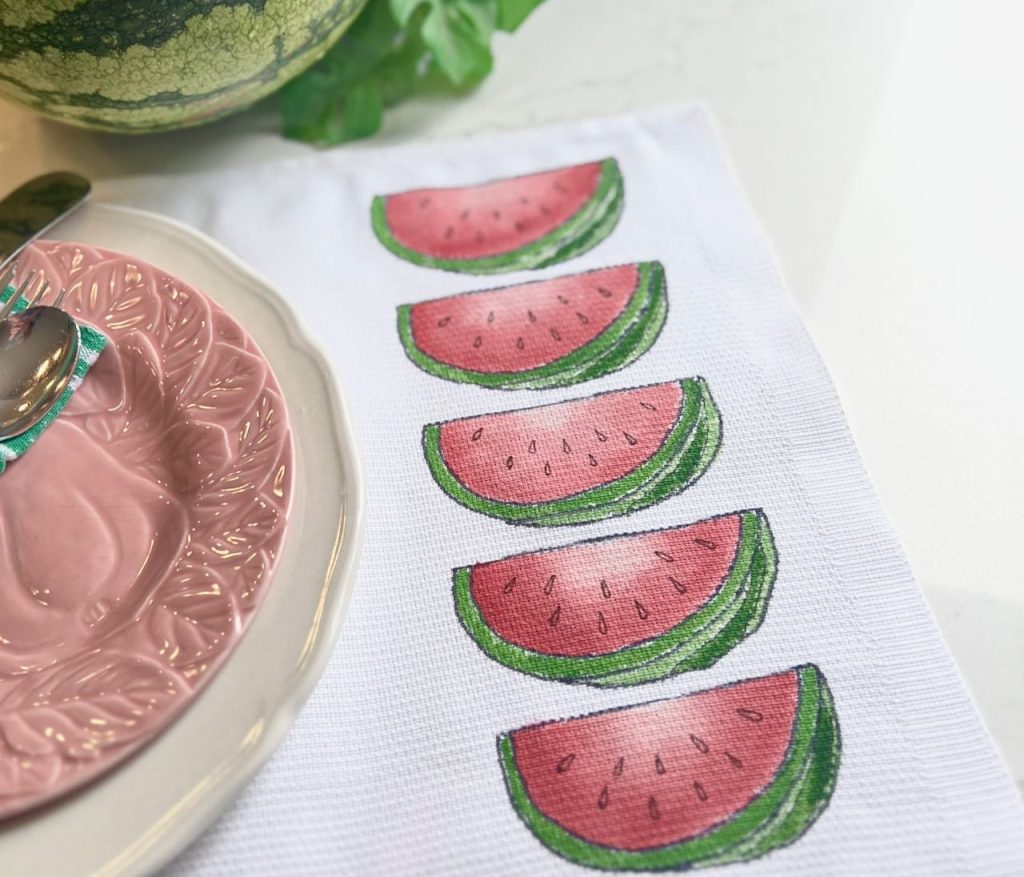
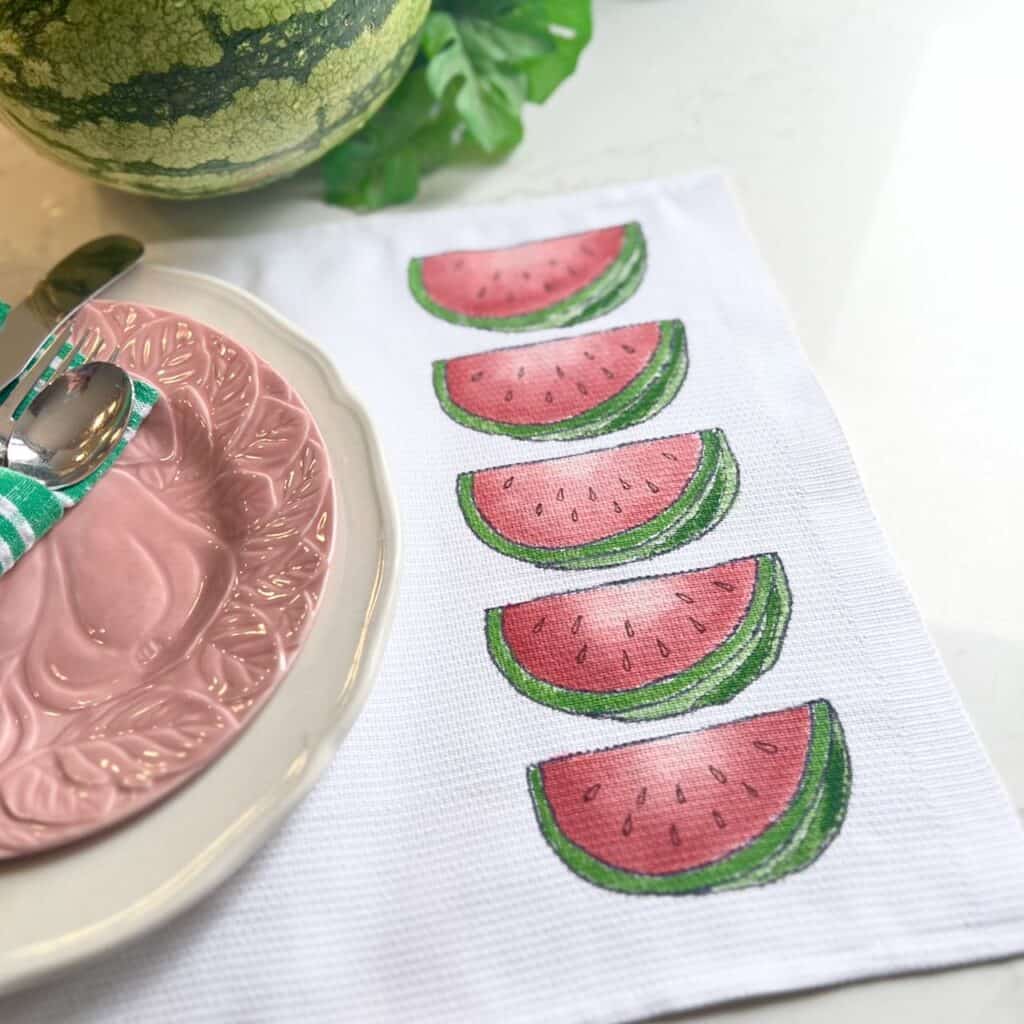
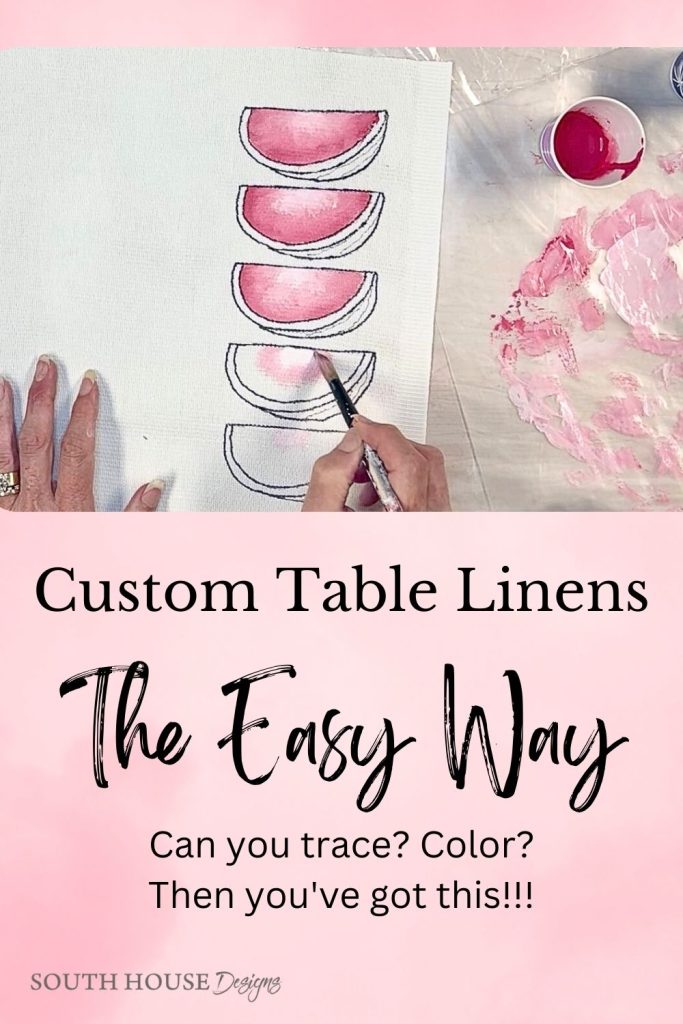
I’m in the middle of Summer right now, so I’m thinking picnic, which of course means watermelons! To keep things simple, and because I don’t consider myself a traditional artist — like sketching something, I used Canva to create my artwork.
This watermelon design and several others are in the Free Printables Library that is available to all my subscribers. (the current password is at the bottom of every email you receive).
Consider your audience, your table theme, even your dishes for inspiration.
Who are you making these table linens for? What are their needs and expectations? Once you know your audience, you can start to choose colors and patterns that will appeal to them.
Use a color wheel to help you choose colors that work well together.
There are a few different color schemes that you can use, such as complementary colors, analogous colors, or triadic colors.
Don’t be afraid to experiment.
The best way to find the right design and colors for your table linens is to experiment. Try out different combinations and see what you like best. Use scrap fabric or at least something similarly textured for tracing and coloring on the fabric.
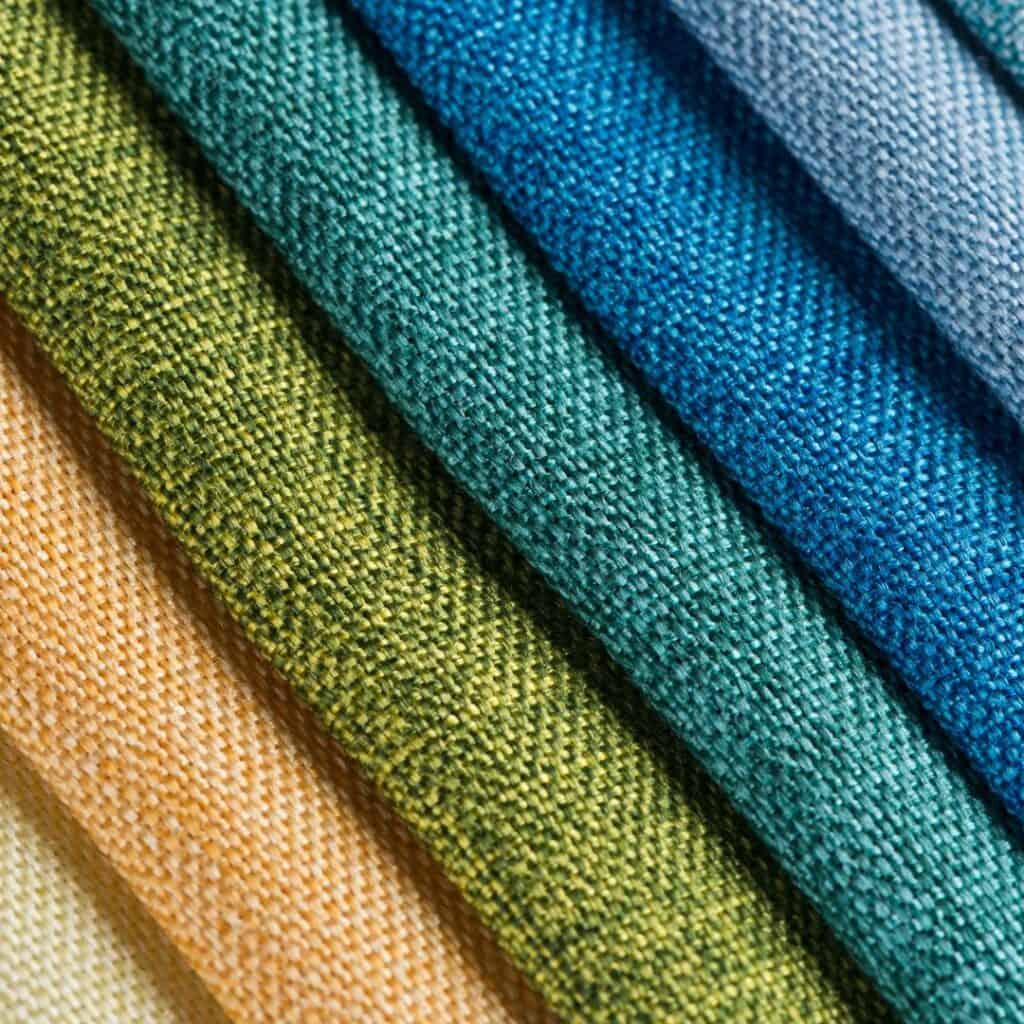
Now that you’ve decided on a design and colors, we need to talk about the fabric and paint.
For Fabric–
I used fabric called Huck Toweling, because I recently scored a fifty yard bolt at a thrift store. Table linens are a great project to develop your sewing skills because there are typically just straight lines.
There are amazing fabric options for table runners, plain tablecloths, placemats, napkins. Well, any table linen you can think of!
It’s best to use a cotton or linen fabric with minimal texture. And avoid any stretch fabrics. And the paint will have a hard time sticking to any slick or glossy fabrics.
Not.a sewer? No problem! Go with ready-to-do blank table linens that are super easy to find and usually very reasonable priced! I’ve added a few options that looked good:
For Paints–
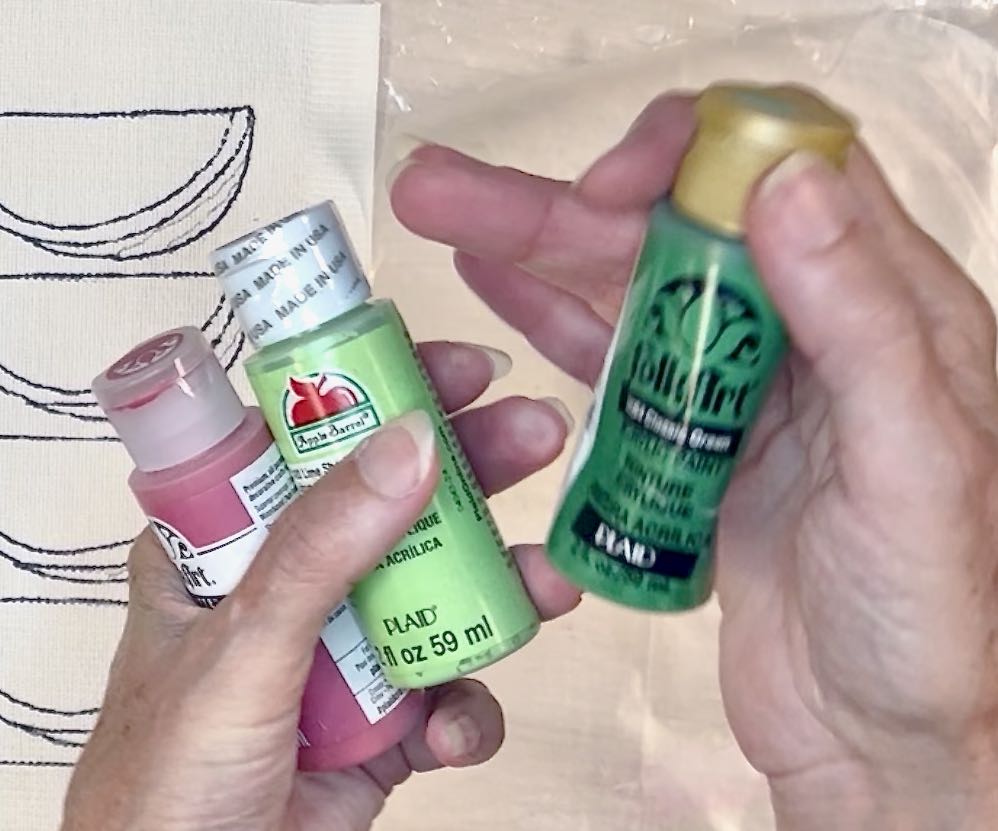
I use the small bottles of inexpensive craft paints. .They are readily available, they don’t cost must, they’re easy to mix, they’re easy to clean up. What’s not to love?
Really any acrylic paint will do, but probably skip anything that is high gloss.
But you do need to “enhance” them slightly to make them suitable for fabric by adding a bit of a Textile Medium and a bit of water.
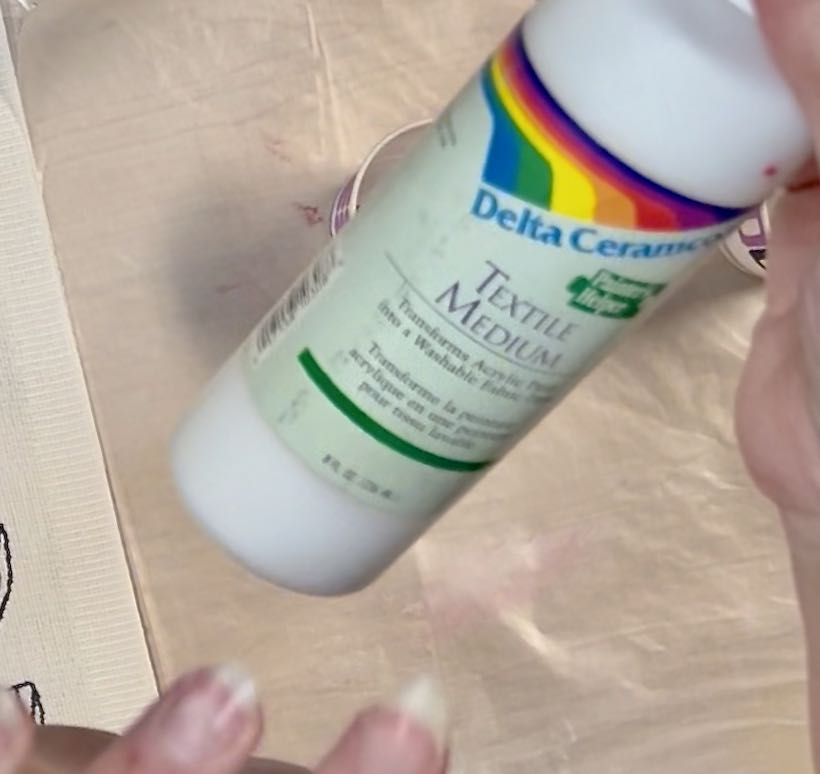
The Delta Ceramcoat is the fabric medium I used because it’s what was in my stash. Follow the directions on the bottle you use. To give you an idea, with mine you use one part textile medium to 2 parts paint.
Yea, I just eyeball it.
I used a variety of craft paints that I have squirreled away.
After mixing in the textile medium, add a splash of water to make your paint glide easily over your fabric.
You want it to be thin enough for your fabric to absorb it, not to have a coating sitting on top.
Other Materials and Supplies–
- Permanent markers
- Water, spritz bottle is very helpful but certainly not necessary
- Paint brushes, artist or craft brushes with soft bristles
- Dixie cups for mixing paints
- Wax paper or a paint palette for blending paint colors
- Disposable craft sticks or popsicle sticks
- drop cloth, disposable plastic tablecloths or work surface cover
- paper towel
- Painter’s tape, or really any tape
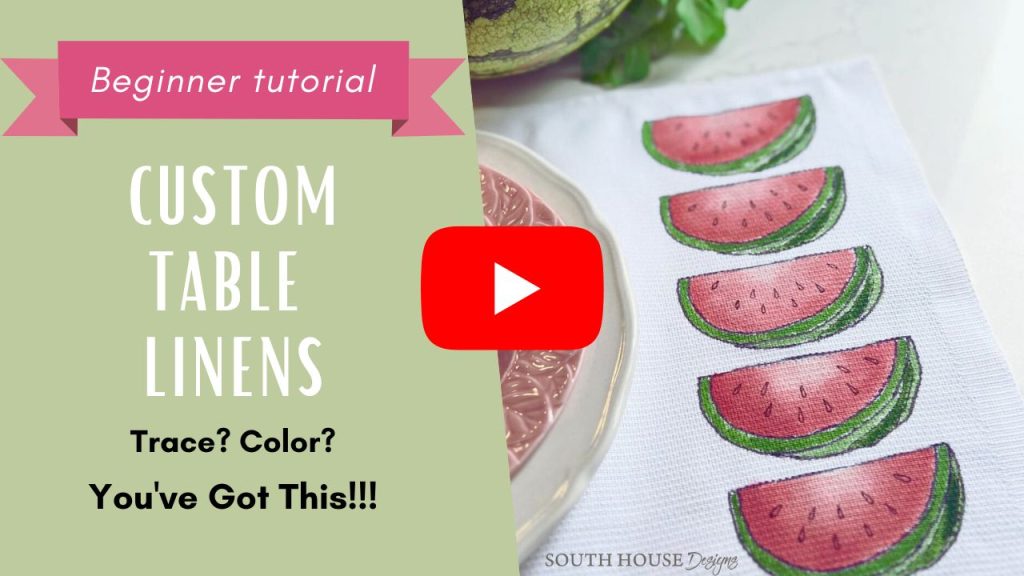
Would You Prefer Video?
Great! I’ve Got Ya Covered
Just click the picture bellow
Step 1) Create your design–
As mentioned above, truly the skies the limit.
I’m demonstrating with watermelons, but certainly do what appeals to you.
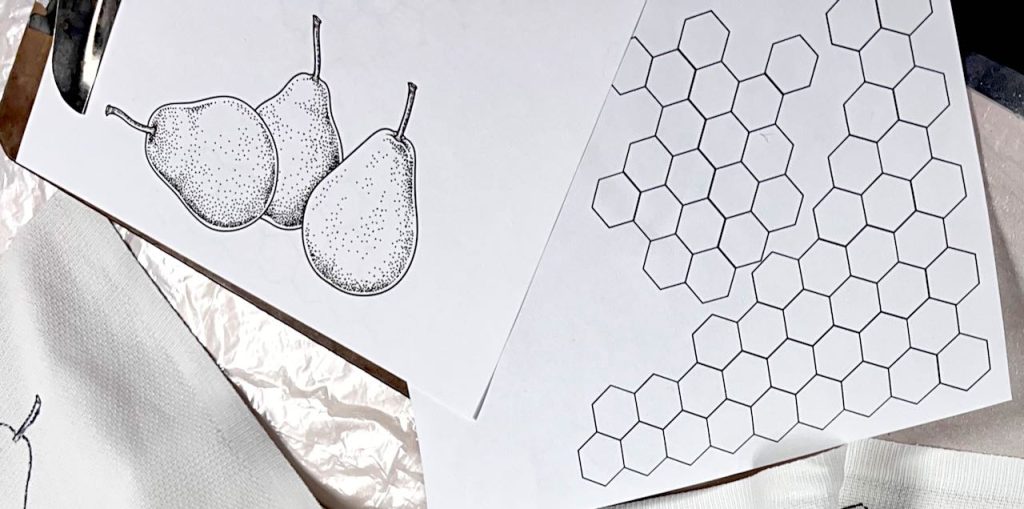
Now search through Google for “free clip art of ______” or “free line drawing of _______”.
I used Canva.com for mine. I have the paid version, but the free version has quite a bit to offer. Be sure to expand and/or contract your design to the correct size for your project.
The pages of watermelons along with the other projects I show later in this blogpost are all available in the Free Printables Library. Why not subscribe now and experiment with this technique:
Oodles of Thanks!
Now save your design Once you have your design in a format that can be printed, such as PDF or PNG or JPEG.
Print your design on white paper.
HINT: I like to print two copies, so I have one sitting next to me while I’m tracing in case there is a detail I can’t quite make out through the fabric.
Step 2) Pre-wash your fabric–
It isn’t always necessary, but it is a good idea to eliminate and sizing or coating by running it through the wash cycle and then drying it with the appropriate heat.
It’s also best to have your fabric shrink now, rather than later.
Step 3) Trace your design–
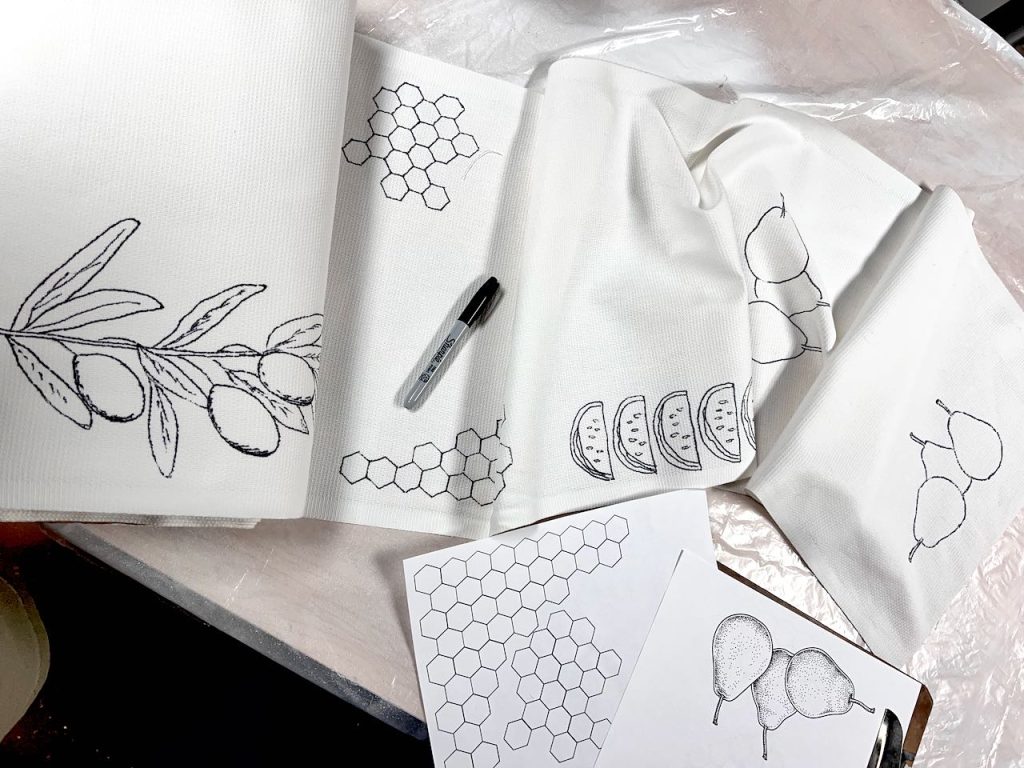
PERMANENT marker is the key! For classic black, I used a fine point Sharpie. Then for details, I used Micron pens from Sakura (LOVE these!!!)
Keep in mind, that your outline does not have to be black.
If you are a neutral lover, depending on your design, a mid-brown could look great with many shades of cream and ecru
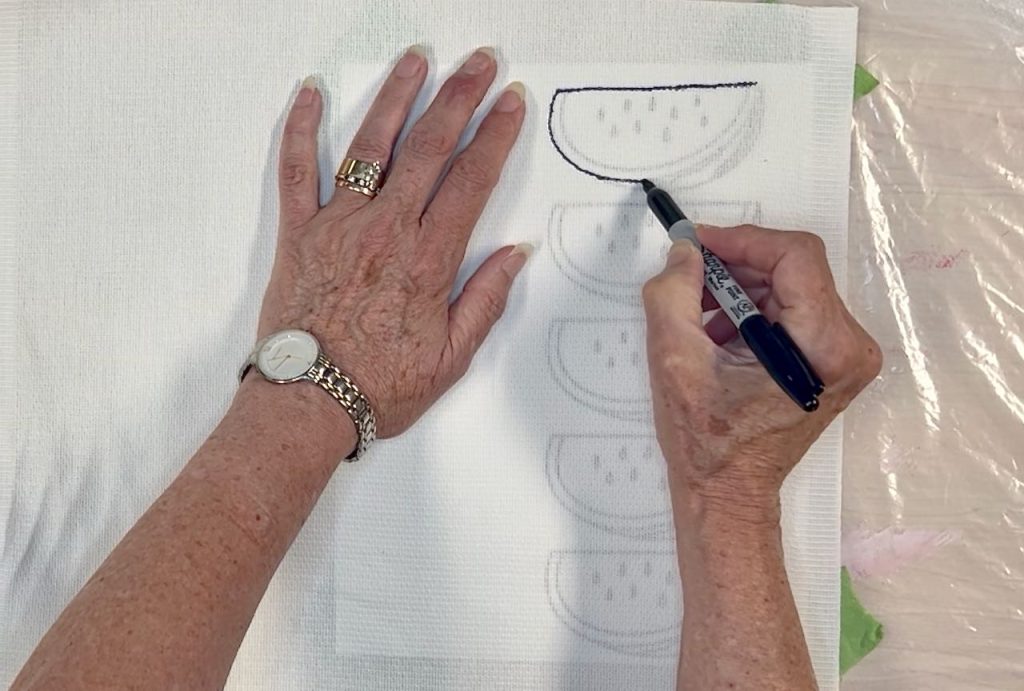
Tape your printed paper to the backside of your fabric.
If you have one, on a scrap piece of fabric, or something similar, practice the feel of the marker on the fabric. Depending on iff it’s a smooth surface or fairly textured, there might be significant drag on the marker.
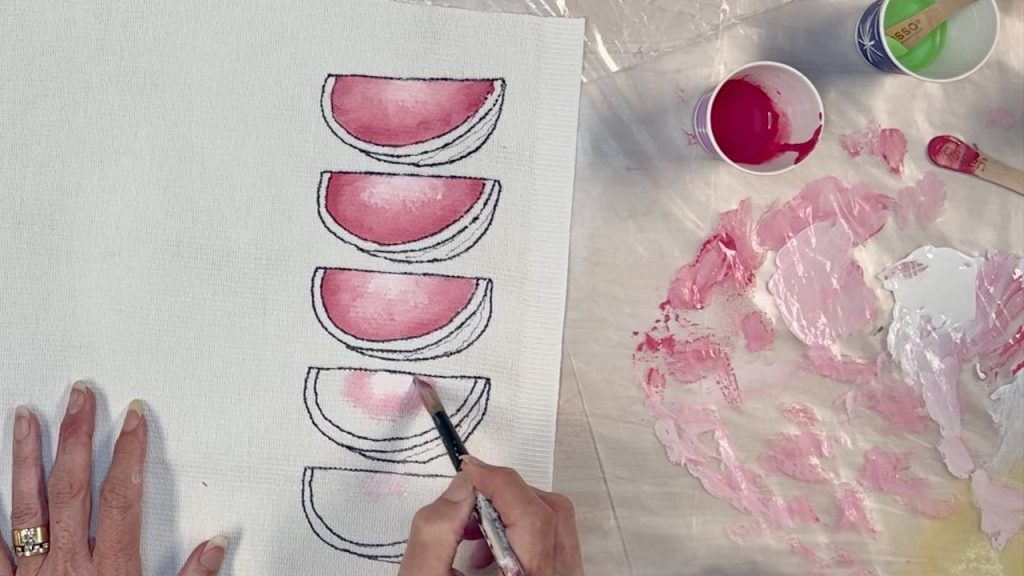
Step 3) Color in your outline–
There is truly no right or wrong way! The best results are the ones that please you!!!
If you want a pop art, mid century or exaggerated comic book feel, color in your lines with bright pops of single shades of different colors.
If you want more of a soft watercolor feel, soften your color scheme and use blended brush strokes with lots of variance in your shading.
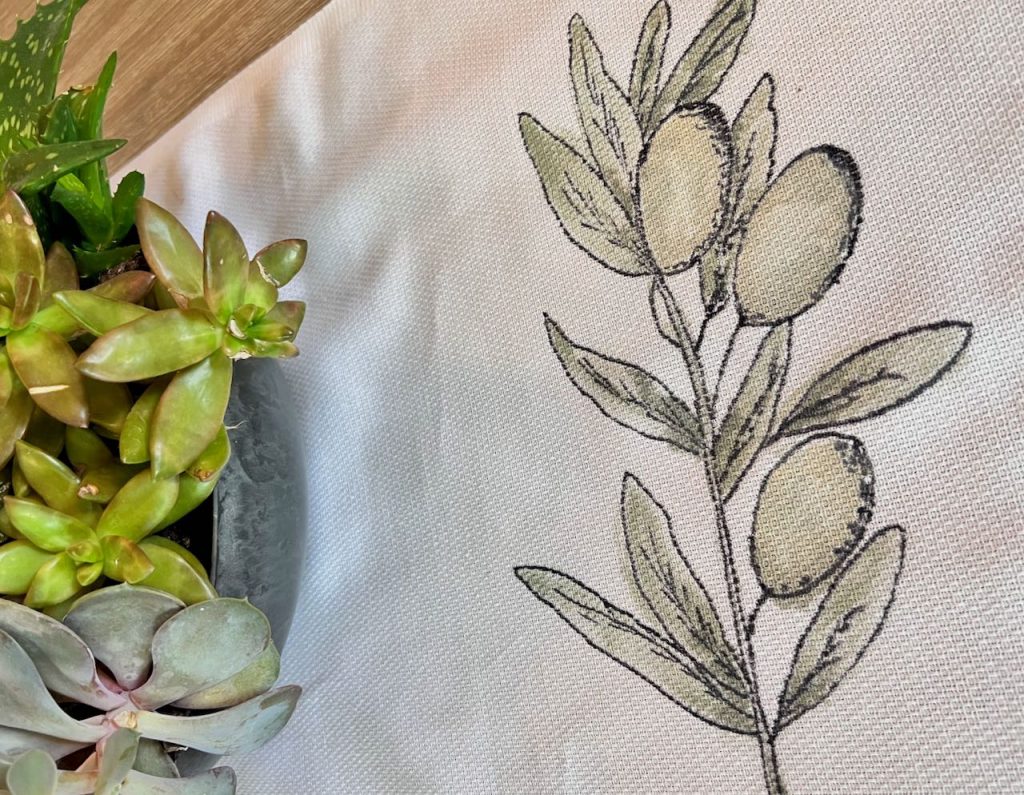
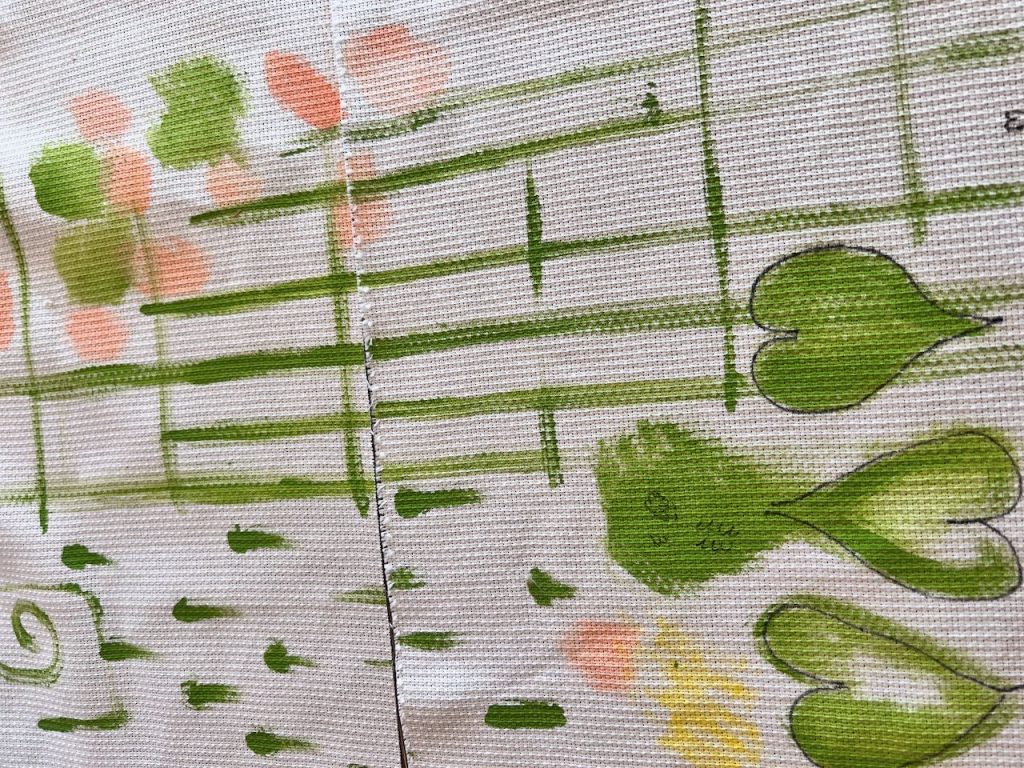
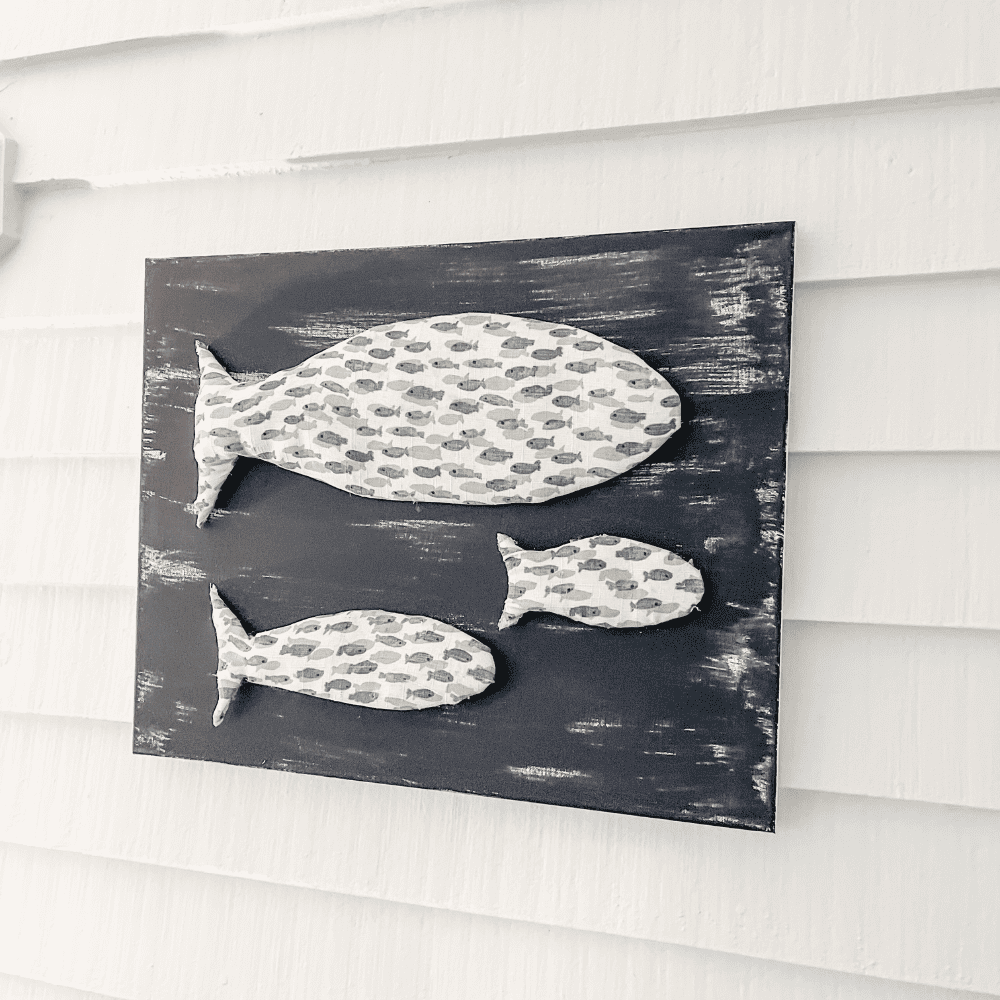
With the watermelons, I stayed pretty much in the lines. Compare that to the olive branches where I intentionally went outside the lines for the artist sketch type look.
Again, no right or wrong.
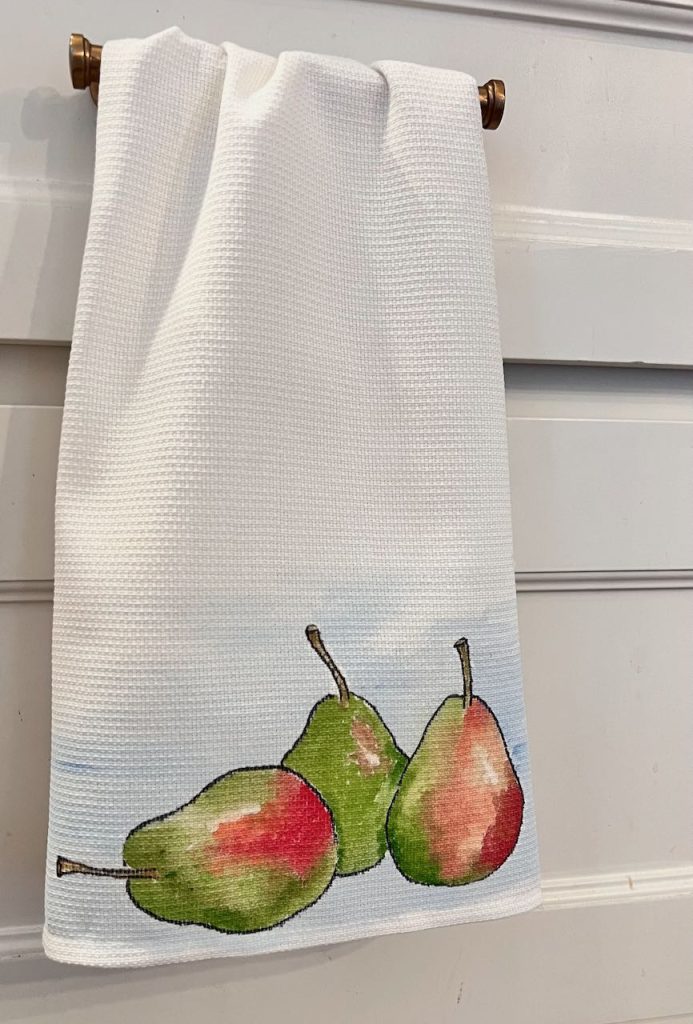
Take a cue from the video. Do you see that when I painted the three pears tea towel, I was following the example of my beloved pear painting. There is nothing wrong with being inspired by the brush strokes and color choices of a painting you love.
Step 4) Add any detailing–
After the paint has dried, add any additional detailing with thinner permanent markers. Depending on the look you are after, add some details with a thinner micron permanent marker either before or after your painting.
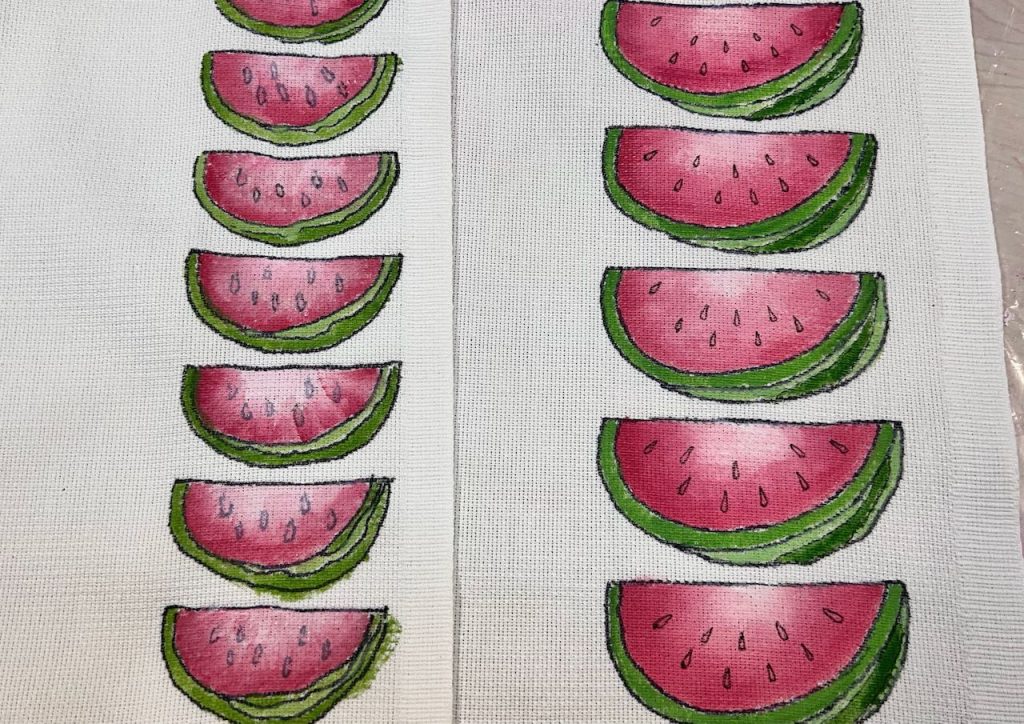
Look closely at the two set of watermelons. The smaller ones, the seeds were added before painting. The larger ones, the seeds were added after the painting.
Step 5) Heat set–
Sound complicated and challenging?
Not a bit!
Wait until your paint is dry. Cover your painting with a Press Cloth — a fancy term for a thin piece of cotton. (An old shirt would work fine).
Now iron on low to medium.
Remove the press cloth. Let Cool.
You’re Done!
You May be Asking:
What Does Heat Setting Do?
Will the Paint Wash Out?
Ahhhh! The beauty of heat. It makes your paint permanent.
Okay, I’m not comparing your napkin to the Rosetta Stone. In time you may see some fading, But it will probably be stained beyond use before the paint fades.
Sketical? So was I!
When I was dreaming up this project, I decided to test it before I would ever recommend it.
I cut my sample, experimenting cloth in half. I washed one side with Tide detergent, cold water, on the normal cycle. And then threw it in the dryer.
Check it out!!!
I couldn’t tell one side from the other. Can you guess? There’s one clue in the picture.
Keep reading to see if you’re right.
Keep an eye out for more projects like these. I am crazy about the results with minimal time, effort and skill! The trifecta of crafting!!!!
With a little bit of planning and effort, you can create beautiful and unique table linens that will be the envy of your guests. So what are you waiting for? Start brainstorming your design ideas today!
Back to the burning Which One question: Did you guess?
The one on the right.
The only reason I know it was washed is because it had a bit of fraying at the cut line and it shrunk at bit (although you can’t see that in the cropped picture above).
Amazing, right?
(Am I the only one who geeks out over things like this?)
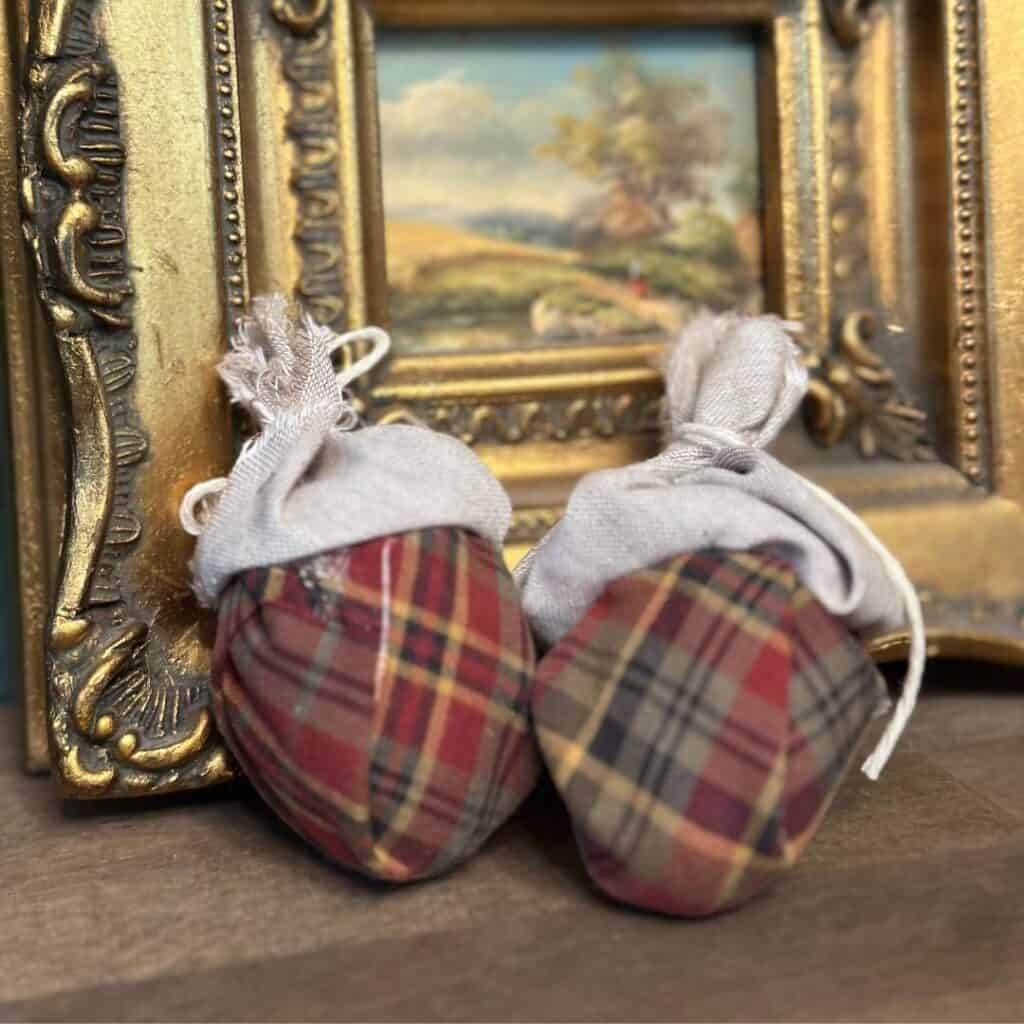
And now it’s time for me to send you on to Amy at Amy Sadler Designs. Check out those adorable acorns!!! Leave it to Amy to come up with something so stinkin’ cute!


As always it has been such fun crafting with these gals. And sharing them all with you. So go check them out. Or at least Pin the above graphic so you can find them all again.
It is truly my honor to have you here with me today! Thank you, thank you!
I can’t wait to have my inbox loading up with picture of your painted fabric creations!!!

Diane, I adore this project! You give such clear instructions and make it so easy for those of us who can’t freehand. I think your pears are my favorite! Thank you so much for leading us this month. The video was fantastic!
I had a fantastic cast and material to work with!!!
I love the pears too! I’m anxious to actually dry dishes with them and run them through the washer several times.
I know what to do with my extra dish cloths now. Excellent tutorial Diane, and I love all your cute design suggestions. Thank you for the inspiration!
Thanks Michelle! I can’t wait to do more, I’m surprised with how relaxing it is.
DIane – Ok, first I am in love with the video – great job. Next I want these watermelons. I think I would be so intimidated to try these but you surely do make them look easy. I love how you varied with staying the in lines and not. So darn cute. Thanks for suggesting this medium it was a fun one.
Regina, so sweet of you! Both easy. I had a great cast for the video and the placemats are really just tracing and coloring any way you like.
Diane, these linens are so beautiful. You did an amazing job, not only can you sew, but you sure know how to paint. Love, love, love! I am going to have to try this for sure. Iv’e pinned it for reference.
Thanks Wendy! I know with your design eye, yours will turn out gorgeous! Share pics when you do.
This is such a sweet craft, and looks easy. I think the pears will be nice for fall birthdays coming up. Thank you.
Thanks Pamela! It’s not magic. I made it look easy because it is! I hope you do give it a try (and send me pics).
Super clever project, Diane. I love the olive branch one, I love the earthy greens you used.
Thanks so much Jennifer! It’s fun to experiment with totally different styles. The olive branch is really more my stye too.
Wow! These table linens are stunning!
I love how they all turned out but the olive branch is my favorite!
Thanks Amy! Mine, too. (But if you tell the watermelons, I’ll deny it!)
WOW, so pretty and adorable. I was once gifted by my SIL a tablecloth and napkins all hand painted and I treasure it as I know the amount of work that goes into something like that! It’s a labor of love.
I visited you via The Happy Now Blog Link- Up #387
I linked up this week with = 83+85 and this is a friendly reminder to come and join us at SeniorSalonPitStop. You will find the linkup information under BLOGGING.