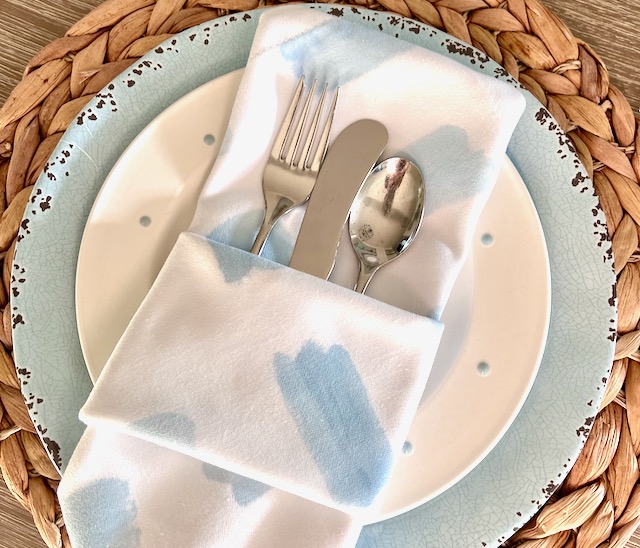
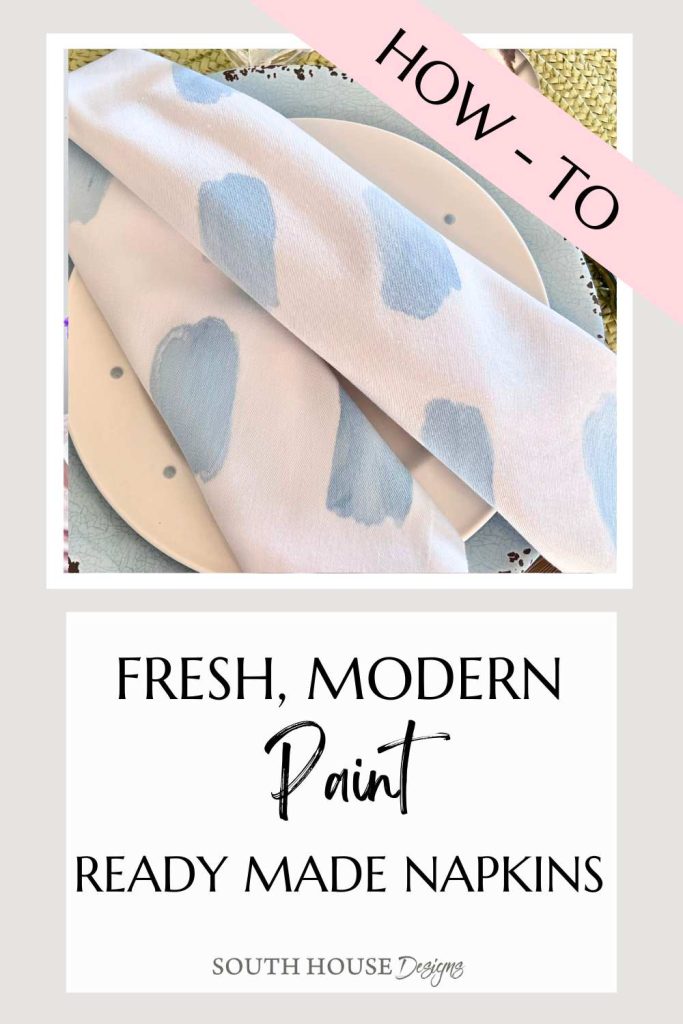
Easy to Paint on Cloth Napkins With Amazing Results!
Wow your guests and family by using craft paint and my guide to turn boring white napkins into elevated custom designer napkins.
Do you love setting a great table too? Nothing overboard! Enough so our family and friends know they are special.
Cloth napkins add a special touch. Plus trees are so much better at shading us, being a noise barrier, protecting the birds and certainly cleaning our air, than catching drips of BBQ sauce.
In our house, we use fabric napkins everyday. No, I’m not crazy, we don’t use the linen napkins every day.
We have an odd assortment in our “every day” napkin drawer.
But I like to have a few sets of 8 – 12 that match the season or our dishes. Sets that I can easily pull out when we have neighbors drop in and an impromptu gathering happens.
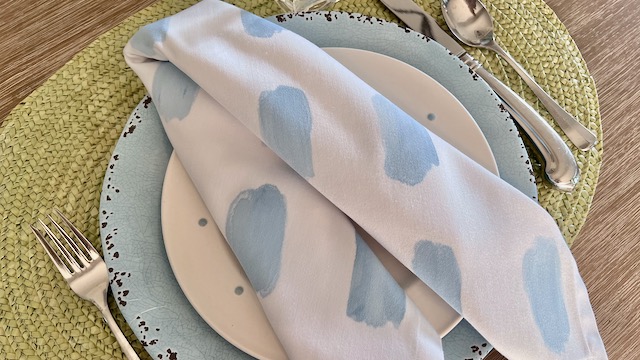
Or sets for casual gatherings, like this Labor Day weekend when there will be twelve for a pontoon picnic. This weekend is more focused on celebrating Summer, rather than rushing through to Fall.
So I made these napkins in a color for my kitchen and dining room, but also works for my patio and Summer!
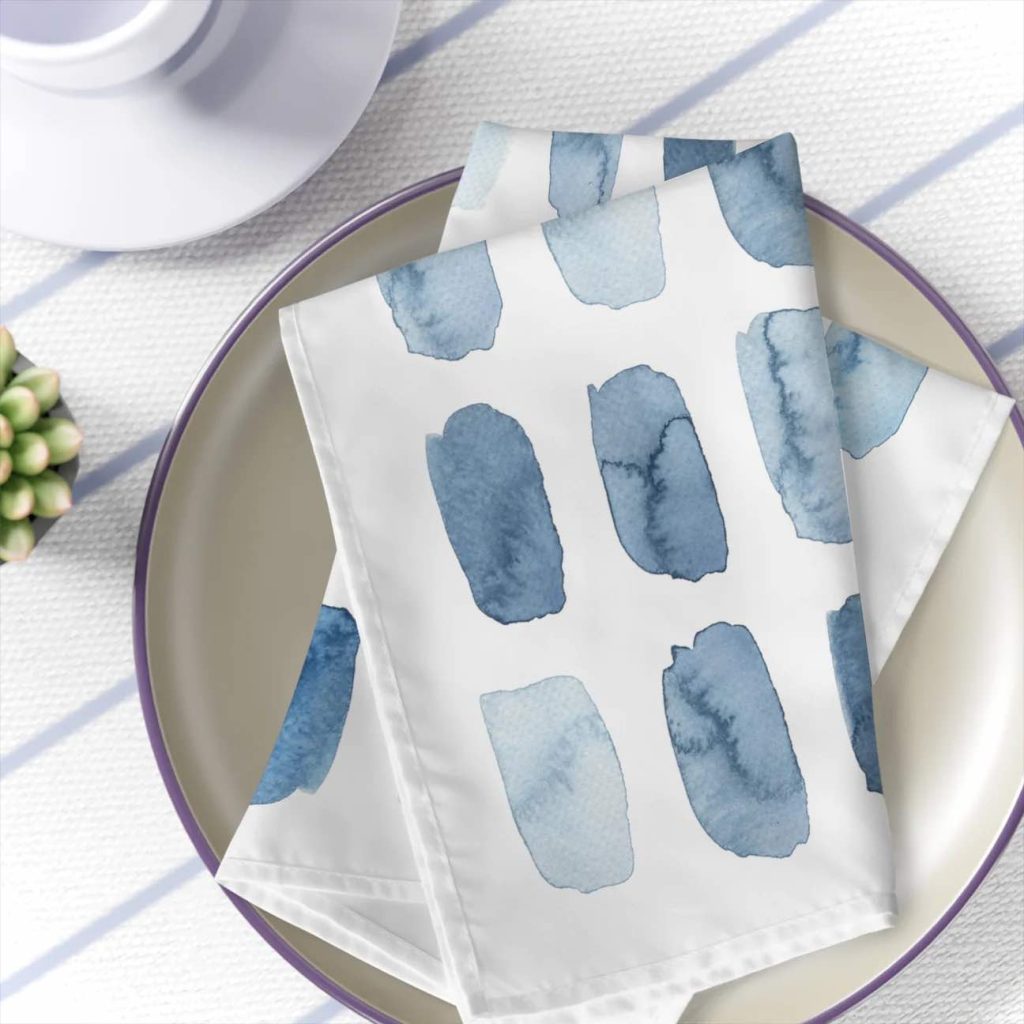
Actually, I was inspired by these that I saw at Pier1. Love these!!! But at $90 for twelve, they are well beyond my picnic price point.
Of course you can recreate these in any color scheme that works for you, for your home, for the event or season when you’ll host your next dinner party.
HINT: Red and white napkins are particularly versatile: with candy canes for Christmas, with pink for Valentine’s Day, with blue for the Patriotic holidays.
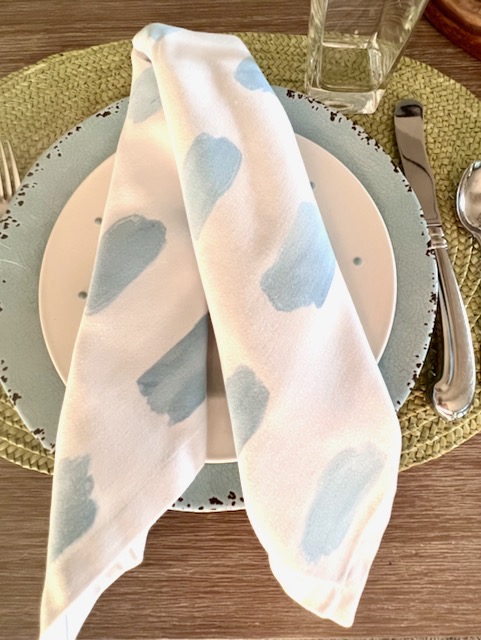
I couldn’t reproduce the watery watercolor layered Iook of the Pier1 inspiration napkins (watercolors don’t work exactly the same on fabric as they do on paper) but I wanted a hand-painted look of brush strokes. You know, the imperfectly perfect look, but I like the orderliness of a set grid. So I came up with a very simple way to achieve balanced uniformity, but with each brush stroke being unique.
Aren’t these fun? And they are so, so easy!
I know what you’re thinking:
Can You Wash Painted Fabric?
Yes, they are machine washable!!!! Provided you:
- use Fabric or Textile Medium in your paint
- and heat set with a hot iron
And both are included in our steps below.
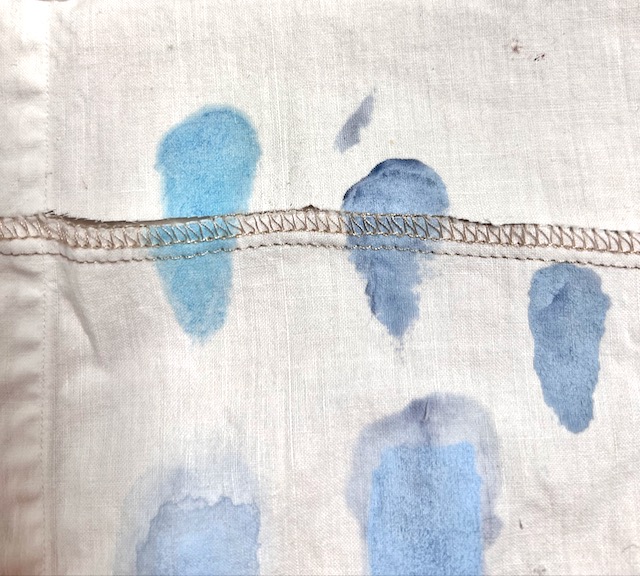
Didn’t believe me did you? The bottom piece is the side that went through the washer and dryer. The only reason I know is because it’s the side that’s serged.
BONUS: Keep in mind, both dinner napkins and cocktail napkins make great hostess gifts or holiday gift.
Let’s Get Started.
Do You Prefer Video?
No problem!!! Click on the image below for a video of this same information.
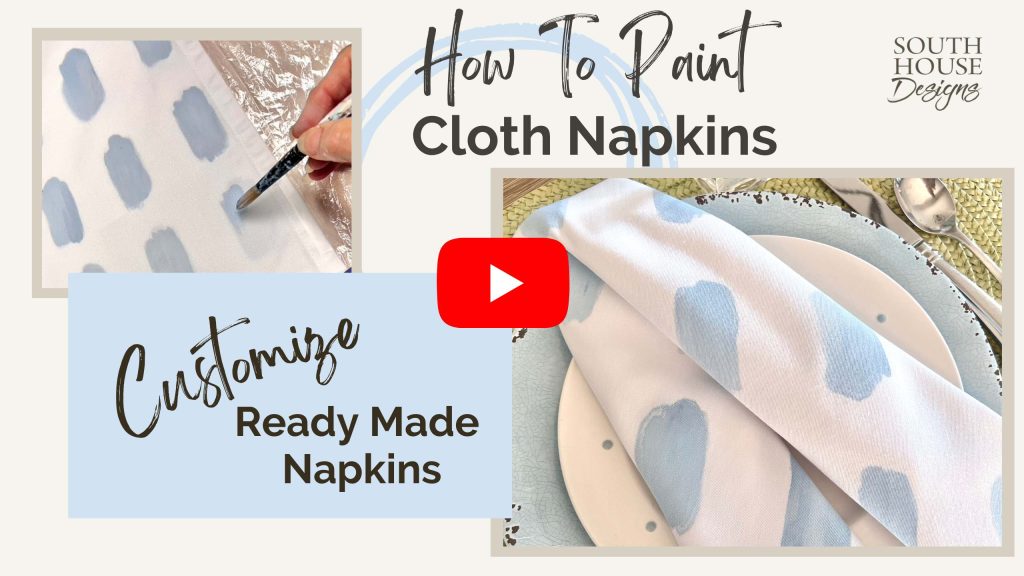
How to Paint Purchased Napkins For a Custom Look
Supplies and Materials-
- Napkins – See notes below
- Flat surface
- Plastic – one to protect your work surface, and a smaller piece for over your pattern
- Pattern – the one I made is available for free in the printables library for all the South House Designs subscribers
- Paint – any acrylic paint will work. I used several shades of one paint color from my craft stash
- Textile or Fabric Medium – this is the brand I used
- Paint Brush
- Plastic palette with cover. Recommended, but not required.
- Scrap piece of fabric for testing and experimenting
- Wax paper
- Cup of water
- Paper towels
- Iron
- Press cloth – a thin scrap piece of fabric
- Washing machine and dryer
Where to Find Napkins to Paint-
- Just about anywhere!
- They don’t have to be new. You can give your own cloth napkins a fresh makeover.
- Even a nice set of napkins you find at garage sales and thrift stores.
- Tea towels and flour sack towels can stand in as napkins.
- Order them online, like these 20 x 20 set of 12, or these cotton 18 x 18, set of 12.
Napkin Notes-
- Do not use any fabrics that are shiny or slick, or stretchy.
- Natural fabrics (cotton and linen) work best, but it can have some poly and/or rayon in it too.
- I’m picky about napkin size. I prefer 20 x 20-inch napkin size (try to never go below 18 X 18) for a dinner napkin
- Double rolled hem with mitered corners – that’s the gold standard for napkin corners.
- Napkins with a frayed edge are fun too.
- They do not have to be white, but plain napkins are best. Pale colors are best for this technique.
My white cloth napkins came from Home Goods. They are cotton, 20 x 20 and have mitered corners and the best part is that the set of 8 was $12! Here are some similar ones from Home Goods.
Step 1) Prep Your Napkins-
Of you’re using new napkins, you MUST wash and dry your napkins first! Most ready made napkins will have sizing in them. You want to get rid of that for the paint to really bond with the fbaric.
You also want them to shrink now rather than shrink with your pretty design on them.
When they come out of the dryer, give them a quick press so they lay flat and smooth making painting them easier.
If you are using used napkins, you can skip washing them, but best to still press them.
Step 2) Print Out Your Design or Pattern-
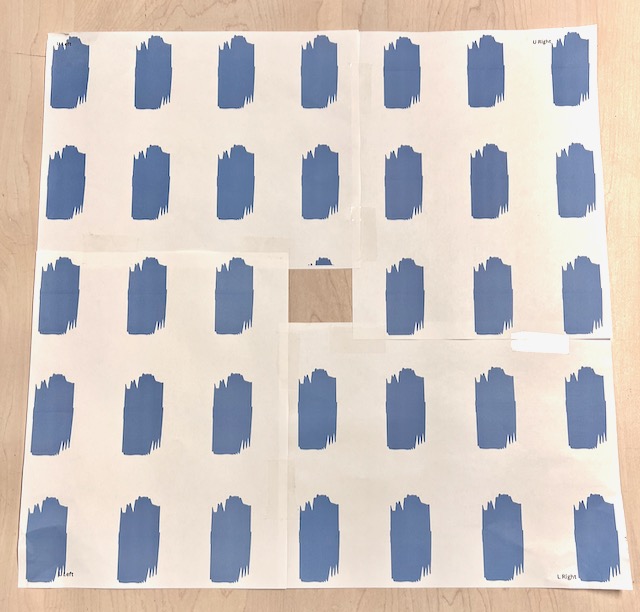
Using Canva, I made this brush stroke pattern. It’s available in my Printables Library for all my subscribers.
You will need to print out all four pages and then tape them together the corners are marked Upper Left and Right and Lower Left and Right. They make a 19. 5 x 19.5-inch grid. If your napkins are smaller than my 20 x 20, reduce the sizing slightly when you print to fit your napkin size.
Or, this is where you can inject your own personality by making your own pattern and creating a gird for it.
A little break to say, now is a good time to subscribe if you aren’t already:
Thanks! Now back to our napkins. . . .
Step 3) Prep Your Work Surface, Pattern and Napkin –
Cover your work surface and your pattern with plastic.
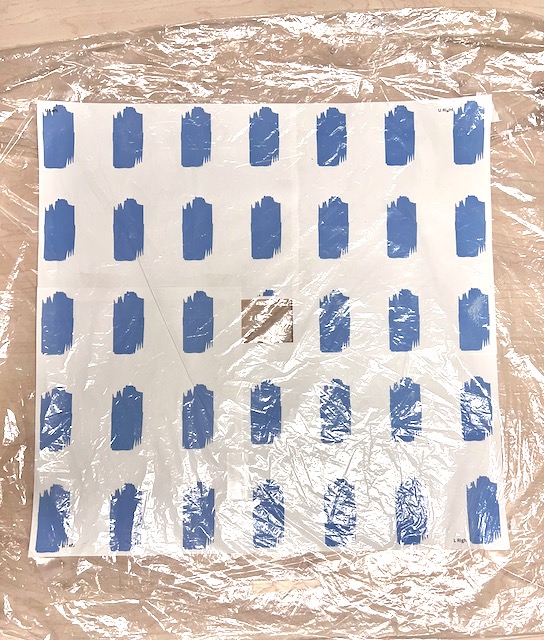
I slipped my pattern inside a large dry cleaning bag and taped it in place.
Now center your napkin on top of the plastic coated pattern and tape it in place.
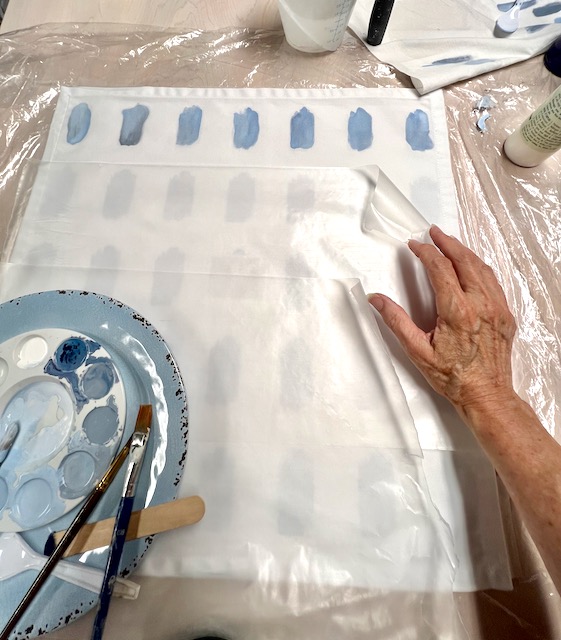
And finally lay two rows of waxed paper (or another sheet of plastic) over the napkin only exposing the top row of brushstrokes. (Sorry, I forgot to take a picture until I had already painted the first row)
Now is a good time to also prep your practice fabric and your press cloth. If you are using an old bed sheet for your practice, that is also the perfect fabric to be a press cloth.
Press cloth? It’s a fancy term for a thin piece of fabric to use between you iron and whatever you might be pressing — in this case, your newly painted napkins. Cut a corner off your old sheet or scrap fabric that is preferably slightly larger than your napkins. Doesn’t have to be, but it sure makes things easier.
Step 4) Mix Your Paint-
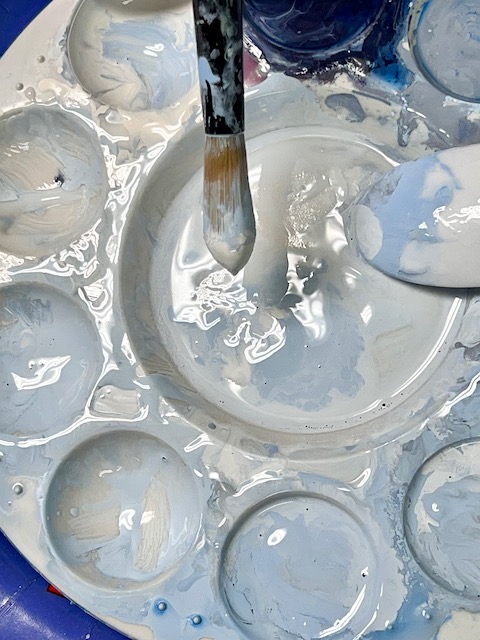
Remember, this is a judge free blog: This is what my palette and brush looked like after 4 napkins. Notice it’s sitting in a larger paper plate and sometimes a plastic plate. My advise: get messy, have fun, but protect the napkin your working on from drips and smudges.
I think variety in the main color looks best. This gives the illusion of depth over one flat color.
Working in a plastic paint palette, I partially filled one well each with white, a soft blue (Folk Art Sky Mist), a grey blue (Deco Art Colonial Blue) and a navy (Folk Art Midnight) beside three wells of a mid blue (Folk Art Light Blue).
Then I mixed and experimented with these colors on part of an old bedsheet until I had the shades I wanted.
Yours might be shades of avocado green, or deep russet. Whatever color family you want, do the same. Fill a palette, or just a plastic plate with your colors, blend and experiment on an old bed sheet or scrap of fabric until you have the shades you like.
Now you want to mix in your fabric or textile medium. Read the instruction on your bottle. Typically it is one part medium to two parts paint. Just eye ball it and add enough fabric medium that looks like it’s 50% of the amount of paint you have.
PRO TIP: If there is one small craft paint bottle that will be your main color, pour a third of it into your palette or into a disposable cup. Fill the bottle with textile medium and mix.
I very quickly realized that I was going to be using mostly the mid blue, so I just added the textile medium to the small craft paint bottle and mixed it thoroughly. Then I marked the lid so I would remember that one is already mixed.
For the the other accent colors, I added the textile medium into the wells of the paint palette and mixed them there.
And lastly, it’s a good idea to experiment with how much you thin the paints with water. You want the paint to be fairly thin so that it doesn’t just sit on top of the fibers, but rather absorbs down into them.
Too thin and your paints will run and bleed out of control. But you determine how much bleed or how sharp a line you want on your brushstrokes. Basically, how much of a watercolor effect you want to achieve will determine how thin to mix your paints.
If you’d like to see my specific process, jump over to the video tutorial. There are links in the description to all the main points so you won’t have to watch the whole video if you’d rather not.
PRO TIP: give the sample some time to spread before thinning more. It doesn’t happen instantly.
The beauty of this is there truly is no right or wrong way. It’s what looks good to you and what you will enjoy creating!!!
Step 5) Paint the Design-
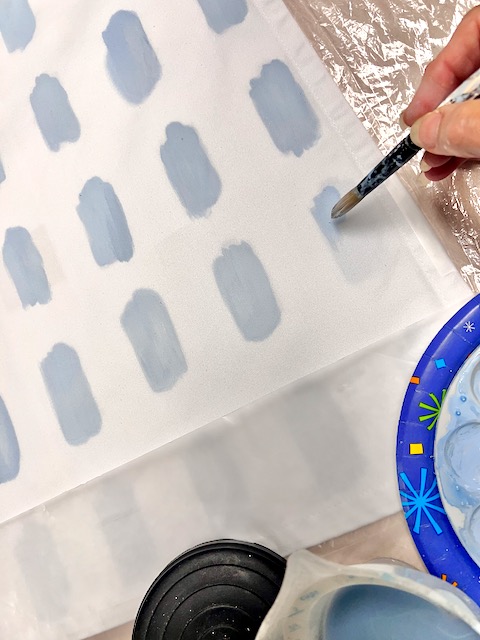
Remember, the goal here (at least for me) was not to have total uniformity in the individual brushstrokes. I was going more for uniformity in overall size and in the grid placement. I loaded my brush each time from the large center well of my palette, sometimes picking up just a dab of the grey or a dab or the white, swirling it around.
Sometimes the brush would have pretty uniform color and sometimes there would be quite a bit of variety in that one brush full. Because I had a rather small brush for the size of my designs, I loaded two or three times for each design. You may not have to if you are using a larger brush.
Resist the temptation to keep layering paint on top. We want to keep the amount of paint to a minimum so the fabric napkin is soft and fluid. The paint will naturally dry stiff, that is why we wash and dry after heat setting. But that won’t take care of layers of intense paint.
There really are no best ways, just different ways. Find what works for you using your old sheet or scrap fabric.
PRO TIP: If right-handed, start in the upper left corner. If left-handed, start in the upper right corner.
Then work across the top row of your pattern.
Slide the protective wax paper or plastic down one row, and paint the next row.
Put on some favorite music or podcast and repeat row after row! Repetitive acts like this can be very soothing, downright therapeutic. Let yourself get into a flow. Don’t overthink it and just let your mind go.
NOTE: if you are a novice painter and would like to see this part of the process in video form click here and you should jump to that part of the video.
CLICK HERE to jump to the point in the video for mixing and thinning your paints.
Step 6) Let Dry-
When your first napkin is all painted. Carefully remove the tape holding it down and hang (using a skirt hanger) or lay flat somewhere to dry. It really doesn’t take very long.
Mist and wipe the plastic covering over the pattern to make sure there is no seepage from the first one to get on the back of the next one.
Now tape the next napkin in place and repeat step 4.
Over and over until you have your whole set done. I actually did a few each night until I had them all done. I just washed my paintbrushes and covered my palette. Easy peasy.
Step 7) Heat Set-
If you’ve been wondering:
How to Seal Acrylic Paint on Fabric
It’s called Heat Setting.
This is perhaps the easiest step, but CRITICAL step. Do NOT skip this!!!
Once dry, use a hot iron, without steam, to set the paint.
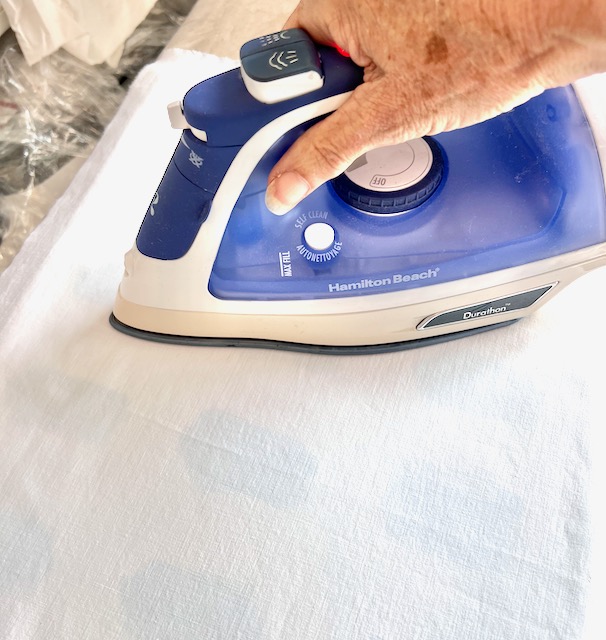
Be kind to your iron and be sure to use a press cloth. That’s really a fancy term for a thin piece of scrap fabric. Remember the one you cut from your old sheet? Now is when you need it. Lay it over the dry paint,
Set your iron to the hottest setting your cloth napkin will take. Press for roughly three minutes on the painted side, flip it over and another minute on the other side.
That’s it!
Step 8) Wash and Dry to Soften-
It’s so much fun when they come out of the dryer all soft, drapey and perfectly imperfect!
This is just one way of making hand-painted napkins. Stenciling is another favorite way amongst crafters. And recently I shared another trace and paint method that is a lot of fun too!
Don’t these sound simple? Custom, designer (you) napkins at less than $2 ea.
- No cutting and sewing
- Inexpensive
- No artistic experience required
- Any color can be substituted for my blue
- Any simple motif can be substituted for my brushstroke
- And they’re washhable!!!
What’s Not To Love?
I can’t wait for you to send me pictures of your napkins, because of course you’re going to paint your own set!, right?!?!!!!!
It was great having you here today! Looking forward to your next visit,

This is such a fun idea! Thank you for sharing.
This is really interesting stuff! What designs do you like the most?