Easy Pumpkin Decorations – From Mesh Tubing
It’s so easy to make these pumpkin decorations from cheap mesh tubing from Dollar Tree. Brighten your Fall decor, your Fall tablescape or gift a friend.
Happy pumpkin time, again!!!
Sorry, not really, but I just can’t help myself.
I seem to be all about the pumpkins this year! And I have another pumpkin decoration tutorial for you.
Do you remember last week when I shared these adorable mini metal pumpkins made from Dollar Tree finds?
You missed it? Quick! Jump over to take a look at them. It’s okay, we’ll save your place here.
Aren’t they the cutest?
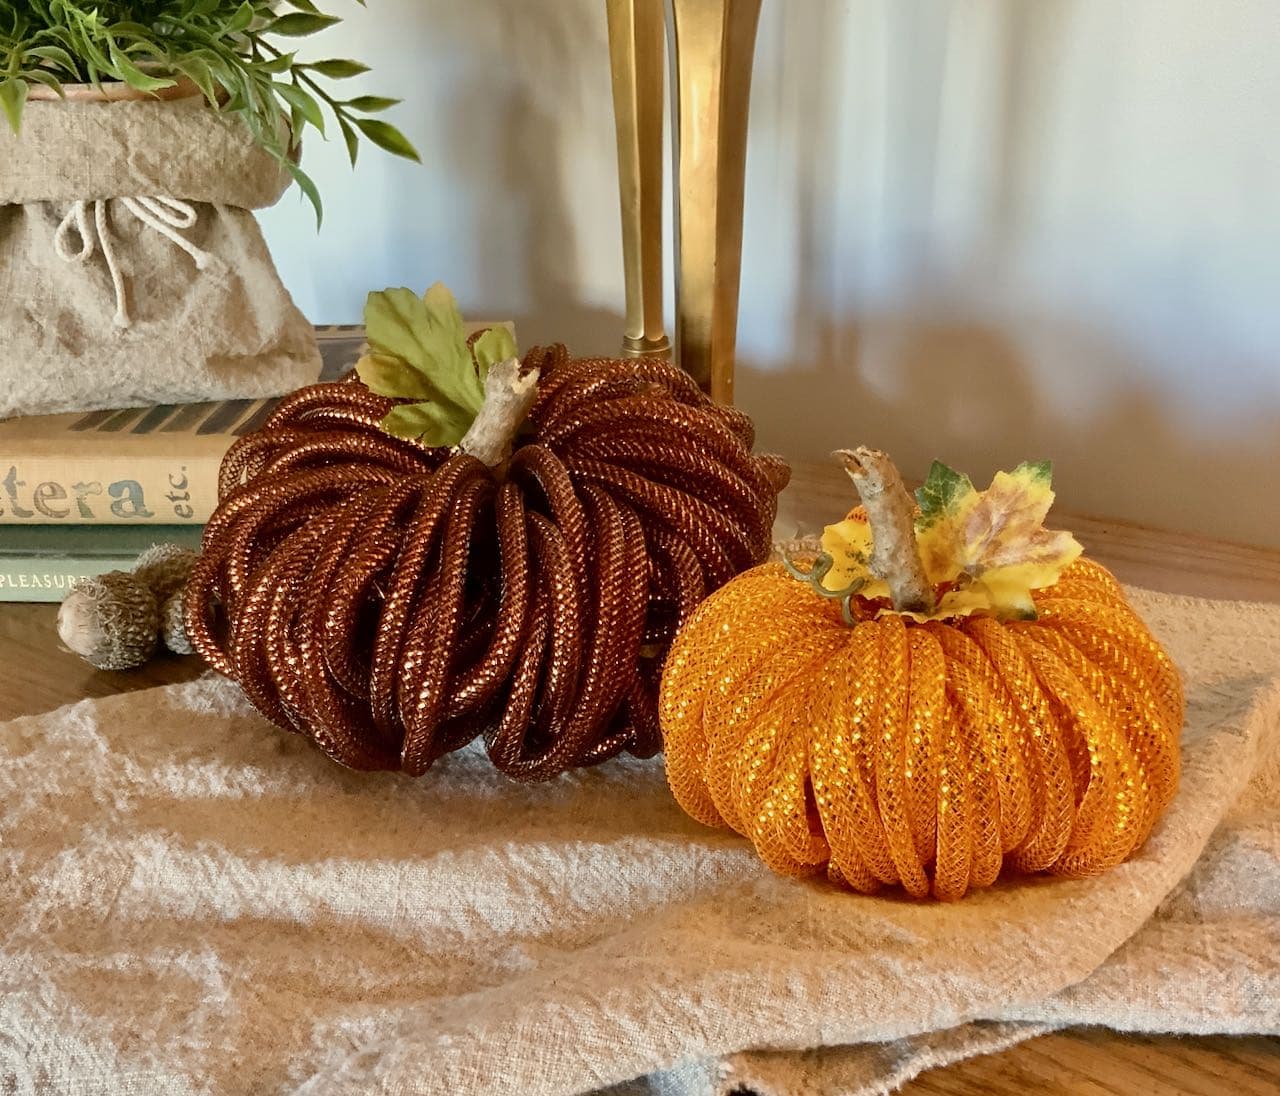
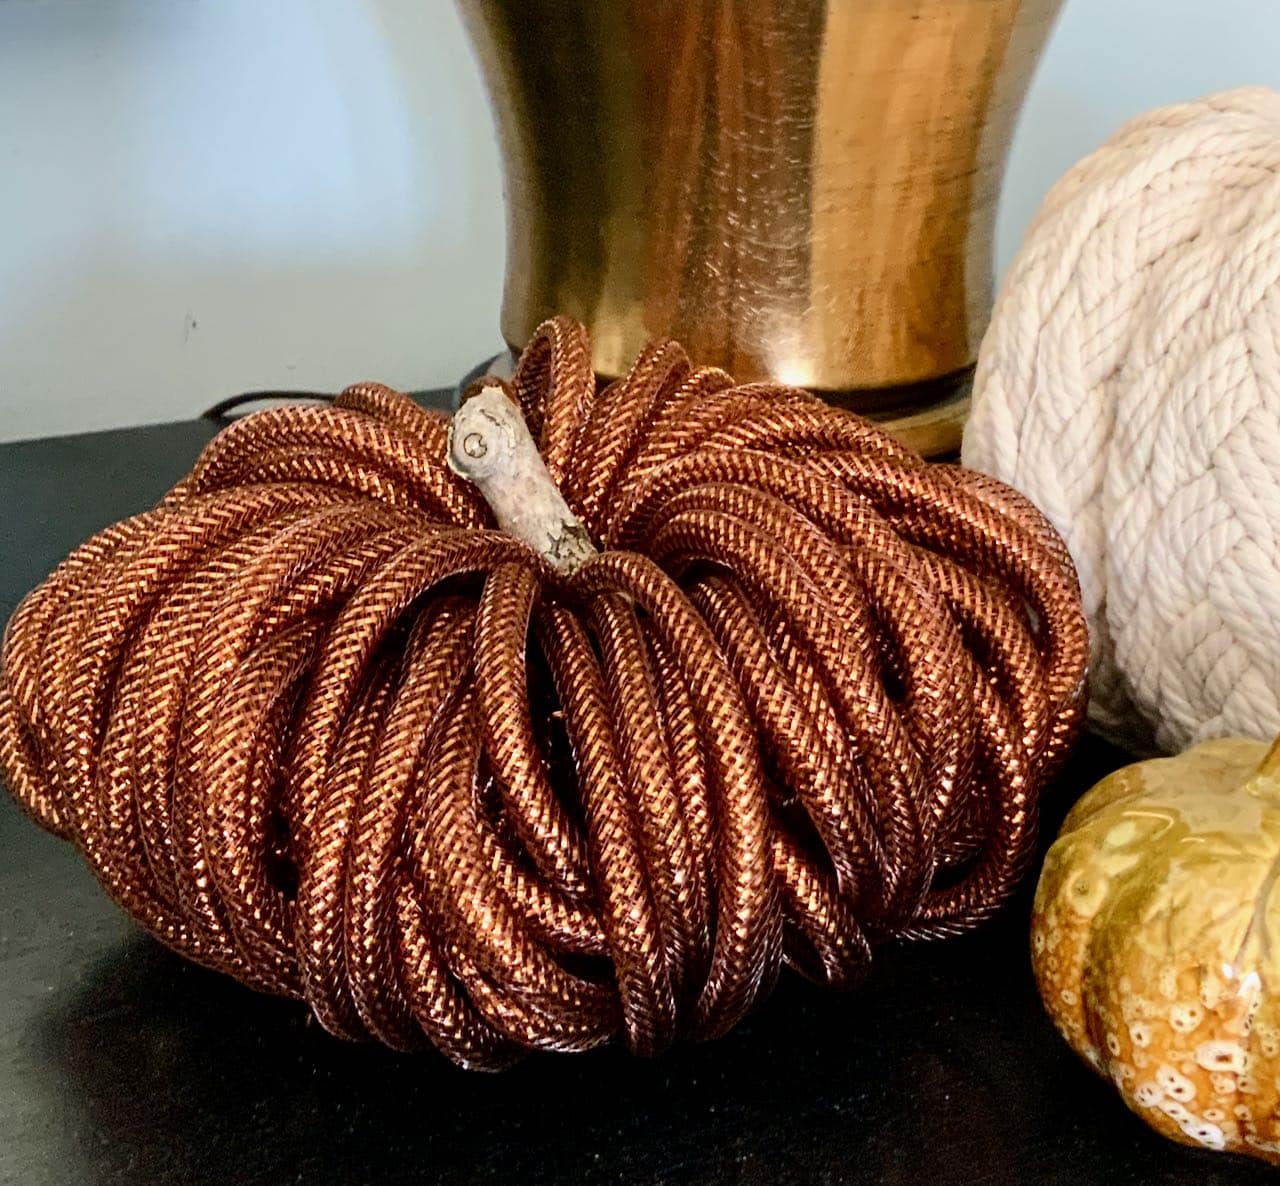
Well, today I have another Dollar Tree pumpkin craft! Think of them as the big cousins to the mini metal pumpkins.

These fellas are bigger and can grow even bigger, taller, smaller, squattier (oops, not a word? hmmm. We’re going with it anyway). You decide.
They’re perfect for vignettes, for tablescapes, to tuck in a bookshelf, add to the coffee table, perhaps to add a colorful nod to Fall on the kitchen island, in the guest bath.
SO MANY OPTIONS!
Let’s up the pumpkin decor. Less is more? Ha! I’m in the More-is-Never-Enough camp when it comes to pumpkin decor.

Aren’t they FUN!!!
And you won’t believe how quick & easy they are to make! And did I mention downright cheap? Just about a buck each!!!!
Let’s Make Some Easy Pumpkins:
Supplies, (more on mesh tube at end of post):
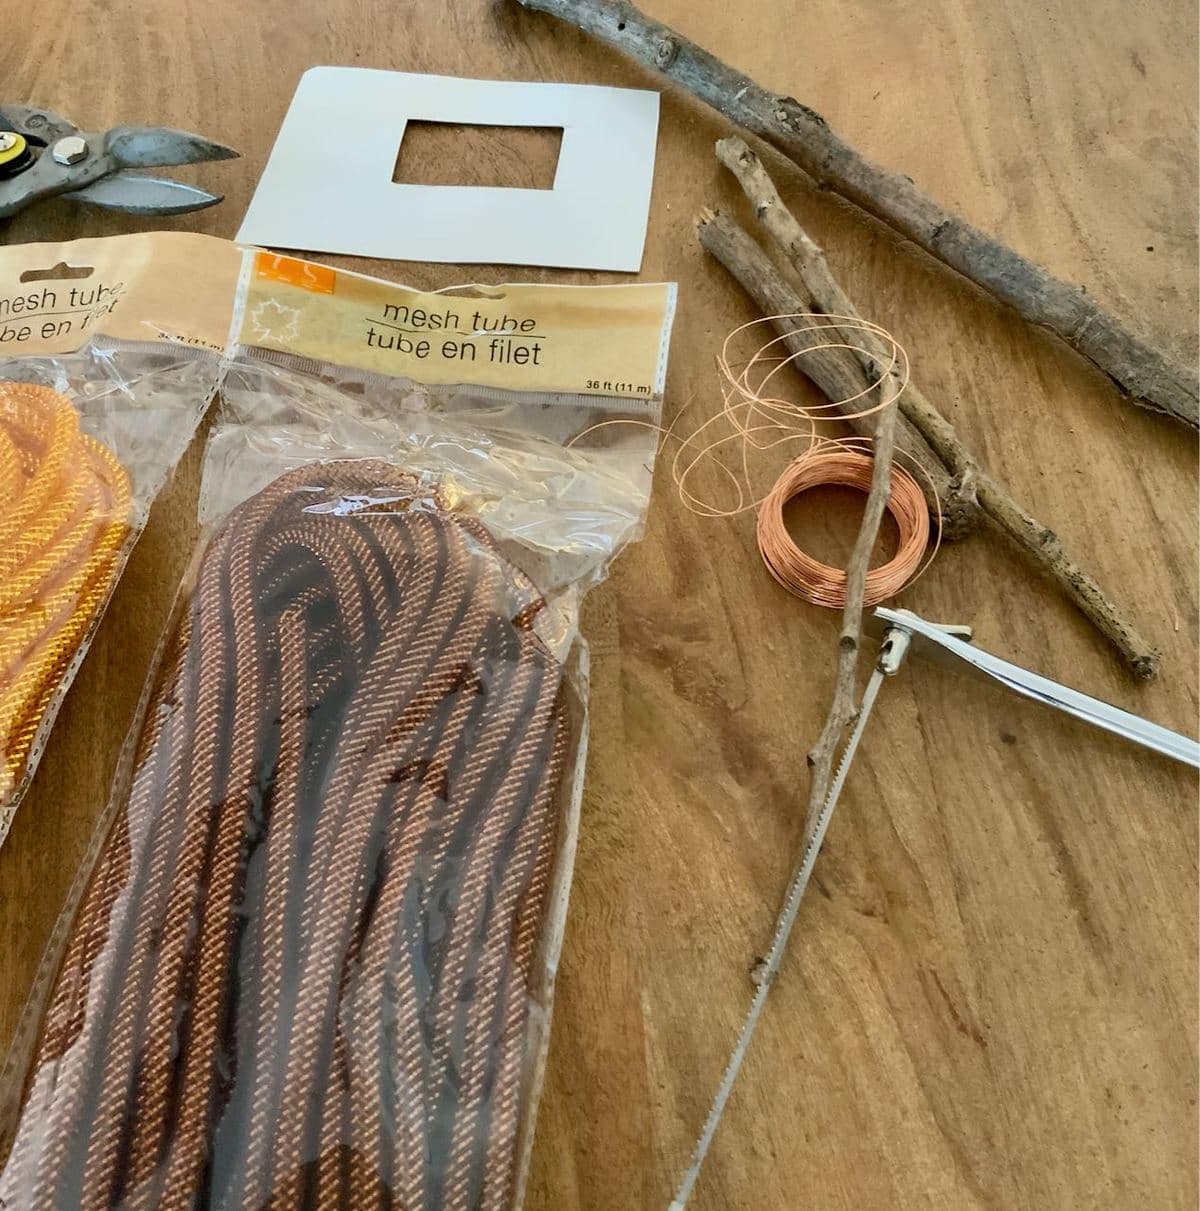
- Wire snips (I prefer needlenose pliers)
- Measuring stick, tape measure, or just a good eye
Materials:
- Packages of mesh tubing (3 yards per small orange pumpkin and
- Matching wire (mine is 26 gauge copper)
- A pumpkin stem, a twig from your yard or one made from polymer clay like I made here.
- Leaves off faux flowers, optional
- piece of cardboard
Step 1) Cut the mesh tubing approximately 9 ft long. Mine came in a package of 36 ft, so I cut it into 4 sections by doubling it over twice.
Step 2) Tie a slip knot in each end
Step 3) Cut eight pieces of wire approximately 6-inches long


Step 4) Wrap a length of mesh tube around a 3-inch wide piece of cardboard. Try to have even tension as you wrap
Step 5) Slip a wire under all the laps of tubing and gather them tightly together to make a bundle of pumpkin ribs. Twist the wire several times to hold them securely. Try to get both of the slipknot ends close to that twisted wire.
Step 6) Slide this bundle off the cardboard. Create a spine for this bundle by securely wrapping a second wire maybe 2-inches from the first wire.
Repeat Steps 4, 5 and 6 with the other 3 lengths of tubing. Compare your four bundles and try to slide the wires so the spines of all four bundles are the same length.


Step 7) Cut a length of stick to the length you want for your pumpkin stem. Try for a flat cut on the bottom. I used a hack saw to cut mine.
Step 8) Wire one of your bundles of mesh ribs around the stem. Twist those wires tightly and then coil up excess wire and tuck it inside
Repeat with all four bundles.
Step 9) Fluff and optionally add faux leaves and tendrils with hot glue or the adhesive of your choice
And for a Larger, Squattier Pumpkin:


Just a few modifications:
- I used a 4-inch cardboard jig
- I cut the mesh in 12-ft lengths.
- I used 5 bundles, so this took 1 and 2/3 package of Dollar Tree mesh tubing
- I only wired the bundles once
Where Did My Inspiration Come From?
On a recent visit to my local Dollar Tree, I spied this tubing in that wonderful bronze color and it made me think of a pumpkin craft one of my blogger friends had just shared.
Wendy, who owns WM Design House has a weekly IG live called “Meet Me in the She-Shed”. I had stumbled into one of these where she was showing this same concept but with twine. Here’s her blog post.
I LOVE those twine pumpkins. They had stuck in my head. So of course, when I saw the bronze tubing, I thought it might make a fun twist on her jute pumpkins.
Sources For Making Your Mesh Tube Pumpkins:


I bought my mesh tube at my local Dollar Tree, 36 ft per pkg. But it seems like it’s rather hit or miss if a store has it in stock, and I think the new packages are smaller.
There are quite a few options for you from Amazon. But check the pricing, sizing and quantity. Quite a variety. I linked the best option pricewise in the size I used.
At the time of writing, the 30 yard bundle of mesh is just $14 and the copper wire is under $6. It is enough to make 10 of the small orange pumpkins or 4-1/2 of the larger bronze pumpkins. Great for a crafting party, Girl Scout project, a girls craft night, Fall birthday party activity. decorating and/or activity at a “L’il Pumpkin baby shower, and more.

I hope you are enjoying a glorious Fall filled with color, cooler temps, crisp mornings, chilly evenings and plenty of pumpkin spice — and pumpkin decor!

These are adorable Diane! Pinned!