
How to Fix a Hole in Board and Batten Siding
Don’t let a large hole in your board and batten siding intimidate you. Here’s the easy and solid fix!
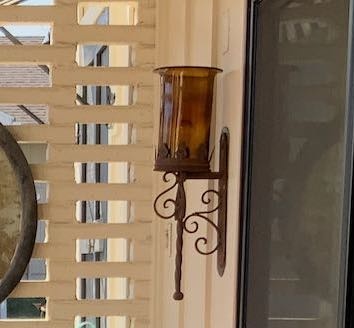
We were so bummed when moving a light fixture revealed a “huge” gaping hole in our board & batten siding. But here’s the easy fix we came up with, plus the materials we used.
In remodels, you come to expect the little surprises. But unlike the surprises in the Cracker Jack boxes, ours do not seem to be getting smaller.
This “little” surprise measured 4.25 x 5.3-inches. Too big to just mud over. Typical sheetrock mesh would show. We could hang a sign over it and call it a day . . . . but really? that seemed rather lame and what sign would fit between the battens and behind the new light fixture and look good.
Not that I tried finding one or anything. ha! ha!
After a week of letting that gaping hole intimidate me, I stepped back.
Way back. Like way, way, way back — to third grade, maybe second.
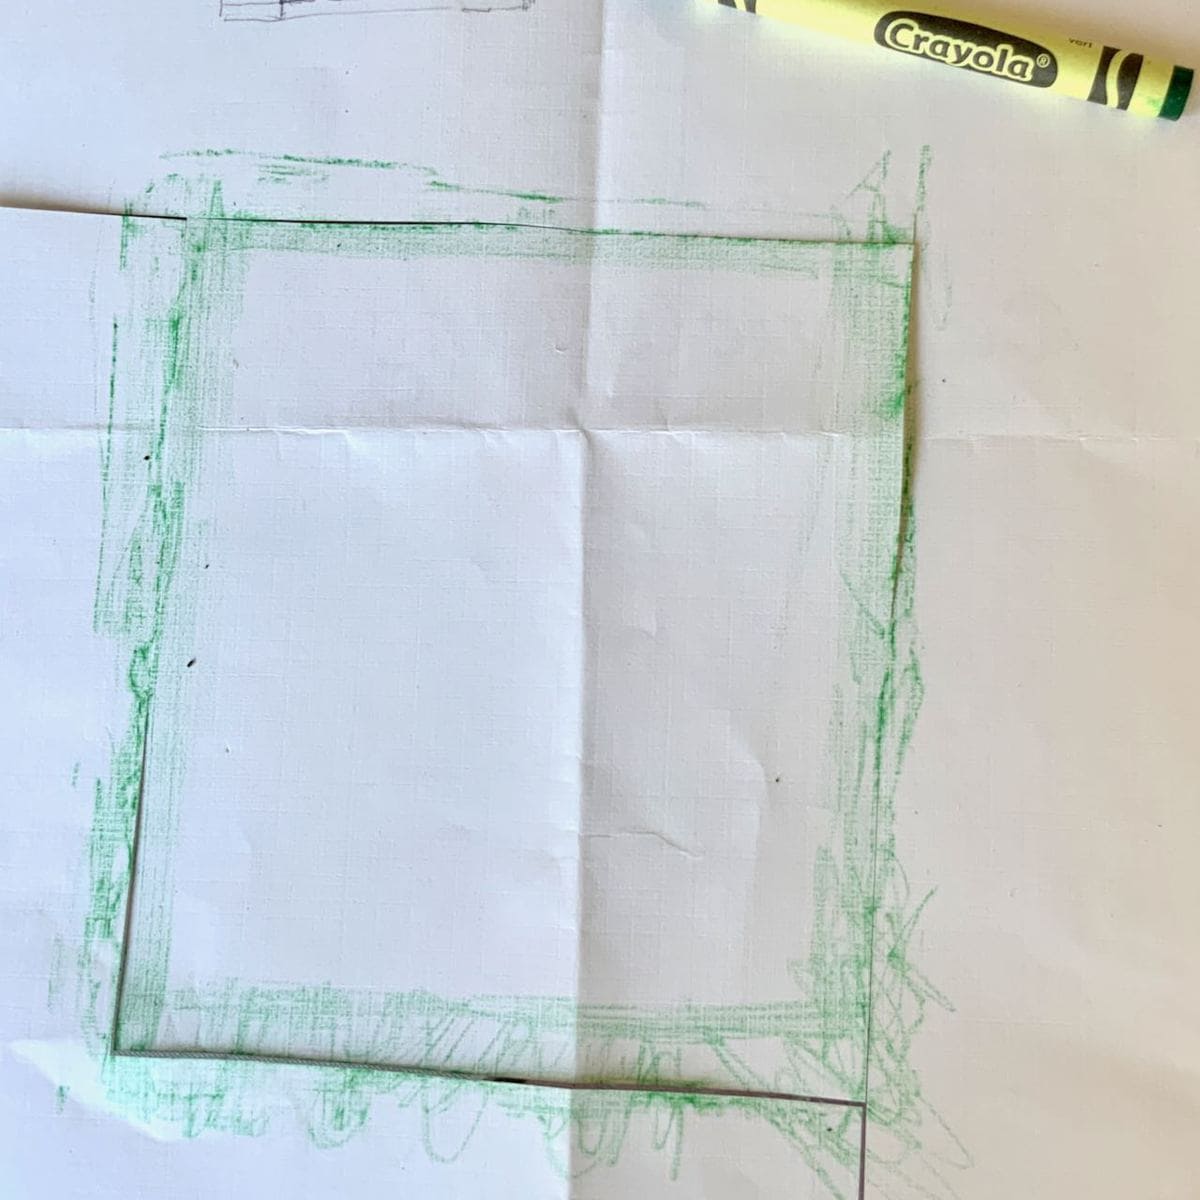
Yep, crayon rubbing to the rescue. I held a piece of paper against the hole and rubbed the crayon to get the outline of the rather irregular edges of the hole.
PRO TIP: take the time to get a fresh piece of paper and to take the wrapper off the crayon.
I think I doubted whether this would really be a good solution and didn’t invest that extra 90 seconds that really would have made things easier.
Cut out and then test fit against the hole. I made several slight adjustments to the original to get as close a fit as possible.
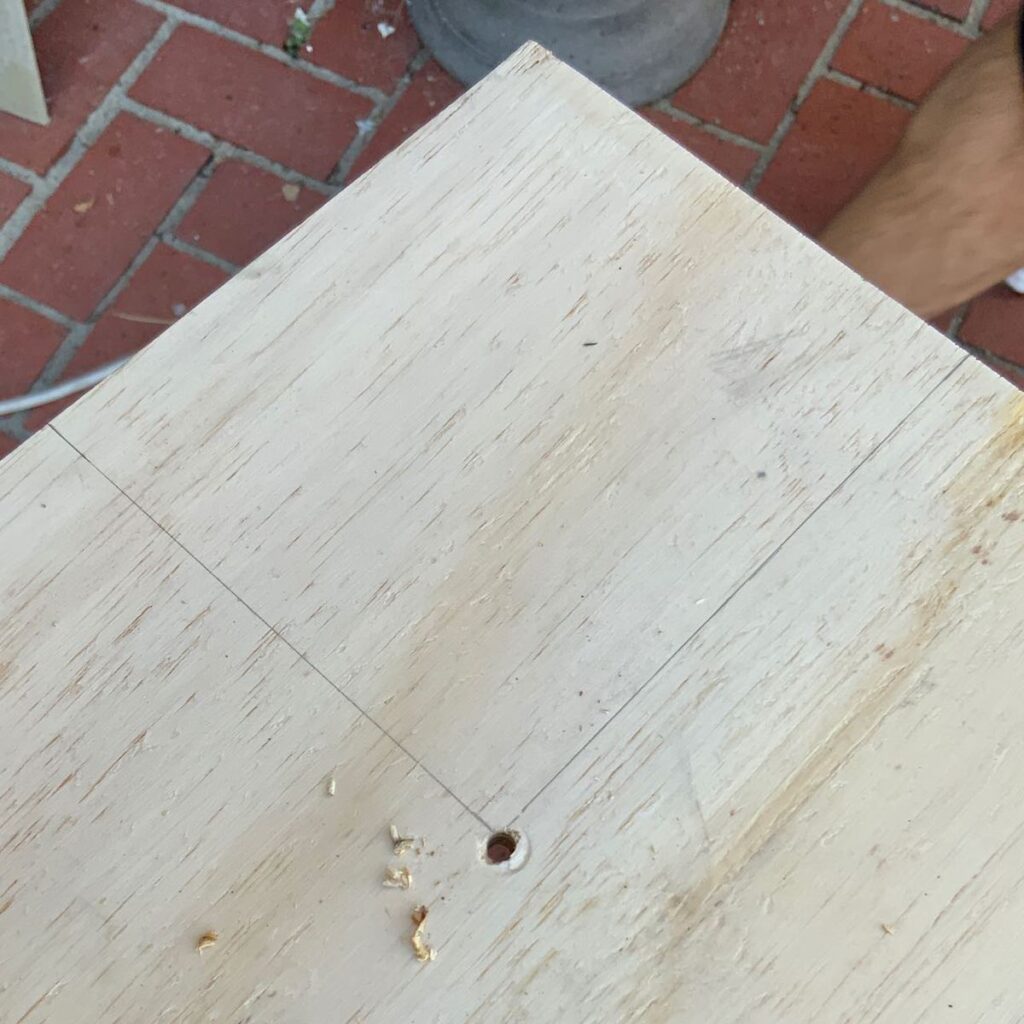
Next I lined up the two straightest edges of the pattern along two edges of birch plywood and I traced around the pattern.
To make cutting this with a jig saw easier, we drilled a small hole just to the outside of where our two cutting lines meet. This gives us an indicator when we have cut far enough and it seems to help the corner to keep from splintering.

Doesn’t this picture make it look so easy. One try, right?
Ha! More full disclosure: we had to go back and trim the original cut several times. A hand-held rasp really saved the day. It didn’t take that much time, just a bit of patience.
And now that we have a fit, the big question is how do we secure it in place?
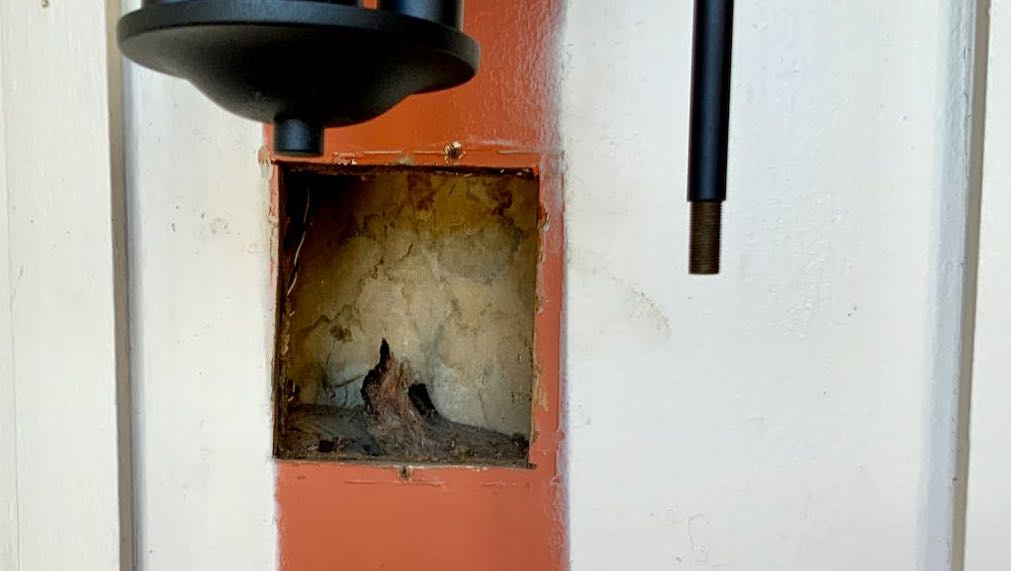
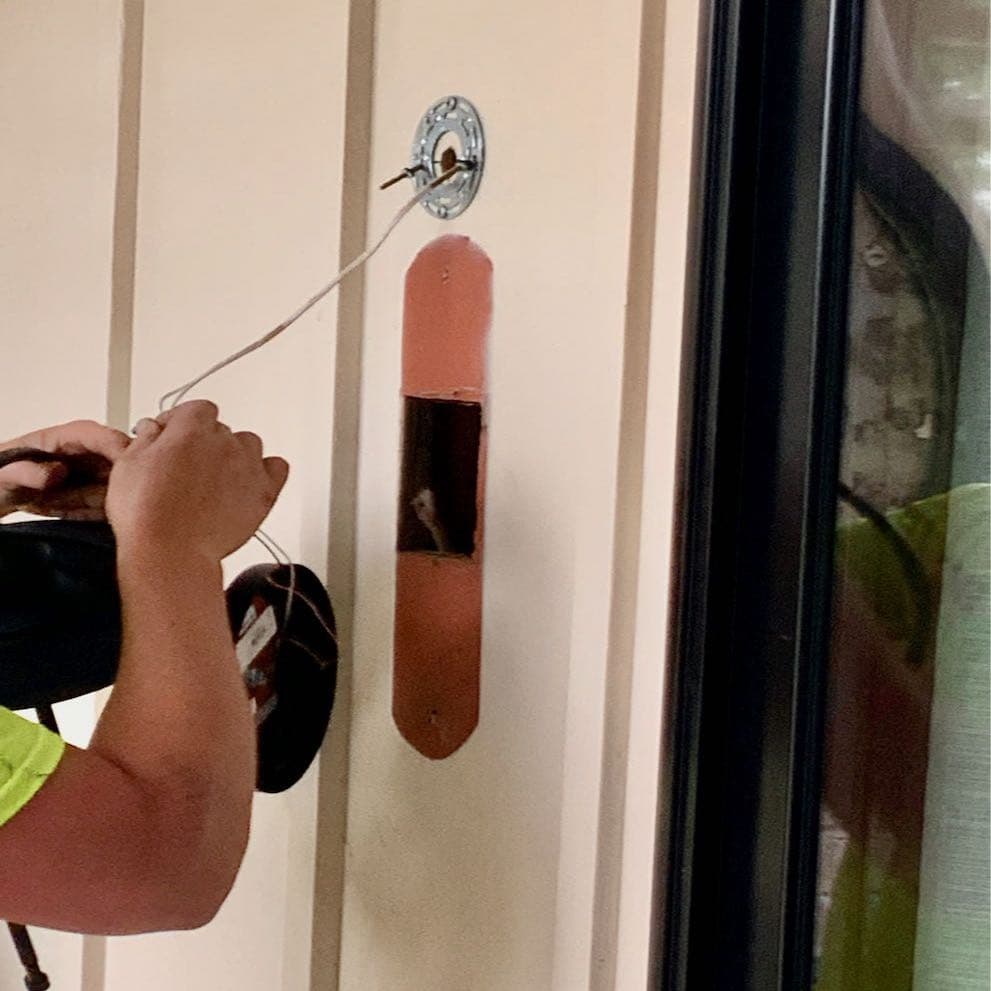
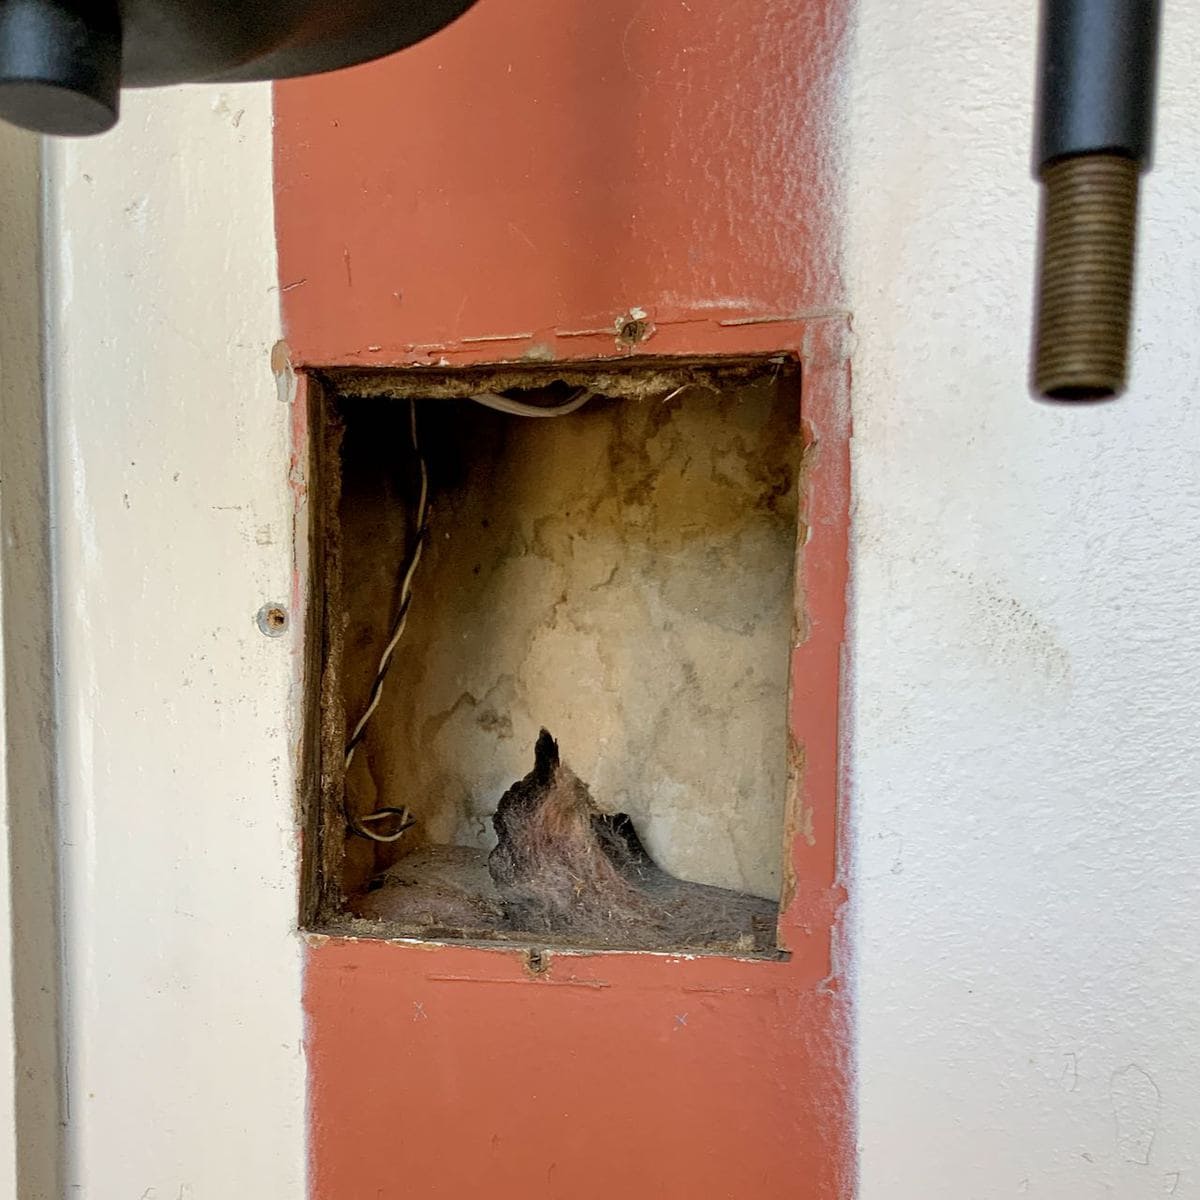
As you can see, there is nothing to attach the new wood filler to. That hole is about 3.5-inches deep. So we need to build or attach some kind of an infrastructure to support it.
That certainly sounds very elaborate and sophisticated . . . . which our’s certainly isn’t!
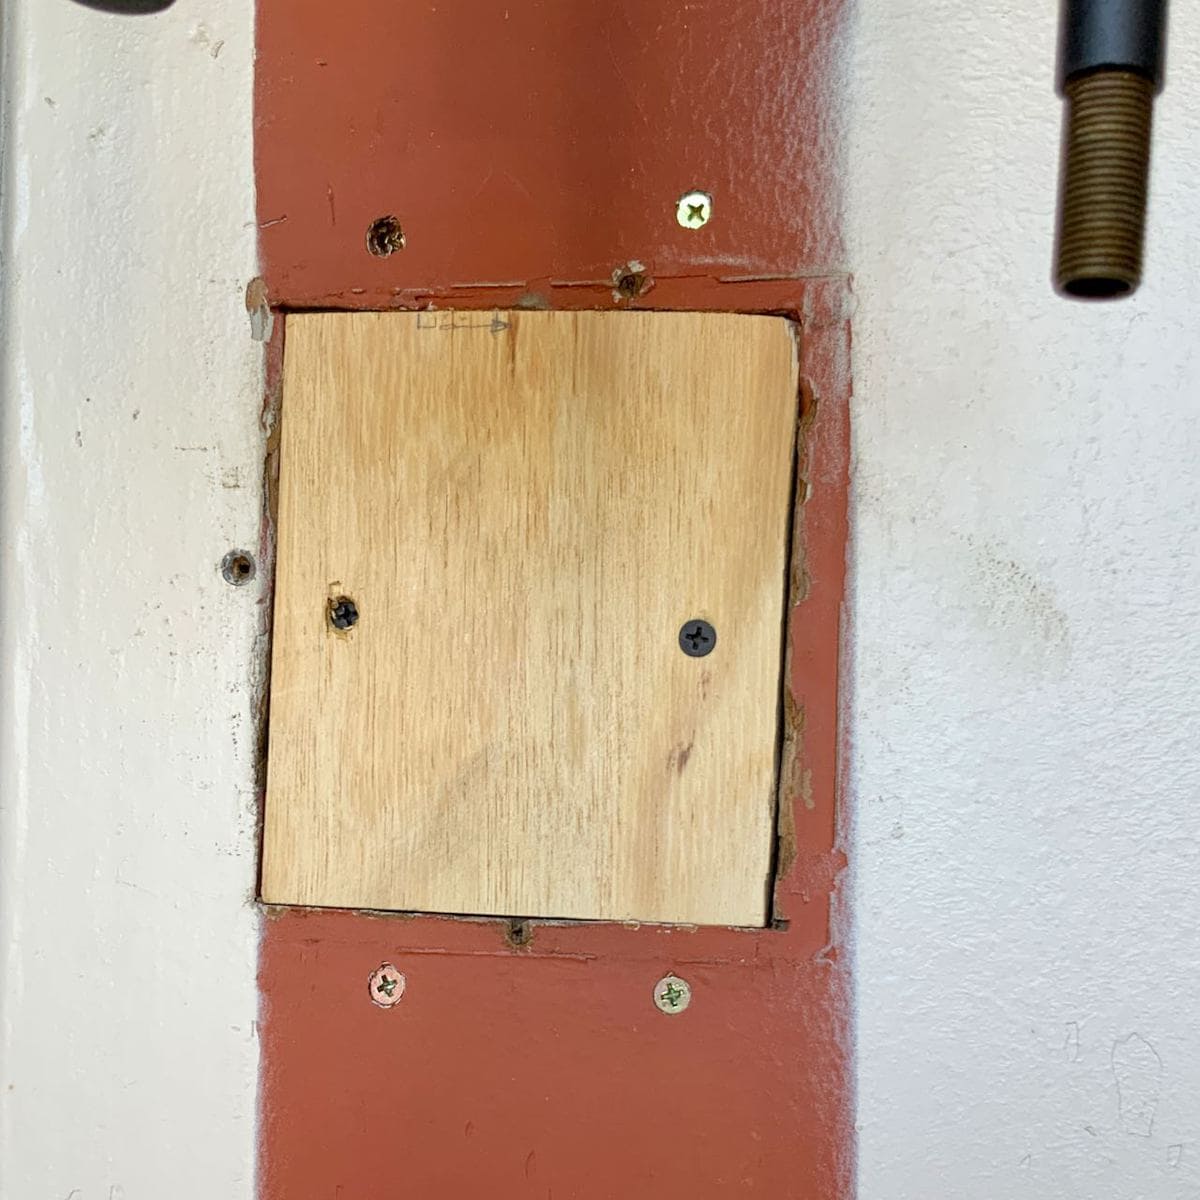
Hole-Fix-Fail-1.jpeg
First attempt at a support structure = first fail at a support structure!
Learn from us!!!! The filler board needs to be supported in at least two locations, either top and bottom or on the opposite sides or opposing corners.
We had hoped that because of the size of the filler board and how snuggly it fits in the original hole, that one screw would be enough. But once we had it secured in place, there was still some wobble to it that we, which actually means I, felt would be susceptible to compromise and cracks would appear with the weather extremes outside even though it is sheltered under the balcony overhang.
No big deal to take out, just meant one more hole to fix before painting.
Hole-Fix-Success.jpeg
We couldn’t take the horizontal support all the way across because the right side of the hole butted up next to a support of some variety.
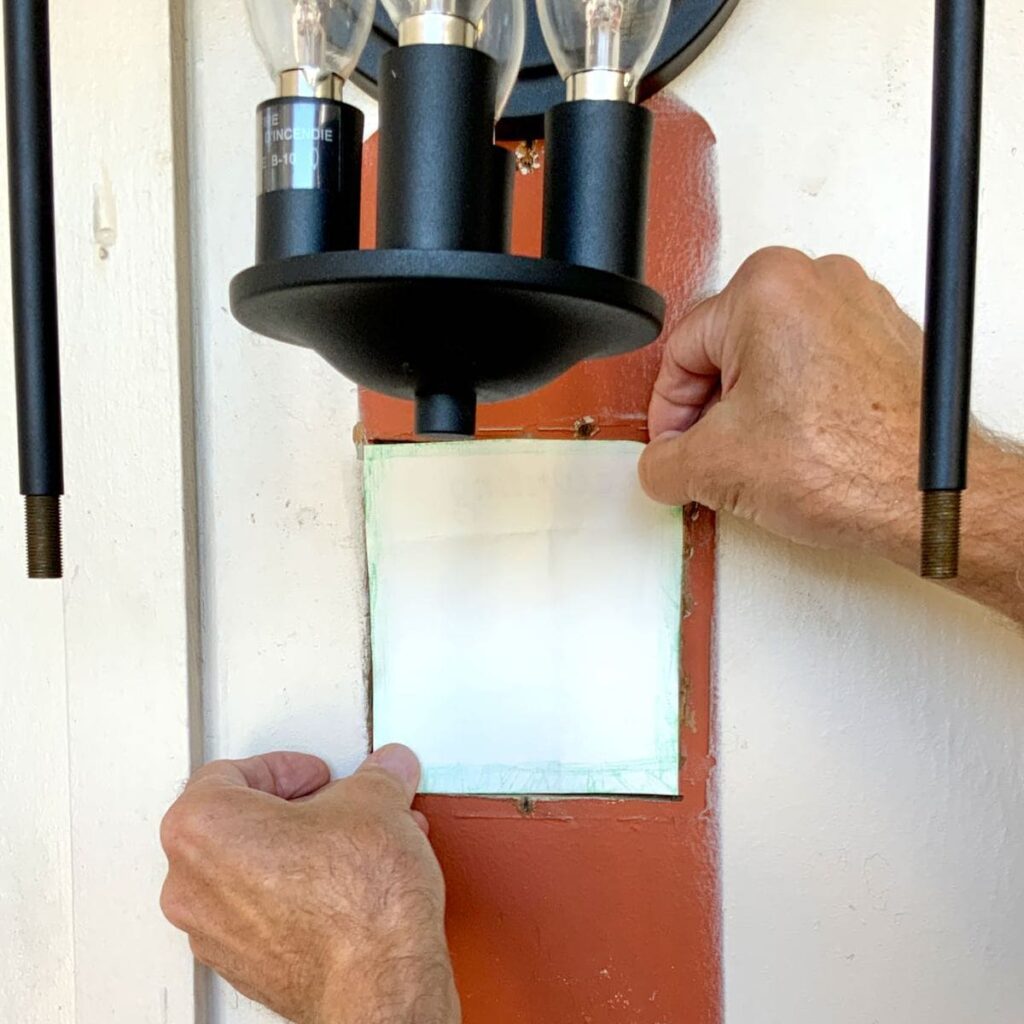
Above and below the opening were unobstructed, so we went with two vertical supports and attached our hole filler in not one but two spots!
We held the supports in place with clamps while we drilled in the screws. Then we backed out the screws several turns to get a bit of distance between the back of the original wall board and the supports to accommodate the slightly thicker birch plywood. But the screw heads remained below surface so they can disappear under putty and paint.
Function is done. Now for the form — making it pretty!
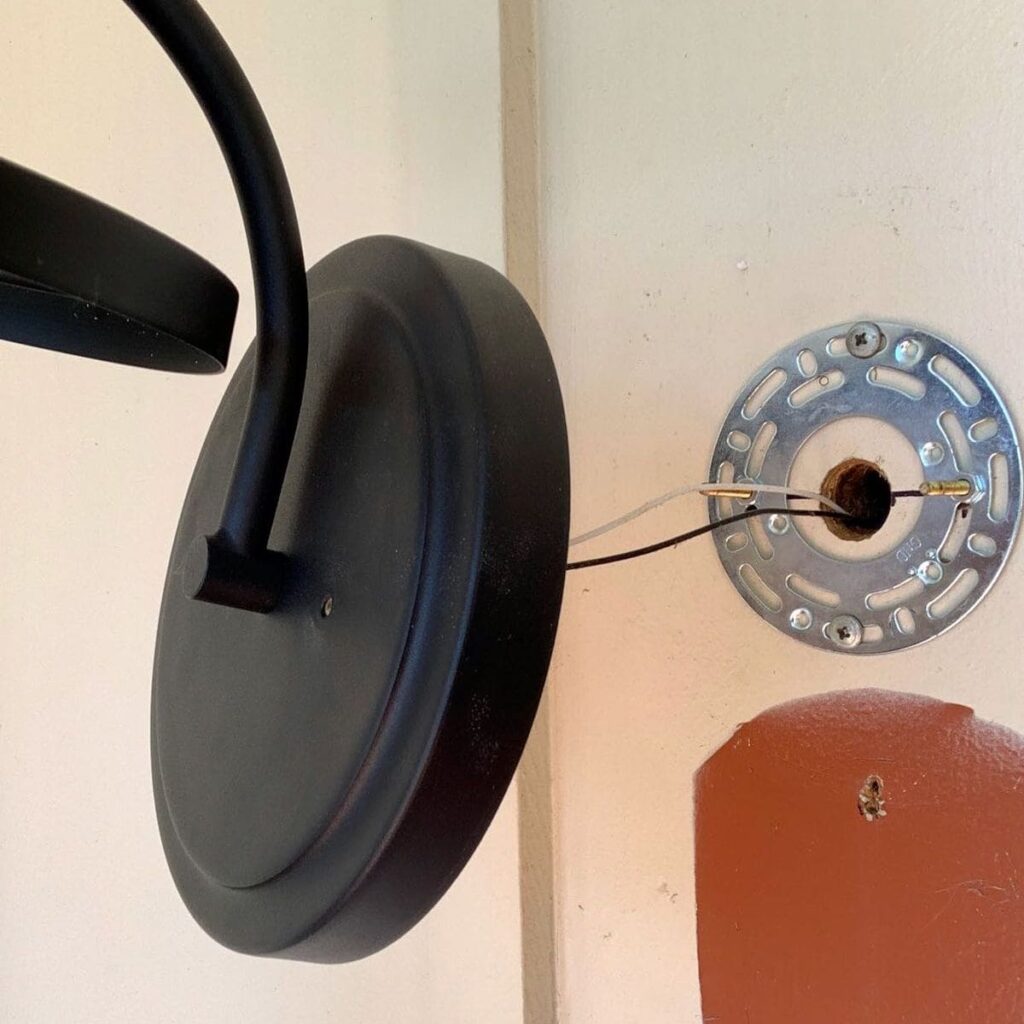
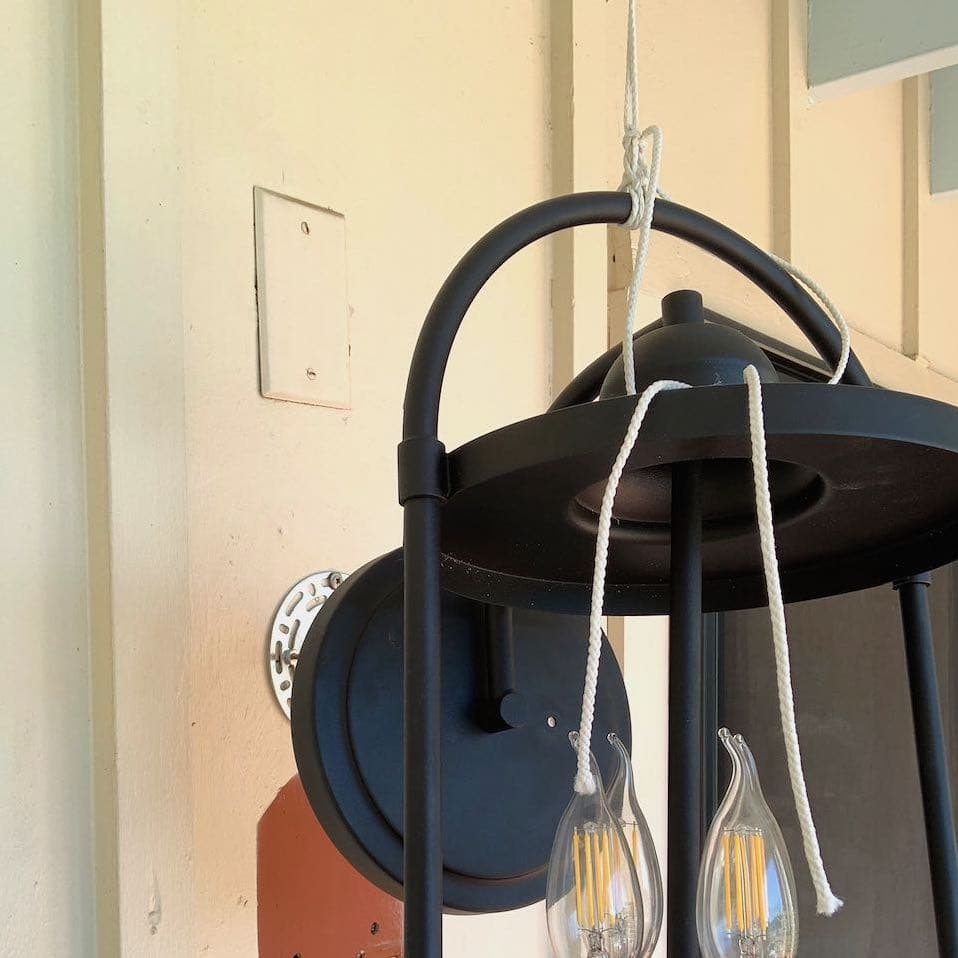
We started by detaching the new light fixture from the wall and suspending it from our overhead balcony. This gave us a couple of inches of space and eliminates the need to mess with the wiring. We covered the fixture with a couple of plastic bags to make sure it stayed fresh and clean.
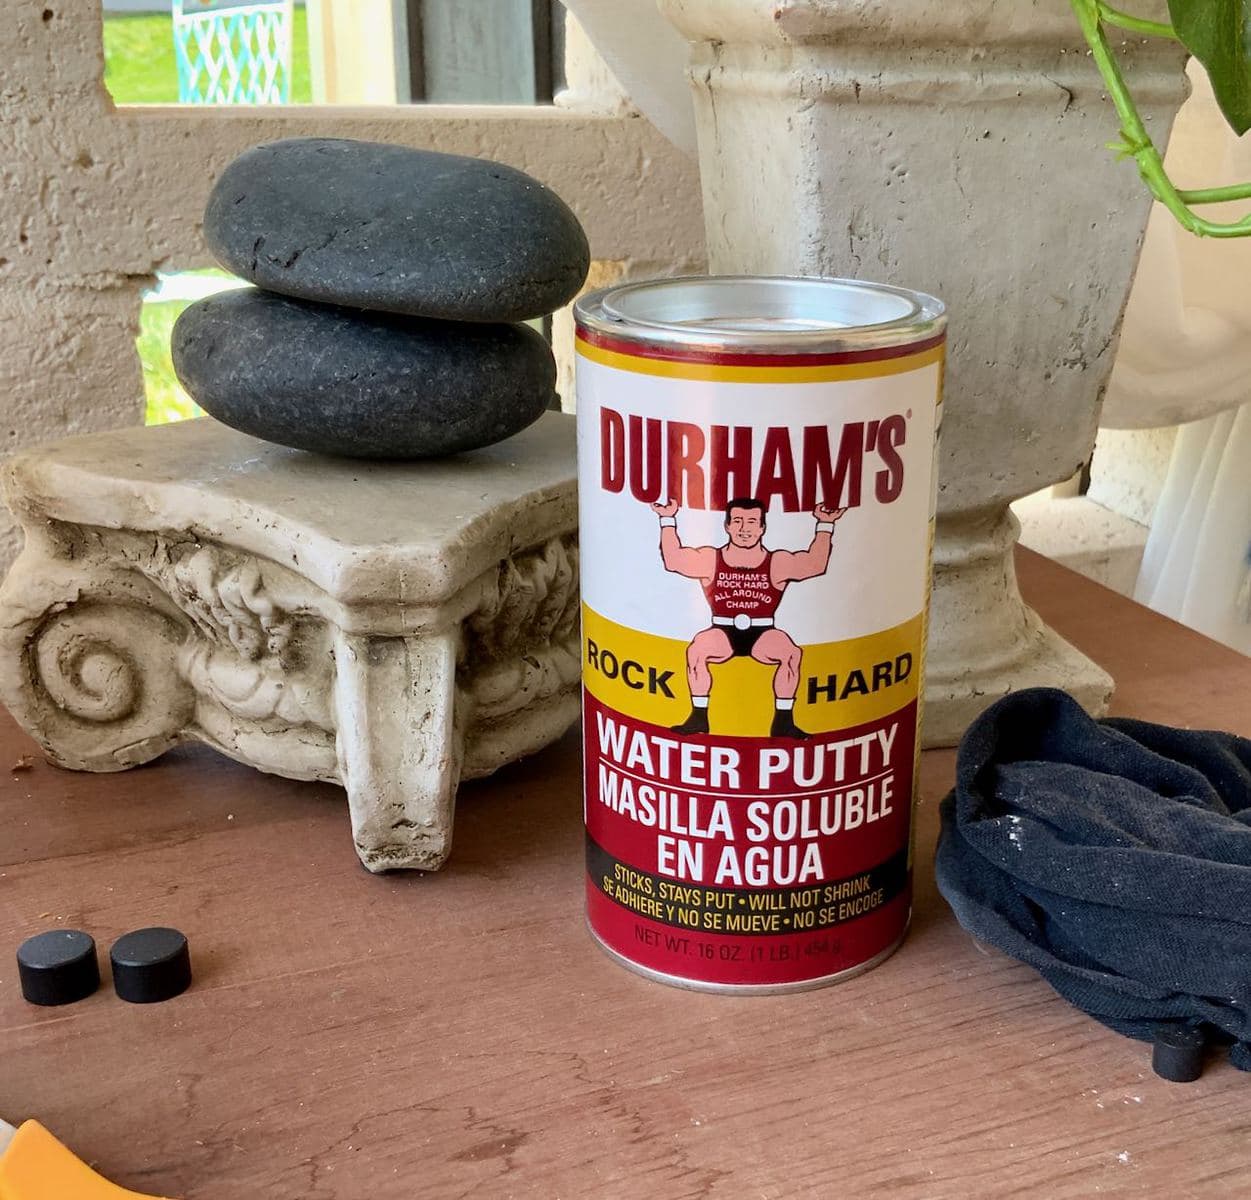
I’m so grateful one of the friendly Orange Aprons at my neighborhood Home Depot suggested Durham’s Rock Hard Water Putty.
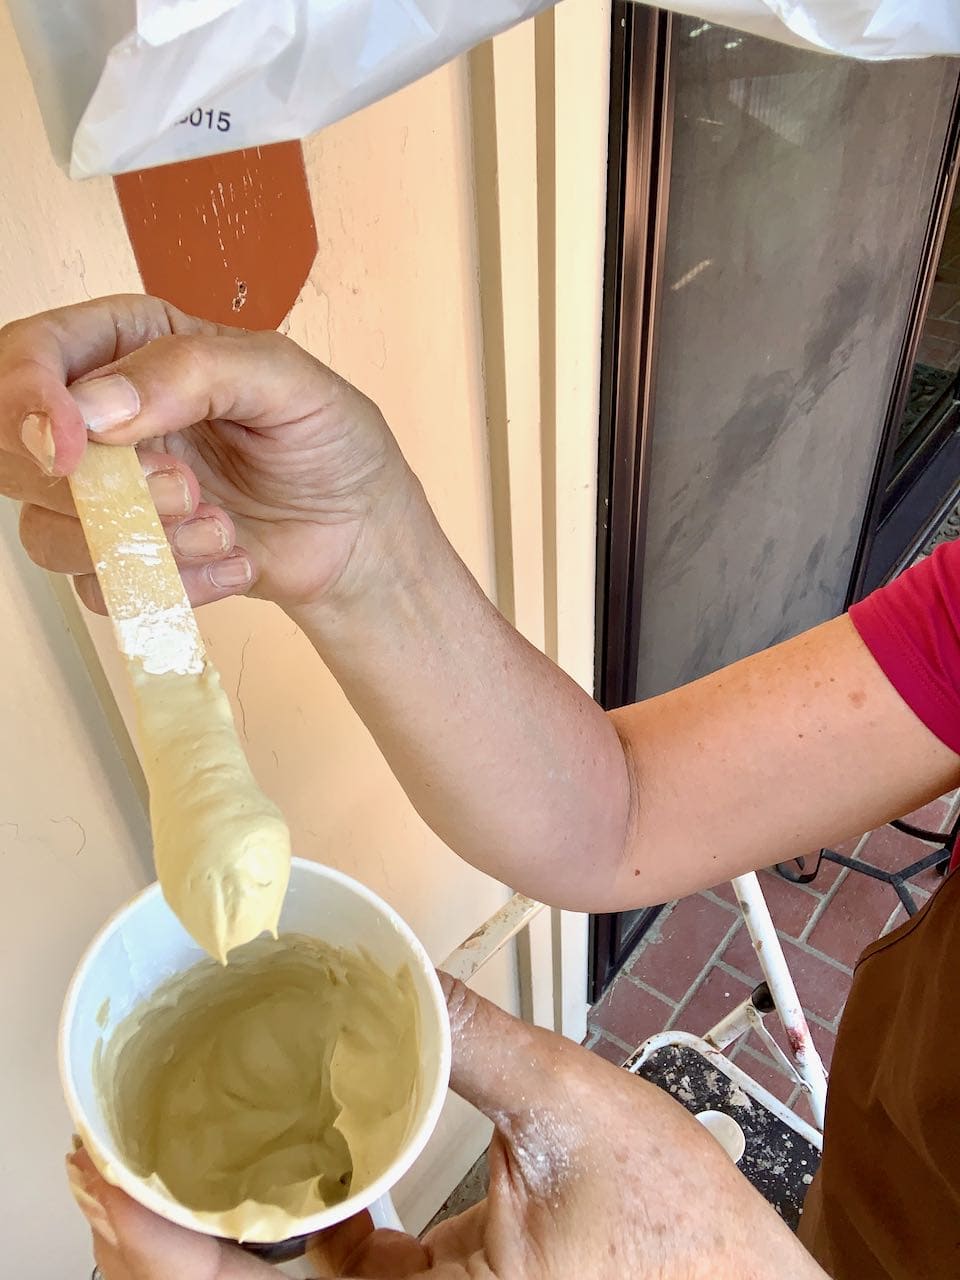
I mixed the Rock Hard putty in a paper cup. They suggested three parts powder to one part water. I stayed pretty close to that and mixed it thoroughly with a craft stick. Once I had it all blended, I smeared it on the holes and over all the seams. Then scraped it back off with a putty knife.

I didn’t want the surface perfectly smooth because our original siding is not perfectly smooth. This was actually the trickiest, recreating the imperfections of decades of questionable paint jobs, but still wanting it fresh, clean and for the most part smooth.
The Rock Hard name is true!!! I’m glad I believed it and before the putty was completely dry, I used a sanding block on it to even out the seams in particular.
Just like with sheetrock, I used only a thin coat and came back the next day with a second thin coat and sanding. That did the trick, I did not even do a third “finishing” coat.
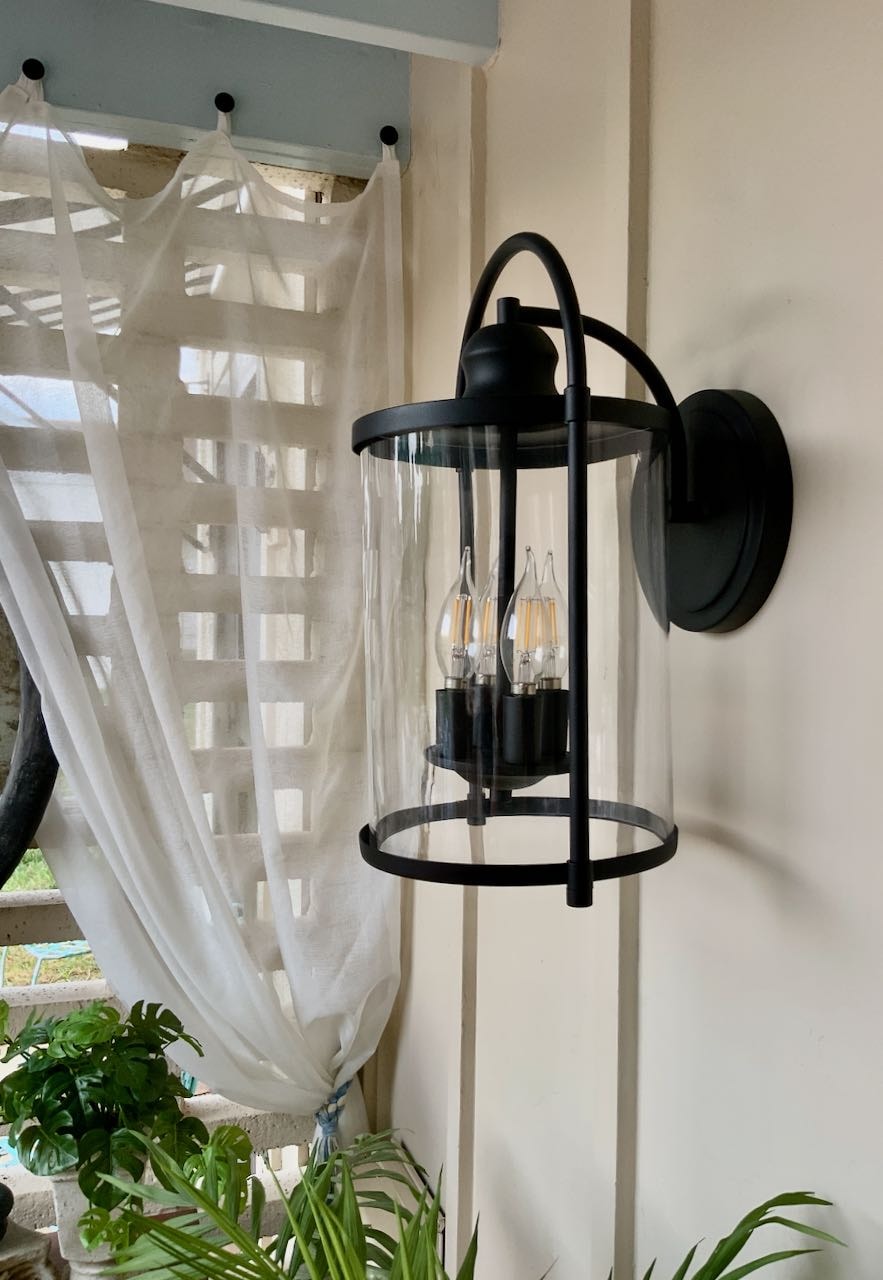
It took three light coats of paint to cover that deep terra cotta. And look at it now!
I know, you’re saying, what am I supposed to be looking at?
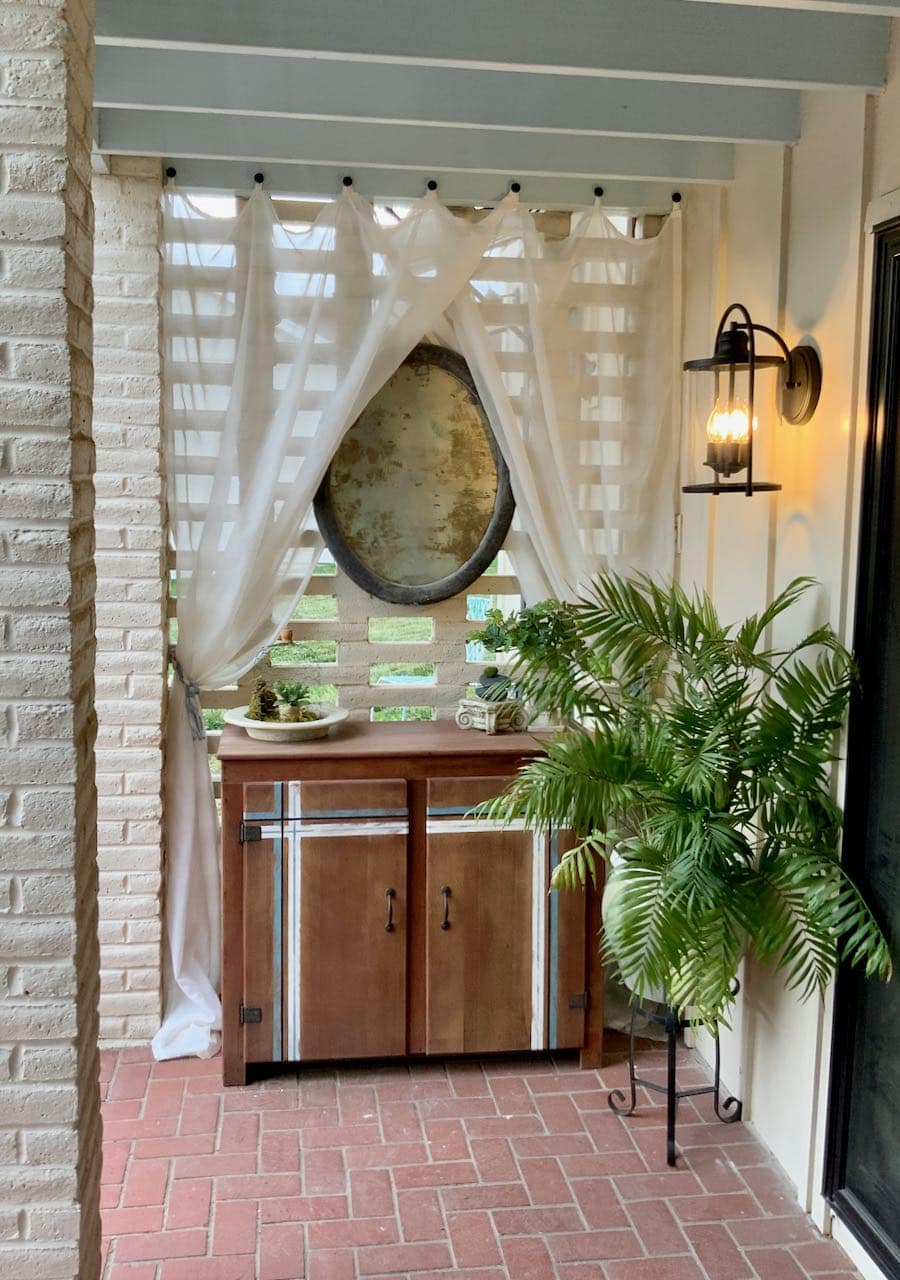
Exactly! I want you to see nothing there. Nothing, but a beautiful new light fixture to complete the patio corner makeover. You can see it all right here.
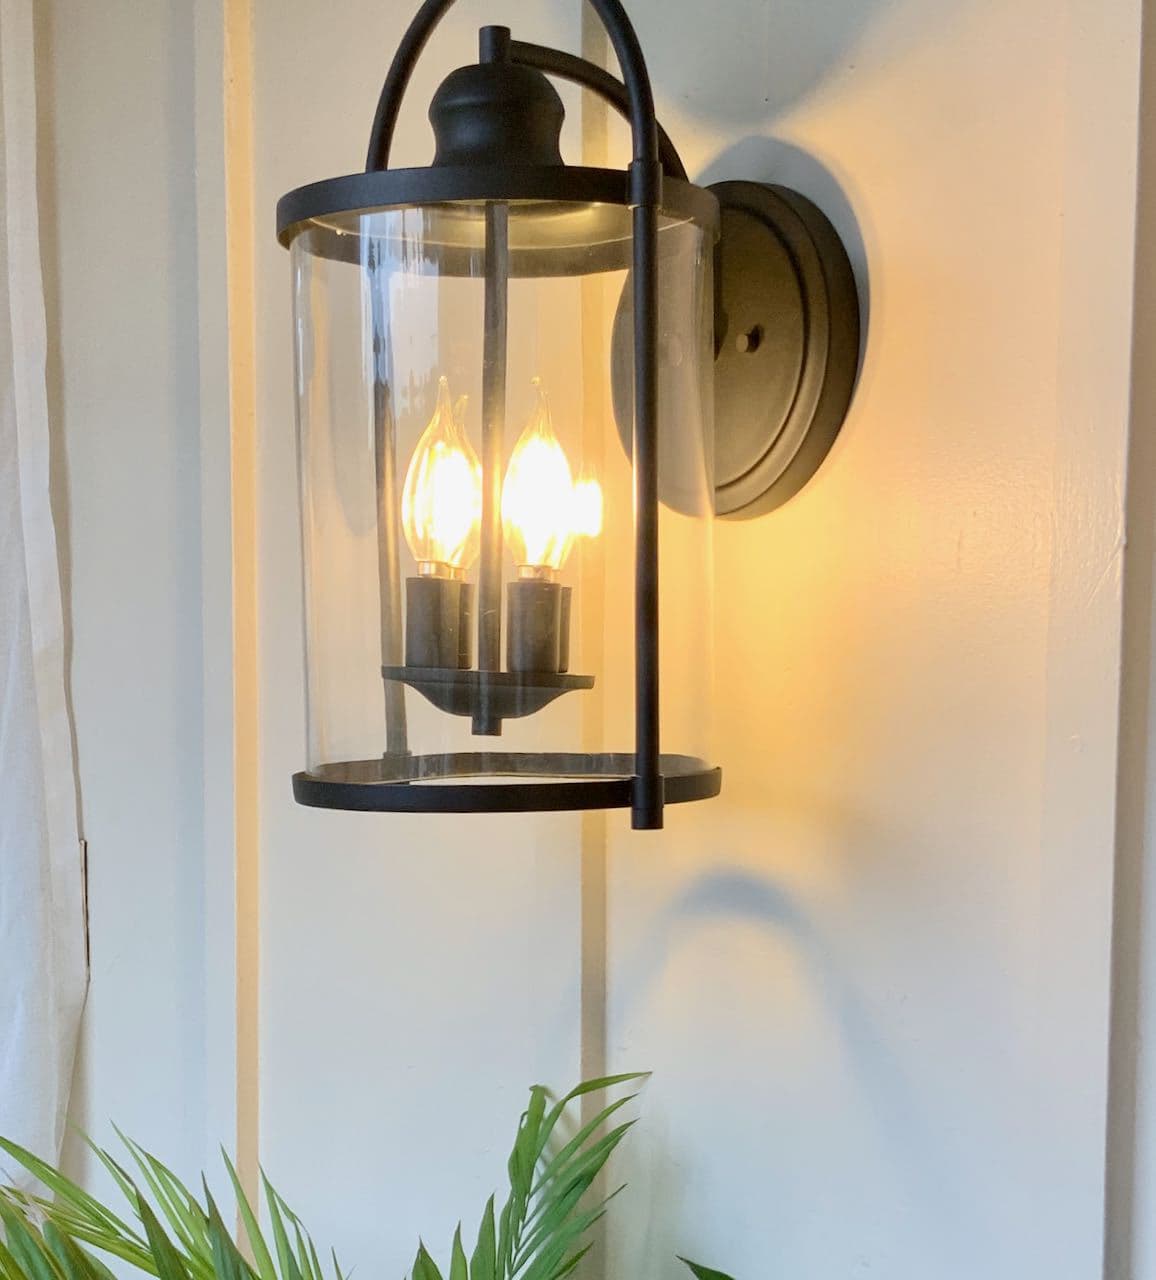
Now try again with the light on.
Still can’t find it can you?
I know, I’m amazed, too!!!!
Chances are you are not sitting there, right now, with a hole in your board and batten siding.
But the day may come that you need this.
For that surprise random hole that shows up.
Pin this to your “How-To Fix Anything” board.
Or to you “Brilliant Solutions” board
Or to your “Cool Products I Need to Know About” board
Pin it to wherever you will be able to find it when your Cracker Jack day arises.

I hope sharing this might help you some day, perhaps resorting to a crayon rubbing to get the shape right or using Durham’s Rock Hard Water Putty to fill a hole.
My goal is to share solutions that might make your life a tad bit easier and therefore more joy-filled. It’s all about the joy (and creative thinking and problems solving)! Don’t hesitate to reach out if there is an issue at your home that needs a fix. Together, we can probably solve it.

I am sitting right now with a huge hole in my board and batten siding!!
Lol this post came in handy….. we are needing to move a light fixture just like your situation!! We will have to try this method.
Thank you so much for posting!!!!
Oh Victoria, I’m so glad you found it. I was totally taken aback with the hole behind the old light. But in very little time it was fixed and you absolutely cannot tell that hole was ever there.
Just break it down into little steps, and you’ve got it. The most challenging part is figuring out how to get your scrap wood to stay in the front of the gaping hole. How close your hole is to one of the battens, may make a bit of a difference.
Let me know how it works out!
Great job!! I have an A/C unit size hole to repair and plan to try your method. 😉
Oh, I do hope it works for you. Please share how it goes and any modifications you needed to make for the size difference. I’d love to update my post to help more.