Transform Large Outdoor Pots
Leftover exterior house paint and a soft touch transforms large outdoor pots and gives them age and history.
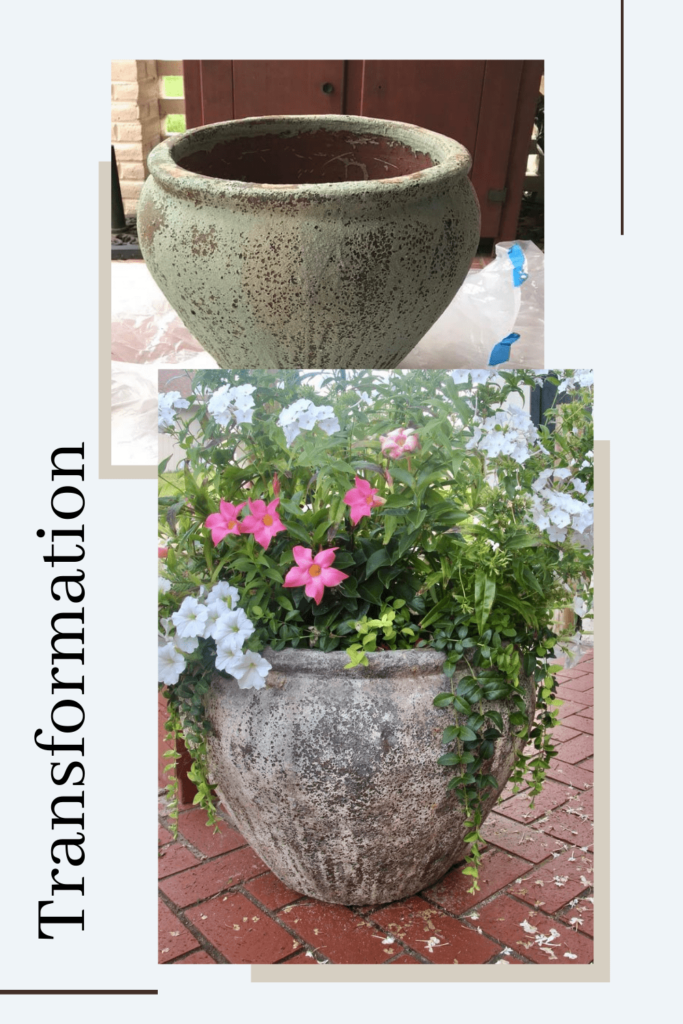
What to do when you have outdoor pots that are perfect except for one thing? When that one thing is their color, transform those outdoor pots into the pots they were meant to be, or at least that you want them to be.
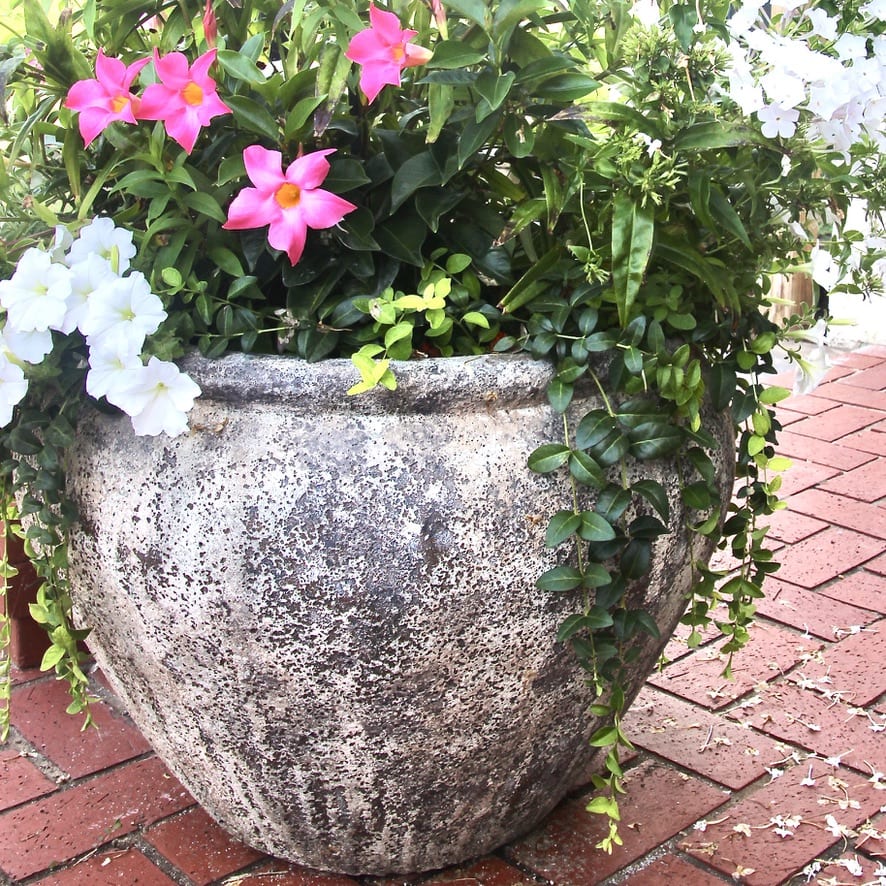
Isn’t she gorgeous! She looks like she has such history. Mayflower, perhaps? Oh the stories she should be able to tell us.
But sadly her stories will only be of despair! And perhaps embarrassment as she sat passed over all season, to be left behind, along with her twin sister …
… on clearance …
… in the hardware store parking lot! Oh the indignity of it all.
Fortunately, my sister has an eye! And this fabulous sister snatched them up knowing I would love the scale, the shape, the texture, the weight (and they are enormously heavy) . . . BUT, oh that color.
See that shape? That size?
AND that texture!
That color? No worries, I can take care of that color.
And sadly this is where it all falls apart. I’m sooo sorry.
Once I started the transformation, I was so excited I either forgot to take pictures or forgot to save them. I have searched high and low and no pictures of the actual process exists.
But it was deceptively easy. You might think because of the texture it would be hard. The texture made it easier, I just had to go slowly.
The Process to Transform Your Outdoor Pots
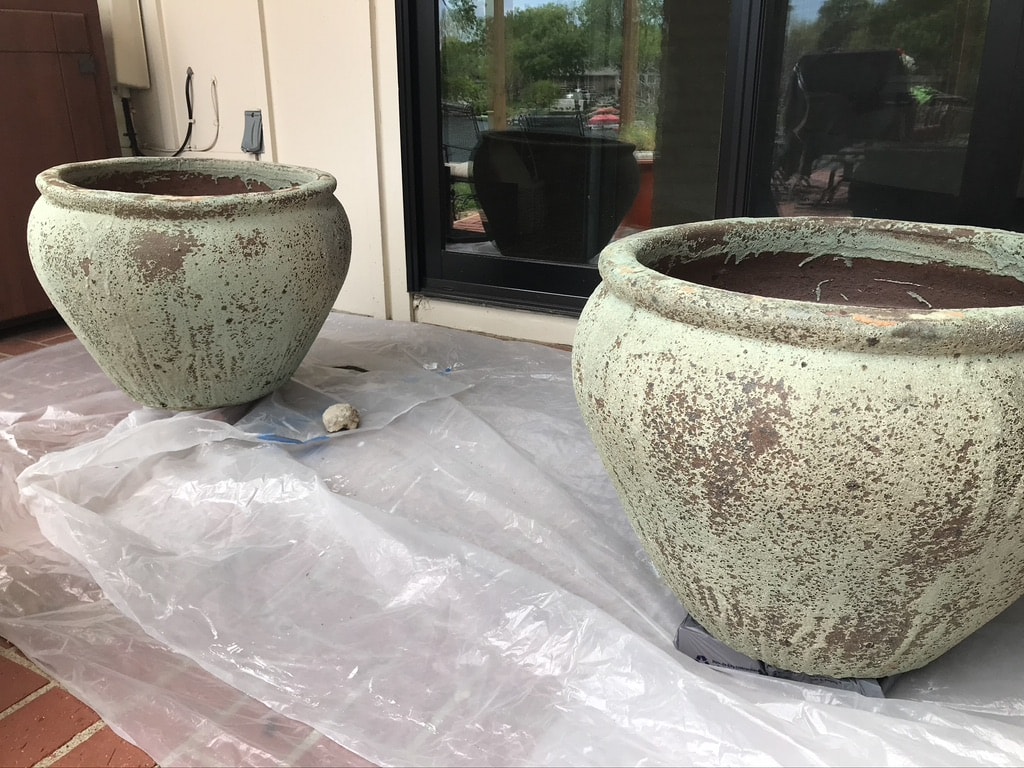
What better way to make sure they work well with the house color than to use the house colors? I brought out the cans of remaining house paints.
Our main house color is Patience with Utaupia on the chimney and balcony floor and Tricorn Black on the windows frames, balcony facing, and roof facing all by Sherwin Williams. The links make Patience and Utaupeia appear much darker than they are on the house.
Start by giving the pots a good cleaning gently brushing off any loose material.
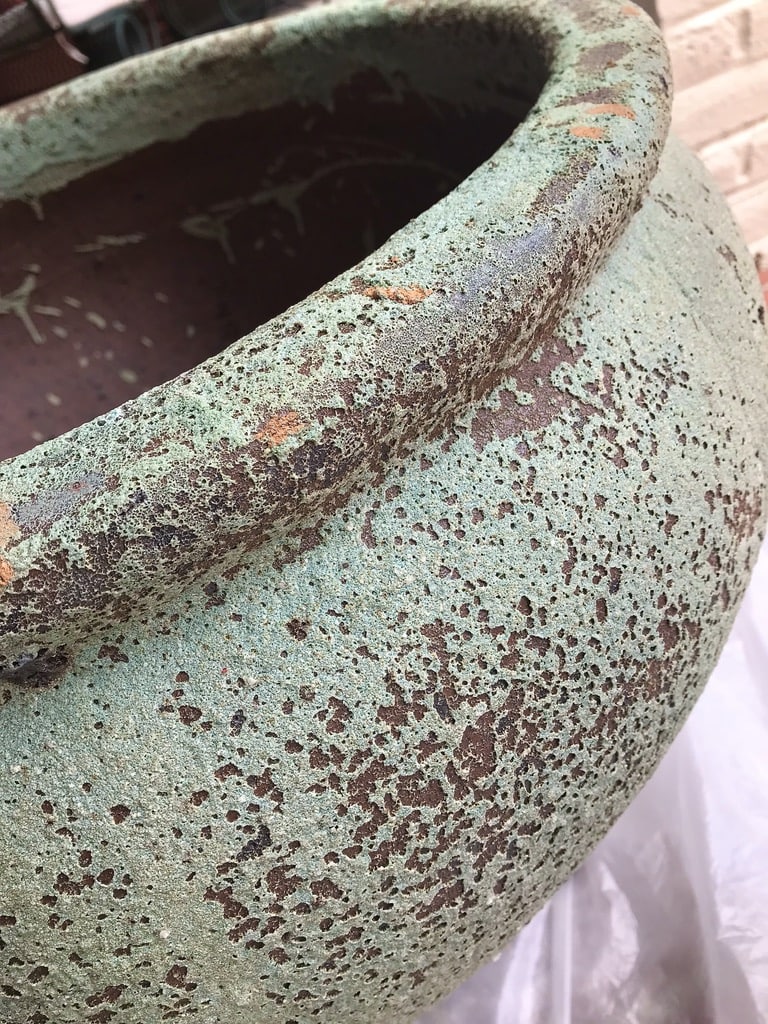
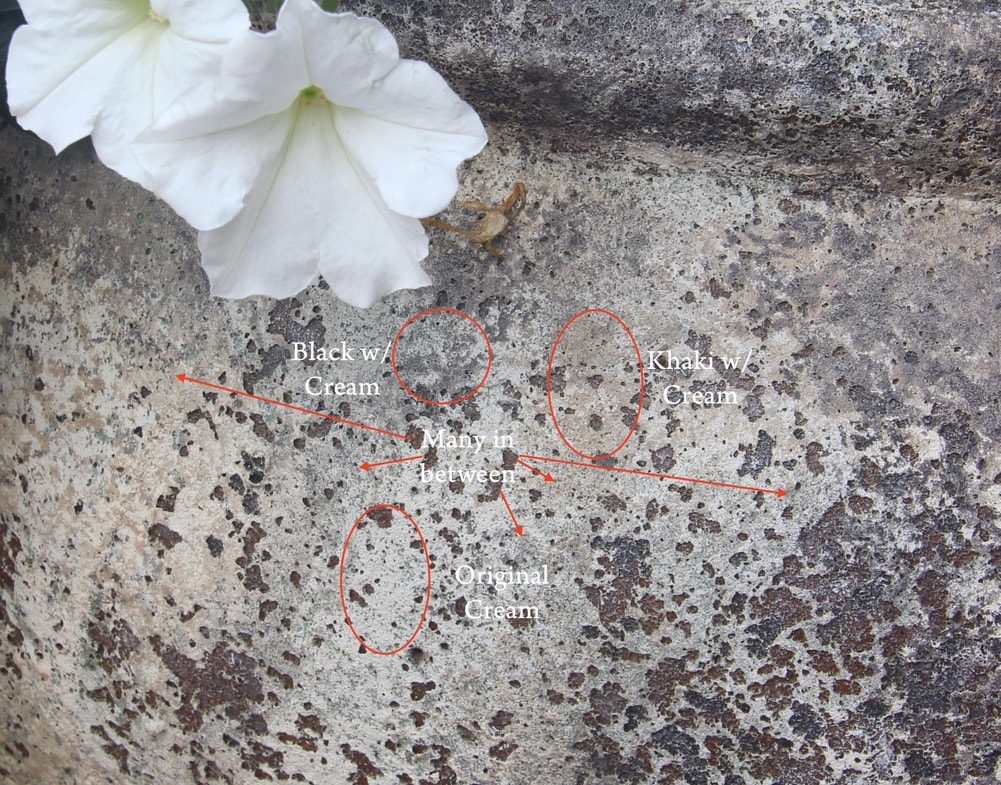
I wanted to preserve the brown in all the recessed areas and give a base of the cream color over everything else. So I used a wide foam brush. I scooped out some of the cream paint into a paint pan with liner. A paper plate would work fine here too.
Then I barely dipped the flat, wide side of the foam brush into the paint and and wiped off any excess. Then applied this with a gentle pouncing motion just like stenciling. This allowed me to avoid paint filling the recessed holes or running. It takes a bit of time, but it is truly very easy.
Once this base coat was on, it was time to add layers of aging.
I put a bit of each of my three colors on a piece of wax paper. The wax paper allows the paints to smear and mix more organically that a porous paper plate that wants to soak them up. I always use waxed paper when I am mixing colors, paper plates when working with just one color.
With a small sea sponge, I blended and layered, very gently dabbing as I went along.

The key is having many, many shades from the same three colors. Note that I did not use any of the black without blending it with the others to soften. Pure black would have been too harsh.
How Does the Outdoor Pot Transformation Hold Up?
We are almost through our second year with these pots transformed and no issues. I used exterior paint, but no additional sealers.
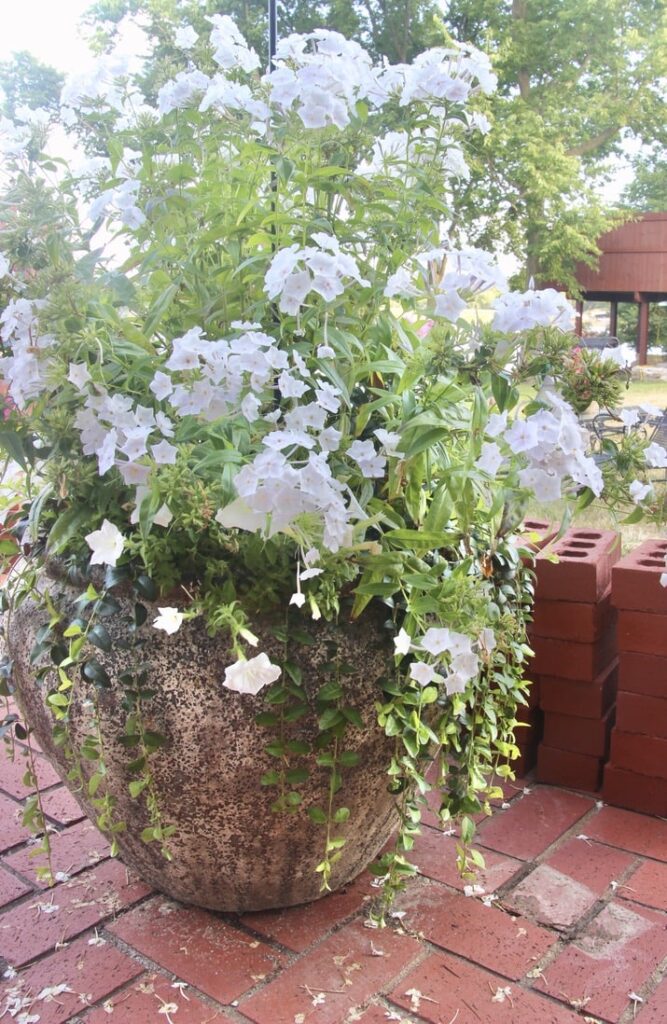
The first year I planted them with garden phlox and vinca vines, thinking that in the Fall I’d transplant into a landscape bed and get extra duty from the money spent. They sat in the pots all winter as I underestimated the time to get the beds ready for planting.
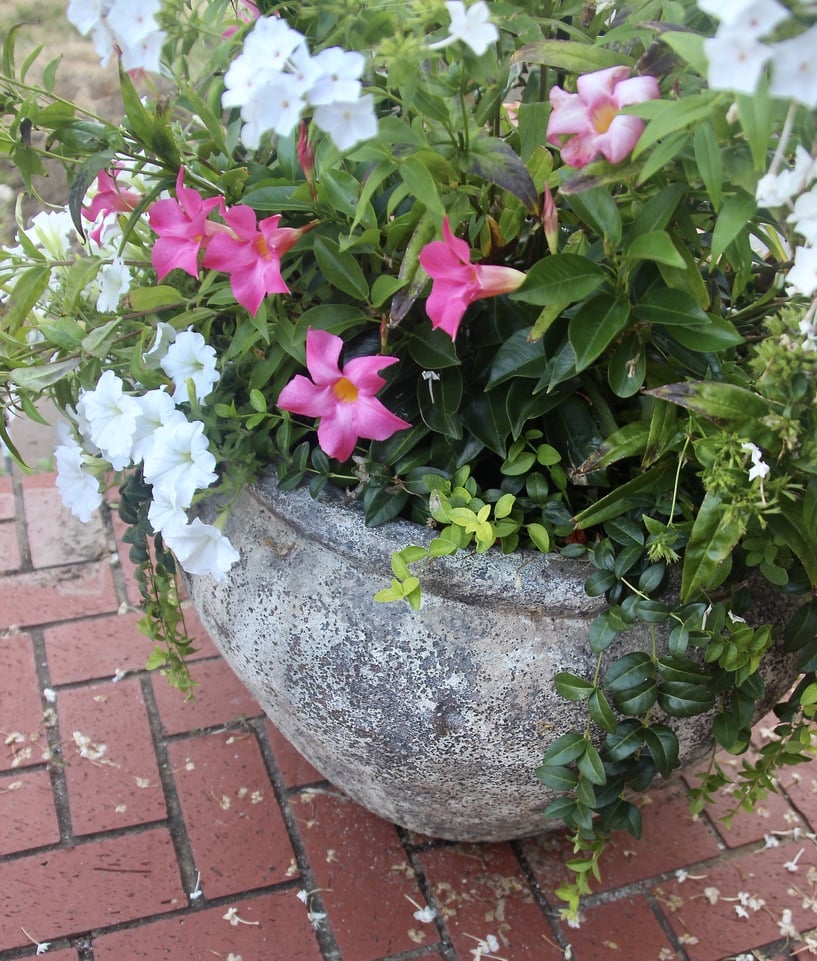
But what a surprise this Spring when it all came to life on its own (we’re zone 6)! I just tucked in some fresh petunias and dipladenia for filler and the showpiece pots of our patio were ready to go.
I hope this gives you some ideas to transform outdoor pots that you may have or discover despairing in your hardware store parking lot.
Now if we could just complete the rest of the patio transformation . . . sigh!

This is my first time to visit your site. I found you on Hometalk. The transformation is awesome. Unfortunately, I don’t have pots with that great stone texture but I’m going to give it a try anyway. Thanks for the idea.
Thanks Chris. I have another “transformation” of a large outdoor pot that did not start out with great texture, I had to add it! I’ll be showing how to do that shortly. So keep an eye out.