How to Best Choose Design Elements for Cohesive Room Remodel
Your floorplan and mood board are complete. But how do you refine your design choices for a cohesive stylish room? Answers right here!
Welcome to Week 2 of the One Room Challenge!
I hope you’re following along, because I am all about sharing the nitty gritty of planning and installing room makeover or remodels.
It’s my hope, that by seeing exactly the process I follow, you’ll feel empowered to be able to take on a room remodel you have been dreaming about.
Last week, I shared How To Plan DIY Half Bath Remodel Adding Warmth & Style. Yes, I’m doing a very small, but tall, half bath in our daughter and her husband’s home in DC. (while, we live in KC — so hopefully with a LOT of pre-planning and prep, we can install in ONE week)
I shared the floor plan and mood board for the remodel. But perhaps more importantly, I shared the process we went through to get to that point.
It all boils down to five basic, broad steps that every makeover project needs to start with.
Every time I have taken a short cut, I’ve paid for it in the long run. When I’m not diligent at the beginning, those are the projects that tend to grow legs and run wild with me chasing behind.
We’ve all done it.
The mailbox is looking dingy. Just a bit of paint is needed.
Now the door looks awful and before you know it you’re replacing the front door — but adding the sidelights you always wanted. Which now means the mailbox needs to be moved.
Or even worse, have you ever finished a room and then thought, “Rats, if only we’d moved that over 3 inches . . ” or “why didn’t we close up the cased opening by 2 inches and then the gorgeous hutch could fit in here”?
You missed out on opportunities to bring in more functionality because you didn’t take the time to brainstorm the possibilities.
Takeaway From Week 1: Always, always do the proper planning with floorplan and mood board.
TABLE OF CONTENTS:
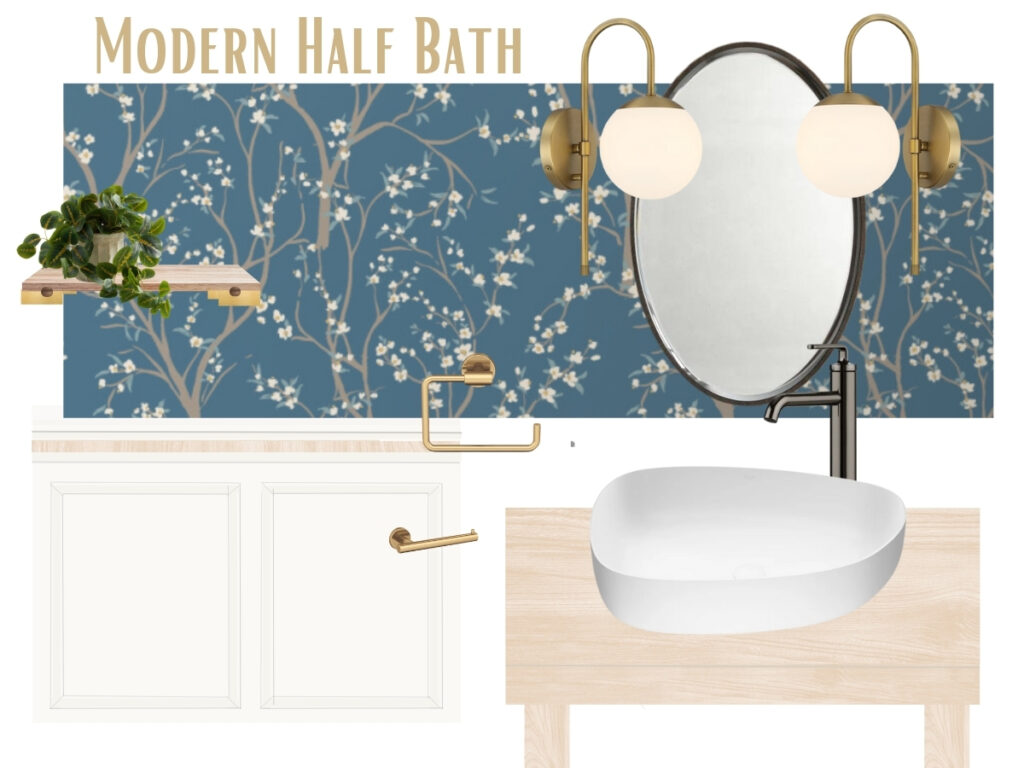
And this week we’re refining the broad design choices in the Mood Board to assure a cohesive finished space.
Where to Start Finalizing Design Elements
PRO TIP: Do NOT start with paint colors!!!
It’s great to have a general idea of the color you want to use in your new space.
But I always advise not to start with the specific paint, because it is actually the most flexible element in the room. Paint can literally be mixed and tinted a gazillion ways, to match or complement anything.
Always start with the element(s) with the least flexibility.
That would certainly be any elements that are staying in the room, as is.
If you’re doing a bathroom and you don’t want to replace or paint your tile, then start with that and everything needs to work with your existing tile.
Then go to the next elements that are least flexible. And focus on them starting with the ones that carry the most visual weight.
Upholstery and drapery fabric comes in narrow choices. Tile comes in only so many colors.
And rugs can also be narrowing, but typically not so much.
The links in this post may include affiliate links, which means if you purchase anything using these links, you pay no extra, but I may receive a small commission that helps keep this blog running. I truly appreciate you using affiliate links whenever possible. Please know that I will never recommend a product I do not believe in!
My Half Bath Example
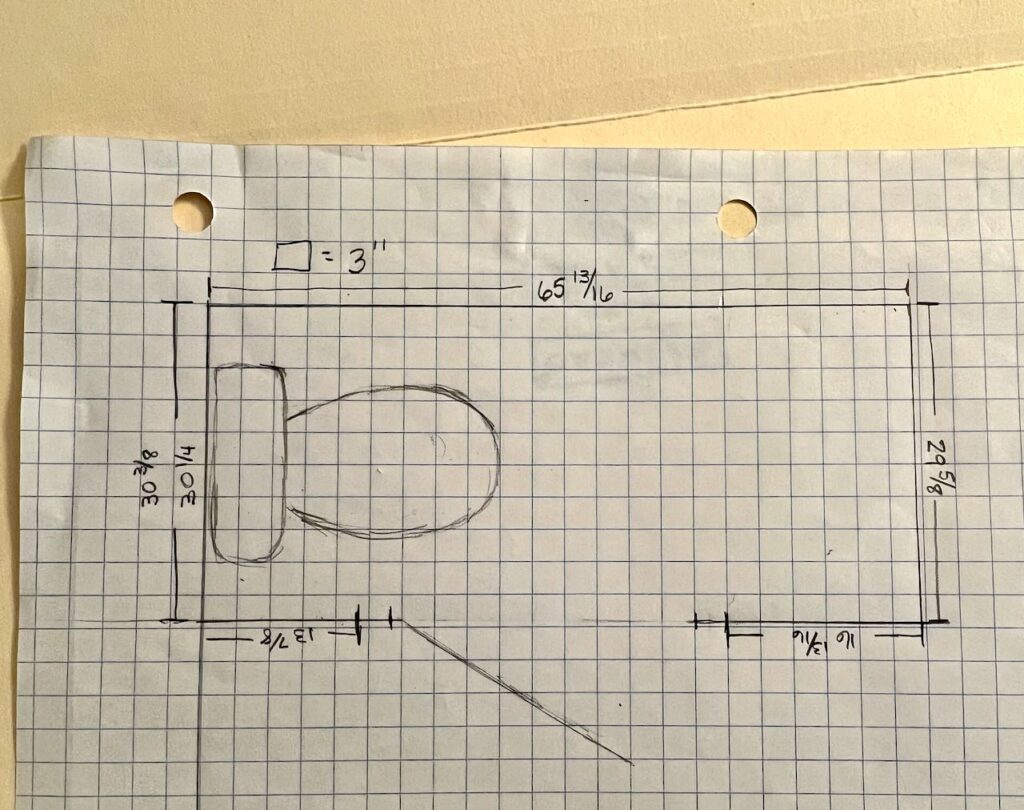
Tiny and Tall!
The floors are the same hardwood running throughout the entire house. Someday they hope to refinish them, but for now they are a light color (which they love) but with fairly strong yellow tint (which they don’t love).
The new-ish toilet is staying. It’s white, nothing to match there.
Katie has been saving inspiration photos for quite a while. The recurring theme of these has been wallpaper above an interesting wood wall treatment.
The wallpaper and wall treatment will carry the most visual weight, so those needed to be determined first.
Initially, we were leaving the white pedestal sink and updating the faucet. However, with their baby due in August, Jon pointed out they’d be at the little-potty-chair stage of life before we know it.
They would need to be able to slide the potty chair out of the way under the sink, so the pedestal sink had to be replaced. Good catch, Jon!
So I’m building a simple table for a vessel sink and faucet.
Then there are decisions for the remaining accessory type items, that were decided in order by visual weight:
- Lights
- Mirror
- Shelves
- Towel ring
- Toilet tissue holder
So there’s our broad stroke design. Now it’s time to refine the design elements for that cohesive look we want.
Our Choices and the Why’s
I’m going into detail on why we made the design choices we did so that you can apply some of the same to your next room makeover project.
Your project will be different, but the principles will be the same. I’ve highlighted them below as Takeaways.
Wall treatment-
Our weightiest and therefore first decision to be made.
We are working with the amazing Love vs. Design for our wallpaper. If you haven’t heard of them, let me just say they are amazing!
I’d love to see their facility! Not only do they offer wonderful patterns, but they are printed to your color specifications. They have over 200 colors to choose from. And depending on the pattern you may only have two colors or you may have up to 8 to choose.
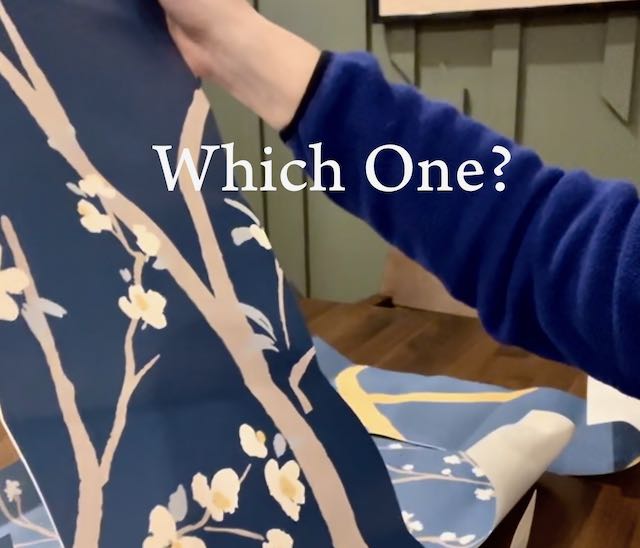
Katie explored the patterns and narrowed her favorites down to 12 options. Most of these were very angular and somewhat contemporary. This starting point included just one floral called Cherry Blossom.
The bathroom opens into the dining room. Yes it’s unfortunate, but with a long narrow home like this, it really was the only choice for the previous owners when adding a half bath to this floor.
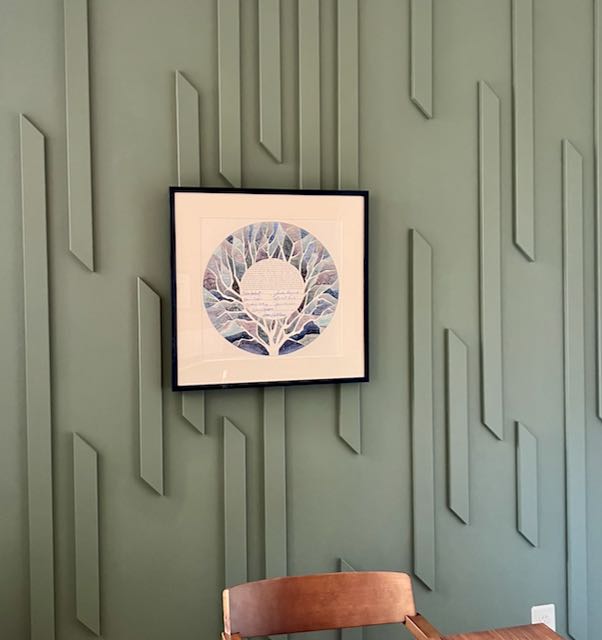
They knew they wanted a deep color to continue the feel of this dining room feature wall we added and the massive library wall we added just around the corner, to their living room.
The side chairs in the dining room are upholstered in a deep blue grey tweed.
So we decided a deep blue from the artwork above and the upholstery would be the right look.
TAKEAWAY: Take into consideration your adjoining spaces to maintain a consistent flow.
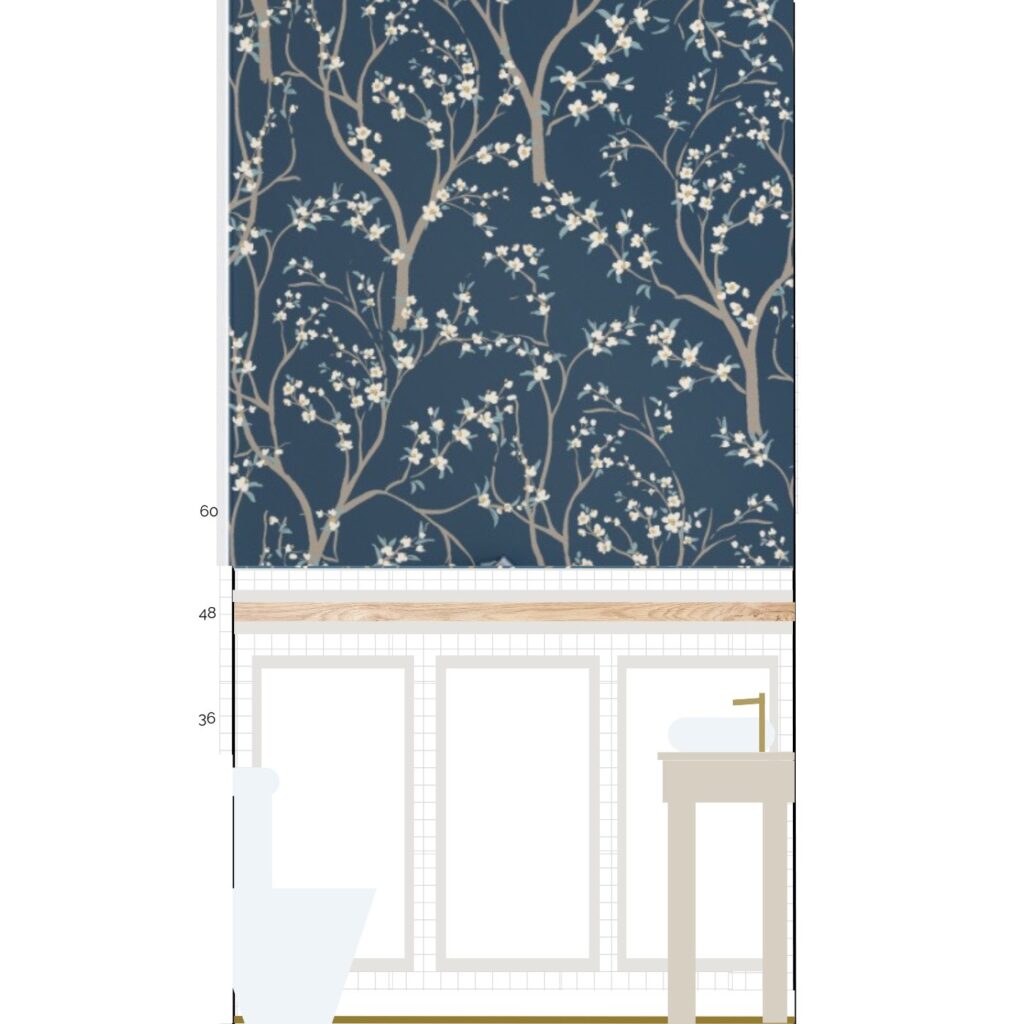
They really want to bring in the warmth of wood tones, so in planning our wall treatment, we started with a wood tone accent strip imbedded in a wide chair rail.
And They liked the concept of traditional applied frame boxes.
But the traditional, intricately carved trim felt a bit too formal and a bit too fussy for their home with its exposed brick walls and tall, but simple base trim.
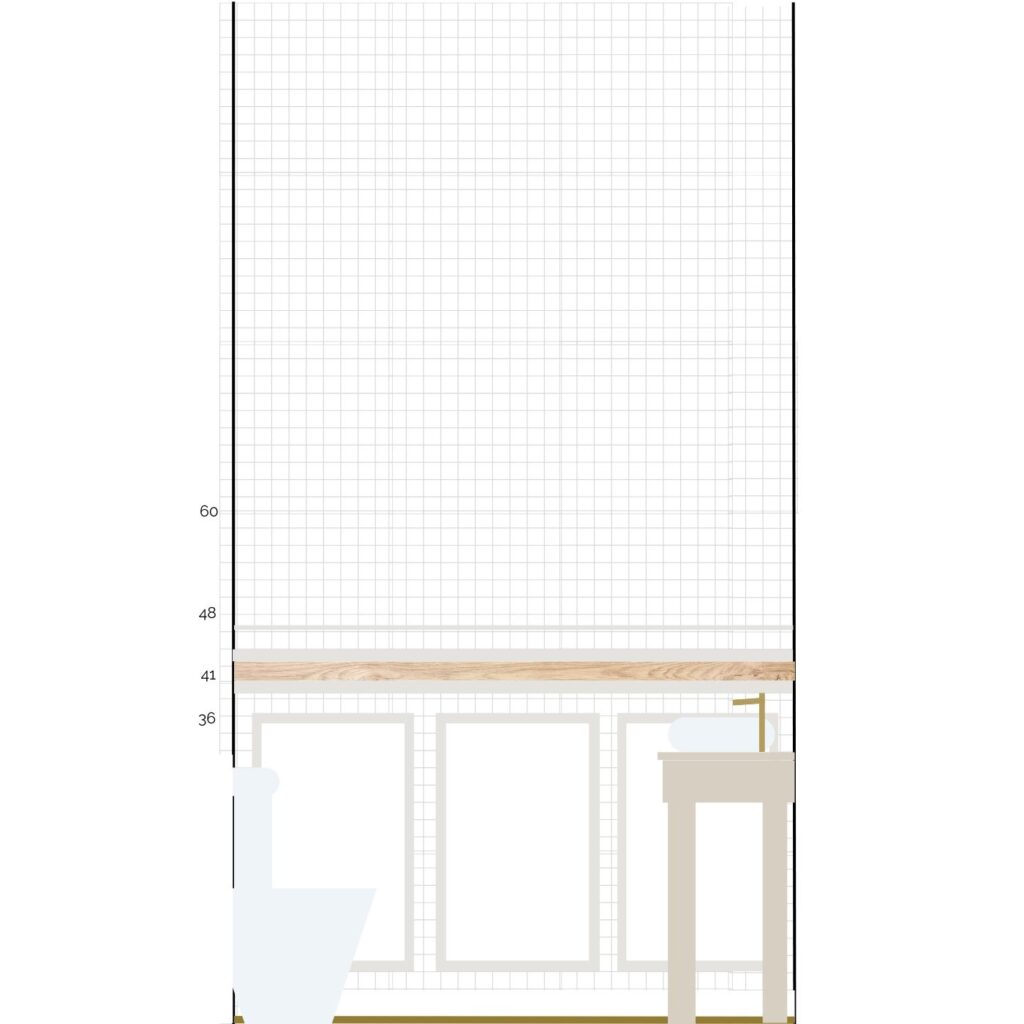
So we took the concept and are making it our own by stacking flat trim boards, for a modernized, simplified version.
The lower wall treatment will be painted a light color to be determined by the wallpaper.
This light color will help highlight the chair rail wood tone accent. Plus breaking that tall height with a dramatic color change will help the rooms proportions appear better.
Once we had the lower wall treatment defined, we revisited the wallpaper and the kids realized that they needed some curves to soften all the strong linear elements.
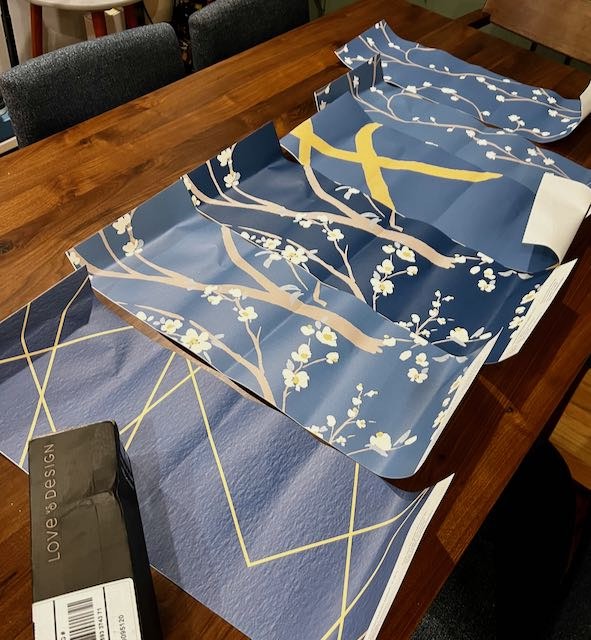
They found a second floral that they liked, Blossom Orchard (no. 2 and 3, left to right, above) This one uses five colors instead of three and is a bit larger scale.
Another great thing about Love vs. Design, not only do you recolor the patterns in real time on the website, you can order generous sized samples printed in your choice of colors.
The kids set out to come up with the right combination, The background color was easy, it would be Regatta. They ended up ordering six samples and at the last moment switched out two of the Regattas “just to see”.
Good thing. When the samples arrived, the darker background, “Notable”, (no. 3) was the clear winner.
Nos. 5 and 6 are the Cherry Blooms, with different light colored flowers. They wanted to see the contrast, because the lower wall will be painted the light color.
And they also switched their allegiance from Cherry Blooms to Blossom Orchard mainly for the additional colors in the pattern.
The branches are in “Ash” which will really speak to the wood tone in the chair rail, sink table and shelves.
The petals are “Light” which will now dictate the final paint color for the lower wall. and the “Faux Gold” flower centers will tie in the gold metal finishes we’ve planned. And the soft blue grey “Sky” of the leaves, references the blue grey that the walls on this floor of the house are painted.
TAKEAWAYS:
- Consider adding curves in a pattern to balance a lot of linear elements, or adding linear to give structure to a lot of curves.
- Use pattern or high contrast to fool the eye into breaking up too tall proportions or extending too narrow proportions.
- Keep in mind the visual weight of shapes and curves when choosing the profile of trim, furniture and accessories.
- Use color to tie elements together.
A quick pause to ask if you are finding this post helpful. Please consider joining us to gain access to our Free Printables Library (You’ll want that next week for sure), behind the scenes exclusives and more:
Many thanks! Now back to our design decisions:
Our Secondary Design Elements–
Now that the walls are decided, The sink table, vessel sink and faucet are next.
Again, the kids requested light wood. So the chair rail and the vanity table will both be made of poplar.
We are keeping the sink table very simple. This is a small space and the wall treatments have a lot design weight, so we want to balance that with a very simple table.
We are working with a very tight space, so our sink options are a bit limited, but we found this really cool shaped vessel sink from Vigo, that we all love!
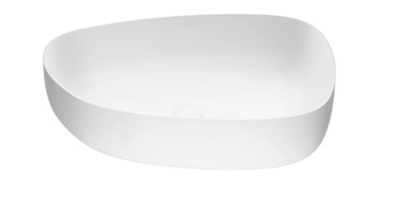
We are planning to install it with the corner void in the back right side.
This way the faucet can sit in the corner and the sink can sit an inch or two further back towards the wall. — critical inches in a room this size!
TAKEAWAY:
- Always keep size proportions in mind. Just because something will fit, doesn’t mean it should. Breathing room is good!
- Be careful not to “overdesign”. Use the strength of simplicity.
Negative space can be very powerful in design — especially in a small space.
Lighting Decisions–
In some cases, some rooms, the light fixtures can be more important than even the secondary design elements.
In this case, the sink, faucet and table as a group weighed in heavier (just barely) for me. But now we’re on to the light fixtures.
Do NOT discount the impact of light fixture in your design. Placement and style are critical!
I have a thing about over mirror lights — not a good thing!
They never produce flattering light, but rather shadows that can at times be rather scary.
My daughter gave in and we have two beautiful sconces that will sit on either side of the mirror.
Again because of the small space, we had to use narrow fixtures.

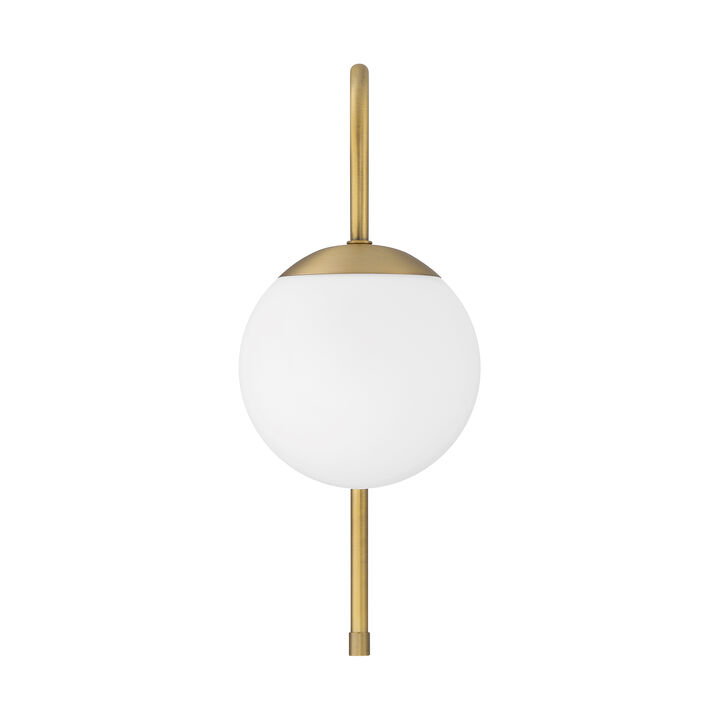
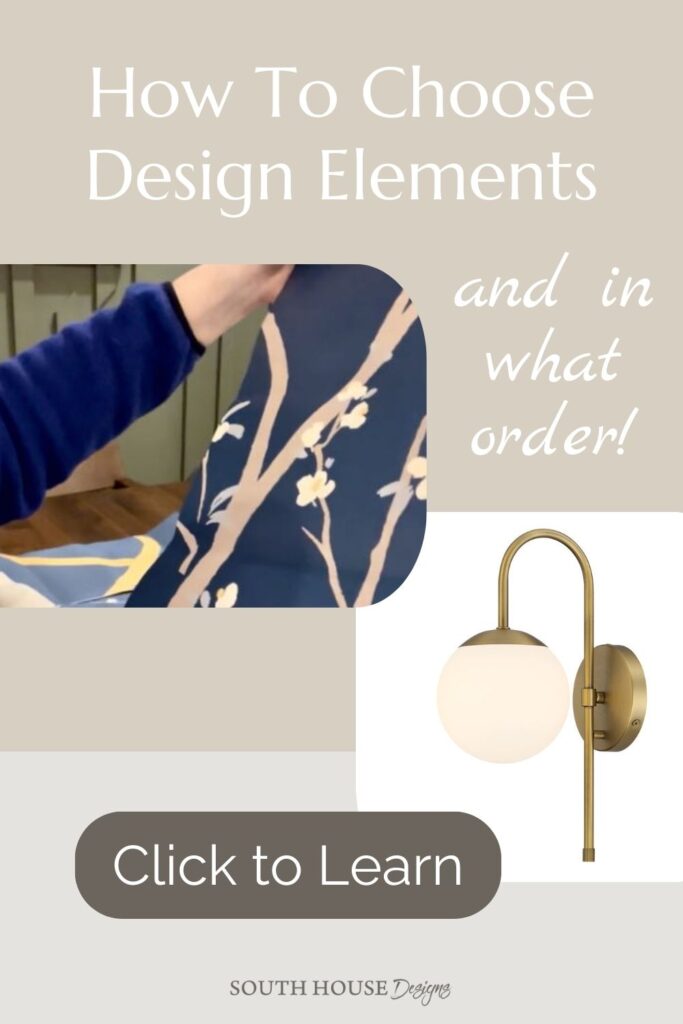
These aged brass Castell sconces from Lights.com measure just 6-inches across. Perfect for this space!
Accessories For Cohesive Remodel–
We’ll be adding an oval mirror between the sconces.
Two reasons for picking oval:
- Oval to bring more curve between the straight lines of the lights
- The back plate of the light fixtures can sit in a bit closer above the widest part of the oval. This allows us more mirror surface without pushing the lights right up against the side walls.
PRO TIP: Better to go larger on bathroom mirrors, they help expand the space and reflect more light.
There is no storage in this bathroom, so we are adding two shallow shelves above the toilet to stack extra hand towels and a few rolls of toilet paper as well as a faux plant.
You guessed it. These will be light wood. I’ve planned a very unconventional way of hanging them. Fingers crossed it works. I’ll have a detailed How-To as we get further along.
The towel ring and tissue holder will be of our accent gold. The kids picked a finish that blends nicely with the aged brass of the light fixtures.
PRO TIP: Be cautious with the aged brass finishes. They vary wildly between brands.
Some have a very orangey color where some lean towards green and some rather pinkish. They don’t need to match, just try to avoid clashing.
TAKEAWAYS:
- Use accessories to repeat an accent color dispersed around a room.
- Balance of shape is still important, even in accessories.
- A mix of textures and shiny vs. matte is important for adding depth and interest.
And now we have our Mood Board refined even more! I need to switch out the wallpaper in the Mood Board. And we’re still working on the exact mirror and faucet, but it is coming along.
Keep in mind that a Mood Board is not static and the final word. It evolves as your makeover evolves. Like this version needs to now be updated with the darker background wallpaper.
That’s okay, it its a great tool to keep you on track. And if a snag arises and you have to take a slight detour, you’ll find your Mood Board is invaluable.
I hope this helps you feel empowered to take on a room makeover. What room are you hoping to makeover?
Next week, I’m sharing all the installation planning tools I use with free printables for you to use .
Here’s a pin for you to save to help you remember where to find these Takeaways when your ready to dive into planning your next remodel.
Stay tuned for as this half bath makeover keeps chugging along.

Love your tip about not starting with paint color. That’s so true, I’ve made that mistake more times then I’d like to admit.
Right? You think, how can I possibly go wrong with this color I love, but then there is NO tile with the right undertone!!!
I love how your organize your thoughts so well, I have so much trouble with that! Your takeaways in How to Choose Design Elements are brilliant. I love this wallpaper company and I can’t wait to see the final result.
Oh, Julie! Thanks so much for your kind words. Wow, I really needed to hear that today. Thanks for making my day so much brighter..
This is going to be beautiful, Diane. When can you come to CA, I need you here! :))))))