Free Printable Spring Place Cards + Cutest DIY Card Holders
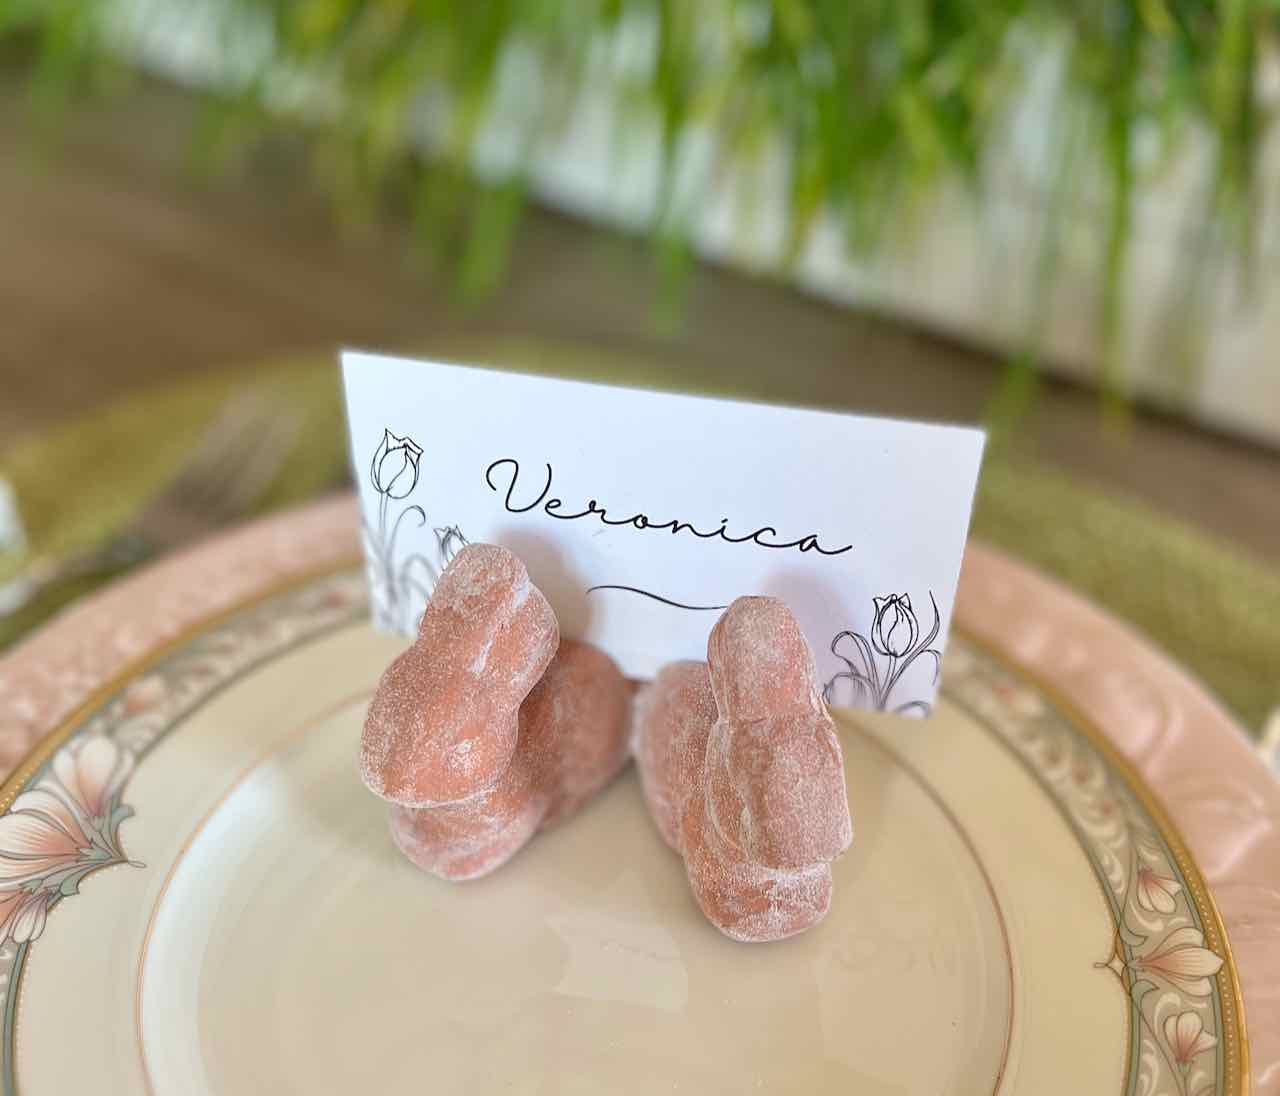
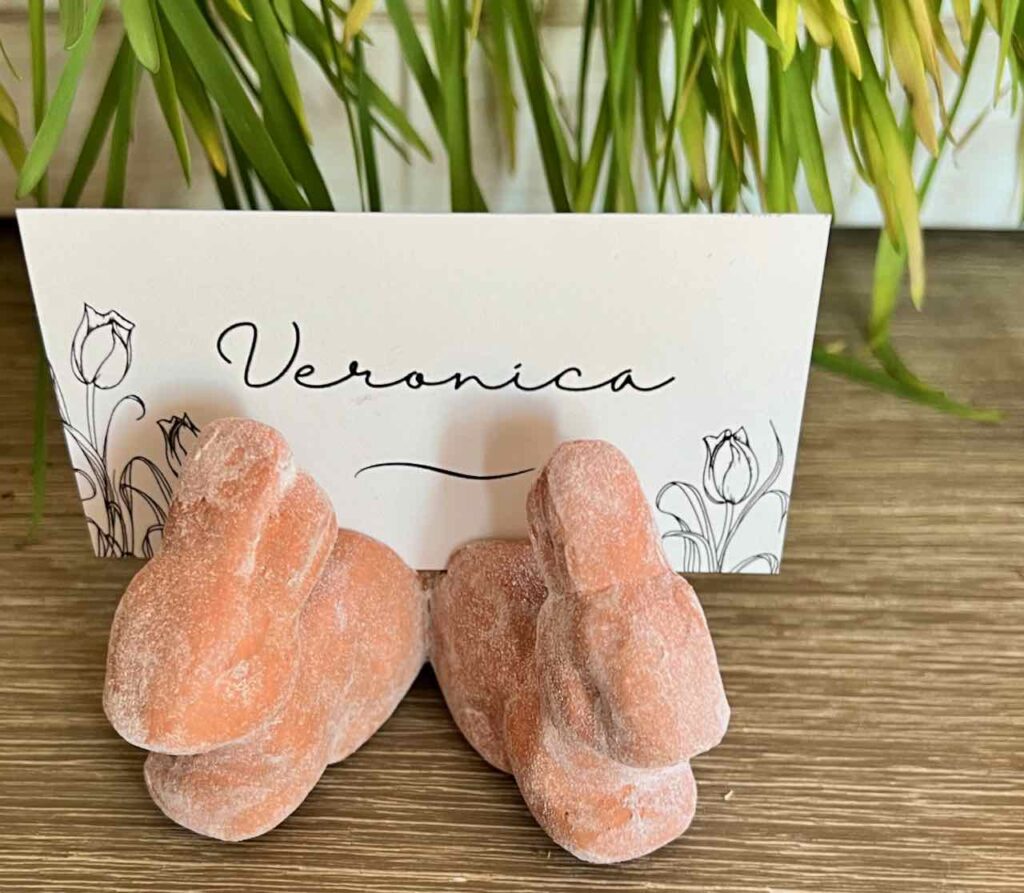
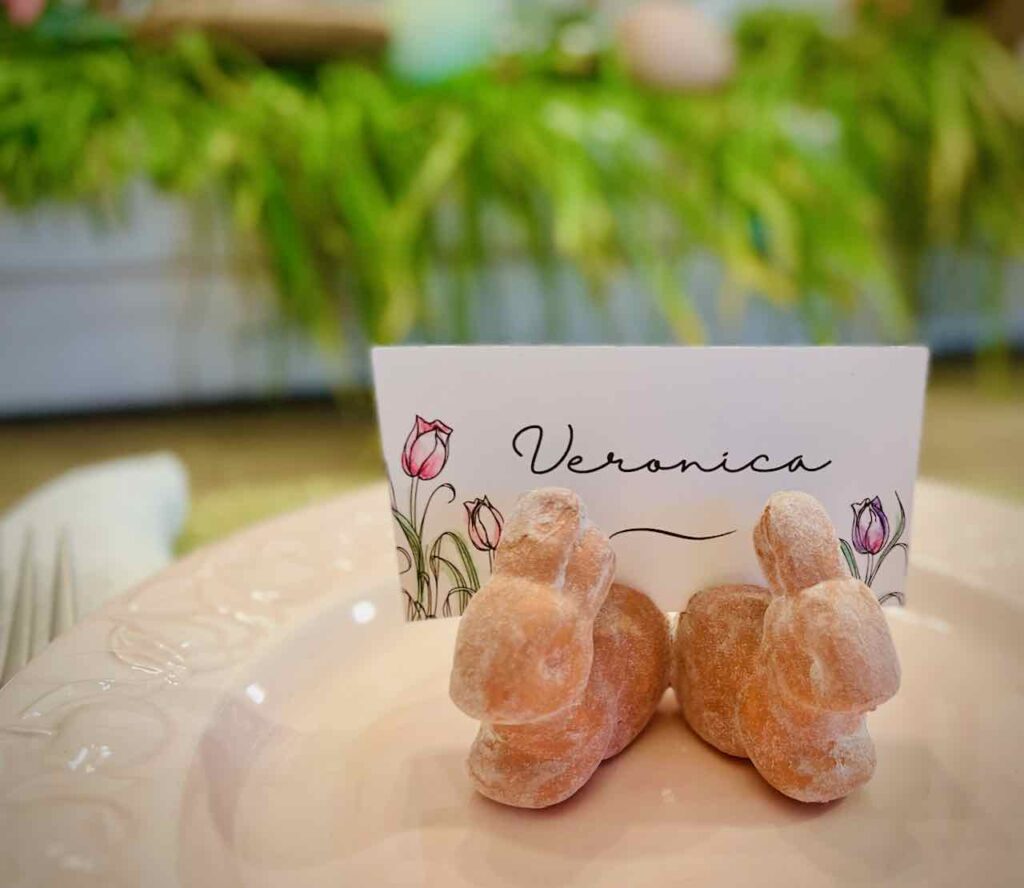
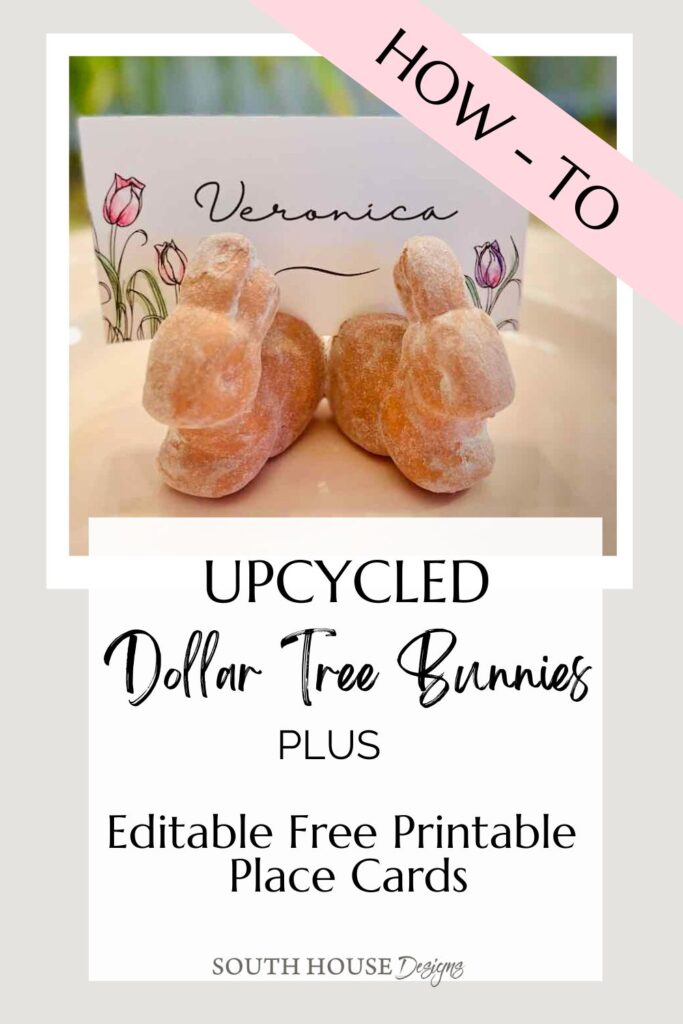
Aren’t these the sweetest DIY Easter place card holders upcycled from Dollar Tree bunnies? There’s more: free printable, and editable name cards!
Spring is hopping in, and what better way to celebrate Easter dinner than with floral place cards and adorable bunny-themed place card holders?
This craft is perfect for a budget-friendly tablescape, using cute foam bunnies from Dollar Tree and free printable name cards you can personalize with your guests’ names.
But those cuties don’t stay foam long! In two shakes and a hop, they are aged terra cotta bunnies ready to bring a touch of garden to all your Spring decorating.
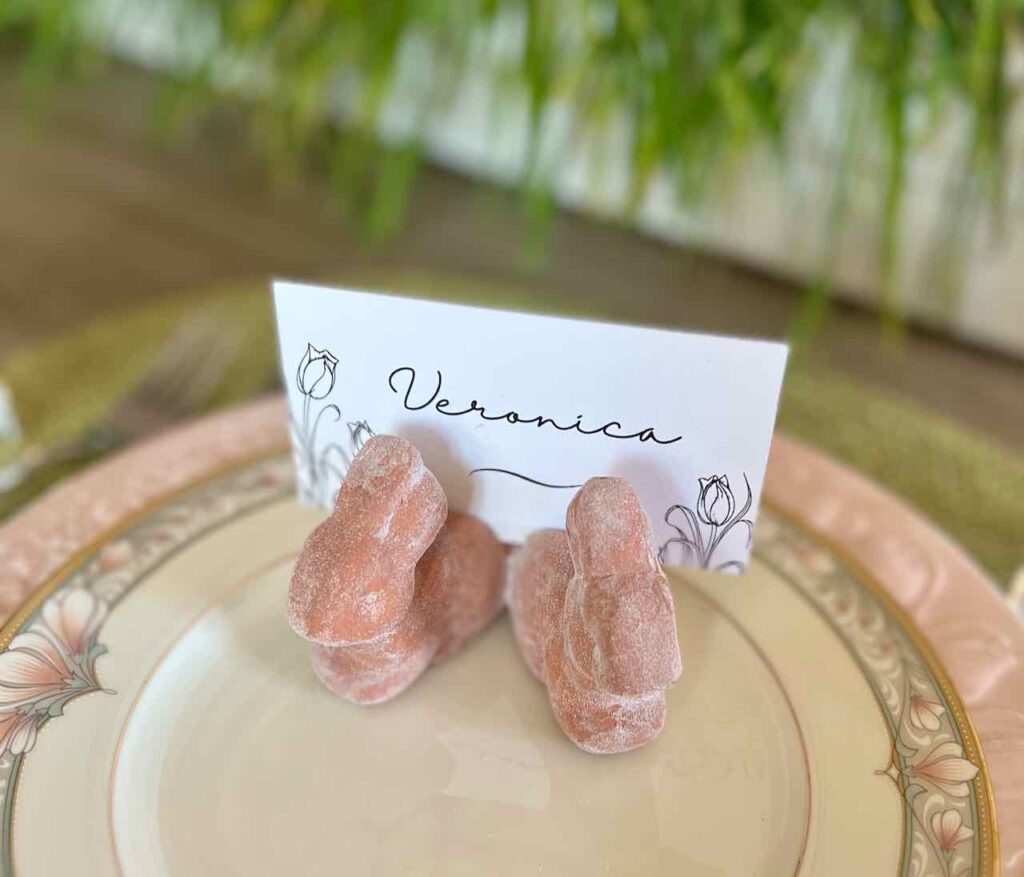
These faux terra cotta diy place card holders would be the perfect compliment to an Easter tablescape featuring terra cotta pots and wooden eggs or perhaps paired with a centerpiece of a box planter with real grass as I did here.
These little terra cotta bunnies were inspired by this larger bunny statue that I upcycled a month ago.
TABLE OF CONTENTS:
Let’s Make Spring Bunny Name Card Holders
Materials and Supplies-
Place Card Holders:
- Foam bunnies from Dollar Tree, two per placesetting, come in pkg of 8
- Acrylic paint (craft paint) in your choice of paint colors
- Aging Additive: Flour, baking soda or baby powder (your choice)
- Paint brushes
- Disposable cup and disposable spoon or stick for mixing
- Disposable container for flour, baking soda or baby powder
- Fine sandpaper, or nail file
- Electric knife or craft knife
- Hot glue gun and glue sticks, optional
Name Cards:
- Stiff paper
- Printer
- Paper cutter, rotary cutter or scissors
- Water color pencils and fine paint brush, optional
NOTE:
I used two bunnies per place card, as one bunny by itself was prone to falling over.
Alternatively, a single bunny could be glued to a free-form shaped base cut from heavy cardstock or balsa wood.
Step 1) Prepare the Bunnies-
A) Smooth the surface-

With the sandpaper or nail file, smooth out any seams and smooth the bottom for a stable surface.
B) Make slits to hold the Easter place cards

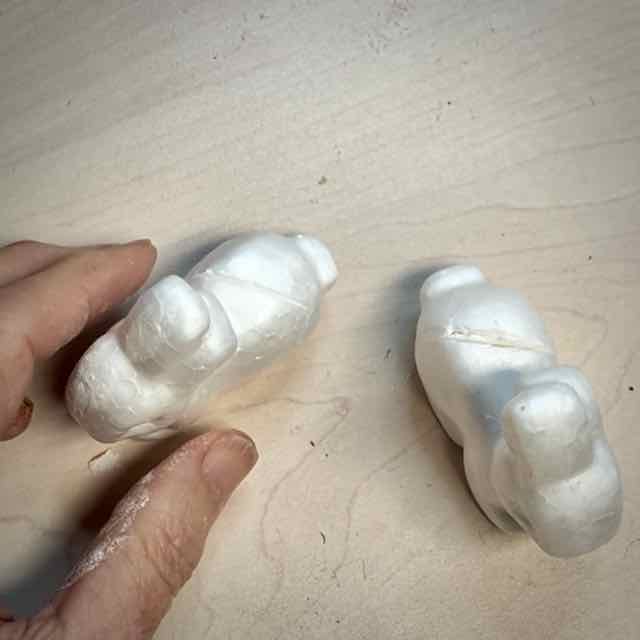
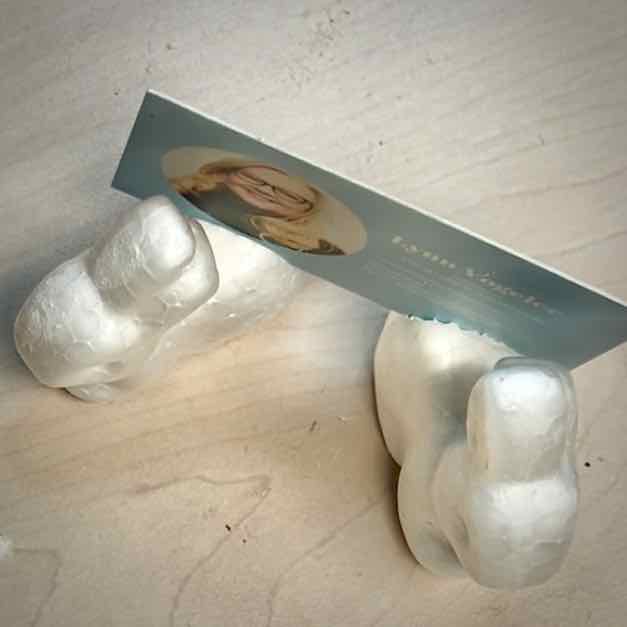
Use an electric knife, craft knife or long chef’s knife to cut slits in the back of each bunny.
With two bunnies facing outwards, you’ll need cuts going win opposite directions, like in the pictures above.
Slant the cuts a bit so the surface is further back, towards the bunny’s hinny, and the deepest layer of the cut is further forward, toward the bunny’s head. This will have the name card tilting slightly back so it is easy to see (and read) the place cards.
PRO TIP: An old electric carving knife is a great addition to your craft room. Keep a look out for one at thrift store and estate sales.
Step 2) Faux Finish the Bunnies-
Of course, I always encourage everyone to find their own rhythm and process that works for them. But I found significantly better results when I did two coats and each coat received the aging treatment.
This way, if I missed a spot on the second coat, there was some aging already present and it wasn’t nearly so obvious.
I started by glueing pairs of bunnies, and then painting and aging, but it was harder to paint then.
Ultimately, I found it much better to paint, then glue. And some I didn’t glue but spread them apart instead. Do what you like best!
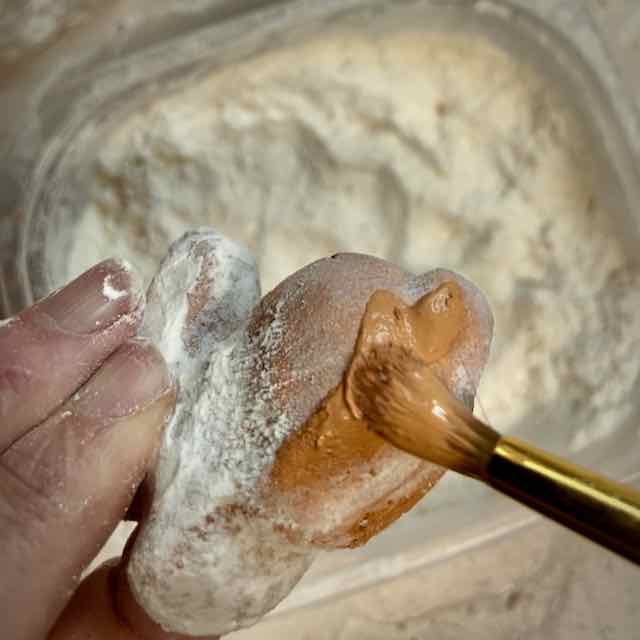
For the paint, I used the paint left from the large statue bunny I made over. It’s a blend of 5 different craft paints. Buy one jar of a color that you like or mix your own.
Pour a good amount, maybe an inch deep, of your aging additive into a disposable container
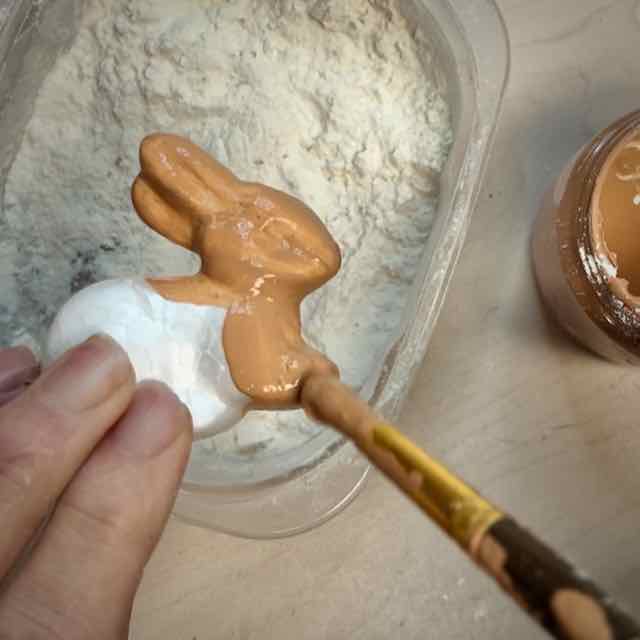
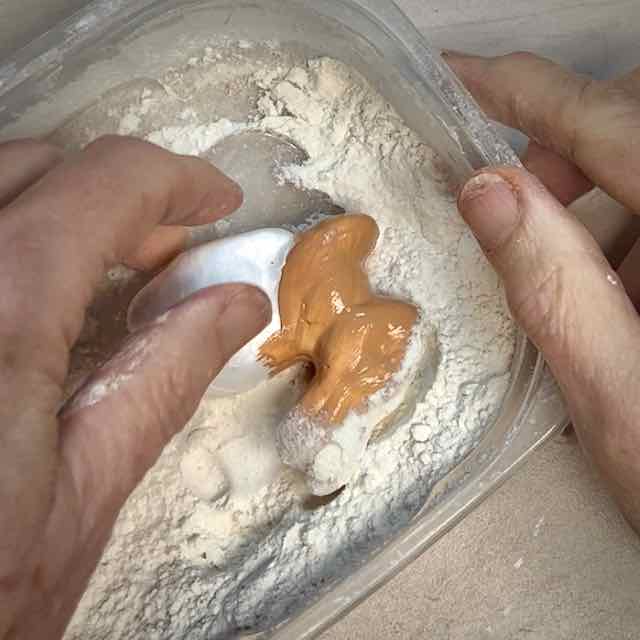
With a craft paint brush, thoroughly coat half of one bunny and immediately drop into your aging additive, coat and gently shake off. Go ahead and leave the majority of the additive on the paint.

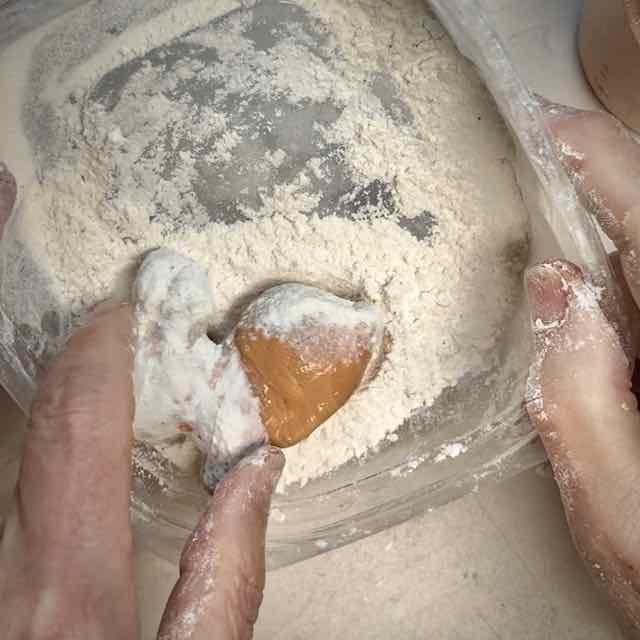
Repeat on the other half of the bunny. Set aside to dry. Repeat this first coat with each bunny.

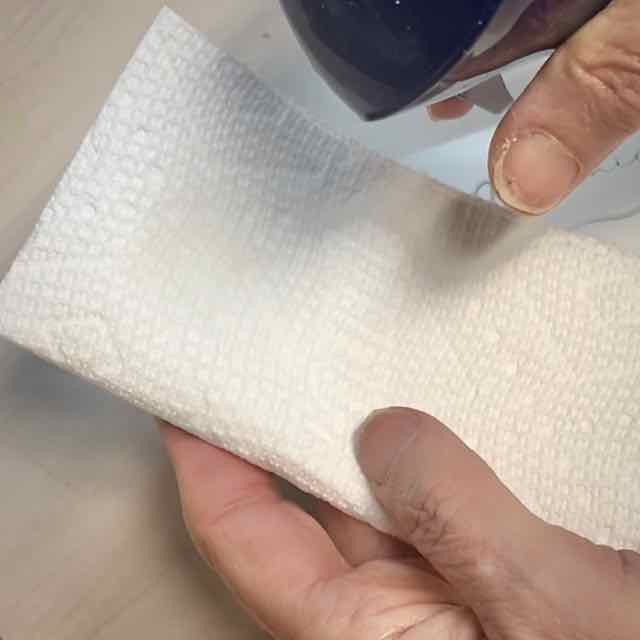
Once dry, and it doesn’t take long with craft paint, use a clean paint brush to brush off all the excess additive.
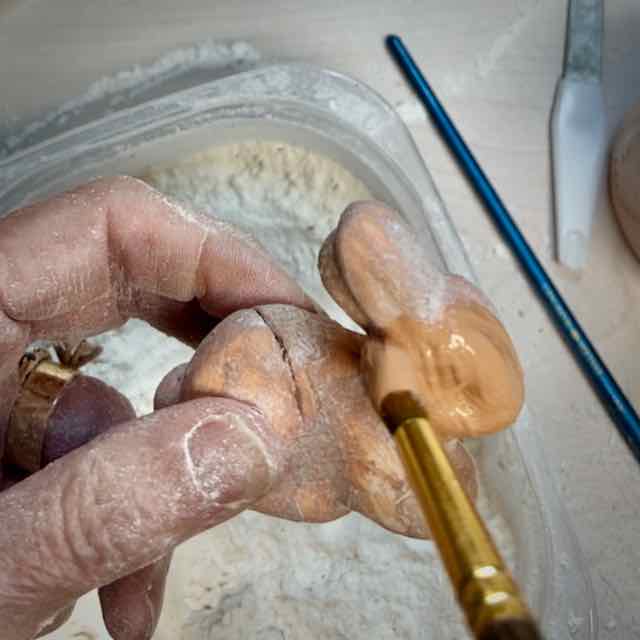

Now add the second coat in the same way, leaving most of the additive on until the paint has dried.
Once dry, brush off all the excess additive. Touch up any spots as necessary, but keep in mind these are to be aged terra cotta bunnies and not perfect!!!
Optionally, you can spray the finished bunnies with matte sealer. Remember two thin coats is better than one heavy coat.
Step 3) Glue Two Bunnies Together, Optional–
Optionally, using hot glue, attach two bunnies together at the hip.
CAUTION: Be sure to line up the two slits for a name card to sit nicely.
Now For the Place Cards
Step 1) Sign Into Free Printables Library-
The Free Printables Library is for the House Mates and South House Designs Subscribers. If that’s you, the link and password is at the bottom of all emails you receive from me.
If you have not already, we’d love to have you join us, and you will receive immediate access:
Thanks! Now on to our place cards:
Step 2) Download the Printable-
In the Printables Library, you’ll see an image and the title Spring Place Cards. Click there and it will open a PDF with instructions and a link you must copy and paste into your browser.
That link will open a Canva window. If you already have a Canva account, it will open that for you. If you do not have a Canva account, no worries. The account you need for this is FREE — completely, I promise! And I’m sure you will find all kinds of ways you’ll want to use it in your life. It is a very user friendly, yet powerful graphic design site.
Click the purple “Use This Template” button.
Step 3) Add Your Guests’ Names-
Now that you have the file open in Canva, you can rename it up at the top.
Notice there are two different styles to choose from, one per page.
You can edit the names. You can change the font if you like
The files are set to print in black ink. You can change these to a different color too, if you prefer.
Step 4) Print and Cut-
Once all your edits are complete, print and cut along the faint grey dotted lines.
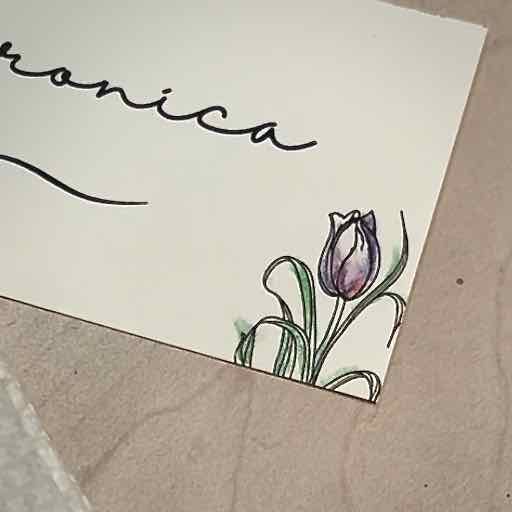
Step 5) Optionally, Add Color to Match Your Spring Table-
If you have a bright Easter table setting planned, or specific colors in your Spring table decor, it is easy to add lovely watercolor effect to these.
PRO TIPS: This is an example where watercolor pencils are a much better option than watercolor paints. (Keep reading)
Paper that will typically go through a home printer (like not watercolor paper) will warp and ripple (and not in a good way) with the amount of water it takes to use watercolor paints.
For this, all you need are a couple of inexpensive watercolor colored pencils and a barely damp paper towel, I use my handy misting bottle to dampen a folded paper towel. It can’t get much easier than that!

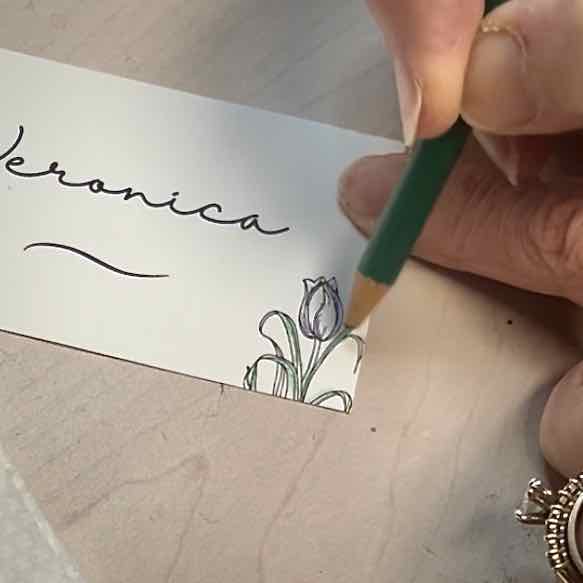
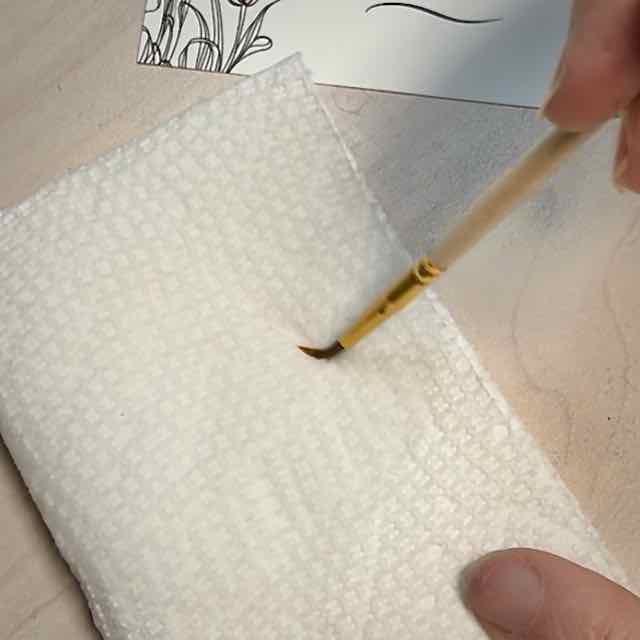
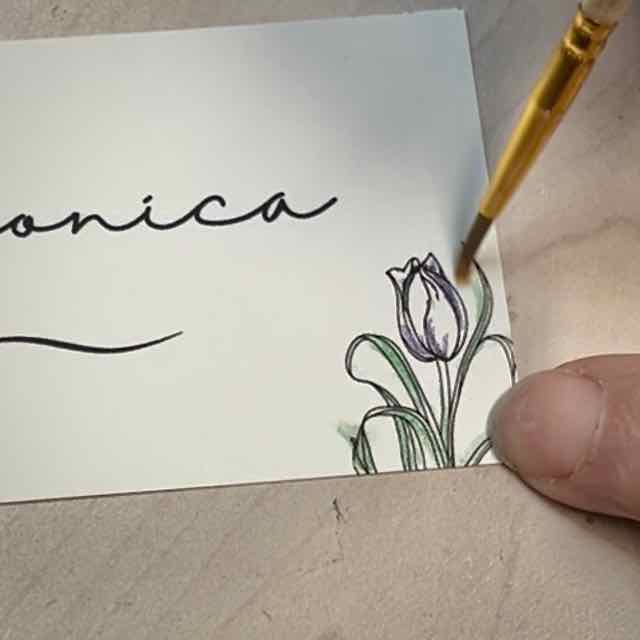

With watercolor pencils, draw just a bit on the design, then with just a barely damp brush wipe over it and pull the pigment where you want it. It’s so easy and fun to do with minimal supplies and minimal time!!!
Watercolor pencils look and act just like colored pencils, but the pigment is different. You need pencils that say “Watercolor” on the shaft.
Even better, with watercolor, it’s really pretty and looks intentional to not stay within the lines! It’s even named “Loose Watercolors”. So with a name, it becomes officially intentional. So enjoy being a bit relaxed and sloppy — and very intentionally stylish!

Other Styling Ideas
If I had a place for a cute garland, I’d string these little sweeties with some white washed wooden beads. I’d hot glue their ears to some white clothesline, jute cording or rope.
They’d be darling in mini clay pots that had been planted with grass seed or maybe a crocus bulb or other spring flowers, sprouting through a layer of moss. Use them at individual place settings or one or two in a tiered tray arrangement.
Maybe you’re hosting a Spring brunch buffet style. Wouldn’t these make the best dish ID card holders?!?!
And they make great gift tags too!
These bunny place card holders and the place cards can be for so many occasions beyond Easter brunch. Any Spring brunch, Mother’s Day, bridal or baby showers, birthdays, etc.
Be sure to save it to remember it:
I hope you are inspired to brighten your Spring table with some adorable faux aged terra cotta bunnies as place card holders. Then print some place cards and you’ll have your guests swooning.
As always, don’t hesitate with any questions, or comments!
