How to Prepare Hollyhocks to be Long-Lasting Cut Flowers
Hollyhocks, those gorgeous garden staples can be beautiful, long-lasting cut flowers with this different, kinda crazy prep — and it’s fun!
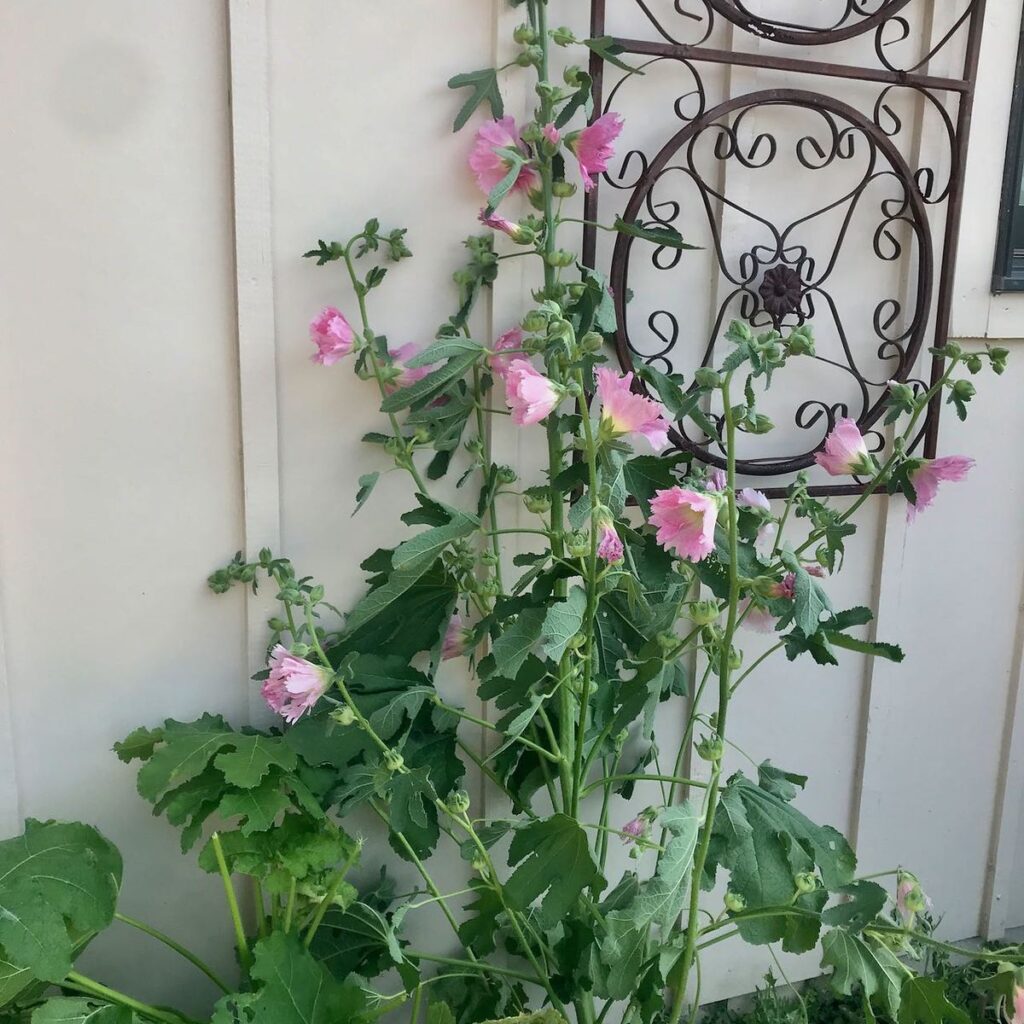
Do you have beautiful hollyhock plants in your garden, with charming hollyhock flowers that you’d love to add to a flower arrangement?
Or maybe enjoy in a vase catching the morning rays by your kitchen sink ?
But not hollyhocks, right? They are a classic cottage garden staple that don’t make a good cut flower!
I know, that’s what I thought, too.
I had actually tried. Those lovely blooms were wilting within hours.
But we are in luck! With a bit of digging around, I discovered that by preparing the cut ends in a kinda crazy way, you can get 5+ days of vase life from them and you can repeat the process one or two more times. Some of those beautiful blooms can last 10 – 15 or more days — Nice that’s a nice long vase life!!!
Hollyhocks can become a great cut flower with a bit of effort on your part — and it’s a strangely satisfying effort.
And look! It Worked!!!!
TABLE OF CONTENTS:
Day 1 (on the left): The stalk had been broken off by a storm. And almost 24 hours later, I was finally able to tend to them and hope to get at least some enjoyment out of them. They are all weepy, droopy and bent over. Lots of buds with just a few blooms. Honestly, I really didn’t hold out much hope. But then . . . .
Day 4 (on the right): It’s amazing. They like rose from the dead — okay, from the brink of death.
The next day, they still looked good, but since I was heading out of town for a week, I performed the searing again. My husband reports, they looked great for another 4 or 5 days. But, sadly, I have no documentation of that. I returned on day 17 and it was too late to try a third sear.
But I can share that this process works! And I will be doing this again and again — at least when I can beat the deer to my new blooms
UPDATE: A reader shared with me that this process also works with hydrangeas, clematis, helleborus, milkweed and poppies. I cannot personally attest to this as I have not tried all of them.
If you try this method on any additional flowers, please share in the comments below which work and which didn’t. We’d all like to know!
Hollyhocks CAN become great cut flowers with just a bit of effort on your part — and it’s a strangely satisfying effort!!!
Prepping Hollyhocks to be Great Cut Flowers
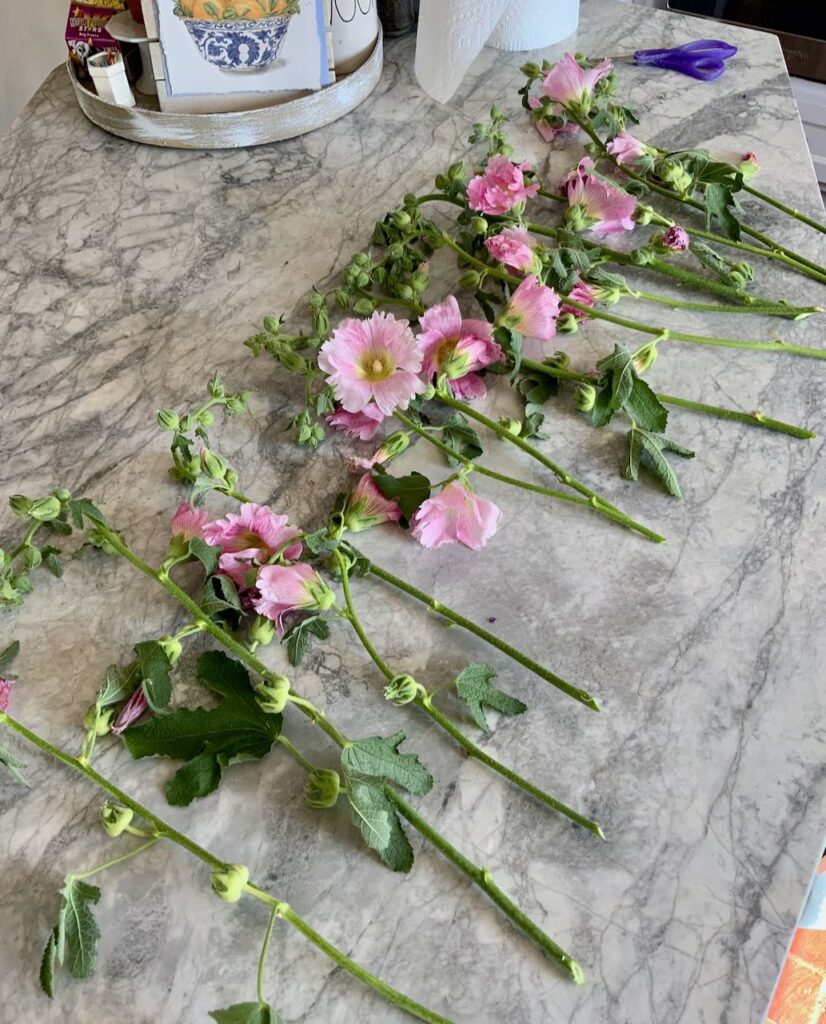
1) Cut at an Angle as Usual–
Don’t cut them too long. This works best with stems that are 18 – 24 inches. Not your 3-footers! They have a tough time soaking enough water up 3 feet of stalk to those highest blooms.
Remove the lower leaves that would touch the water in your vase.
2) Do NOT Put Them in Water Right Away-
We want the stems dry.
Hollyhock plants have thick flower stalks that will release a “healing” sap that actually prevents them taking up water and this is why they wilt so quickly if you cut and put them in water.
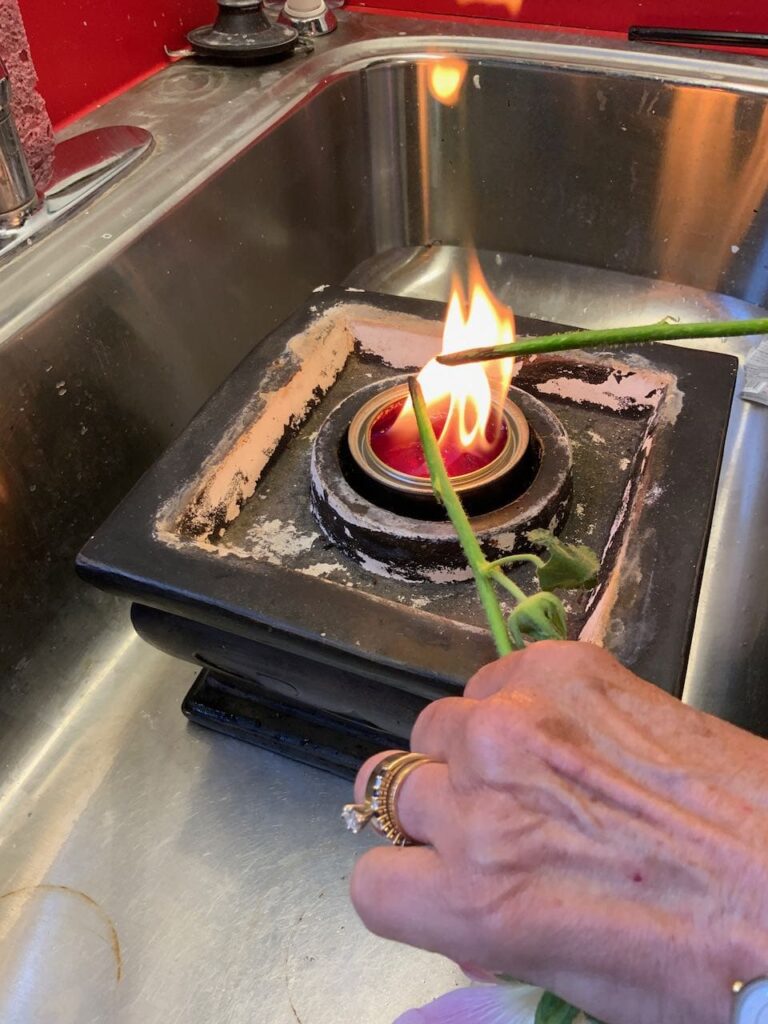
3) Sear the Stem Ends-
Sear the ends of the stems right after cutting>
Yes you read that right!
To use hollyhocks in a flower arrangement, you must sear the end of the stalks This prevents the thick woody stalk from producing the sap that prevents then from taking up water so that they wilt very quickly,
You need an open flame. The easiest way is over a gas grill or a camp stove. I used a can of Real Flame — essentially a large Sterno. You can use a candle, but it will take much longer.
Of course, use CAUTION!
It was very windy, so I set my Real Flame in a holder in our utility room sink (with an open window).
Not knowing what to expect, I even had a fire extinguisher at hand. However, this was so much easier than I anticipated.
You want the end charred all around, not burnt to ashes. It’s like roasting marshmallows, but no calories!
And that is it!.
Now your tall flower spikes are ready for some nourishing water. Whether you drop a single flower stalk in a vase with some fern or make an arrangement with a variety of colors and additional filler blooms and greens, as with all fresh flowers, be sure to change out the water every day (or two).
A quick pause to ask: Are you enjoying this blog post? If so, please subscribe so you won’t miss out:
Thanks bunches! Now back to the post:
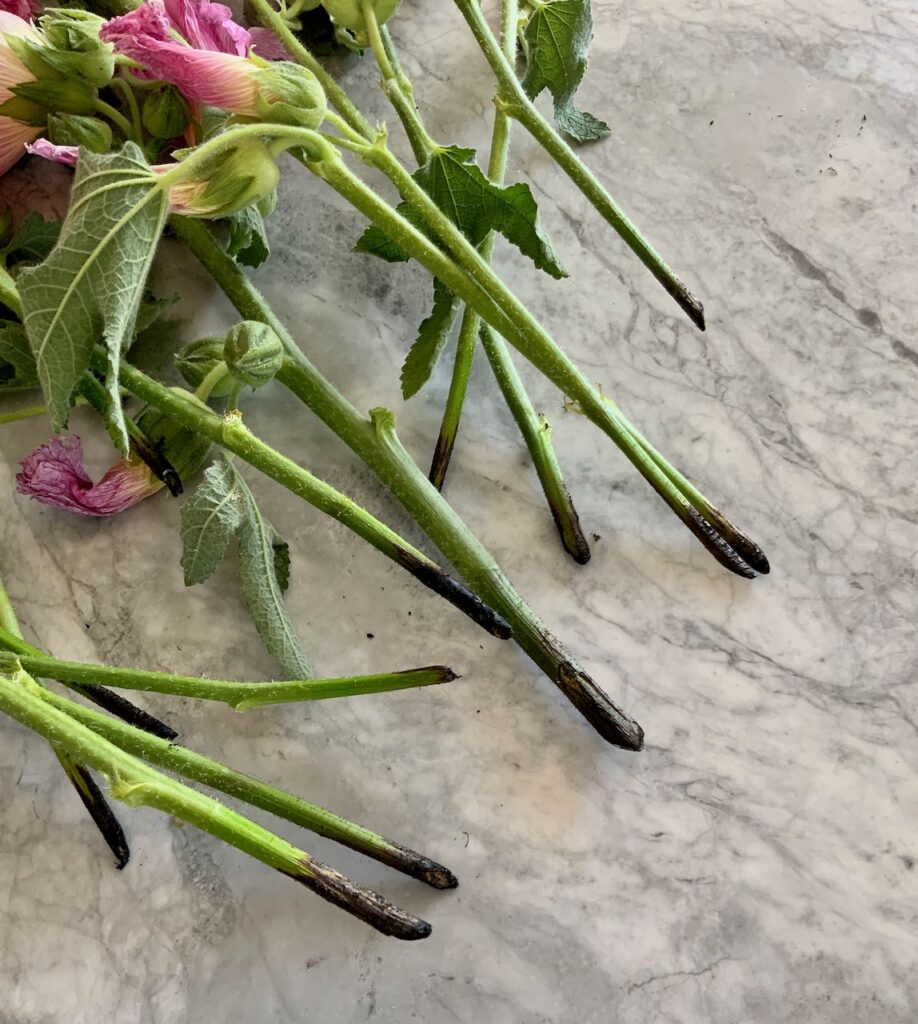
And that is it!. You want the end charred, not burnt to ashes.
A quick pause to ask: Are you enjoying this blog post? If so, please subscribe so you won’t miss out:
Thanks bunches! Now back to the post.
Now Arrange Your Hollyhocks
There are soooo many ways to arrange these long-lasting flowers.
There’s a minimalist, or sleek option of a single one stem with ferns or even large hosts leaves in a cool bottle or vase.
These long multi-bloom stalks can bring the structure element to a more elaborate arrangement, paired with five or six complementary blooms in a monochrome color way or an arrangement that features a variety of colors.
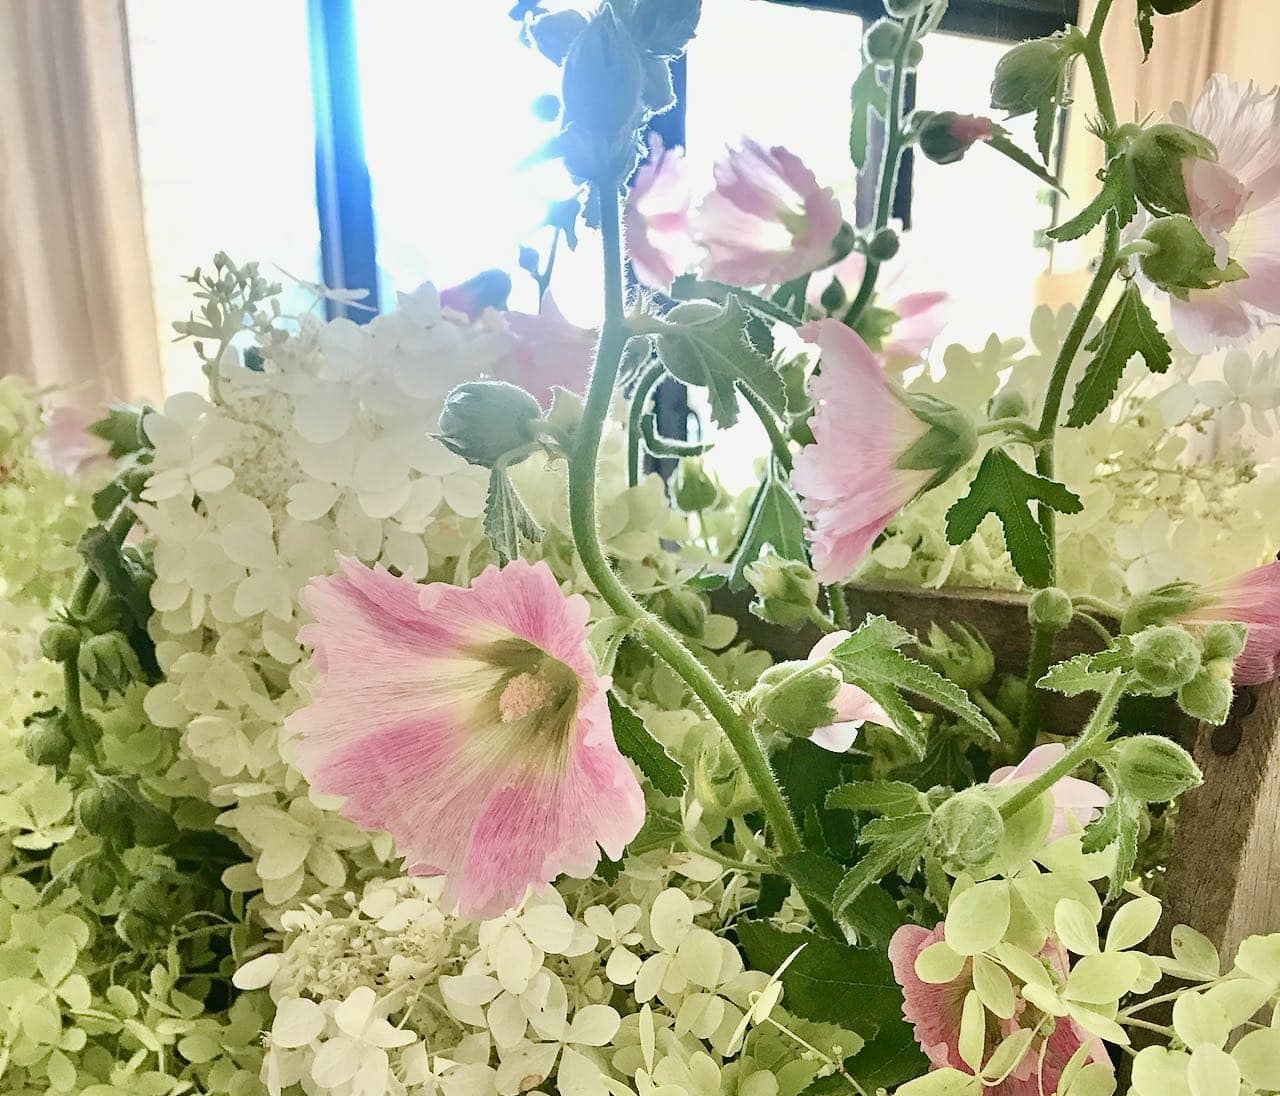
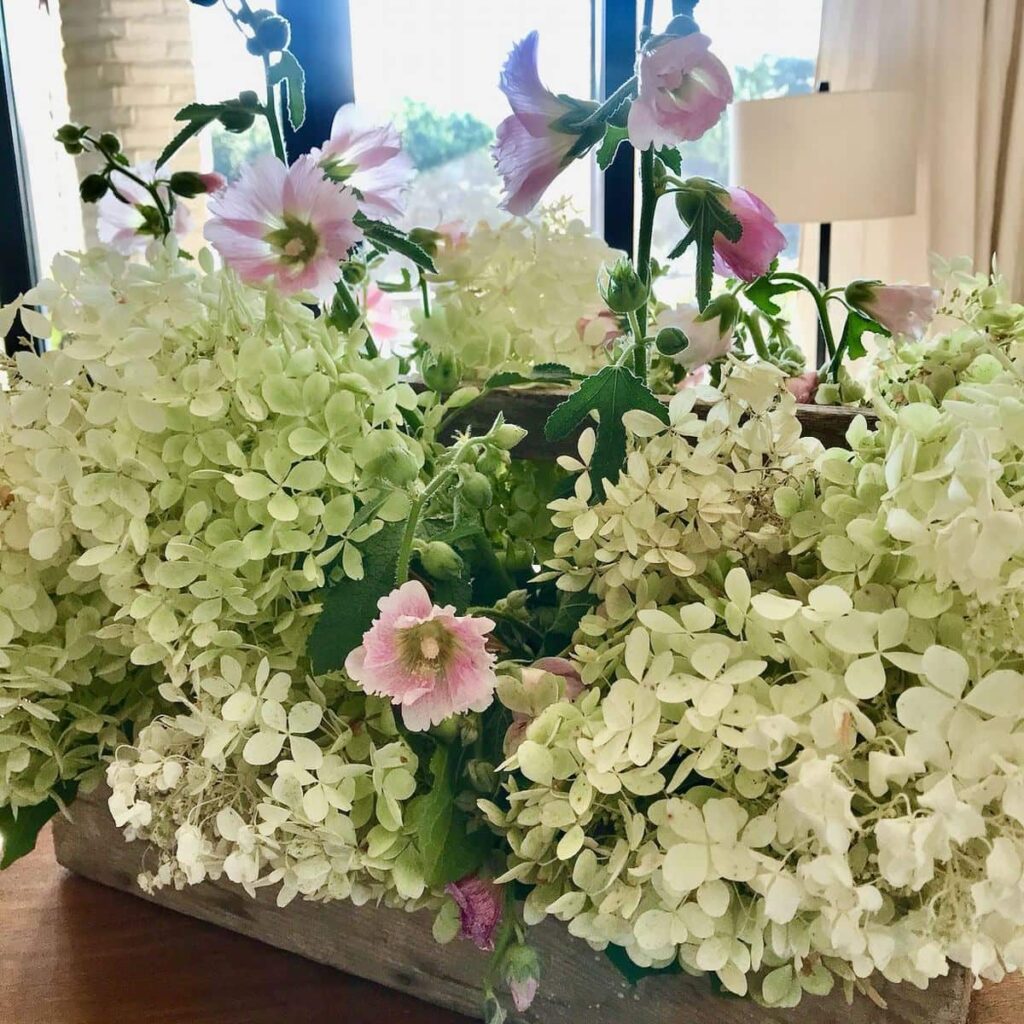
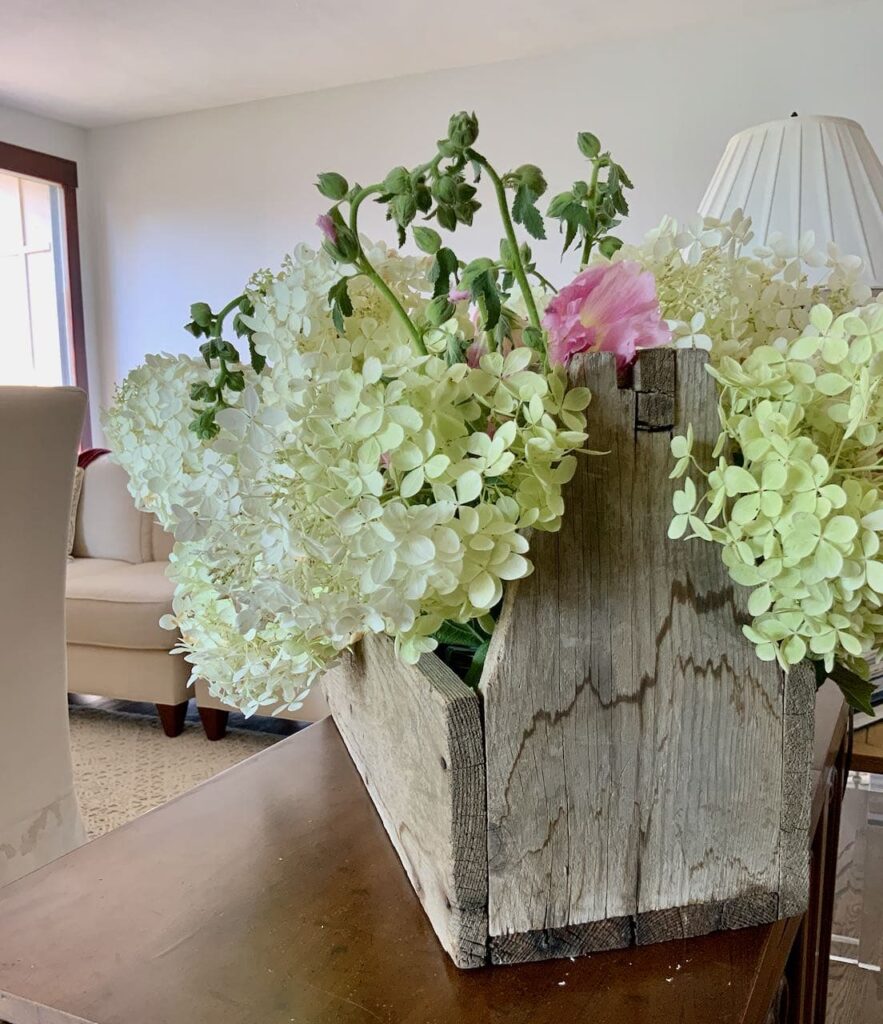
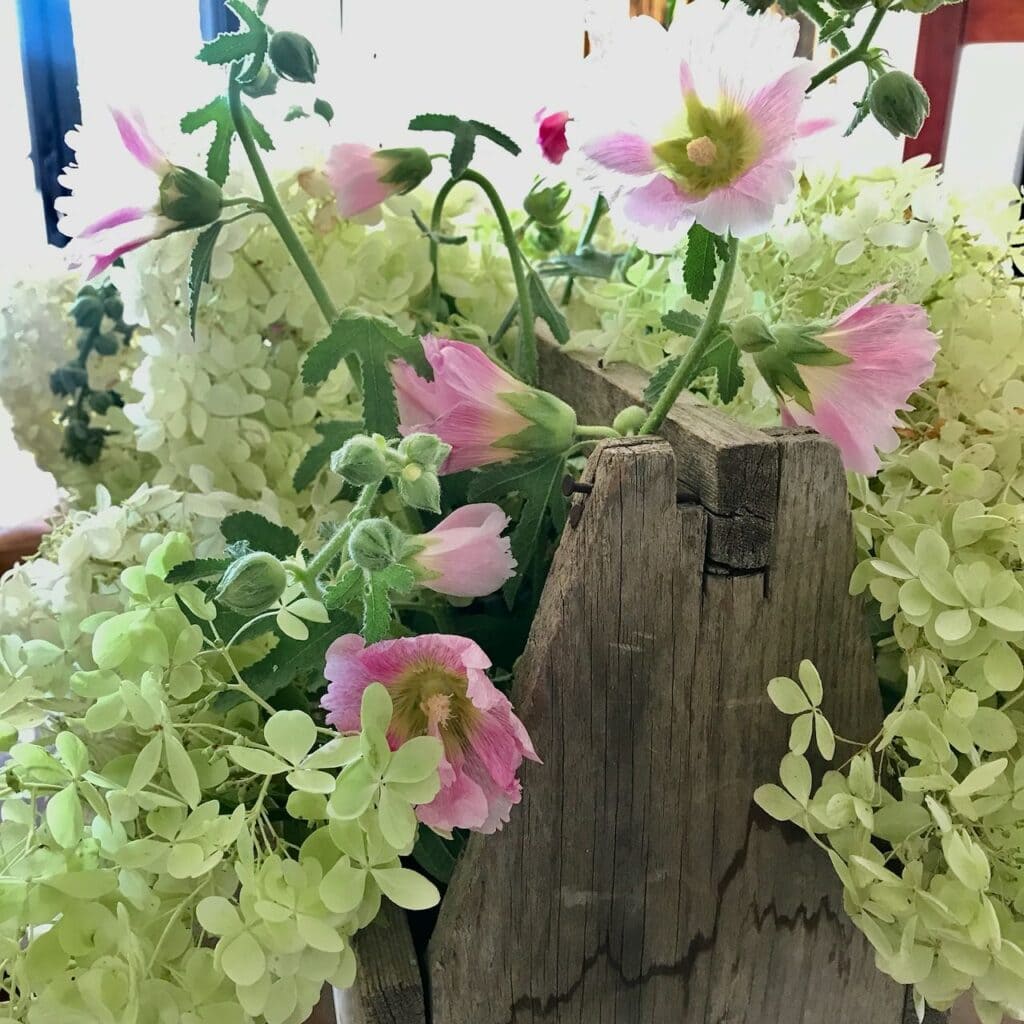
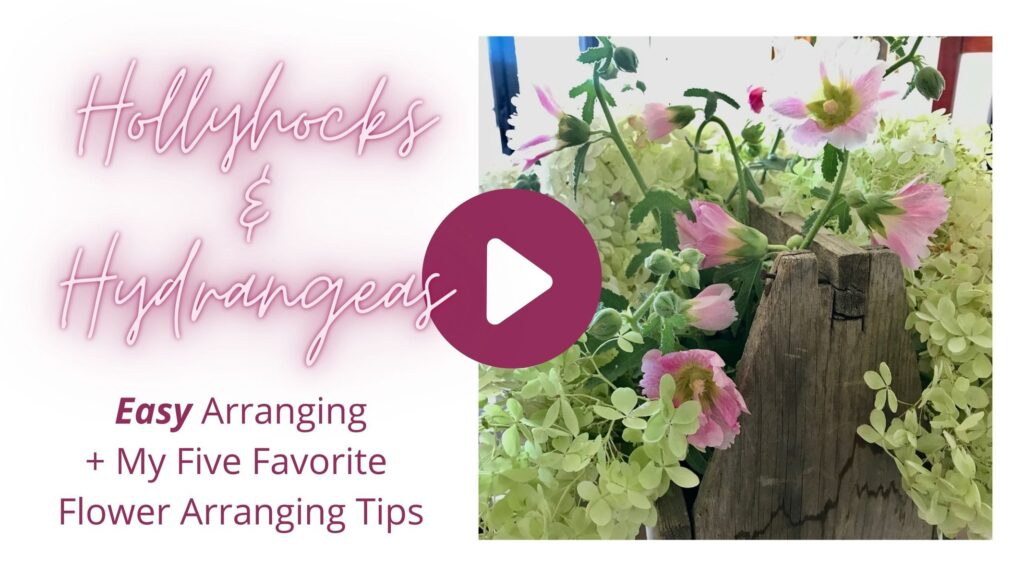
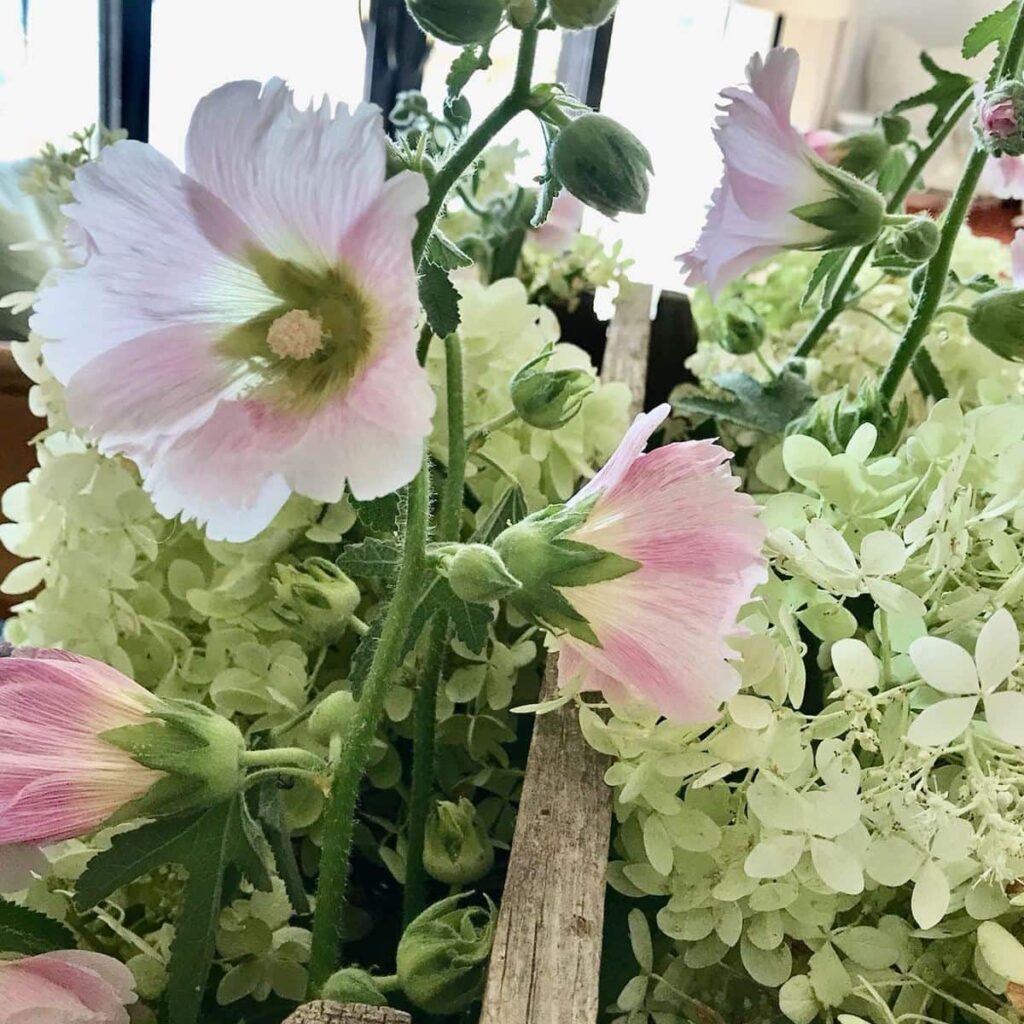
Here, I went the simple, casual route in the country-style garden arrangement.
I filled a vintage wood toolbox with Ball jars to hold all the Phantom Hydrangea blooms that were also struggling after the crazy storm.
Here’s a short — less than 5 minute — video of how I did it. BONUS: it includes my 5 favorite flower arranging tips. Perfect for novices.
And while we are talking about arranging cut flowers from your garden, check out this how-to. Charming fresh flowers in under 10 minutes!
Just because I can’t get over it, let’s look again at the Hollyhocks pre-searing:
Look at those wilting leaves and all those sad, drooping buds and limp blossoms!
Four days later, they’re going strong. The bent over stems are much more upright and the buds are opening and the leaves are nourished.
Granted, it’s a crazy method. But it sure did work!
If you’ve ever tried to bring Hollyhocks in as cut flowers you know why I’m so excited.
Now I’m off to make room in my garden for more Holly Hocks.
Curious About Adding Hollyhocks to Your Garden?
Here are the Hollyhock Gardening Basics You Need to Know
Alcea Rosea, known as Hollyhocks are generally a biennial plant type with some new hybrids labeled as short-lived perennials.
That said, mine bloomed the first year. They were started from seed by a gardening neighborhood friend. I’m sorry I don’t know the variety.
Typically their first year is spent growing roots, stalks and storing up reserves, The second year, they are ready to bloom and then will die off when the weather turns cold. Hollyhocks self-seed, so it is possible to keep a nice stand going with new plants beyond the original plants, so it feels like a perennial with blooms the following year and beyond.
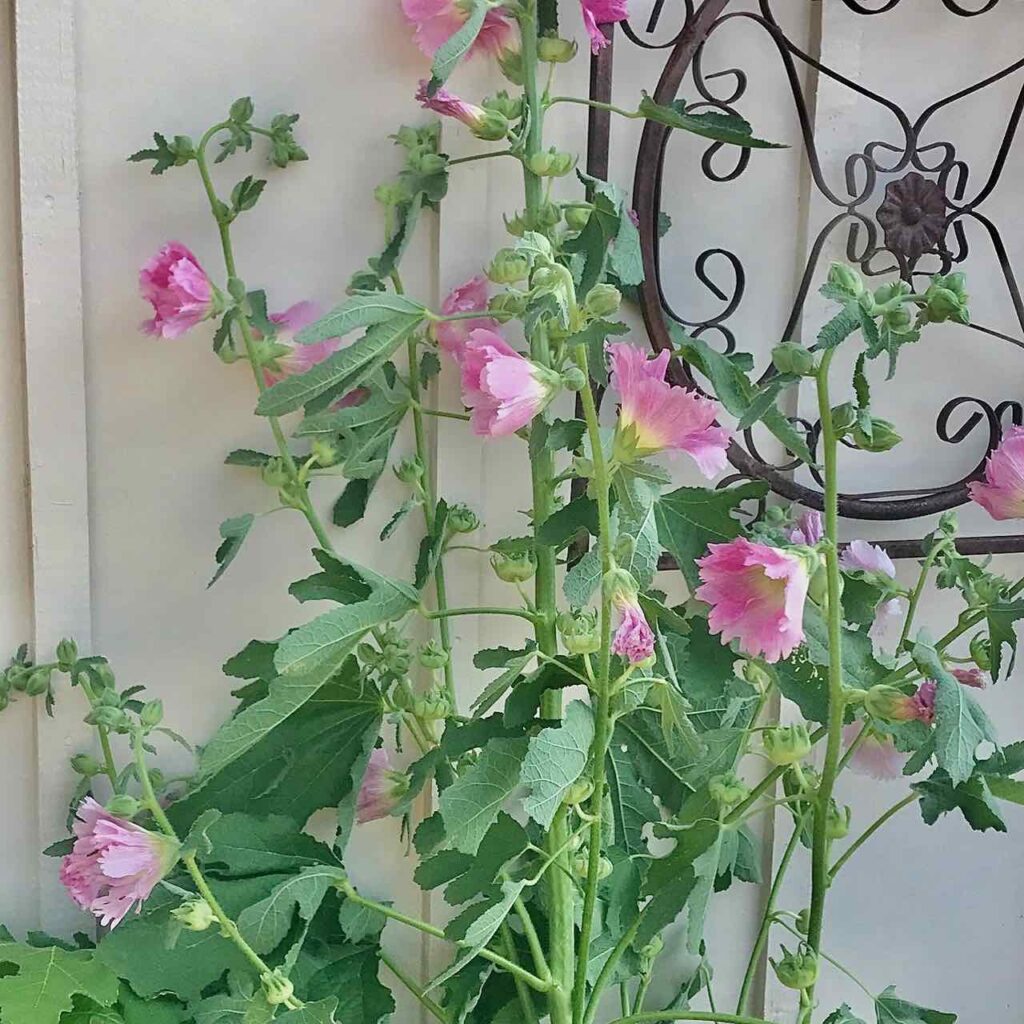
They are tall plants. Taller varieties can reach well over 6 feet. This makes them best for back of the garden placement. They also do best with some wind protection, ideally close to a building or structure of some kind.
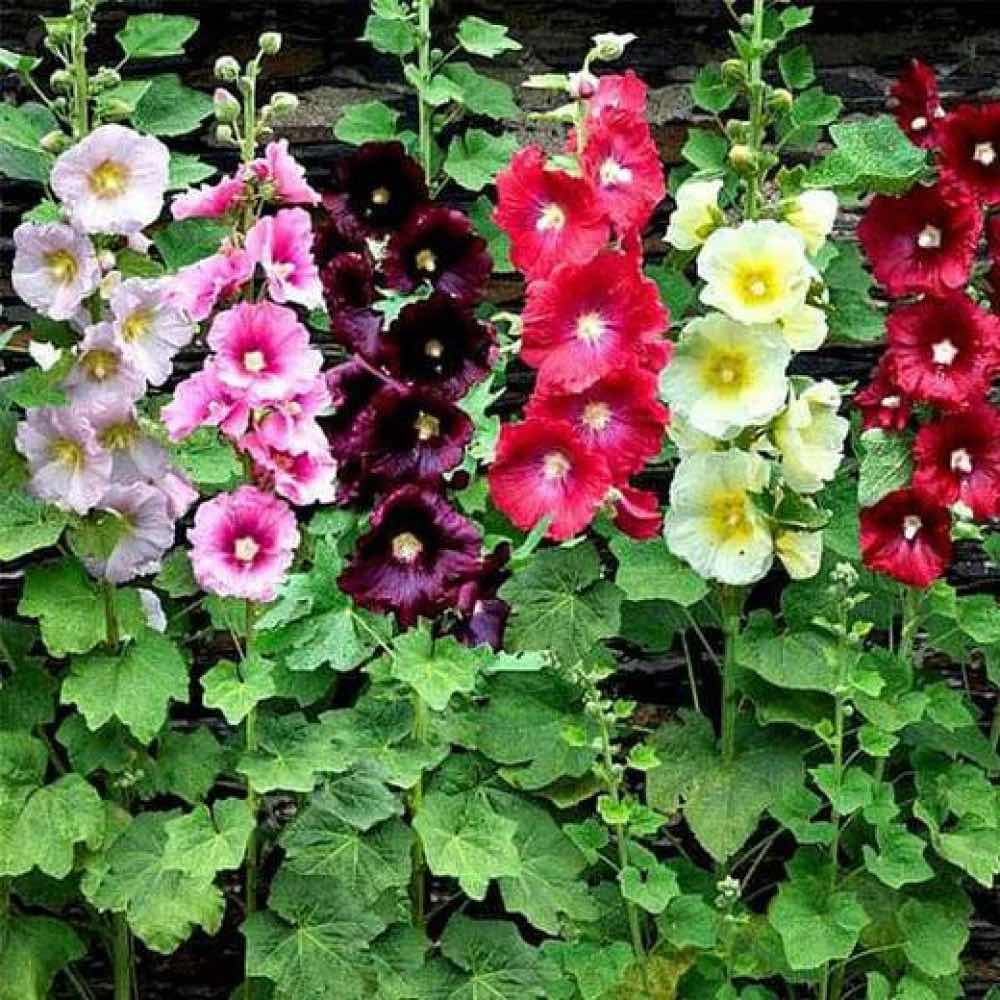
They come in many varieties, with single flowers and double flowers in different colors from white to yellow and orange, coral and pink to maroon.
Hollyhocks are prone to fungal disease or rust disease. To help prevent this they need good air circulation, so don’t crowd them and make sure they are in well-drained soil.
Holly hocks are somewhat prone to mold, so if a lot of seeds fall and germinate close together, It is best to gently transplant the strongest self-sown seedlings about 18 -inches apart.
Their preference is full sun. However light shade to partial shade. With enough sunlight and rich soil, they will bloom from early Summer to early Fall.
Deer? My constant garden nemesis? Conventional garden wisdom says that the deer usually leave them alone preferring other flower delicacies — NOT mine! The young fawns devoured them. I’m guessing because they are sooo hungry those first several months and because they don’t know better, they sample everything! And I mean everything!
How to Harvest Hollyhock Seeds?
My friend Michele of Vintage Home Designs has a whole post dedicated to How to Collect Seeds from your Holllyhocks.
Then once you know how to gather the seeds, jump back over here to a post of Great Ideas for Hosting a Seed Sharing Party, including a remote version.
I know you’re busy now, or your Hollyhocks are not blooming yet, but you’ll need this one of these days. So why not help your future self (and me), and pin this?

Give it a try and let me know how it works for you!

Do you know any other flowers that would benefit from this treatment?
I don’t right off, but I planning on doing a bit of research. If you come up with any, please let me know. I really just tried it out of desperation and was amazed.
How long do they need to dry before you sear them?
Not at all. You just don’t want to put them into water as soon as you cut the end like you do with most flowers. As soon as you cut them, you can start to sear them. Just don’t put them in water between cutting and searing.
Thanks for asking! Please don’t hesitate with any additional questions!
Oriental poppies
I’ve been enamored with poppies forever. I’ve never tried them. How are they with deer?
Hydrangeas: boil 1.5 to 2 inches of vinegar in a small pot. Hold the hydrangea stems in the simmering vinegar for 30 seconds. Angle the stems so that the steam doesn’t damage the flower
Thank you for this tip. This is the first time I have ever heard of using vinegar. I love hydrangeas and will definitely try it!
hydrangeas, clematis, helleborus, poppies, hydrangeas
This is a stupid question
After searing holly hocks. Do you put them in water?
No stupid questions! Didn’t we all learn that in 3rd grade?
I never made that clear, did I? Yes.They need the water. The searing prevents the stems from making the sap they usually makes that prevents them from being able to take in water. Once they are seared, they can continue to take in water and stay fresh.
Do you put them in cool or warm water after searing them. Thank you for the information.
Hi Marti, good question! I use room temp, leaning towards cool water. Nothing that will shock them, so not cold cold and not warm or hot. Just like with all other cut flowers, I try to change the water daily and I will recut and sear again when they start looking a bit limp. They’ll perk back up and I can get another whole arrangement out of them.
PLEASE do not use fire indoors without proper ventilation! Fire needs two things to burn: fuel and
OXYGEN! Don’t suffocate yourself 😉 Thanks much for the charring secret, my gorgeous first cut of hollyhocks lasted about 2 hours.
Thanks Dawn for that reminder! Yes, I am lucky to have a window above the utility/hobby room sink.
I can so relate, I had beautiful hollyhock cuttings that withered within hours. But when the storm decimated my hollyhock forest, I had nothing to lose and was so excited when the charring worked for me.
I would never have thought of doing that for any cut flowers; they sure do look wonderful after several days!