
3 Easy Steps to Make a Simple Fresh Boxwood Wreath
Just a few simple steps and no form required for this sweet little boxwood wreath made of fresh clippings. Sometimes simplicity is the best!
Some spaces, some occasions, some seasons, light, wispy and fresh is best!
I often feel that way with boxwood.
We inherited a variety of lovely boxwood bushes with our current house. And I take full advantage of all that wonderful material right outside my door. So many boxwood clippings just waiting for me to harvest any time of the year!
I’ve have several preserved boxwood trees that I love. I rationalized the splurge on them telling myself that they were so neutral, I could “doll” them up for any season.
Yet several years later, I never have! Oh, don’t get me wrong, it’s not for the lack of trying.
It just took me quite a while to realize that they are so perfect as they are they don’t really need — or even want — any dolling up!
My preserved boxwood trees float around my house year round. They have a knack for completing a vignette. Or grouped together, they are the vignette.
Still, it’s hard to compete with fresh! And darn near impossible when the fresh is free!
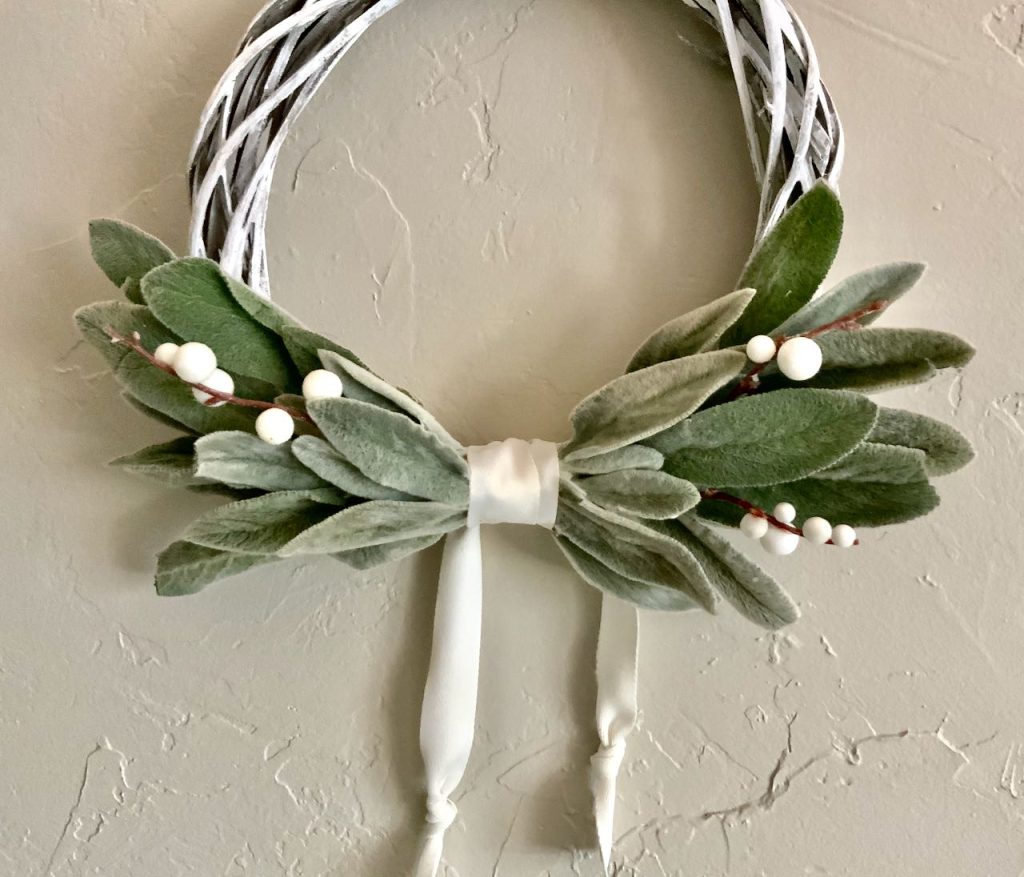
If I’m not making an entire wreath or garland, then often times I use them to add a touch of fresh green to whatever wreath is hanging on our front door at the time.

During the recent patriotic holiday season, I included small bunches of english boxwood to a nautical wreath for a little bit of freshness.

During the Christmas season, I use boxwood clippings to style Christmas stockings.
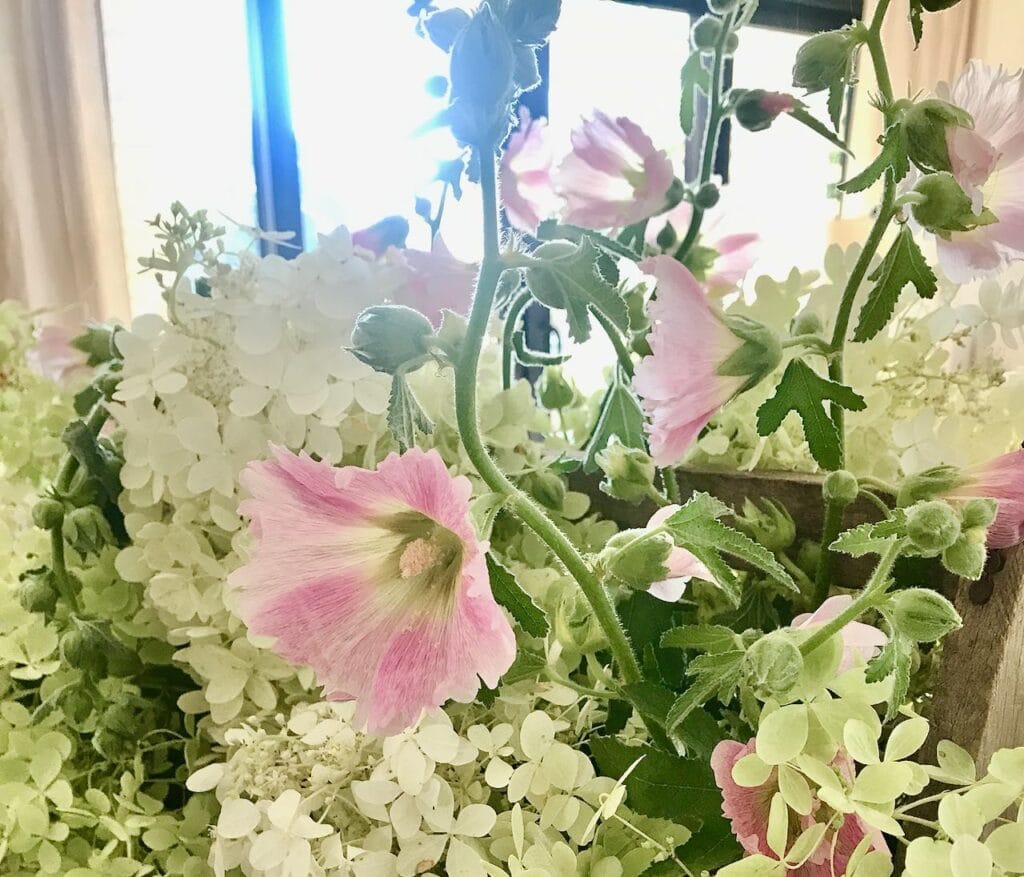
We’re in the heat of Summer now! This is when my home decor tends to get a little lighter, softer and wispier when I can. It just helps to make everything feel lighter and cooler.
Looking at Courtenay’s image, I saw her beautiful unembellished wreath adding a welcoming, inviting touch to her side door. I don’t have a side door — they are all long sliders.
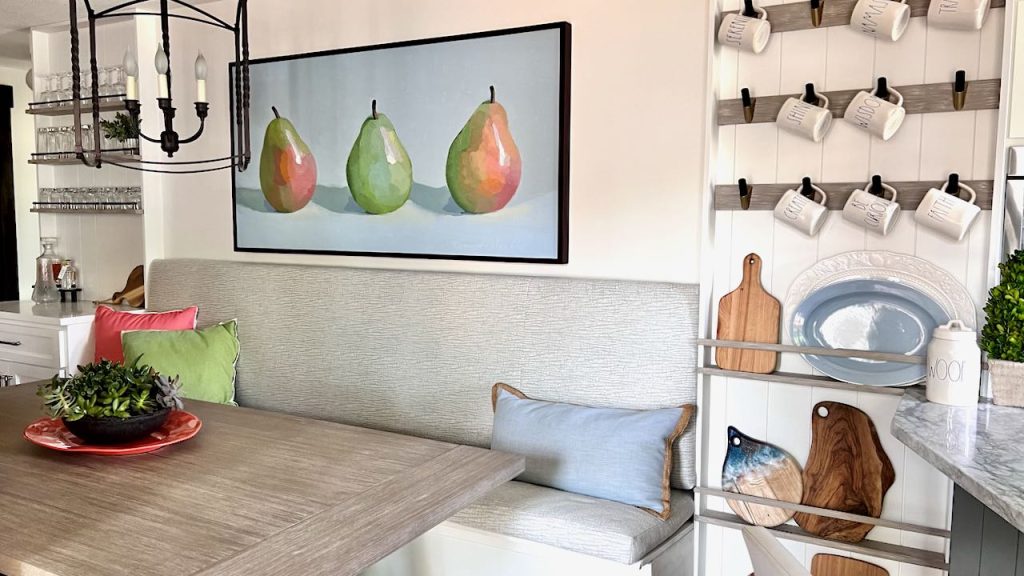
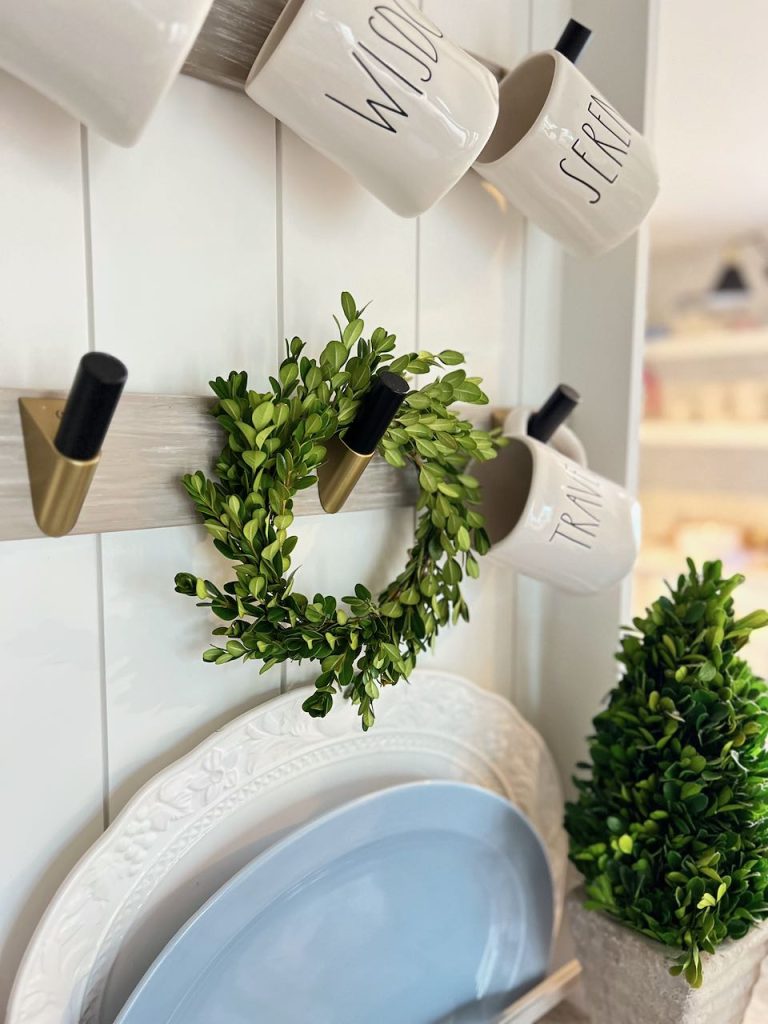
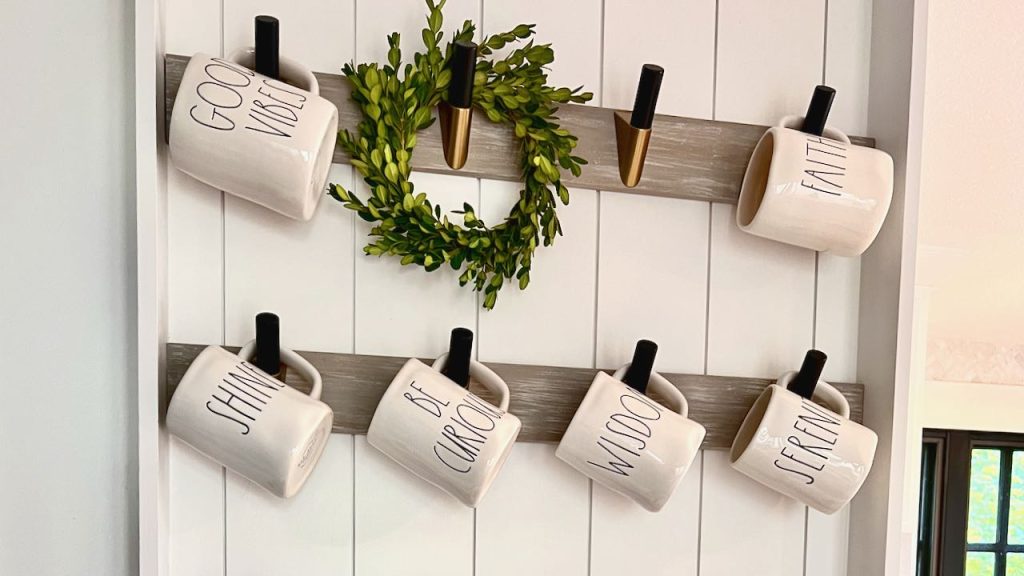
But I do have a new favorite spot where we welcome all. Our new dining room extension to our kitchen is where everyone gathers. My goal all along was for this old awkward hallway to become an inviting, welcoming dining space.
The small woven rattan wreath I tried hanging here did nothing to freshen and brighten the space. I think a fresh small boxwood wreath will be the answer.
It needs a bit of green, don’t you think?
Here’s the Easy Way to Make Your Own Boxwood Wreath
Materials and Supplies:
- Access to boxwood shrubs
- Pruning shears, nippers or utility scissors
- Green 22 gauge floral wire
- Green 26 gauge floral wire
- Wire cutters.
- Something the size of your wreath to form your wire around, I used an oatmeal container
Optionally, if you want a thicker, more solid wreath, you can use a wire wreath frame or a grapevine wreath form in the size you want. In that case, you do not need the thicker green florist wire or the oatmeal container.
Optional additional supplies:
- hot glue gun and glue sticks
- Ribbon for hanging — with or without a bow and streamers.
Would You Prefer a Video Tutorial?
I’ve Got Ya Covered
(Click the image Below)

Step 1) Gather and Prepare Fresh Boxwood Stems —

Cut lengths of boxwood branches 4 – 6 inches long.
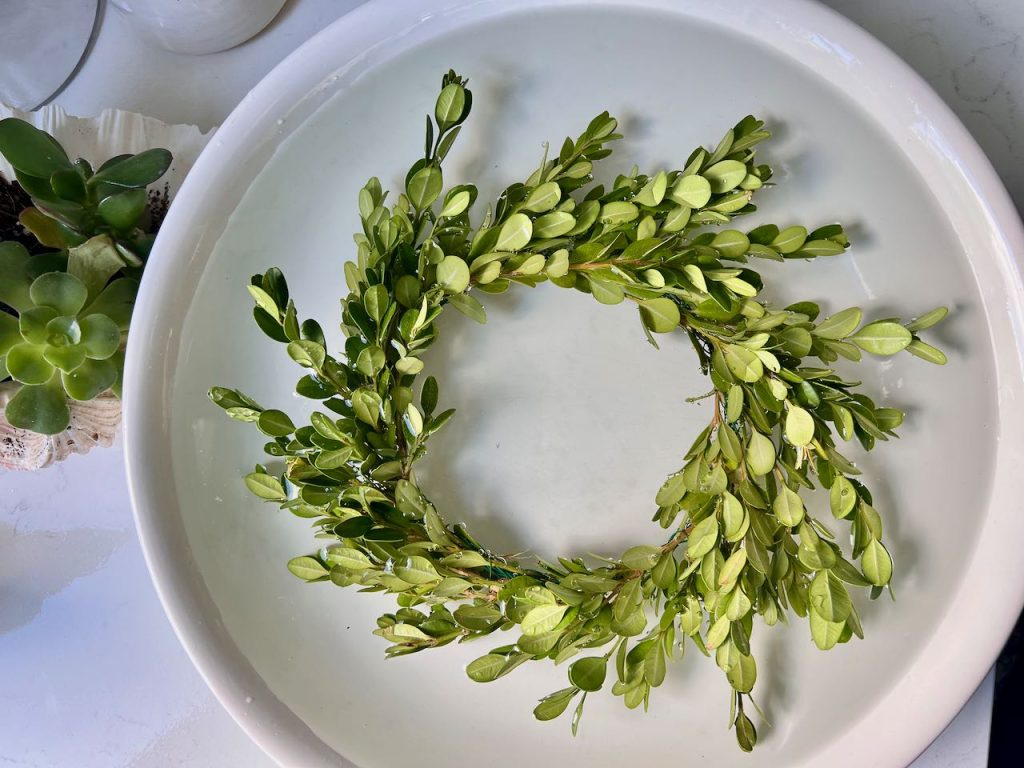
To help your wreath last longer, soak them overnight in water. Alternatively, you can soak the wreath once it is made. (More tips for helping your wreath last longer are included after the instructions.)
Step 2) Make Your Own Wire Wreath Form —
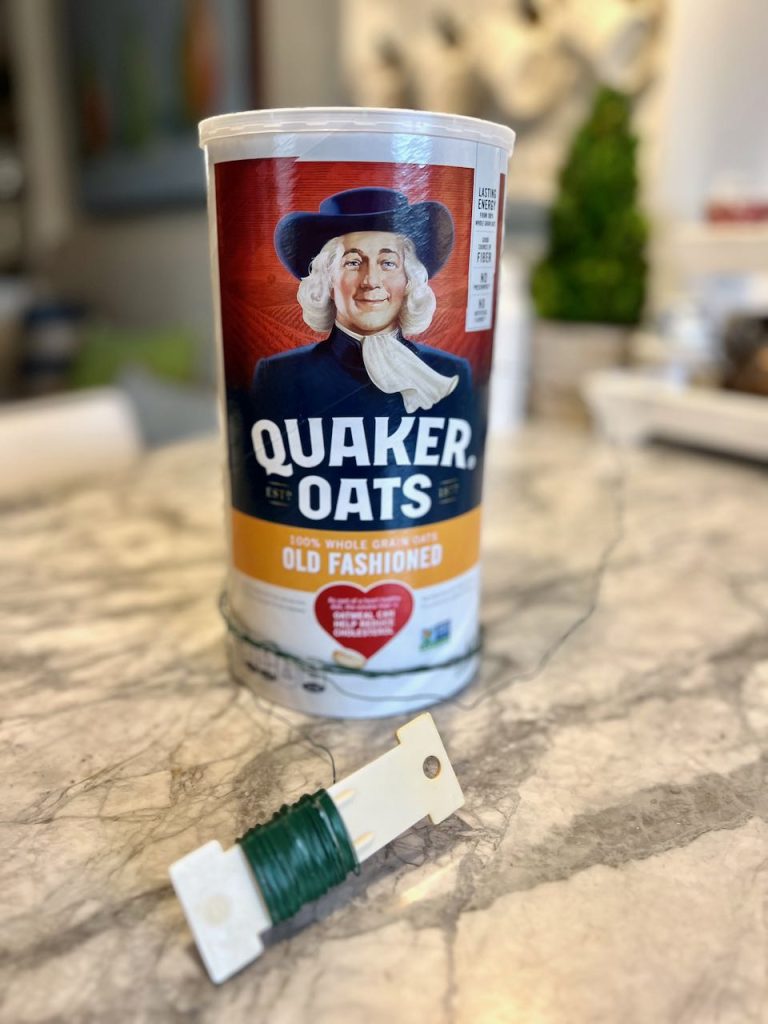
Find something around the house that’s about the size you want for your wreath. I just raided the pantry. Hello, Quaker Oats!
Remember, wreaths don’t have to be round!
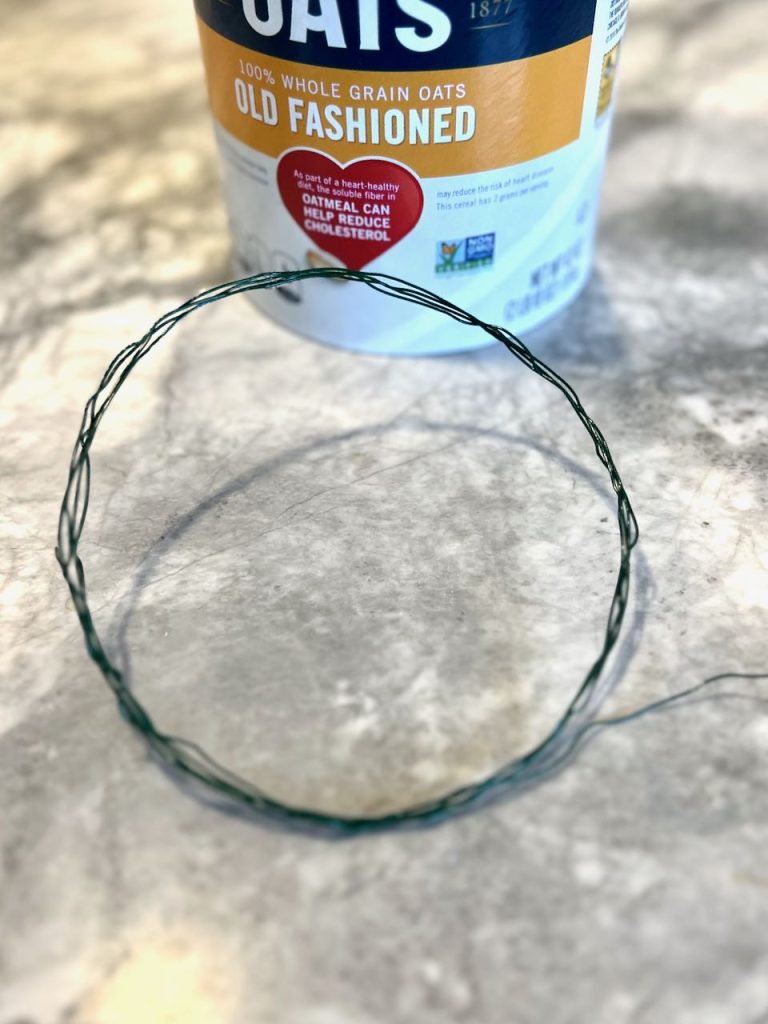
With the 22 gauge wire, wrap your object several times. The first three passes around I pulled the wire so it was pretty smooth. Then for another two or three passes, I let the wire keep some of its “bumps” to give me spots to stick the boxwood stems in.

After about five, maybe six laps, I slid the wire form off the oatmeal container. Then wrap the bundle of wires by passing the paddle down through the center and up around the outside, down through the center and up around the outside, making my way around the circumference of he circle.
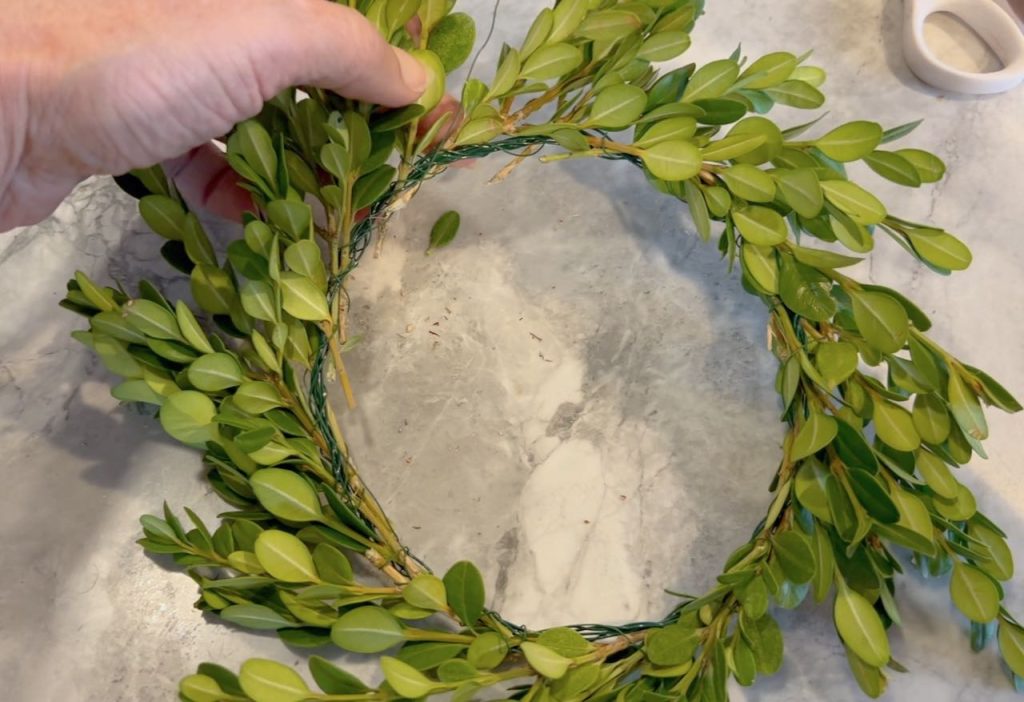
Step 3) Assemble Your Own DIY Boxwood Wreath —
Time to assemble. I want my little wreath to be on the rather sparse side. I’m going for a light wispy look. I’ll make a thick, plush one for my Christmas decor.
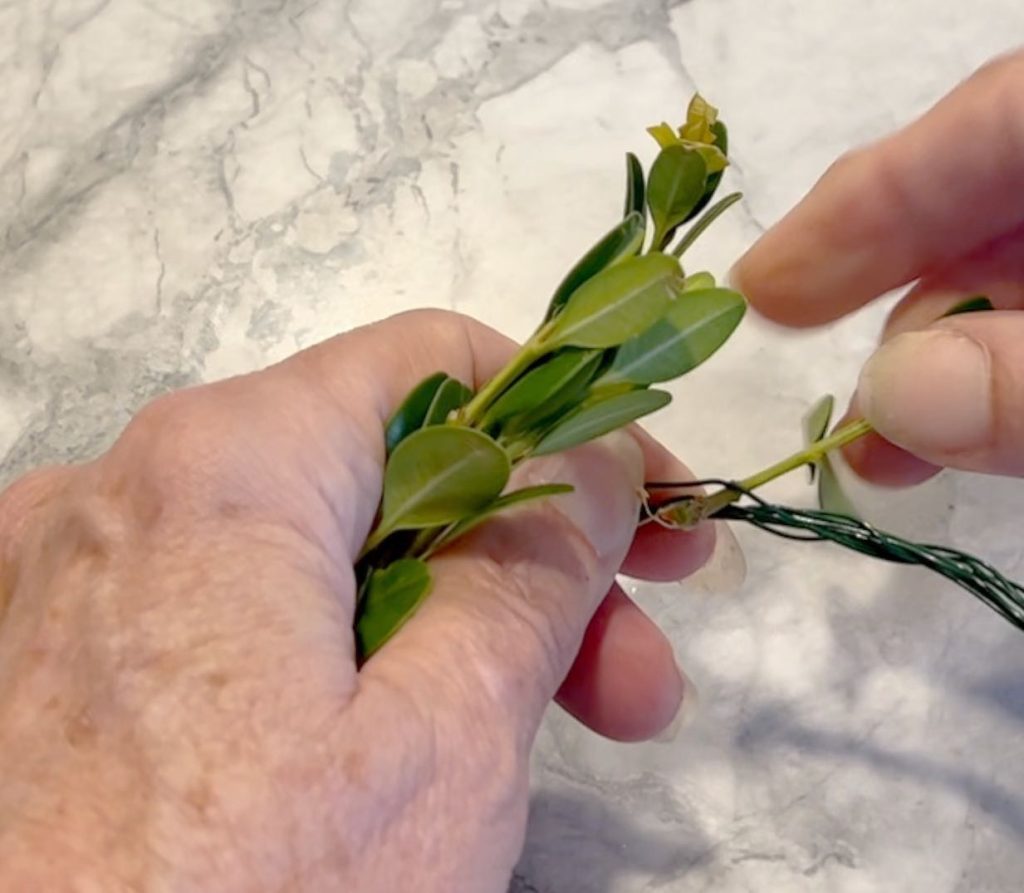
For the wispy look, you’ll apply mostly single stems for at least the first pass around. For my little wreath my stems were mostly 4-5 inches long. strip the little leaves of the bottom 1-inch or so of stem. After the first pass, I added in some double stems, but no more than that at once.
Always work in one direction. Weave the stem though openings in the wire in two places if possible. This is temporary, we’ll go back through and wire them tight with the 26 gauge wire next.
After your complete pass around and you’ve filled in a few vacant spots, grab your paddle of 26 gauge wire. Unwind a bit to get started and wrap and twist the end around the wire form and so you can pull tight on it without it coming apart.
Work your way around wrapping all the stems securely. Take the paddle up through the middle carefully positioning the wire between the small leaves, then over the wreath and back down the outside. Move forward on the wreath a bit and pass the paddle again up through the middle, positioning the wire between leaves and back over and down the outside. Continue around the wreath.
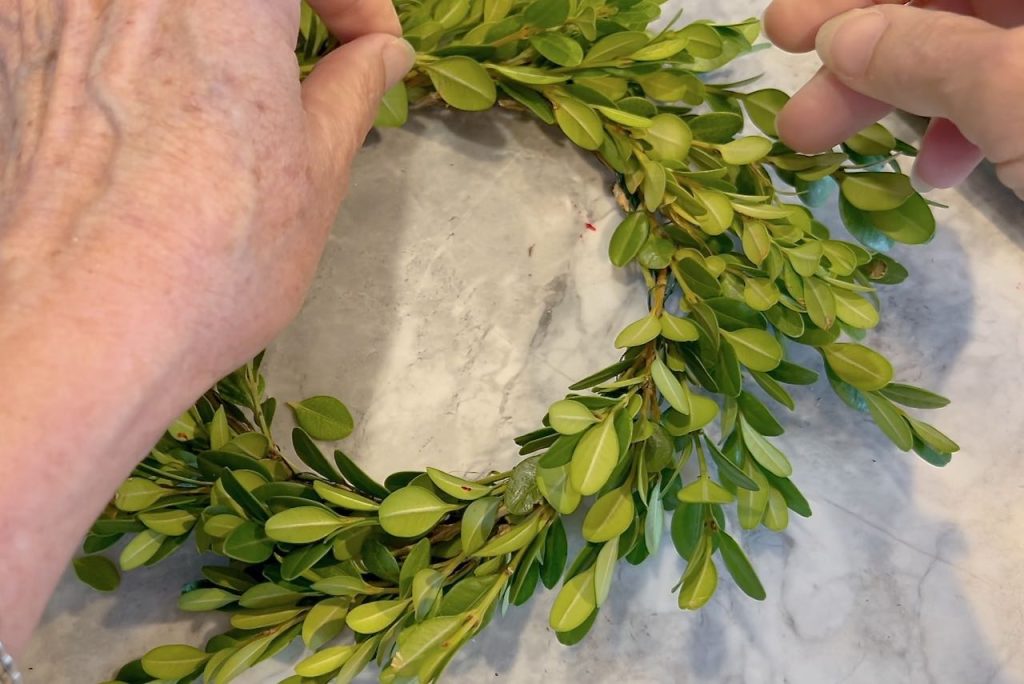
How does it look? This is where I usually go in and add several small stems around the inside to better conceal wire form. In this case I usually sue the wire cutters to snip off a small piece to wire a random sprig here and there.
And now you’re done! Such an easy boxwood wreath — not mention a price tag we can all appreciate, practically free!!!
Easy peasy, right?
There really is no right or wrong look. It’s what is appealing to you at this time.
How Do You Keep a Boxwood Wreath From Drying Out?
Your boxwood wreath. will stay fresher longer if you:
- Keep it out of direct sunlight
- Start with freshly cut sprigs
- Soak it in water *
- Mist it every other day
Your wreath will last longer when it’s cool. So if it’s Summer, hang your wreath inside in the air conditioning to extend its life. But if it’s Winter, hang your wreath outside away from the heat.
*Soak the sprigs in tepid water for several hours or even overnight just before assembling the wreath. Alternatively, you can soak the whole wreath in a bowl or sink full of water after assembling.
Brief Timeout: Are you enjoying this post? Would you like to. see more? Please subscribe and join the House Mates. You control how much is right for YOU!
Oodles of Thanks!
Now Back to the Action:
How Long Will a Fresh Boxwood Wreath Last?
Without following any of the above suggestions, your wreath should last one to two weeks (depending on its sun exposure).
If you follow the suggestions, you should getup to three weeks, maybe even a bit more if you give it an extra soak or two. Just like us and spa treatments! The more we treat ourselves, the fresher we feel!
Where Do You Hang a Boxwood Wreath?
So Many Places:
Outside:
- On the front door
- On the windows for Christmas
- Hanging on a gate
- From a wall light
- Encircling a lantern
- On a sled or blackboard or vintage board propped on the front porch
- Screened porch decor
- tied to a blanket ladder on the porch
Inside:
- Guest Room
- Powder Room
- Entry hall or mudroom hooks
- Kitchen cabinet door
- Pantry Door
- Inside an empty vintage picture frame
- On a mirror
- In the back of a hutch or bookshelf
- On chicken wire doors
- Tied to the rails of a wall plate rack
- Tied around a large stoneware pot or basket
- From the pegs on an open shelf
- As a party favor at each placesetting with a nametag tied to it
- on the back of barstools or dining table chairs
- as part of a centerpiece
- as part of a tray vignette on an ottoman
- around a pillar candle or glass hurricane
And those are just for starters!


If you’re inspired and make one, two or twenty. I’d love to see a picture and hear how you styled and used them.
Thanks for joining me. I hope to see you back again real soon!

Hi Diane, so nice to meet you! I love how you’ve shared soooo many ways to display a boxwood wreath and your tutorial was easy to follow. Love how it turned out!! I have a couple of preserved wreaths I picked up at Judith from Botanic Bleu at her yearly Christmas sale here in Texas, and I have kept them in my hallway all year. They hang on a couple of mirrors there but I like your idea of moving them around, so out they will come!
Thanks for the inspiration,
summer hugs,
Barb 🙂
It’s great to have this new group of awesome bloggers to hang with. I’m always up for a good challenge! I’m so glad to hear you’ll be moving your wreaths around and about. They’re probably happy too to get a change of scenery ????
ps I love the Nautical look of your lead photo with the cute patriotic buoys!!! The braided rope wreath is genius!!!
Oh You’re so kind Barbara! I truly appreciate that.
I absolutely LOVE how you use boxwood in your home. You’ve given me such lovely inspiration!
So glad to hear that Laura. It’s all about inspiration isn’t it? And this was such a fun challenge.
Thanks bunches Laura. It’s one of the few greens that the deer leave for me to use. I’m glad that we all inspire each other so much!
What a fun idea and your tutorial is perfect. I love all of your different wreaths you share, they are all very unique and beautiful.
Thanks Marty! This was such a fun challenge.
Diane, your wispy fresh boxwood wreath is oh so charming! Great tips for constructing a fresh wreath, and you are right…your eating nook needed a little something green! It looks great! xx
Thanks Cindy! I really appreciate that
I love boxwood wreaths and this is such a great tutorial. Brilliant idea to use an oatmeal container for a form! Thanks, Diane!
Hey Missy, you know what they say about the Mother of Invention! Ha Ha! Have fun at Haven this week.
Loved seeing your little boxwood wreath at the party and now to read your blog on how to make it!!!
It was a fun evening and was so. tickled that you girls noticed the wreath and asked about it.
Love this sweet boxwood wreath Diane and how you added boxwood to your rope wreath, so clever.
Thanks Wendy! I have plenty of boxwood — it’s like the only thing so far the deer don’t eat. Kin dof them to leave me this one for my own uses.
Your wreath looks great in your newly decorated spot! I like how you added the boxwood to your front door rope wreath, too! So nice to share this challenge with you!
Thanks Kim! I’m so happy to be onboard with this fun group.
I too love a fresh wreath. When I dared to go out in the 110 degrees last week to make one, the mister said please don’t cut them in this heat so I obliged. But thankfully, I have plenty of the preserved ones around the house. LOL. I love them and feel they are a year round staple. But wholly guacamole – I’ve never thought to add some in our stockings! I am soooo doing that. Thank you for joining us. Great post. pinned
Yeah, Cindy. With all your great ideas, I’m glad I was able to gift you an original one too. Thanks for the challenge — and for pinning!
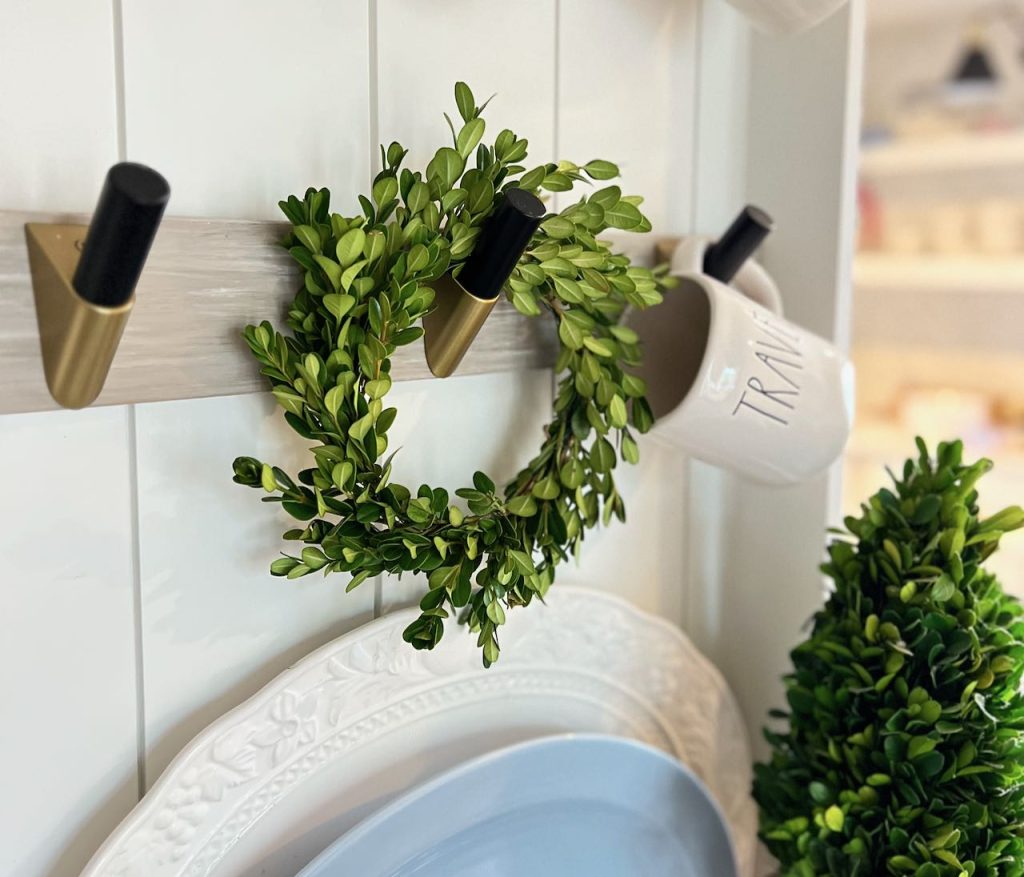
Excellent tutorial Diane! Your wreath is the perfect addition to your cup rack. I think I’ll give that a try too!
I love that I may have triggered a bit of inspiration for you!!! I feel like you’re always inspiring me. This sure was a fun challenge.
Great idea to use the oatmeal container, Diane; so resourceful! What a fun little inexpensive decor accent to make and use anywhere!
I’m all about fun and inexpensive! Kind of like your amazing shell wreath!
This is such a sweet little wreath. I love it. I never thought about making my own wreath form. Brilliant.
Thanks Renae! This was such a fun challenge!!!
Such a cute little wreath! It’s absolutely perfect hanging from you mug pegs.
Oh thanks Lynn! I sure do appreciate hearing that.