
Make a Mantel Cover For Wonderful Christmas Stocking Displays
Easy DIY Mantel Cover — the ultimate for hanging Christmas stockings without damaging your mantel. Makes decorating your mantel a breeze.
Does hanging your Christmas stockings feel like a chore, a frustrating chore?
Would you love to be able to showcase your treasured stockings as part of a festive holiday display?
Are you worried about protecting your mantel?
You’re at the right place! I’ve got you covered three for three!!!
Imagine that, Diane’s talking about hanging Christmas stockings. Yes, I’m all about the stocking displays. But, then again, I’m a stocking designer. For more than 25 years. now. So one would expect me to be a bit focused on hanging stockings, right?
SOOOO, focused in fact that I have written a comprehensive guidebook, an eBook — How to Hang and Style Your Christmas Stockings Like a Pro! It’s available right here.
There’s a reason Better Homes & Gardens Publications has come to me three times for my stockings. And I’m sharing all my stocking hanging and styling tips and tricks with you.
But right here, right now, we’re focusing on my newest “tool” to make your mantel displays:
- more flexible
- more stylish
- easier to install
- safer
- all while protecting your mantel
You’re wondering if that is even possible. Oh but it is my friend, it is! Read on!

Presenting my new Mantel Slipcover!
What is a Mantel Cover?
Simply put, a mantel slipcover is a shelf with three sides made to slip right over your existing mantel.
Not only does it protect your “real” mantel, but it can also change the look of it. The answer for renters stuck with a less-than-ideal mantel.
Or maybe during the holidays you’d love to have a white mantel, vs. dark wood. Bingo, it’s yours!
Why Did I Need a Mantel Cover?
To Eliminate All Obstructions For My Display-
I needed a mantel cover to allow for more flexible Christmas stocking displays. I’ve been using, and loving, stocking rods for years. Here’s where I introduced the idea of a stocking rod eleven years ago.
Yes, I could have 8 or 10 stockings with just two stocking holders, but I grew tired of always trying to hide those two holders when they didn’t fit the colors or theme of my display. Plus threading the rod through the loops of my holders is cumbersome.
When I spotted so many gorgeous cabinet hardware options from Amerock, this idea was born. I wanted to use those beautiful hooks and knobs to hold my stocking rods, but I needed a vertical surface to do that.
To Protect My Mantel-
So now I won’t be satisfied without that beautiful hardware. But I certainly don’t want to screw them into the face of my mantel.
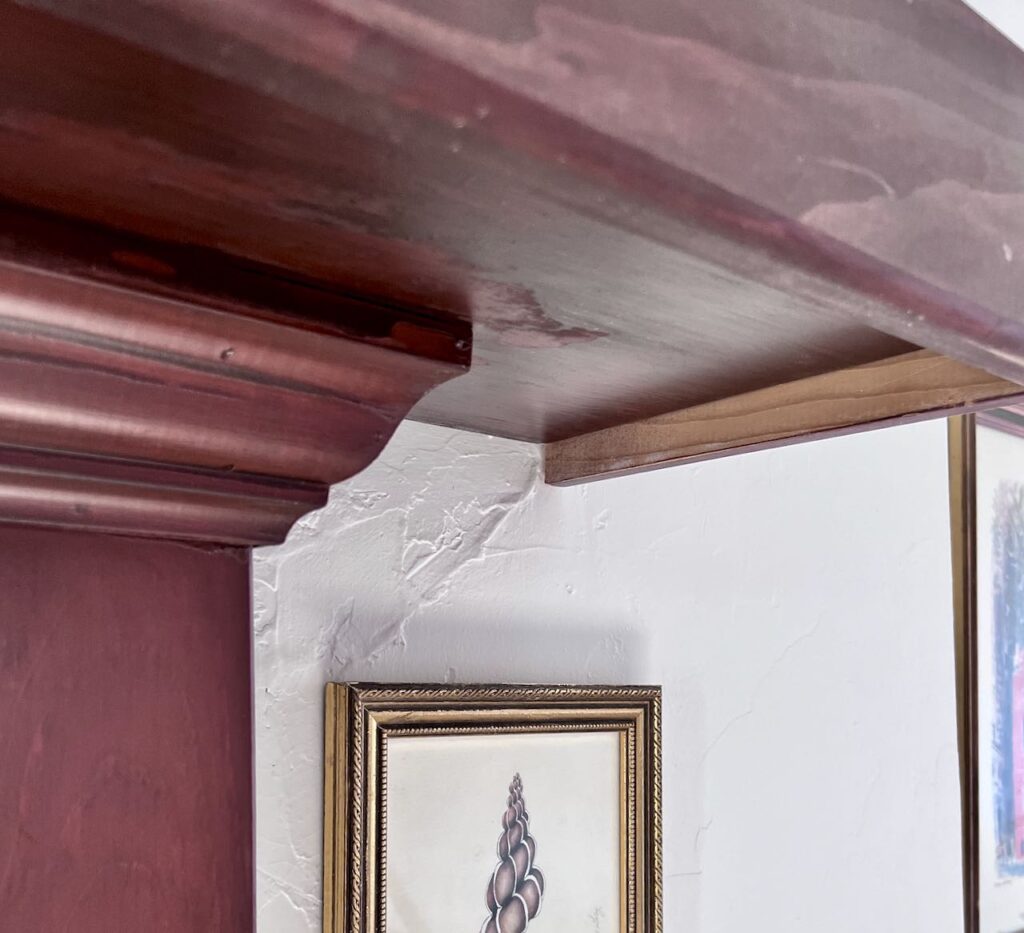
I needed a vertical lip to attach to and protect my mantel.
To Make it Easier & Safer to Use a Stocking Rod-
As I mentioned before, threading a rod through the loops of many stocking holders is doable, but cumbersome. But sitting a rod in an indent on top of a hook of knob is a cakewalk!
And a much safer way to pass out stockings to excited little ones on Christmas morning!
Why Do You Need a Mantel Cover?
For all the same reasons I needed one and possibly if you want to change the look of your mantel. And if you’re due for a makeover, this is a great way to try out a new look for a bit.
How to Make a Mantel Slipcover-
Measurements-
You’ll need just three basic measurements. Two measurements are based on the furthest projection of your mantel profile you plan to cover. The third is the height or how long you want the sides to hang down.
Depth: wall to the face
Width: side to side
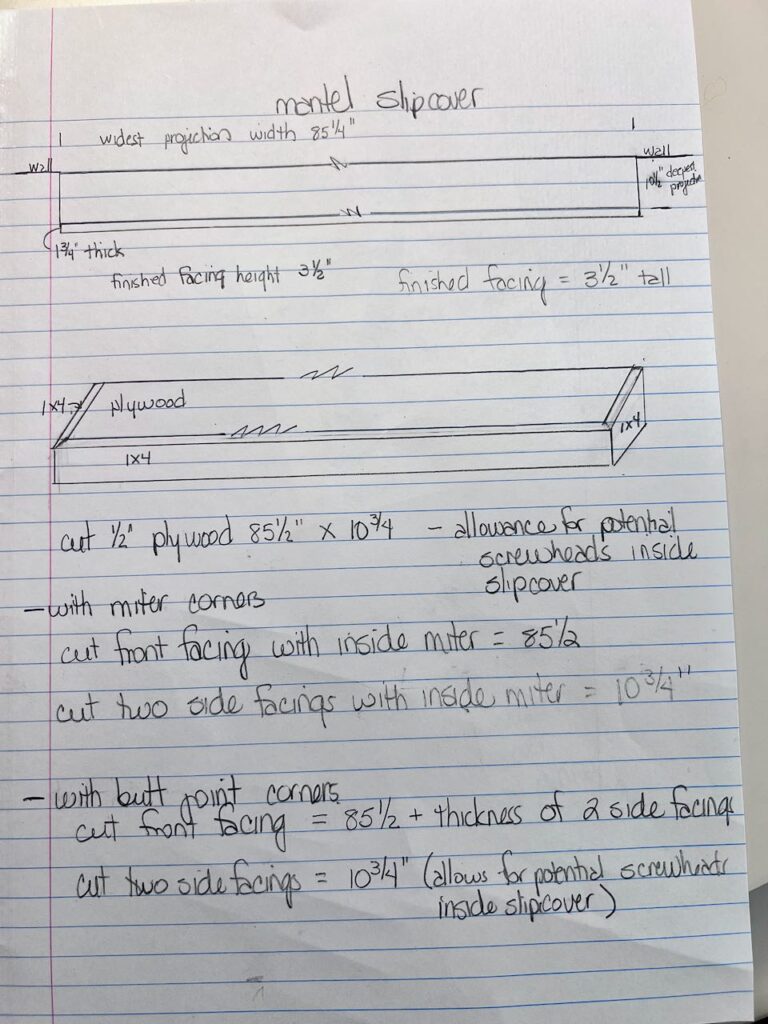
Here are the notes and measurements from my mantel drawing. Notice I built in a 1/4-inch of wiggle room side to side and front to wall. Particularly important is factoring a little extra room behind the front facing to accommodate any screw head.
If your mantel has a curvy profile, use a level to make sure your measurement is true to the widest part you want to cover.
Whether you use butt joint corners or mitered corners, your side lengths will be the same. You’ll just want to start with pieces of wood a bit longer if your cutting miter cuts (at least I do).
Materials & Supplies-
Materials:
- Wood of your choice and according to your measurements
- Nails or brads
- Wood glue
- Stain or paint of your choice
TIP: I found buying an unfinished shelf and trimming it was the best priced option for us.
Supplies:
- Saw
- Brad nailer or hammer
- Level
- Measuring Tape
- Clamps, optional
Step 1) Cut Your Wood-

Start with your large mantel top. This should be your existing mantel’s furthest projections with some wiggle room added in.
TIP: If you are lucky enough to have power in your mantel, be sure to cut a hole in yourr shelf to be able to access it.
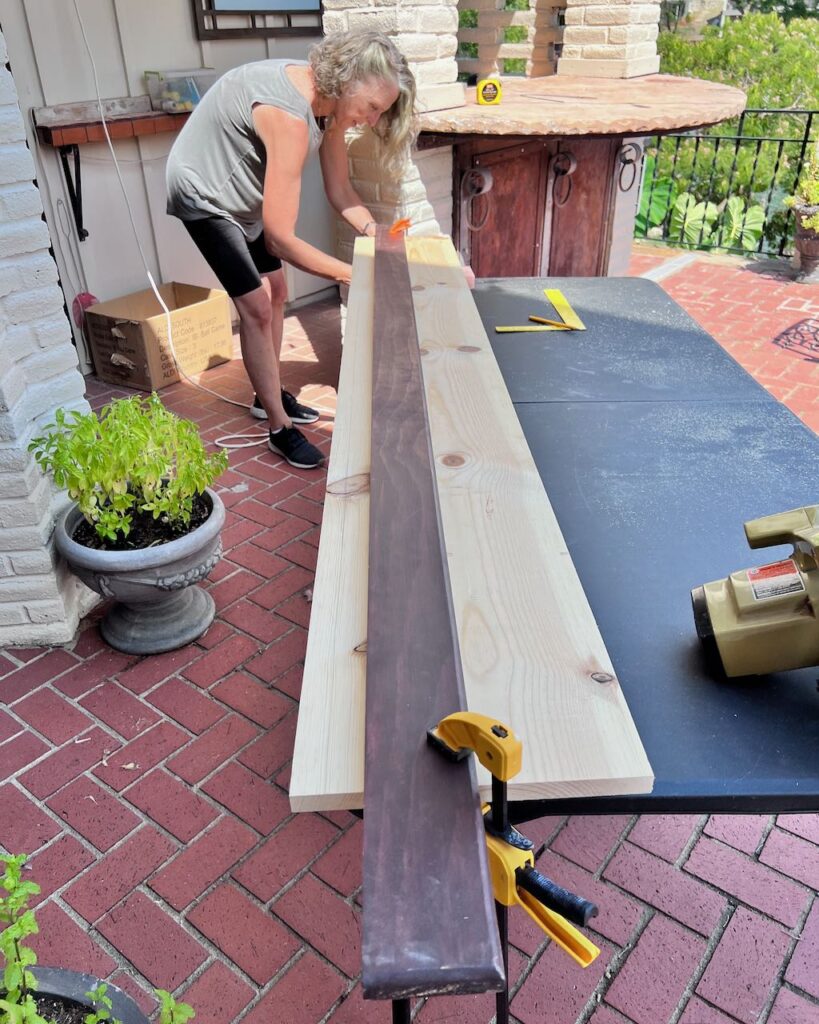
This is where my sliding compound miter saw really saved the day. No flipping and hoping that I’d have a straight cut with a 10-inch blade.
And this is how I rig up a faux table saw. With my long board on a folding table, I clamp a long trim board to serve as a jig for my skill saw to slide along cutting the board at the correct width.
CAUTIONARY TALE: :This works great, but you do have to watch out for how close you come the the table edge. You don’t want to know how I know this . . . . just saying.
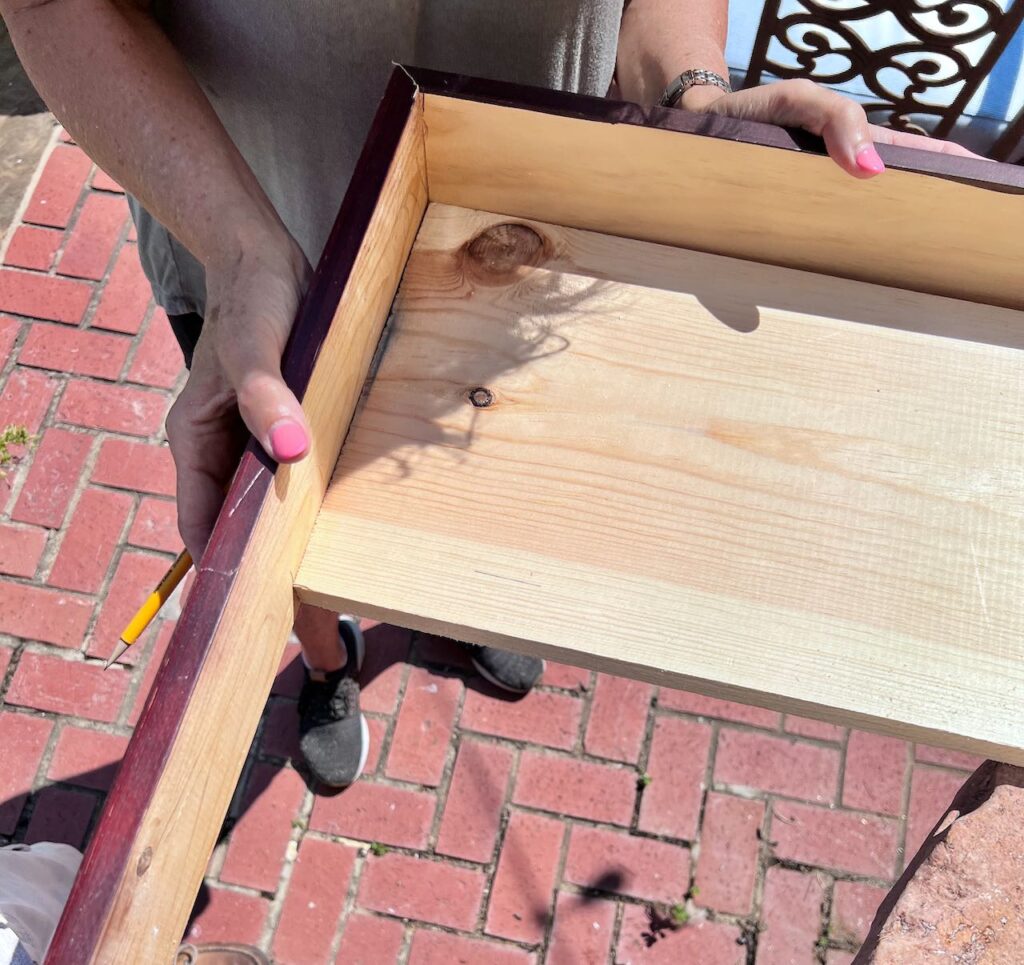
I wanted the clean lines of mitered corners. If they intimidate you, this is a great project for practice.
Start with your front facing, your longest board. Cut two opposite miters so that the inside edges match the length of the mantel cover top you just cut.
Now cut two opposite miters on your shorter boards that will meet up to form the front corners. Cut the miters first, dry fit them together around the top and now you can mark and make the straight cuffs that will be up against the wall.
Step 2) Assemble-
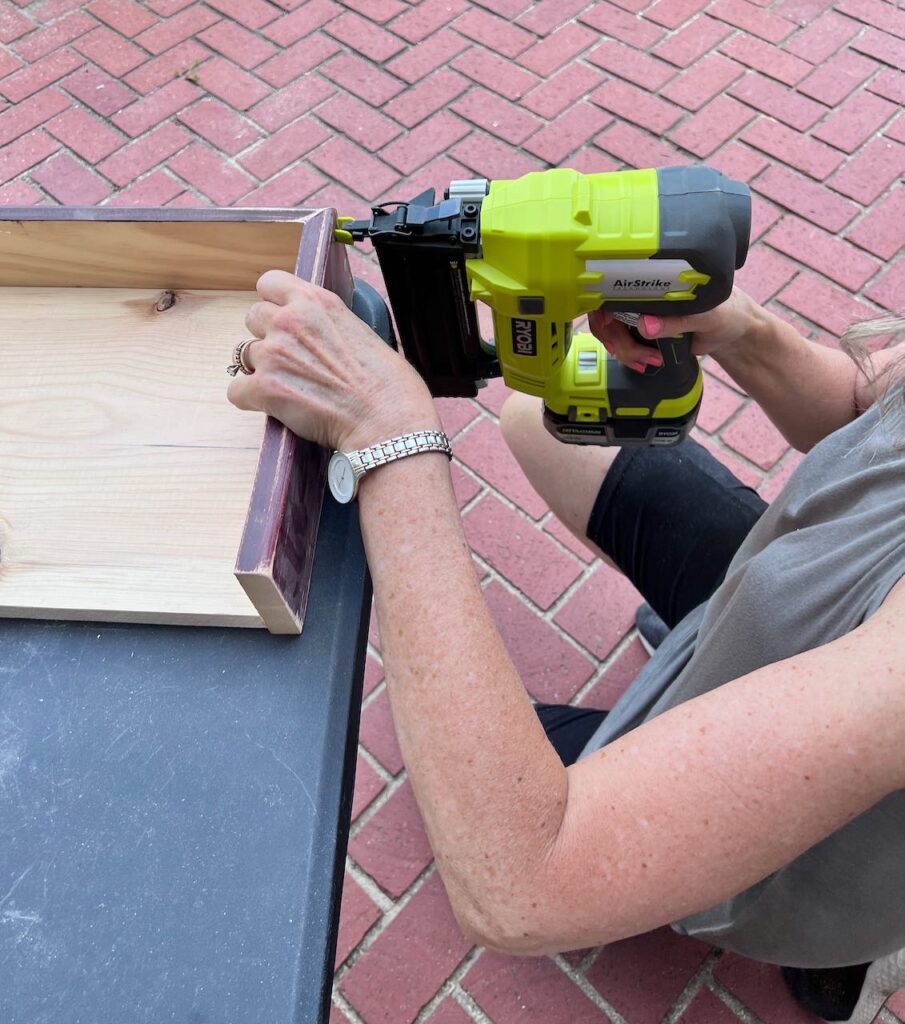
I used one of the empowering tools I own, my Ryobi brad nailer. Wow! is it a time-saving, and energy saving, and the sound just make you feel so powerful.
Lay your top down flat, holding the facings against the top and meeting up the miter cuts, nail the corner together and along the edge of the top.
If tools are on your wish list, an easy project like this mantel cover may be the perfect opportunity to indulge. Here are my favorites that I used for this:
Step 3) Finish Your Cover-
Time to add your choice of finishes whether paint, stain, or sealer.
This is really an easy project, but here I am with another, learn-from-what-I-did moment.
TIP: Check out the backside of the side facings. Yes they will show. So do yourself a favor and stain or paint that part while you’re at it. (You’re welcome ? )
How to Use Your Mantel Slipcover-
Your slipcover should do just that — slip right in and cover your mantel.
MORE TIPS: All about protecting your mantel here: a layer of grip shelf liner will protect your mantel from any rubbing or scratching and always be aware of the length of your nails and screws vs. the thickness of your wood
Let’s See A Mantel Slipcover at Work–
But first, are you enjoying this post? We are just heading into “my” season. So hang on, there’s so much more coming! Don’t want to miss a thing? May I suggest subscribing? You pick how much!
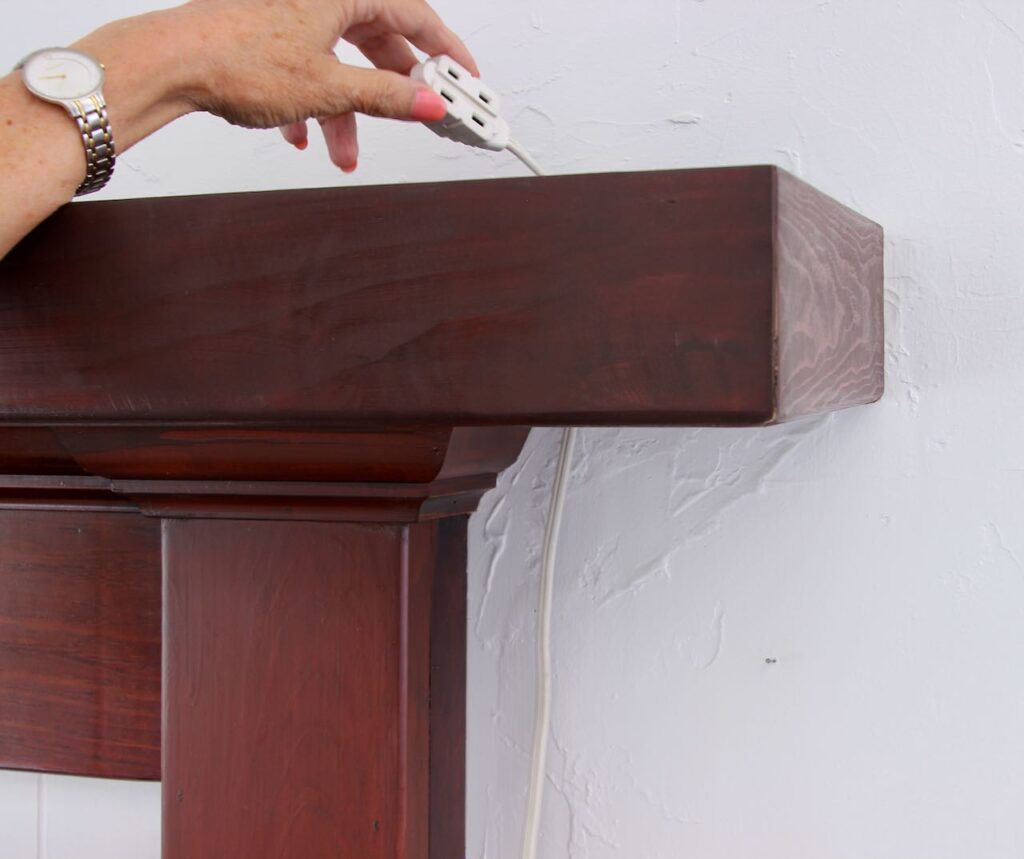
PLUS: If you don’t have power on your mantel, Have a extension cord ready and as you slide the cover in place it can hold the extension cord out of sight and hide it up top.
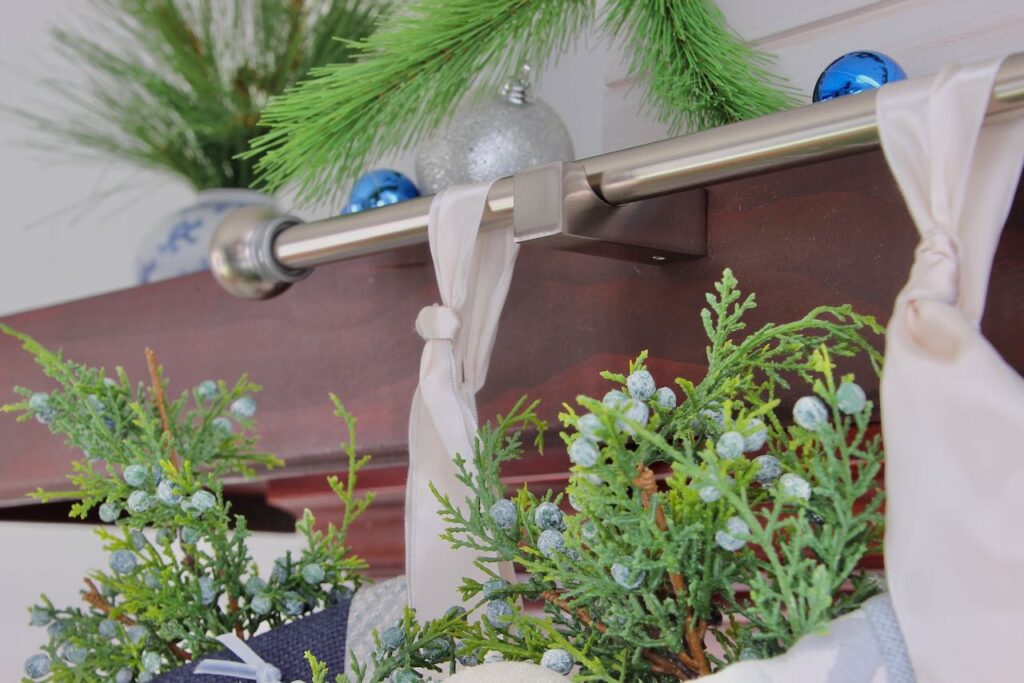
Isn’t that hook perfect!!!
This is why I had to come up with a way to have a bit of vertical surface for the gorgeous hardware I found from Amerock. Here, you will see many more pics of the ways I used the mantel cover for this years Christmas stocking displays
And in the ebook, I share a lot more detail of how to hang and style your Christmas stockings to meld with any beautiful mantel display you dream of.
Here’s a sampling of how I used my new mantel slipcover while styling the 2022 Christmas Stocking Collection.

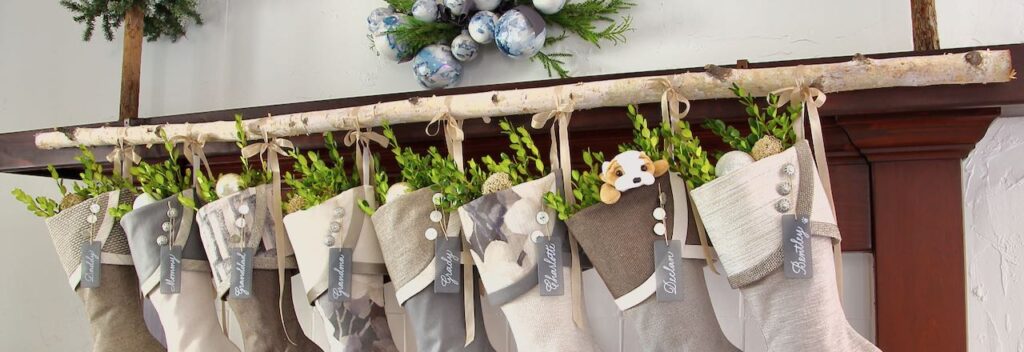


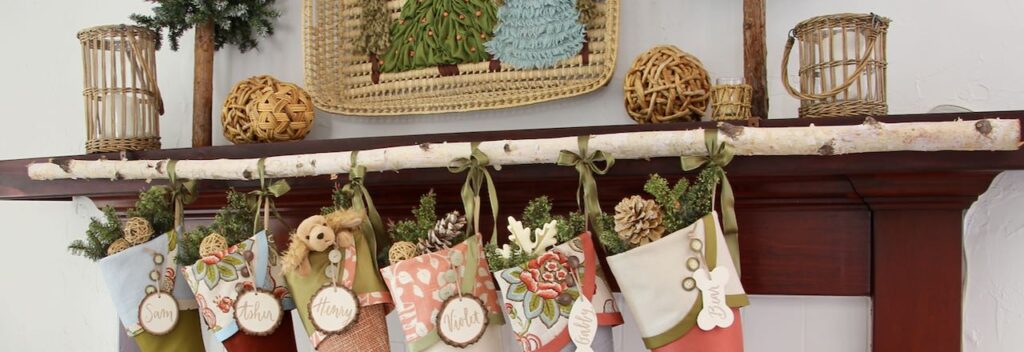
Talk about versatile! Look, I didn’t have to adjust my mantel displays to hide the stocking holders I would have normally used! The mantel boxes I wanted to use interfered with the hangers and the clean minimalist look I wanted with the “Moonlight” stockings would not have worked with stocking hangers.
The birch branch is held in place with part of a standard curtain rod hanger. One end is screwed into the back of the branch the other end is screwed into the top of the mantel slipcover.
All the stockings are from the 2022 Stocking Collection available here.
All the name tags are from Jane at Southern Calligraphy, right here.
And here’s all the great hardware I used — along with an assortment of rods I’ve collected over the years.
As always, don’t hesitate with any questions or comments!!! Love hearing from you.

This is a genius idea Diane! Love this. What a fabulous way to display stockings from your mantel. Pinned! Please come and share at my Home Imagined link party Tuesday 9am-Thursday 5pm. Have a great weekend.-Meagan
I love this idea. How does the mantel stay in place? Don’t you have to attach it somehow to keep it in place?
Hi Marilyn,
It holds very steady because it’s the full depth of the mantel and has some weight to it. it holds very nicely. It can’t slide side to side because of the sides on it.
The only time it has acted like it would tip is when I went to climb up on our hearth, which is about 18-inches high and I grabbed it to pull myself up. Don’t do that.
If your actual mantel has much height, and you make the face of the cover just enough to cover that, then it woudn’t be able to flip up at all.
Hope that helps!
Diane, what a brilliant idea! I’have dissatisfied with our current mantle because it is too shallow for all of the objects I would really like showcase. I just told Charles about your mantel slipcover and I think this might do the trick!
Happy holydays and it’s nice to know who designs some of the beautiful stockings out there, lovely!!!
Barb 🙂
Oh, I hope Charles is on board. Just keep in mind how much you can, or can’t expand the current mantel. It’s all basic physics. If your mantel is quite narrow, you will probably need a spacer between the front of the slipcover and the front of the mantel (felt the edge of the spacer so it doesn’t mar your mantel. The spacer should be inside the lowest part of the overhang to prevent the cover from flipping. Email me if that doesn’t make sense.