Foolproof Steps to a Successful Room Makeover Every Time
Save money, time and energy with easy to follow steps and check lists to plan and complete a perfect room makeover.
So you have a room that needs help, something beyond a fresh coat of paint. Don’t we all?
Maybe it’s a much-used family room that’s just feeling a bit dated and tired and could really use a refresh. Or maybe it’s a room that needs to adapt to changing needs, such as a nursery to become a Big Boy room. Or a guest room that needs to take on a second role as a home office.
It’s Spring ORC — Week 3

To catch up with all the rooms — so many fun projects — visit the One Room Challenge.
TABLE OF CONTENTS:
Let’s Talk Installation Scheduling and PLANNING
I’ve been taking you through the three basic steps for room makeovers that I use every time, large or small BEFORE I ever begin installation.
I’ve applied them to my current One Room Challenge space — our daughter and her husband’s (our new son) powder room in their historic DC row house.
A room makeover can take many shapes and many degrees of remodeling, refreshing or renovating to become the room of your dreams. No two makeovers will ever be the same, but they should always, always start with a simple rule of thumb — PLANNING!
YES! I’ve executed many successful makeovers, and . . . well, a few that required more effort, energy and money (ouch) than they should have. Sure, some room makeovers by their nature require a lot of time, a lot of money and a lot of work. We just don’t want the project to require more than they should have.
My smooth-sailing and successful makeovers are a direct result of lessons learned from those early “challenging” makeovers.
PRO TIP: Planning is key!!!
The lack of proper planning sets you up for all kinds of issues:
- Missed opportunities for better functionality
- Furniture doesn’t fit like you thought it would
- Colors that worked in the store don’t work in your room
- No defined focal point
- Light fixtures in the wrong place
All of these issues and more would be solved in the first two steps I always follow when planning a makeover, remodel or all out renovation. Which of course corresponds with my One Room Challenge Week 1 and 2.
First Step – Wk 1 – Determining your goals for your makeover — starting with functionality and then adding style including general color palette
Next Step – Wk 2 – Refining and finalizing design choices — from flooring to wallpaper, to furniture pieces and specific paint colors
To recap, this is Week 3 and the third of three basic steps I always use before we start any actual installation.
Takeaway From Week 1: Always, always do the proper planning with floor plan and mood board.
Takeaway From Week 2: Follow the correct order in finalizing your selections, each decision influencing the next. Hint: Specific paint color is NOT first!
With those decisions made, it’s time to map out the installation itself.
This week I’m taking you through my simple steps of fine-tuning our installation plans so all runs smoothly. Including all the Printables and Spreadsheets you’ll see me using, available in my Free Printable & Resource Library. This library is open 24/7 to all my subscribers.
What? You’re not a subscriber? Well, this is a great time to take care of that:
Thanks bunches!!! Now back to Step 3:
Like every big project, if you break it down into bite size pieces, it becomes way more manageable.
And that’s what we are going to do right here.
Every living space (think exterior spaces too) makeover needs to follow a step-by-step plan to not waste time, effort and money.
Let’s Face it. An entire room makeover can be daunting at first!
Don’t worry! You’ve got this!!! And I’m here to help, sharing my favorite tools that have never let me down.
Planning Aids or Tools
So now we need a To-Do list — actually a set of to-do lists on steroids.
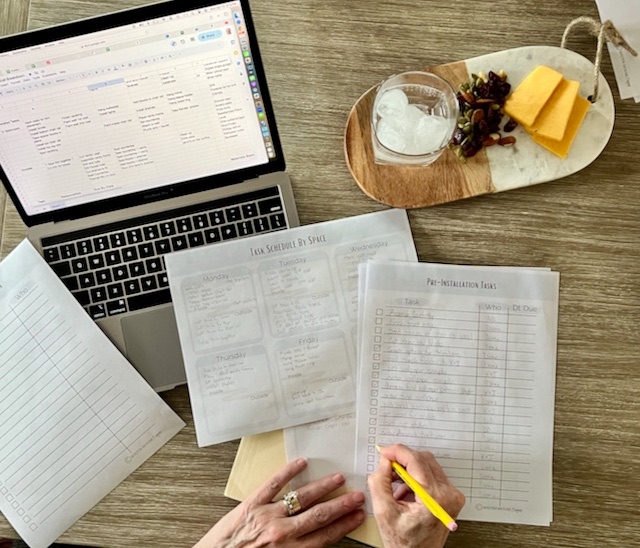
What kind of planning tools do you like to use? Use what you are most comfortable with: spreadsheets and electronic notes or paper and pencil!
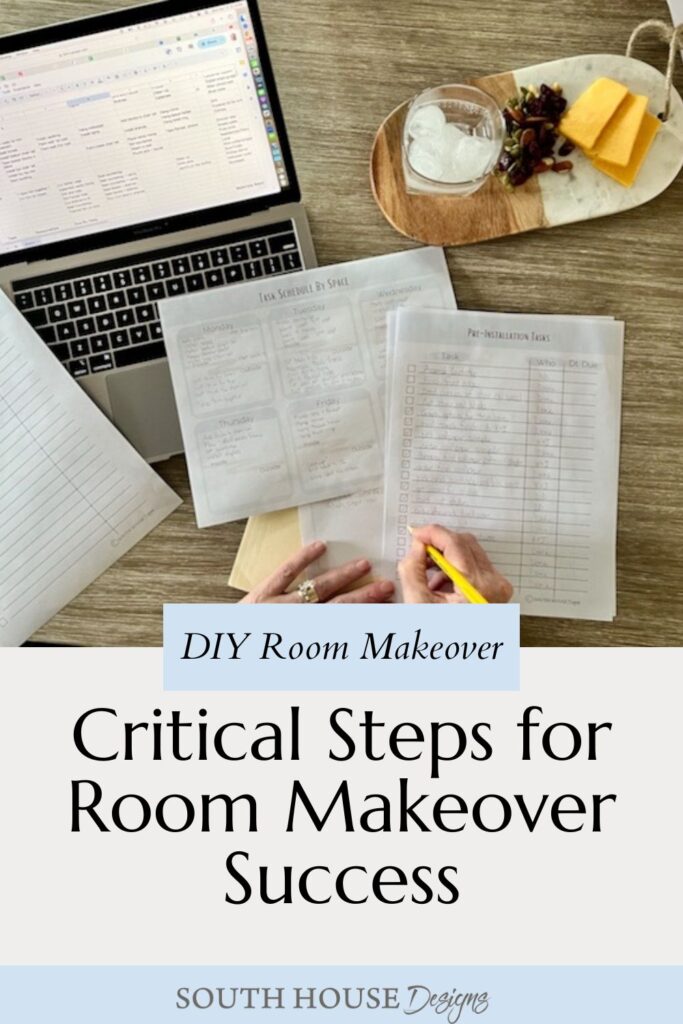
I am using a combination. I’m using a Google Sheet in a shared Google Folder so the kids in DC and The Hubs and I all have access. This is particularly important with the Pre-Installation checklist and with the Materials and Supplies checklist.
But we also all love taking a marker to a checkbox! It’s so gratifying to mark things off and see progress on paper even if it’s not big in the room yet.
You can enter the South House Designs Library by clicking here, or the link in the right side bar of every blog post or at the bottom of every email you receive from me. The password is included at the bottom of every email you receive from me.
The SHD Free Library is also a great place to find fun printables, crafting guides and more good stuff. But today, you are looking for the Remodel Planning Aids Folder.
All the pdf’s are available for you to download and print for your pencil to paper organizing. Print off as many copies as you need for your project.
There is one spreadsheet that contains all the organization of the printout. To use the spreadsheet, ______
You’ll see images of these aids as we walk through my process.
Divide the Project into Chunks
The first thing is to divide the project into ‘Chunks”. The “chunks” will vary based on the project.
Our current project is a small room and fairly simple in scope. Plus it is halfway across the country.
We are going to be on site for just one week, next week, so my installation planning is simpler, yet more critical than most of my projects.
I cannot afford delays because we have to make multiple trips to our handy home improvement store for the right supplies. Everything that can be done ahead, needs to be done ahead.
I broke this project into smaller chunks:
- wood wall treatment
- painting the wall
- wallpaper
- the sink table
- the shelves
- sink & faucet
- lights
- mirror and accessories
With our last ORC, our dining room makeover, I broke the project into three large chunks:
- Modern mug and plate rack wall
- Dry bar
- Banquette
Then each of those were broken down into smaller chunks, and then into individual tasks.
The best way for your project, is whatever way makes sense for that project to you.
Schedule the General Chunks
Start by placing your “General Chunks” across your planned installation time.
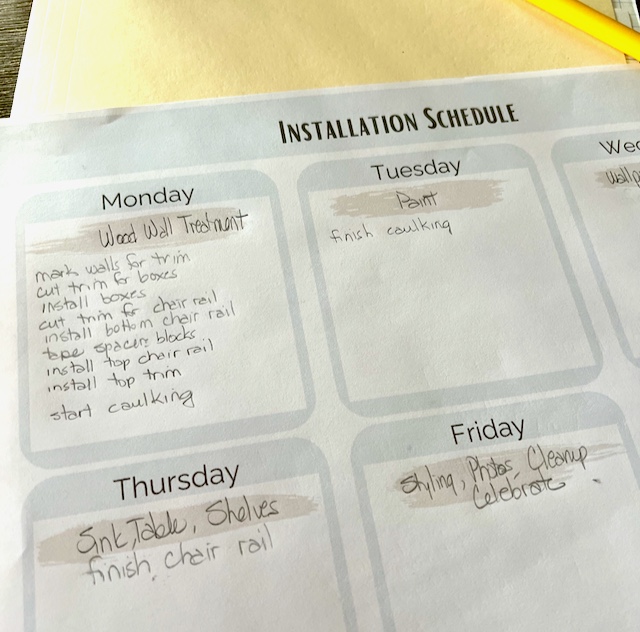
For our current powder room remodel, I placed them across next Monday through Friday. With Saturday reserved as our flex day if we run into any issues.
So I only needed one copy of the Weekly Installation Schedule Since this is my starting point for scheduling, it only makes sense for this to be at the top of my spreadsheet.
This current project of mine is planned to be completed in one week.
If your project will go on for four weeks, print four copies and add dates next to days of the week. On the spreadsheet, copy rows 1 and 2, insert them again and again further down the sheet creating more of a monthly calendar look for as many weeks as you need.
Break Each Chunk Into Detailed Individual Tasks
In my book, the more detailed and smaller the task, the better it works for me.
This is my time to think through the processes of each chunk and what order am I going to do them in. Writing them down, or typing them in, is a great way to catch places to streamline some processes and notice where others may need to be re-ordered.
This process forces you to think through all the details. You’ll probably be surprised at how this detailed study brings a better method to light or points one out that just isn’t right and after thinking it, you end up with a streamlined process and/or better results.
Have you ever been in the midst of a project, excited about how it’s proceeding and you forget all about a small, but critical structural piece that has to be done before you put the final skin on? Oops, now you have to back up several steps.
By breaking down the installation chunks into the smallest steps, with an ordered checklist, I eliminate those getting-ahead-of-myself errors. Plus, I love the bonus of more frequent lifts that come from checking off more boxes!
I methodically start with the first chunk of the installation. I list the detailed tasks of that chunk either on the spreadsheet or in the paper “Installation Schedule” on the same day right below the “General Chunk”
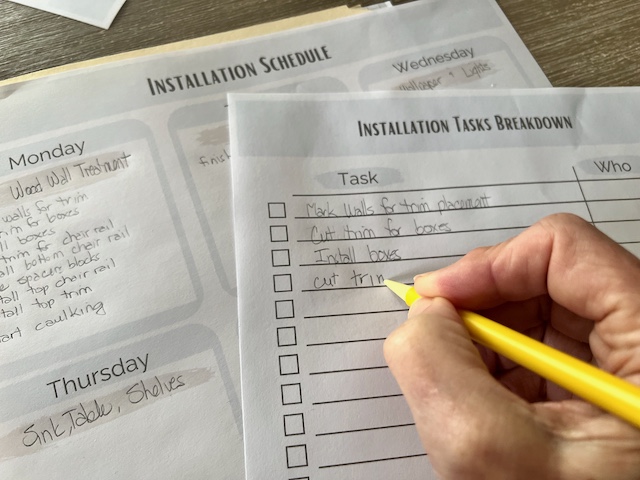
Optionally, you can copy your tasks from your Installation Schedule onto the Installation Tasks Breakdown pdf, post it prominently to help stay on task and enjoy checking off those boxes..
Checking boxes may or may not be our daughter’s primary love language — just saying. But we will have ours hanging right outside the half bath door!
Space Requirements
If your project involves saws and lumber, or you’re making over a small room, space requirements can also be an issue. Plan for them!
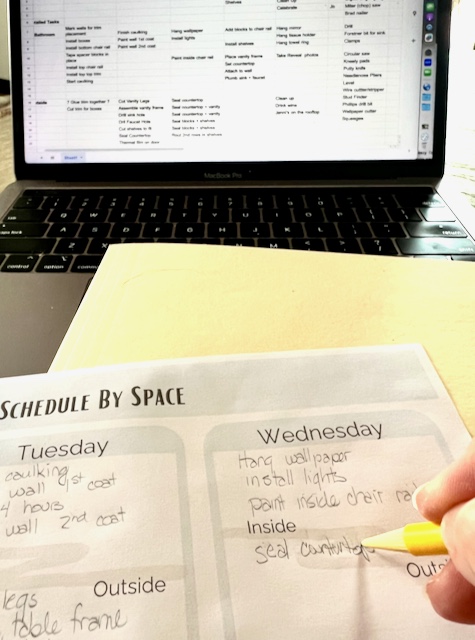
This is why there is a printable for “Task Schedule By Space”. If needed, print off as many copies of this scheduler as you might need.
If you have multiple people helping or even a couple of subs coming in to do plumbing or electrical, I like to map out the space usage ahead. We tend to maximize our time better.
For this project, with its tight time frame and even tighter floor space, while Doug is in the bathroom painting, I have my list of what to be doing on the deck. If one space gets ahead of the other, we can step right in and take on the next task in line for the space sitting back waiting.
It’s basic Critical Path Methodology applied to an installation project. [I have a degree in quantitative analysis — I kinda geek out on these kinds of things]
Material and Supplies
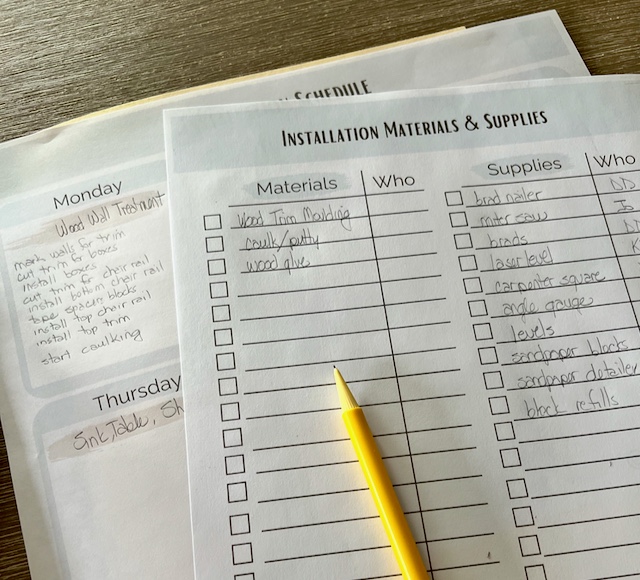
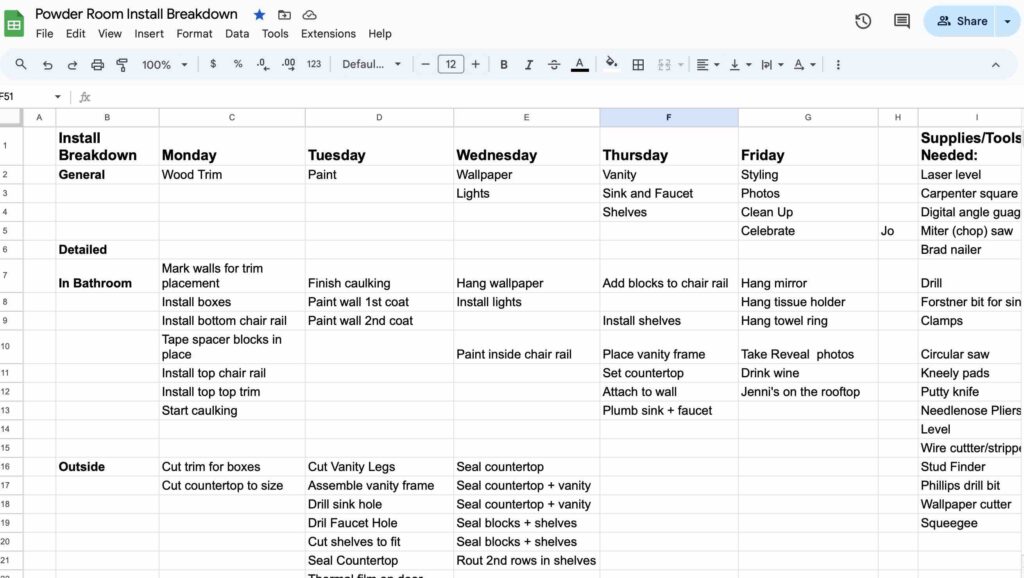
While you are determining and listing your Detailed Individual Tasks, this is the perfect time to also add all materials and supplies for those tasks to the M & S list. I keep it on the same spreadsheet just over to the far right side.
If you prefer a separate spreadsheet for your Materials & Supplies, by all means go for it. Just split your screen so you can be working on them side by side.
If you are working solely on paper and pencil, print off as many copies as you need.
I added a “Who” column that can be used several ways.
Since we are packing up our tools and supplies and bringing them with us, We are noting what we plan to borrow in DC and what we need Katie & Jon to have on hand. No paint on the plane!
We’ll check boxes as we pack (and are counting on our luggage not getting lost- EEK!).
You might also use it to note where you are ordering something from, or whether you already have it on hand.
If you are ordering a lot online, use the who column for the website and date you ordered. Then check them off as they arrive.
Pre-Installation Tasks
The more you can accomplish ahead time, the smoother things feel.
Best part, it can shorten the time that a room is in W-I-P mode and your home and lives feel upended.
Remodeling is exciting, but it is also messy and disruptive. Anything we can do to minimize that is worth it in my book!
As you are breaking down the general chunks into individual task, this also a great time to identify all the pre-installation tasks you need to or can do prior to your actual installation.
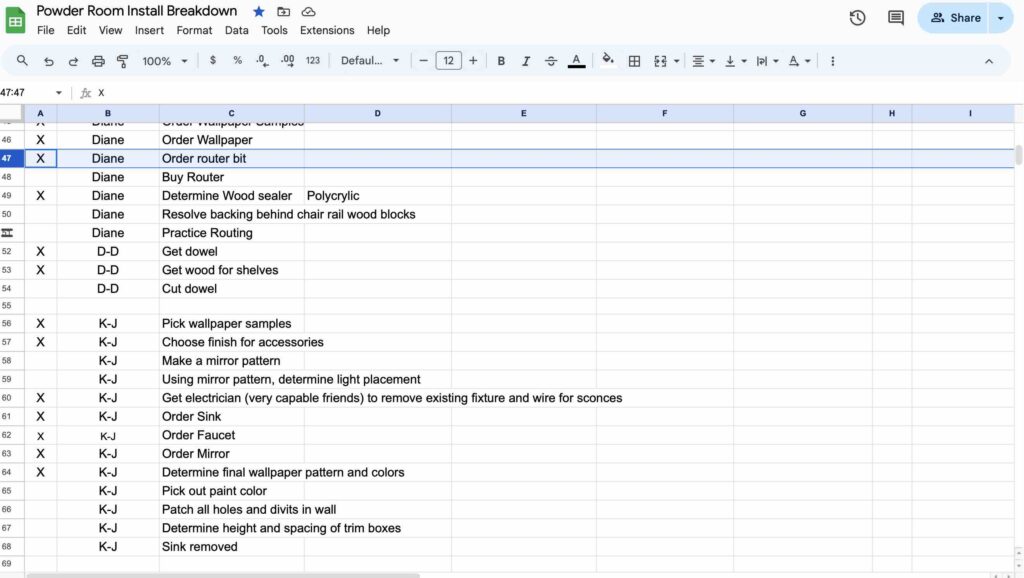
The spreadsheet has Pre-Installation columns, on the left below the calendar columns.
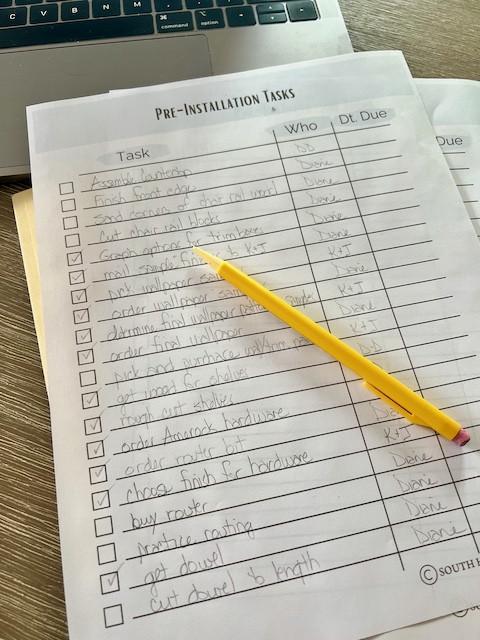
And for you paper people, you’ll find a “Pre-Installation Tasks” pdf for you to print out as many copies as you need.
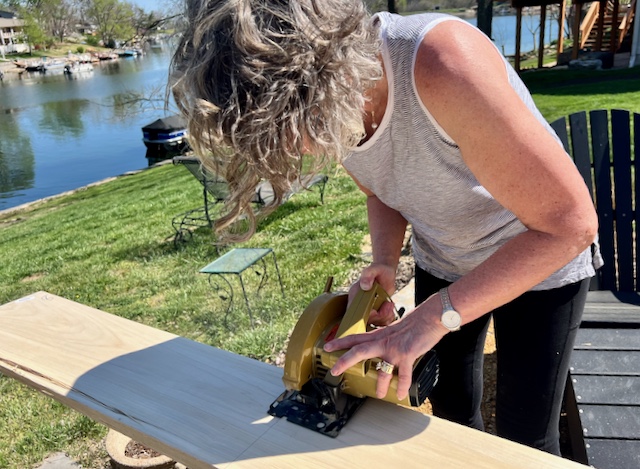
Yes, I’m checking off that pre-installation list, cutting wood for the shelves. Now I’ll be sanding them and starting to seal the wood, so it will be cured when I need to pack them for the plane.
Chances are you’re not set to start your next makeover, but you know there’s one coming. So why not save this pin to remind yourself of these planning worksheets and tips:
Parting Planning Thoughts
Of course, if you are breaking into walls and such, there is always an “opportunity” for surprises. But surprises are much easier to deal with when they’re limited in number.
Plus by staying with a plan, your budget should be in good shape to handle a nasty “surprise”.
Now you’re ready to “Go Forth and Install”.
For me, I’m hopping a plane and then enjoying a hopefully smooth-sailing installation. Weeks 4 -7 of the ORC, will be install tutorials, with a final reveal on May 21!
I hope you’re following along. If you are also participating in the ORC, leave me a comment so I can follow you.
If you prefer to diy your room makeovers on the sideline, I hope my planning process gives you confidence and helps streamline your project. Don’t hesitate with any questions or comments.
