How-To Plan DIY Half Bath Remodel Adding Warmth and Style
The Challenge: Breathe life into a windowless, antiseptic small bathroom in a historic DC row house. The Goal: Create a warm, stylish space that reflects our daughter and son-in-law’s personalities.
Isn’t this the very essence of the One Room Challenge!
But rather than doing this over the course of 8 weeks, I’ll be on site for just one week — YIKES! (Thank goodness Home Depot is a 15 minute drive and Lowe’s is 20 minutes from our daughter’s home)
We all love great before and after images and all the accent walls, all the great things as well as little things that make a room feel special. I’ll be sharing these over the next 8 weeks, but I’m also sharing How-To’s.
This is to aid those of you who are watching from the sidelines. Hoping that you’ll gain confidence to plan and execute your first makeover.
Week One (this post): Analyzing Your Space and Creating a Mood Board.
Week Two: Refining Your Design and Selections
Week Three: Planning and Installation Schedule
Weeks 4 – 8: How-To’s DIY’s of the Actual Components
TABLE OF CONTENTS:
Consider Rest of the House
Let’s take a step back for just a moment. Our daughter Katie and her husband (our new son, Jon) bought their historic row house in DC during the pandemic.
They FaceTimed during their first home tour asking if I could turn the large living room wall into a library of floor-to-ceiling, wall-to-wall floating shelves.
Since they bought the house, you can probably guess my answer. You need to check out their floating library. And on that same trip, we added this feature wall to the dining room.
On the left side of that feature wall is a gorgeous deep window that we have future plans for.
And to the right is of the feature wall, is the door to their half bathroom. (Yes, an unfortunate location, but it’ really the only option to have a bathroom on the main floor of the house.) This is fairly typical in long, narrow row houses.
So now you know their style.
This is going to be a complete bathroom renovation. The only thing not being changed out is the relatively new toilet and the wood floors that run throughout the house.
This small area, just 13 1/2 square feet, will receive a totally fresh look.
This blog post lays out how you should start planning for a renovation, a makeover or even just a refresh.
It’s exactly the same steps I used for this huge dining room renovation we did last year in our home, and that I’m using for this super small space makeover.
Identify Your Pain Points
I am a huge proponent of Function First!!!
Get the functionality right, and then we can always make it beautiful!
First step: Identify what is not working well for you? What is your space missing, storage, traffic flow, natural light? Is your goal a modern space with new fixtures?
PRO TIP: Don’t be timid with your wish list. Get input from everyone who uses that space and adjoining spaces.
When you start dissecting your space, you may realize that making one small change could offer two or three big solutions.
Don’t forget to consider any known life changes on the horizon. For instance, Jon pointed out that while they are expecting in August, they currently have no space for a kiddie potty.
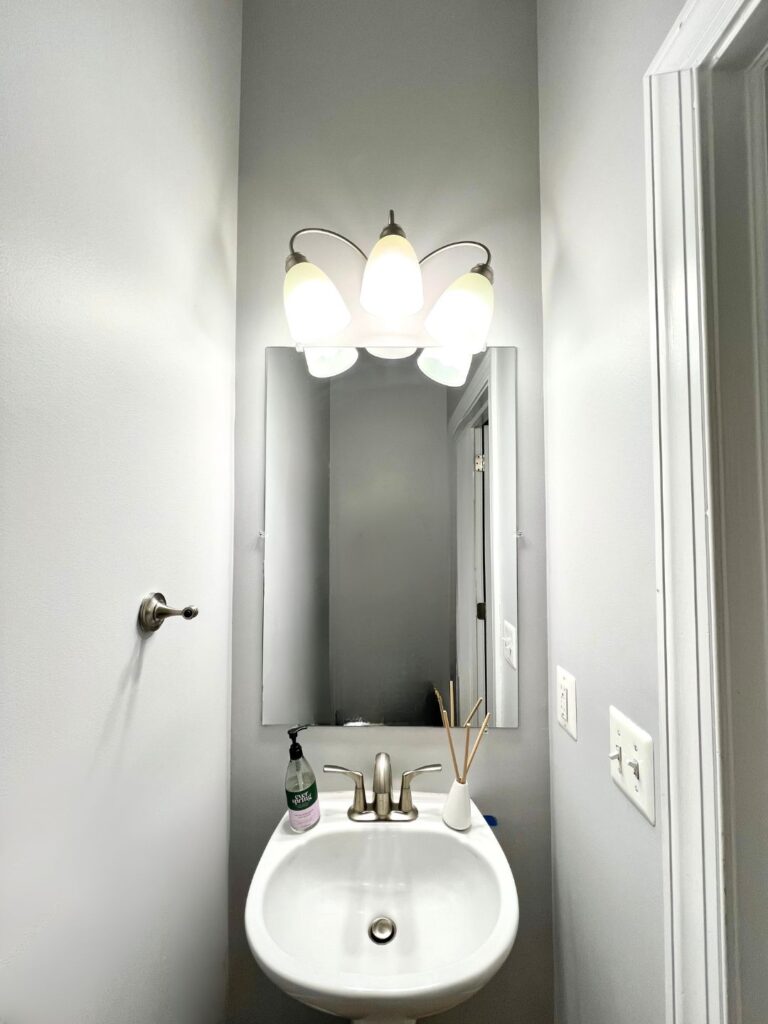
So it was quickly decided that they want to replace the existing pedestal sink in their tiny space with a new vanity that is very open allowing a little potty chair to slide under and tuck away.
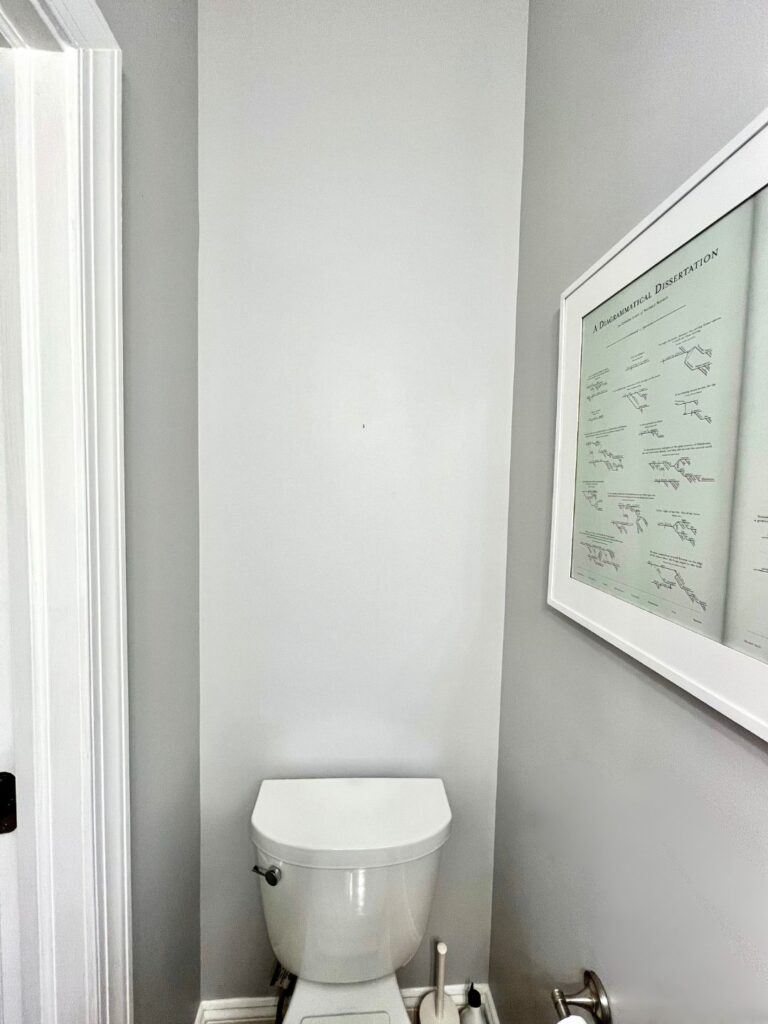
For This Half Bathroom Remodel, our pain points are:
- Zero personality and style
- Zero storage
This rather short list, plus the limitations of a smaller space (okay, tiny space) means that there will be no structural changes for our remodel.
Create a Floorplan
Start by drawing the perimeter walls complete with all doors, openings and windows. Next, add any built-ins.
Pencil in furniture that you know you want to keep.
PRO TIP: Always, always measure exactly. This is not the time for guesstimates!
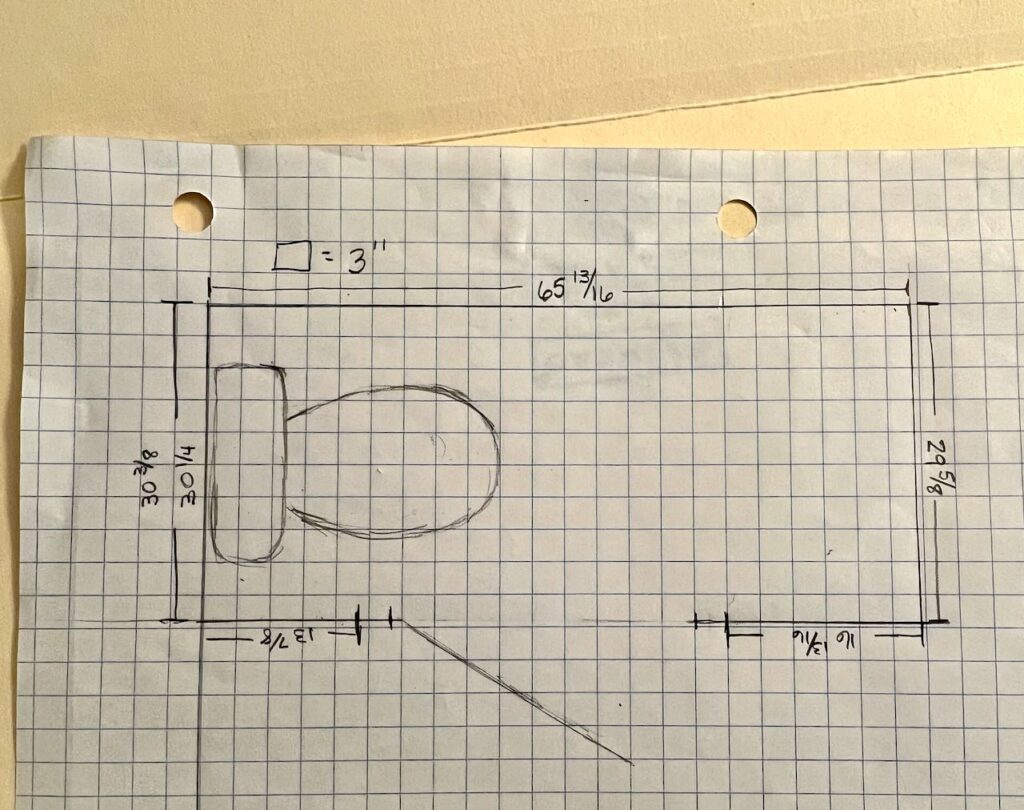
Your floorplan does not have to be professional and fancy, but your measurements have to be accurate!
Sidenote: Wow! Now you realize just how small this room is!
If you have things that are a tight fit, be sure to consider the depth of windowsills and woodwork. Sometimes, a 1/2 -inch makes a big difference!
A floorpan is a great way to see how your traffic flow will change, where you might sneak in extra storage, view from one space into another, etc.
It is also critical in determining the size of new furniture, rugs, artwork, etc.
Conversely, armed with a floorpan with accurate measurements, you can make sure that the antique cabinet you own and love can fit between the corner and the trim of the new planned cased opening. Maybe losing an inch in the opening will save the cabinet.
Even though we are making no structural changes, I still made a floor plan with accurate measurements.
So as we are looking for a vessel sink, for a light fixture, at mirrors, planning for shelving, etc, we know our size limitations.
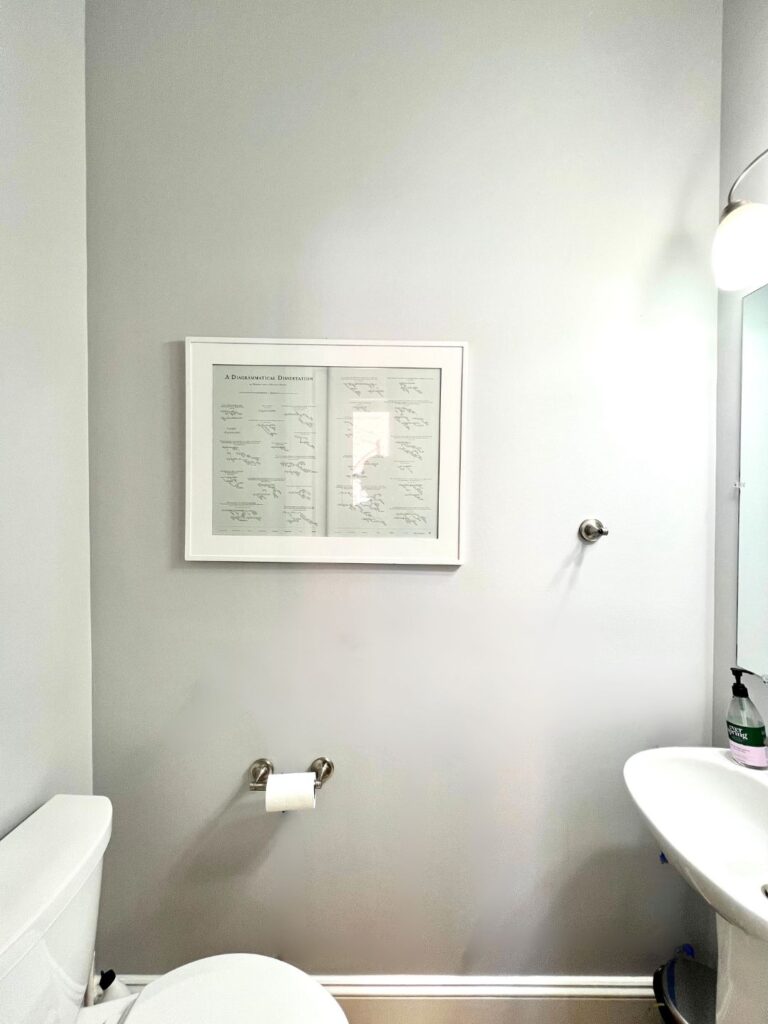
In our case, we are planning narrow shelves, wall to wall above the toilet. I checked that width in several places, with an 1/8 of an inch difference over a span of just three feet, I’ll be cutting shelves on site rather than ahead.
There’s 3/4 inch difference between the two narrow walls. And this room is very tall. So this is going to make wallpapering difficult interesting.
The floor plan is also your best tool for determining how much wood trim and how much wallpaper we need.
And, as you know, this all impacts the budget. So think of a floor plan as also a budgeting tool.
Gather Inspiration
Now is when the real fun begins. Collect inspiration photos.
Don’t let this intimidate you. You may not know a name for your personal style, but I bet you know what you like.
It doesn’t matter whether you use Pinterest or Houzz or even a Google Folder. Find a system that works for you and gather images that catch your eye for one reason or another.
Perhaps you like the general vibe of a space, or something very specific, like the dramatic wallpaper on the ceiling. Or the wall sconce, or towel rack, or toilet paper holder that catches your eye.
Don’t overthink this. Rather gather what speaks to you and your current home.
Once you have a fair size library of images, you can scroll through them and either eliminate some or move them into sub folders or boards. Refine and refine until you have a narrowed down group that feels right together, has a cohesive look or commonality of style.
Now you have a general style — a mood — you want for your space. Time to narrow it down a bit more.
Mood Board
I am a huge fan of Canva — a great FREE graphic design software. There is a pro version that costs 12.95 per month, but you can make a mood board with the free version. Go to Canva.com
Note: In Pro version, you can remove the backgrounds and layer the elements. In the free version you can crop close to the individual elements and arrange them side by side.
To make a mood board in Canva:
- Make a layout the size of an 8 1/2 x 11 paper.
- Upload images of all your design elements contenders
- Start with your most significant known item and place it on the mood board, crop tight or remove background
- Continue adding the elements you are most confident about
- When you get to an element where you want to try multiple options, make multiple copies of your almost complete page
- Drop each option on to a different copy of the page. Now you can easily see which one works best
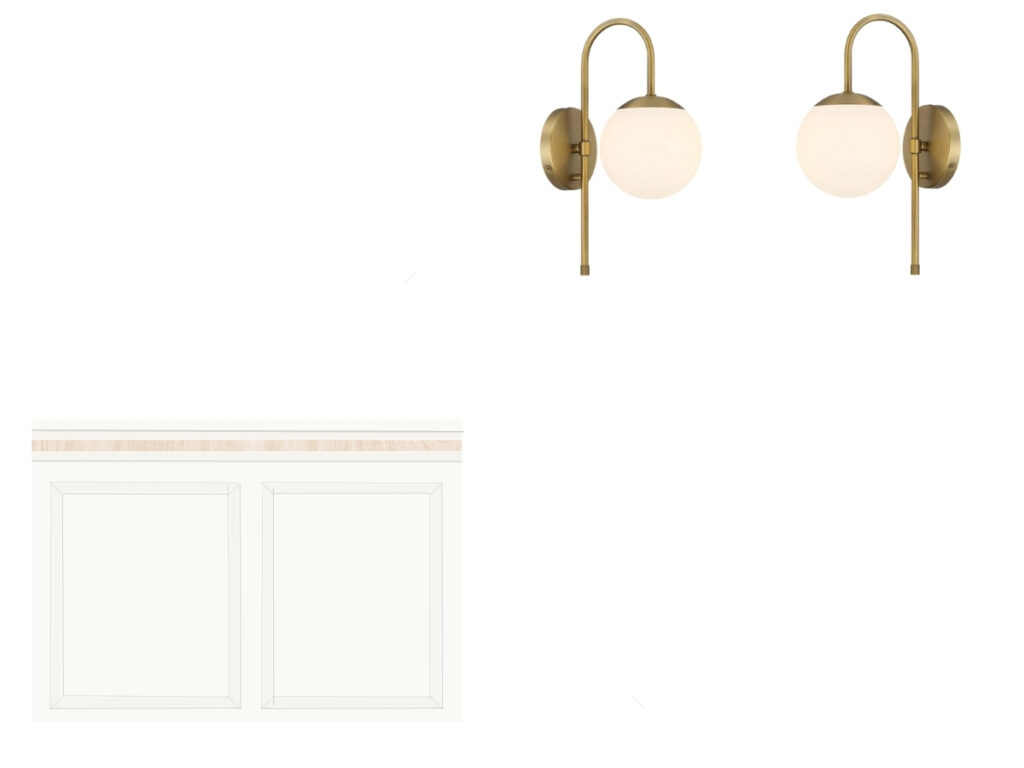
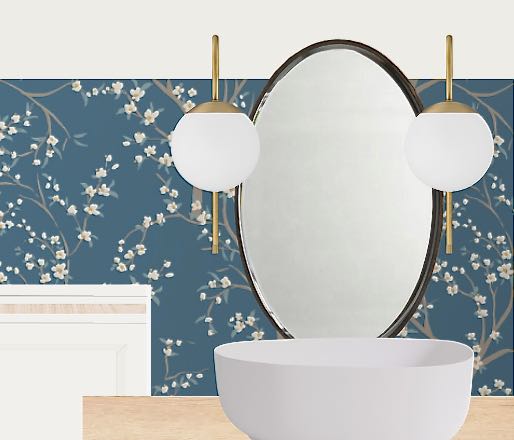
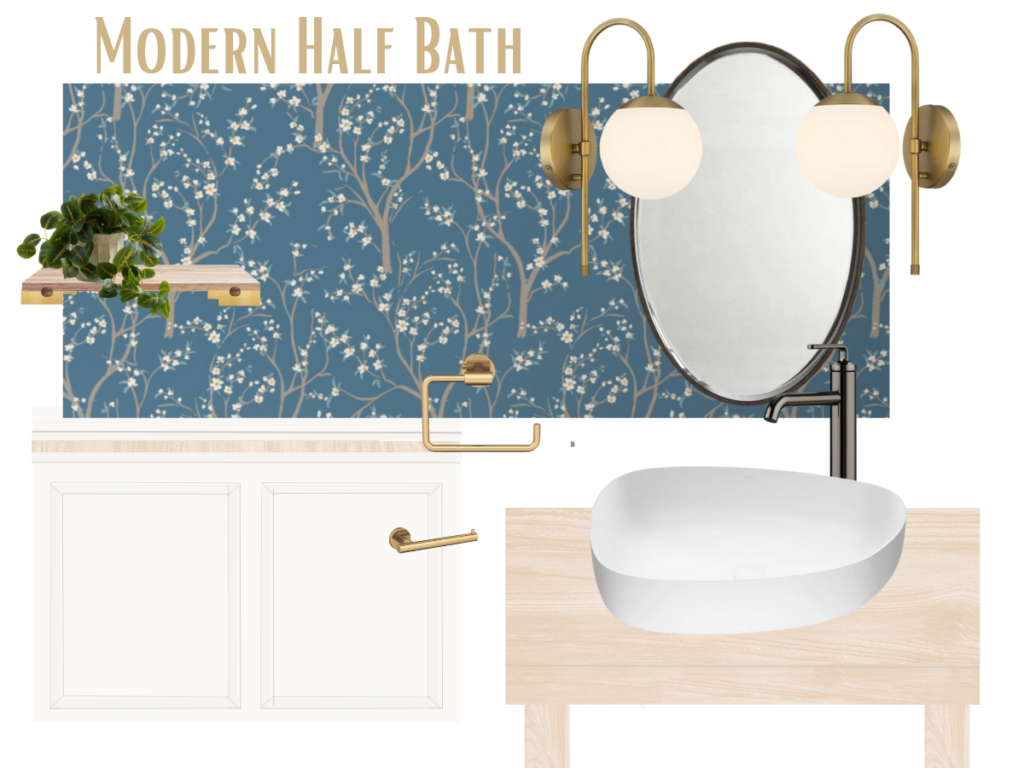
For us, we knew we wanted to do a focal point wall treatment that included a unique chair rail and wood trim boxes below — all light colored. So I did a mock-up of what we have in mind for those. The other known was pair of wall sconces that the kids had picked out, so I added them next.
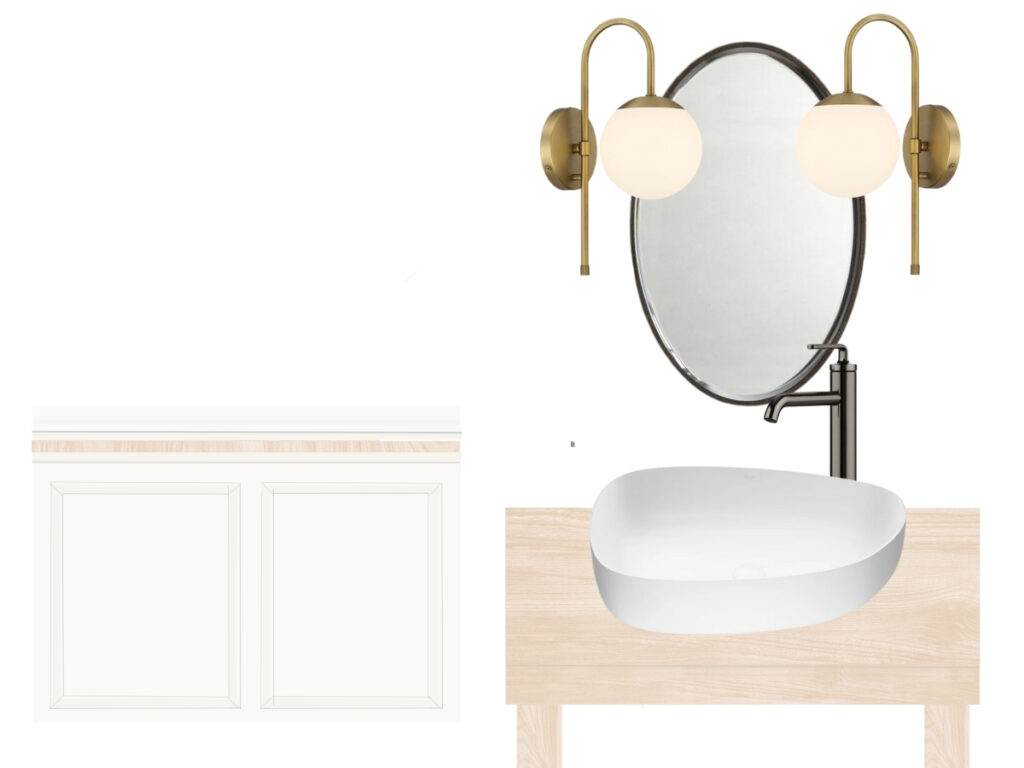
Then I added a mock-up of the stream-lined modern vanity table they want with the new sink that its their first choice.. We’re pretty confident about those.
We have several choices of oval mirrors, so at this point I just added one to see the size and shape with everything else. The winner will be determined as we start seeing elements in person.
For our project, the big unknown is the wallpaper! Good news, we are working with Love Vs. Design, where any of their wallpaper patterns can be interactively recolored in your choice of over 200 colors right before your eyes,
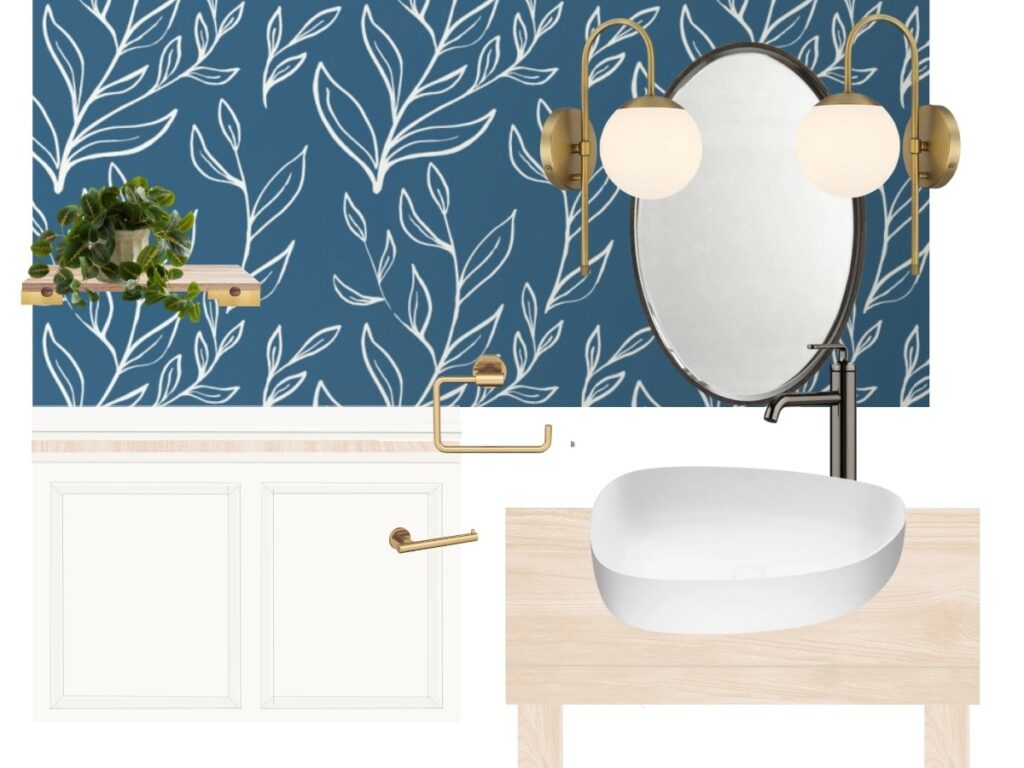
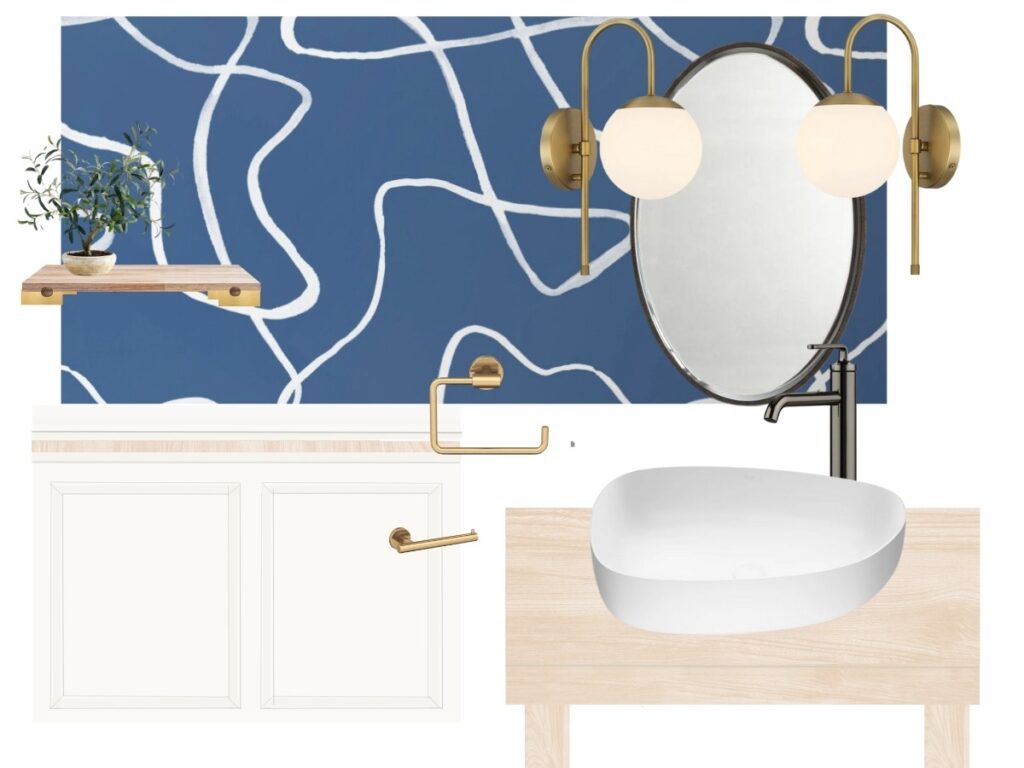
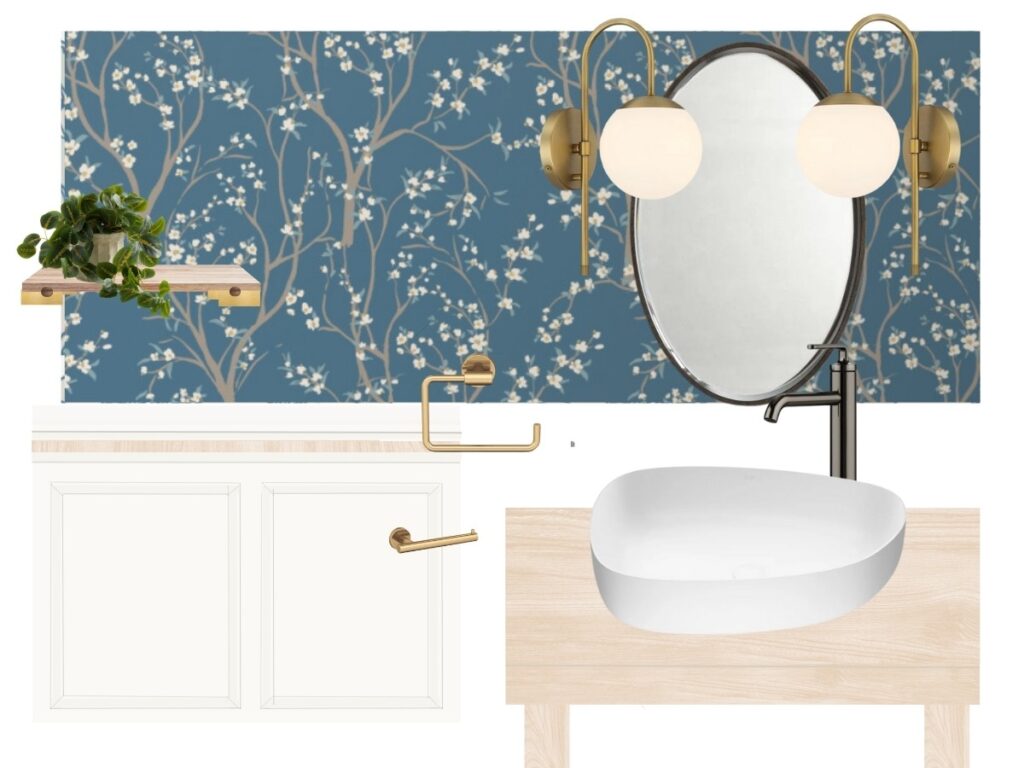
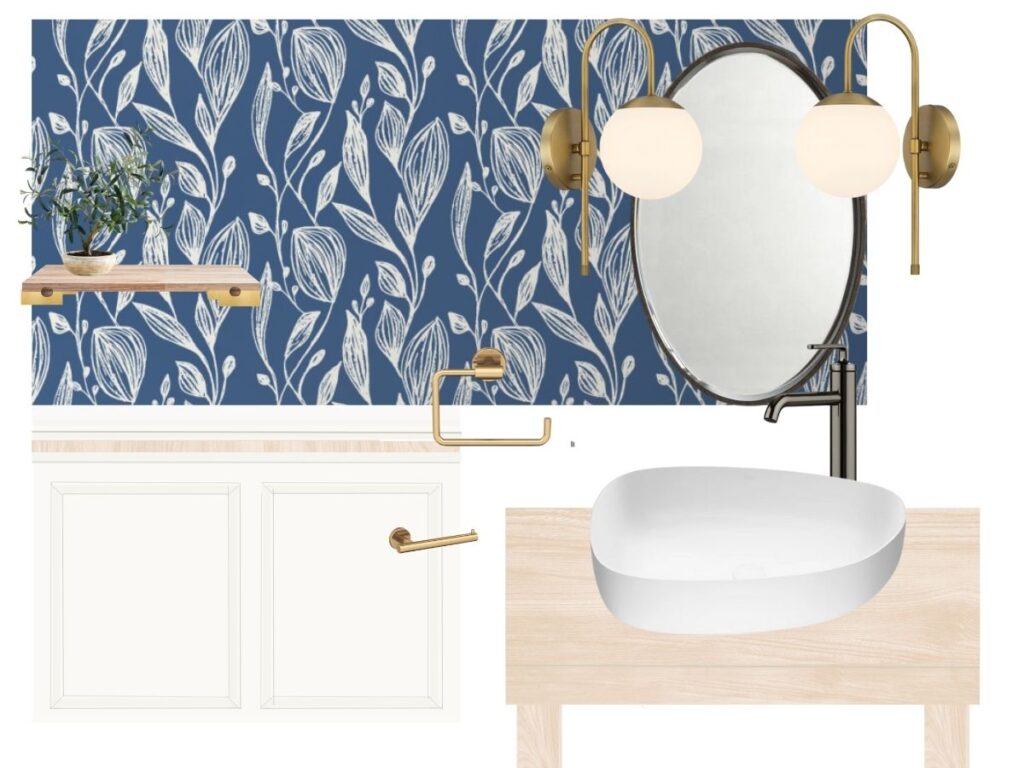
The kids narrowed down the wallpaper patterns to their favorite contenders and then colored them with the colors they thought they wanted. I took a screen shot of many of the options. And dropped a different wallpaper into each mood board for an easy comparison between patterns.
The best part, not only does Love vs. Design offer interactive recoloring on their website, but you can order generous (9 x 25-inch) samples of your recolored wallpaper.
6 samples are on their way to the kids now. So the wallpaper may yet change.
Ta Da! Our Plan is Complete!
A Stylish, Modern Half Bath is on its Way
Are you wanting to see how this project goes? If you are not already a subscriber, I’d love to have you join us. Then you won’t miss a thing and you’ll even get some insider looks and exclusive info.
Next week we are taking a deep dive into our specific selections and the why’s.
Including WHY I advise everyone to pick your paint color LAST!
Do NOT start with paint color!
Join me next week to find out why!
Now be sure to jump over to the One Room Challenge site for all the blog entries.
Reminder: My blog posts are a two way street. Please let me know your thoughts and questions — either by leaving a comment below or by sending me a private comment

Love vs. Design is a great company to work with! I love the pattern and colors you selected for the wallpaper, and this looks like it is going to be a charming little space! I’m looking forward to following your journey!
xoxo,
Julie, fellow #ORC participant
Yeah Julie! We’re going to rock it out! Let’s go ORC!
So many great tips for starting a project. I can’t wait to see the finished room!
Juliette (AKA The Shady Gal), Fellow ORC Participant
Thanks Juliette! I can’t wait to see the finished room, also 🤪