Casual Dining Room Makeover Plans and Your Advice Please
We’re jumping into an 8-week makeover of our Casual Dining Room. Today I’m reviewing our plans, mood board and hoping you’ll help.
I’m soooo glad you’re here!
I was counting on you showing up and hoping you’d share your insight with me.
Sometimes it takes a village, right? And you’re my village!
Are you familiar with the One Room Challenge (ORC)?
It’s eight weeks to start and finish one room!
It’s 8 weeks of demo, remodeling, renovating, learning-as-you-go, searching Google and YouTube in the wee hours, pivoting when things don’t go as planned, happy dancing when they do, and sharing all the successes and the not so great moments very publicly.
Hopefully this all happens with plenty of laughter and minimal swearing.
For us, I’m praying that we end up with a new dining space that:
- Looks intentional and fits our home
- Is welcoming, inviting and comfortable
- Brings needed function and storage
- Increases our seating capacity while
- Improving our traffic flow
- and is worthy of the memories we’ll make gathered around that table
Phew! That’s a lot to ask! But we have a plan.
Now to This Year’s One Room Challenge Project–
Our Casual Dining Area
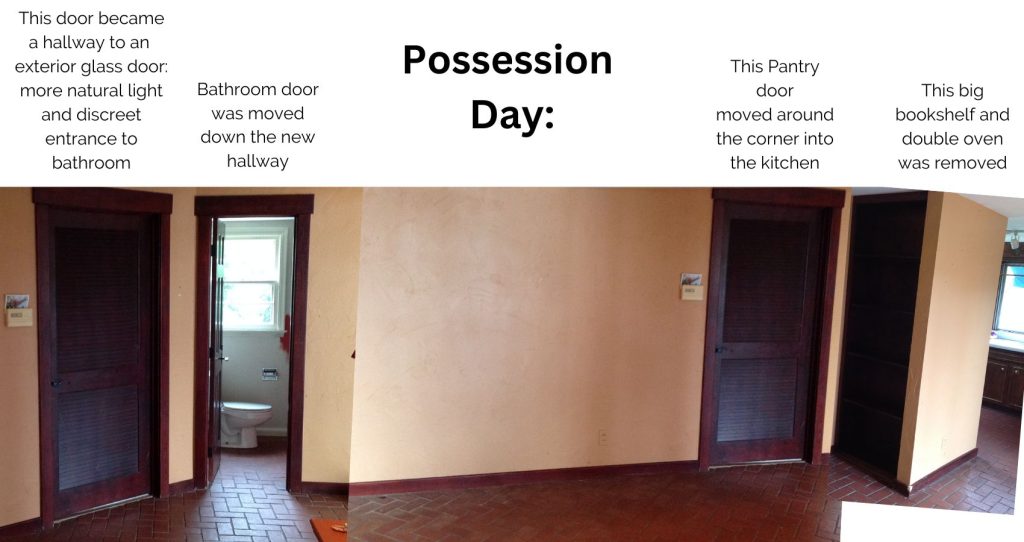
We hired a contractor to do some major renovations (kitchen, bathrooms and adding a garage) before we moved in.
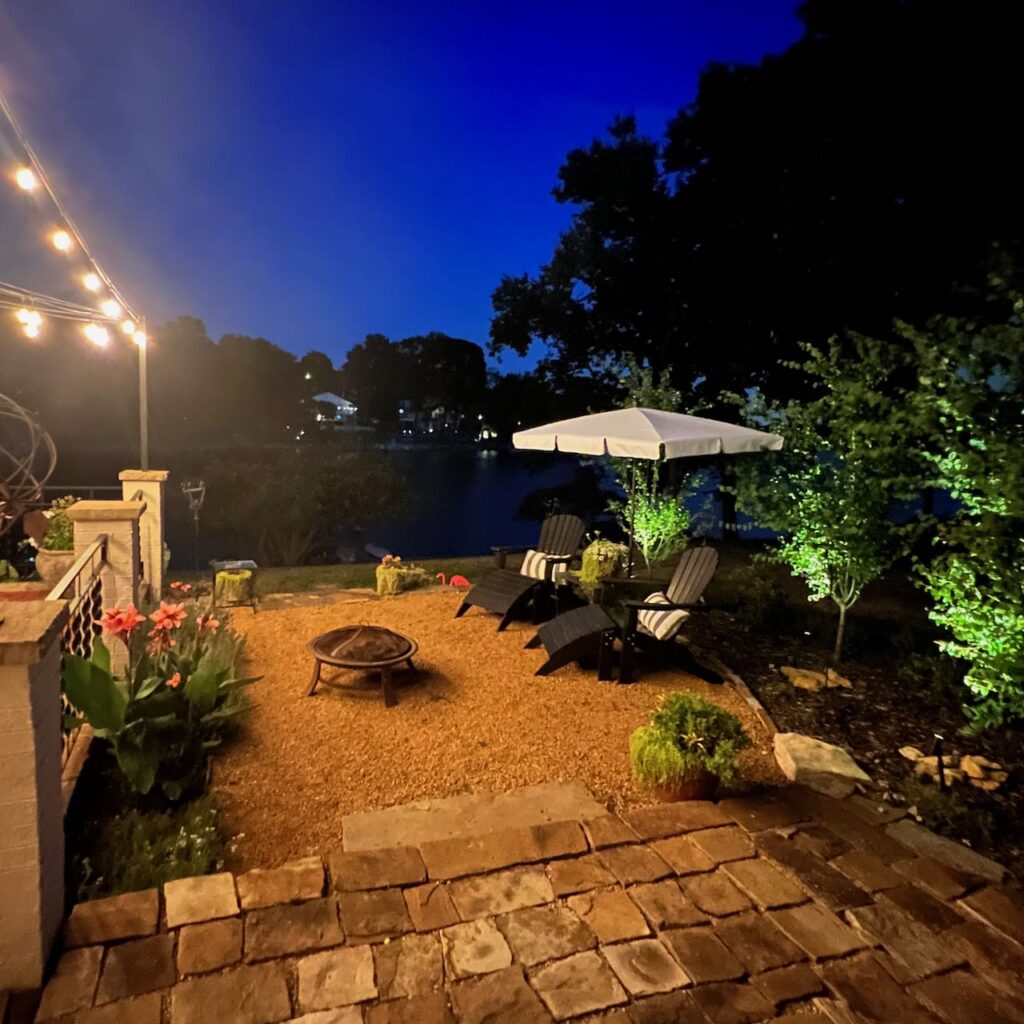
They demo’d the kitchen and everything moved except the sink drain. The relocation of everything gave us better function and style in the kitchen, and also gave us space for a casual dining area. This space bridges the kitchen, family room and patio courtyard.
There was only 6 feet of wall space between the doors. Plus,
- why would you put the pantry door outside the kitchen?
- Who would ever want the powder room right next to the dinner table?
- If the Powder Room door HAD to be there, why would you want to show off the toilet over a pretty sink and vanity?
All I can say is some crazy decisions were made 60 years ago!
The family room is behind the camera, above. The kitchen is tucked behind that big honking bookshelf and double oven cabinet on the right. Across from that is a wall of sliding doors opening to the brick patio courtyard (the same brick you see on the floor inside).
Currently-
But now, with a couple of move-arounds, we have more natural light, a tucked away bathroom, a pantry IN the kitchen and . . . . drumroll, please . . . .
14 feet of continuous wall!!!
That 14 feet is truly game-changing!
I am sooo ready to put it to work for us. And make it beautiful too!
Casual Dining Area Today
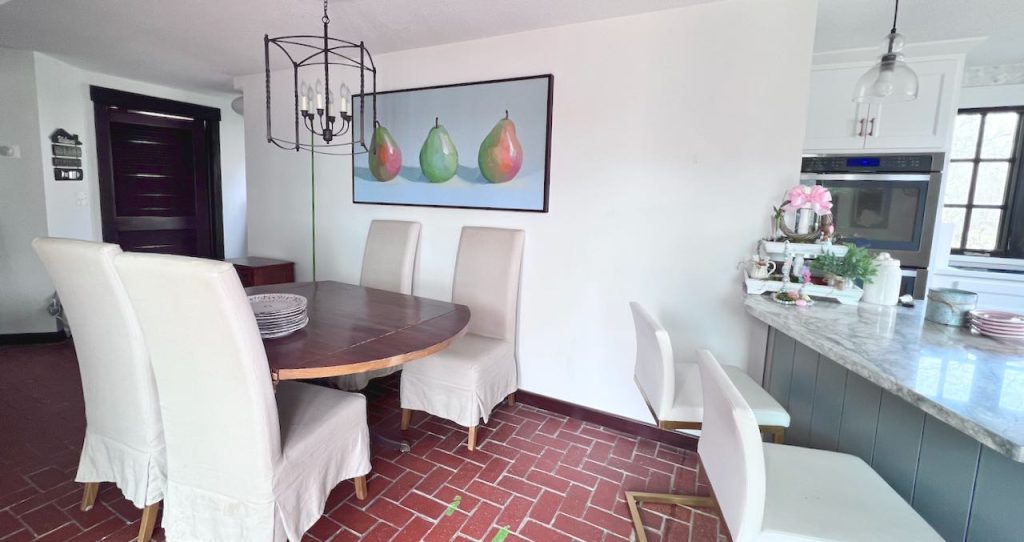
Substantially brighter, right?
And I LOVE having the kitchen opened up. and no heavy upper cabinets. It has certainly been liveable, but now we want to make it special!
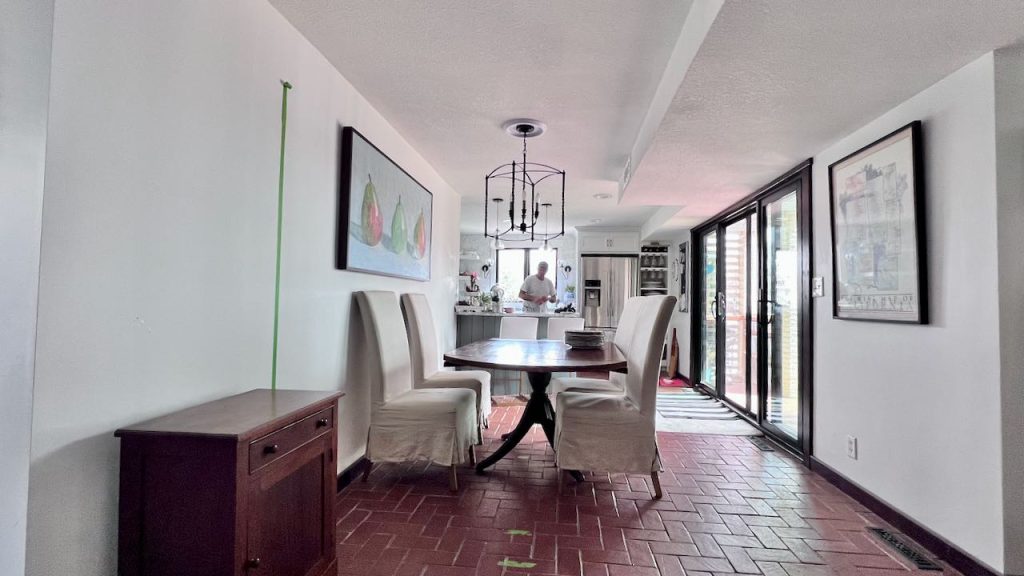
From the Family Room end you see what I mean when I say this space feels more like a wide hallway than a dining room.
Our Plan-
And This Is Where You Come In —
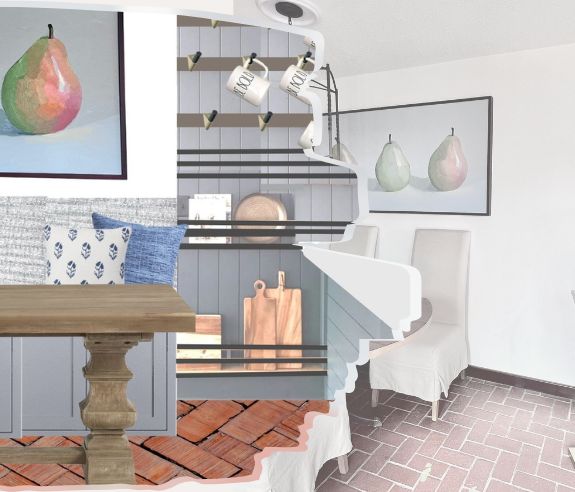
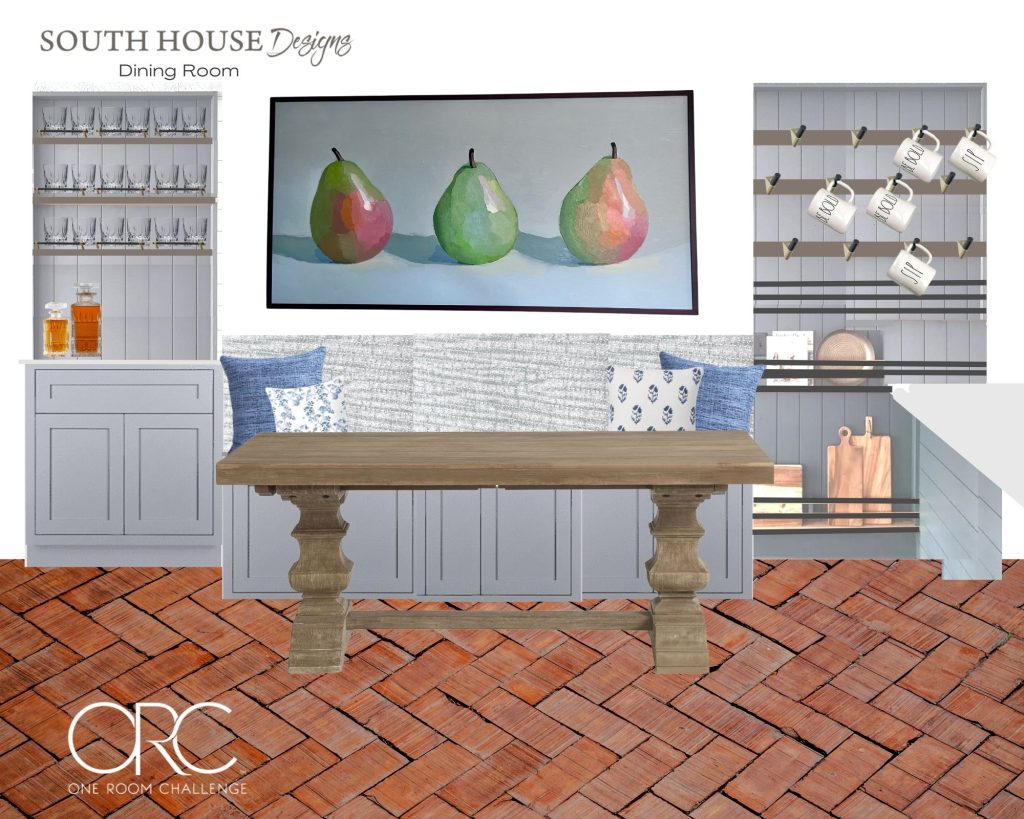
The only elements that are non negotiable is the brick floor and the Pear painting.
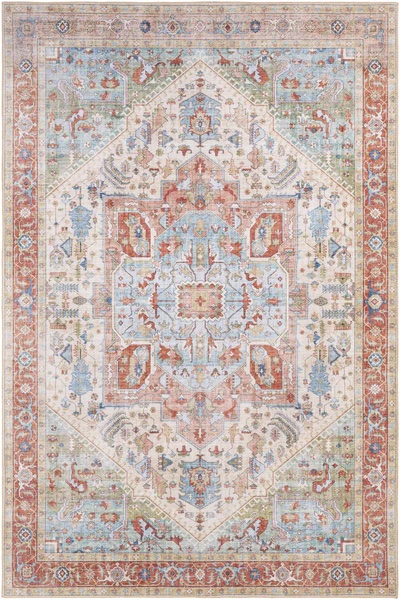
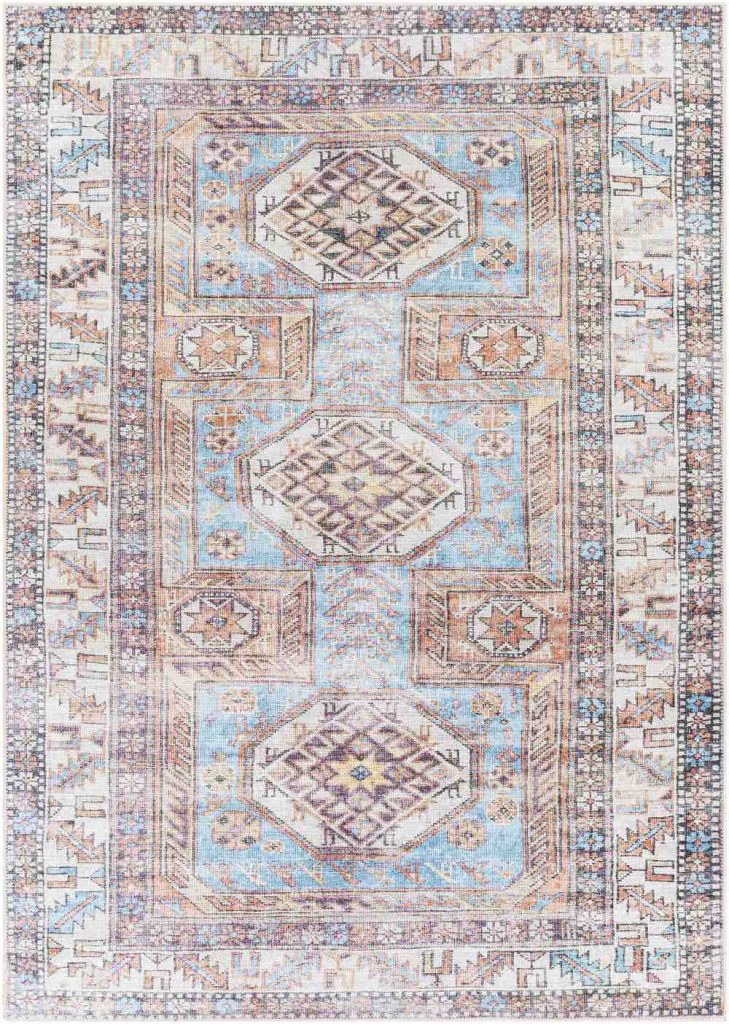
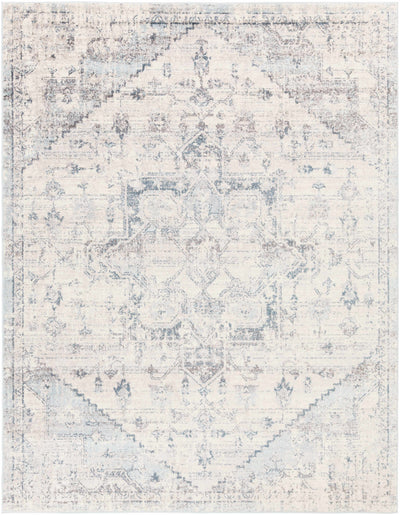
I need your input on a rug!
Yes, I know a rug is seriously less money and seriously easier to install than all the rest of the room.
But we know that an area rug and light fixtures can dramatically alter the very feeling of a room. They’re important pieces. Just adding the open light fixture over the table made a huge difference. And I may change that one out for a shorter fixture to not obstruct my pears.
Why Start With the Rug?
I always encourage my clients, friends, my followers, YOU, to pick your textile based elements first. Or an impact, inspiration piece that has the most restrictive selection. Here, it’s my pear painting.
Wall paint can be mixed in literally endless colors and shades, hues and levels of saturation. That is NOT true for couches, drapery, rugs, tile, wallpaper and paintings.
When pulling together a room, start with a basic concept of color. Pastel? Earthy? Moody? Cool Neutral or Warm Neutral? Maybe go as specific as an earthy green or a soft blue — just don’t pick the actual paint yet!!!
Having a general idea helps to narrow overwhelming choices. And that’s good.
Now you can fall head over heals for a special piece as your starting point without having to worry about whether it goes with your paint selection.
I’m in love with our pears. We. commissioned that piece last year and it still warms my heart and makes me smile every single day!
So now I need to find a rug that will compliment and happily play second fiddle to the star of my room.
The peninsula will be repainted with all the built-ins in whatever shade of probably a muted blue-grey that will work. with the painting and rug.
I am thrilled to be working with Boutique Rugs on this room!
And it would thrill me even more if you’d help me too!
Please share your thoughts on which way I should go. Fortunately, whichever rug we end up choosing will ship almost immediately. I’ll have it in less than a week, and then we can get to work picking paint colors.
Why Boutique Rugs:
- Free Shipping and 60-Day return (with FREE return shipping) Talk about no risk!
- Great prices!!!
- Easy to use website with great filters to help you find just what you need
- AND an 800 # with advisers to help you out even further
And for a big dollop of whipped cream on this Boutique Rug goodness — I have a code to save an extra 5% on any order. YES, that’s 5% in addition to any other sale pricing!!! Use my code: SOUTHHOUSEDESIGNS (that’s an easy one to remember!)
Want to see more from Boutique Rugs? I don’t blame you! Please CLICK HERE!
And click on each of the rugs above to see more about each one specifically!
I may use affiliate links in my posts. I appreciate veery much when you use one. You pay nothing extra, but I may receive a small compensation.
The Rest of the Plan
We’re building in an upholstered banquette to gain a few precious inches of floor space, plus more seating.
We’re replacing the table that was perfect for our old house, but doesn’t really work here. It will be slightly narrower than this one and grows from 5-feet t0 8 1/2-feet!!!!
The outside chairs will be replaced by a comfy bench that will tuck underneath out of the way most of the time.
The vertical shiplap on our kitchen peninsula will be repeated as the backing of our plate and mug rack on the kitchen side and the dry bar on the family room side.
Are you intrigued? if you’re not a subscriber, please do so and cheer me on through these next 8 weeks.
Thanks bunches!
Be sure to follow along on this ORC adventure. I may be coming back for more input — especially when we get to paint color. Oh and the table makeover! Oh and the bench —
YIKES! I better get to work.
Wondering more about this unusual house?
A Little Backstory:
We bought our quirky, but seriously endearing home five years ago.
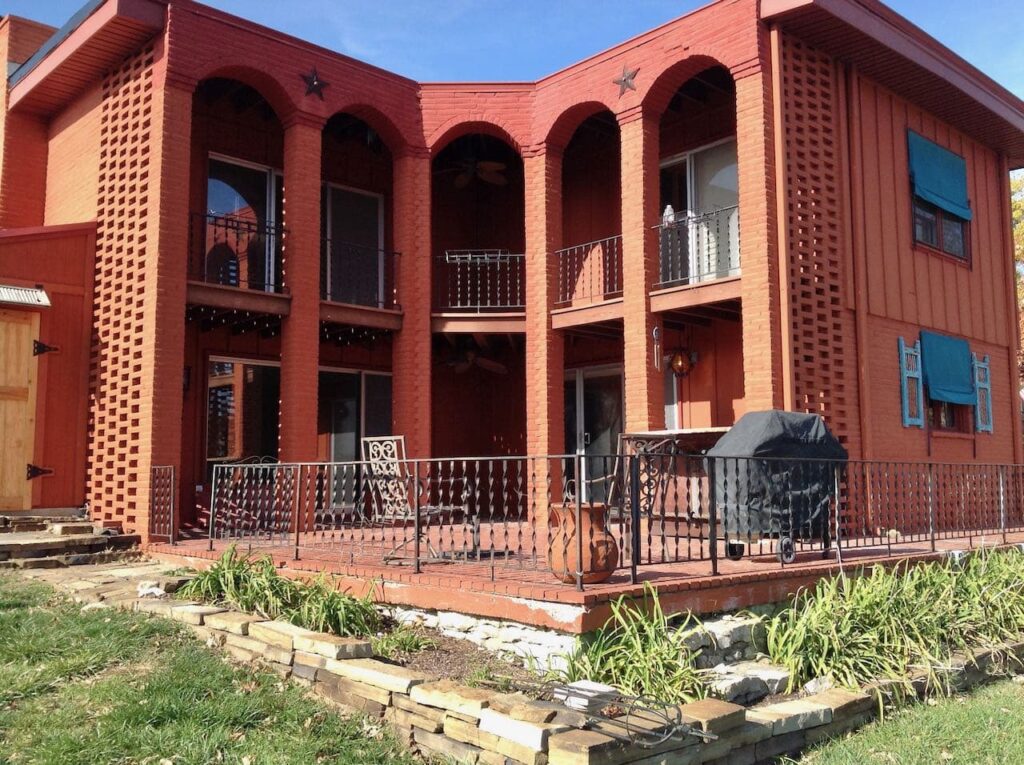
At the time, it was very, very dark and the previous owner took it in the Santa Fe direction.
That’s just not our style, and I didn’t think it was the house’s either.
Afterall, we live on a lake in a hilly section of Missouri with lots of trees and green around. Is that Santa Fe?
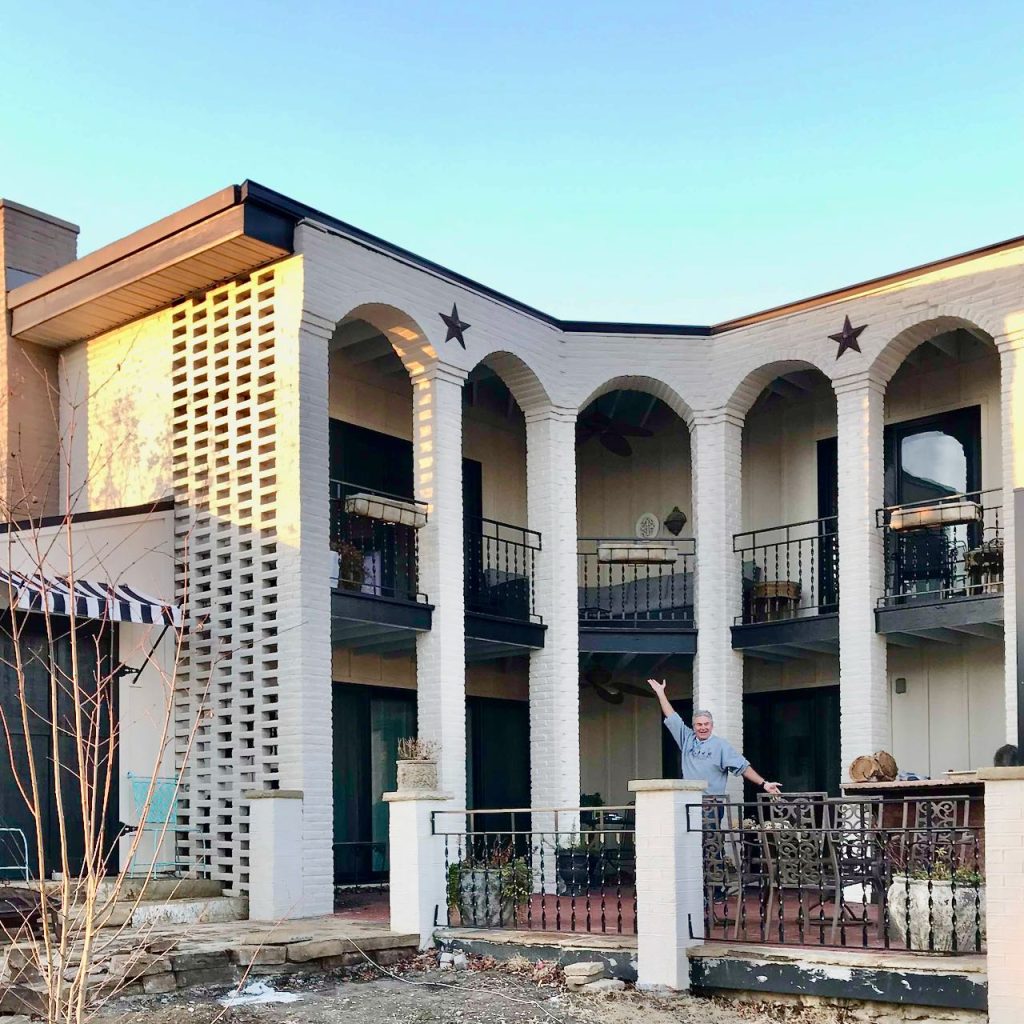
We have been stripping the house of all the terra cotta and deep turquoise that was everywhere. and bringing the house to a bit more modern Mediterranean style. You can read all about the lakeside makeover here. And our first ORC here.
How About the Dining Room? How’d it Turn Out?
Fabulous, Thank you!!!
See for yourself by clicking on any of these posts:
The Dining Rom Makeover Reveal
Building an Ergonomic, Comfortable Banquette
DIY Padded Wall Hung Backrest and Bench Cushion
Small Cabinet Bar with Open Shelves Above
Thanks so much for following along. Whether you enjoy the larger DIY projects we take on or the smaller decor crafting projects, I appreciate you being here. Drop me a line and let me know something about you and what you’d like to see more of.

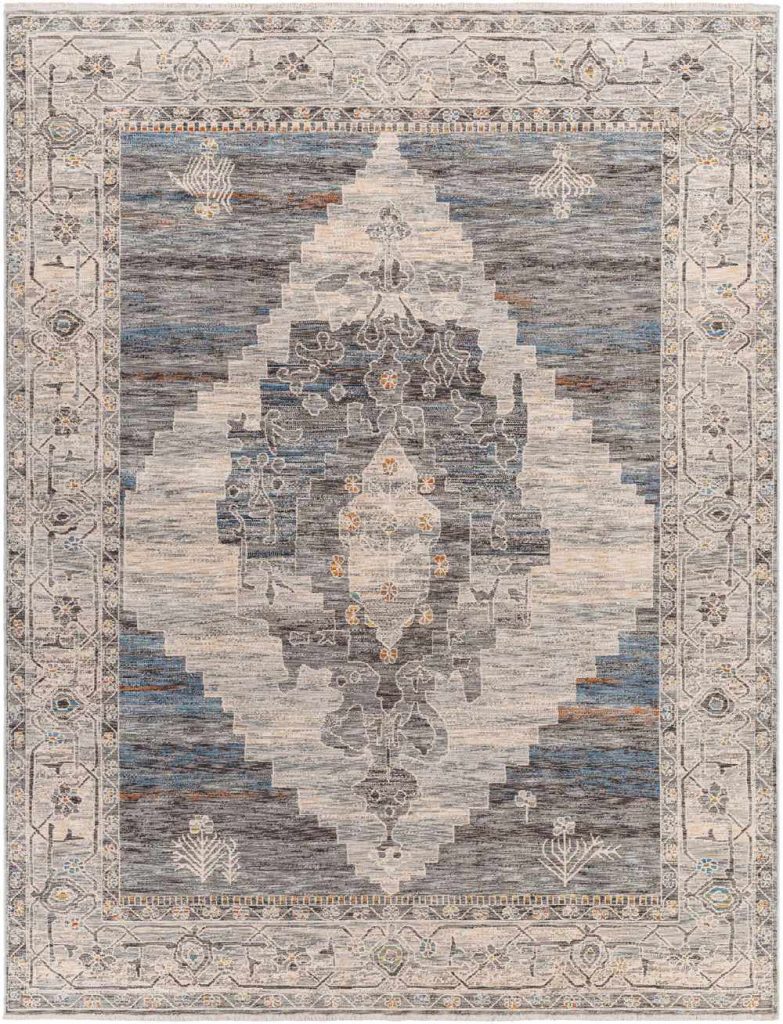
I think the Croy rug would be a good choice. It brings in other tones from your pears while calming down the red of the brick. A classic look. Looking forward to seeing the results of your vision.
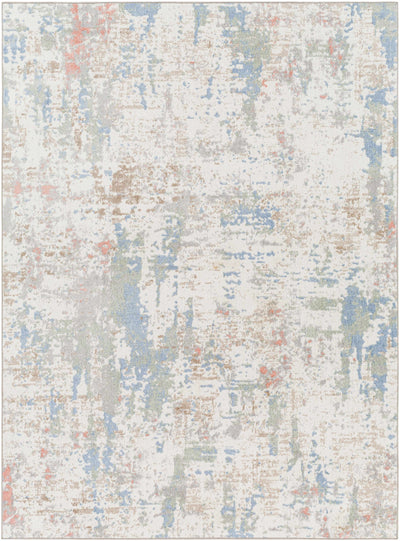
#5 Ahava brings in a bit of green to tie in with the pear painting and a bit of red to tie in with the brick floors and a bit of blue to tie in with the cabinetry and the blue background of the pear painting.
You are sooooo right on that Kim! That’s exactly why it made the first several rounds off cuts. I just wish it were a bit darker, or was a washable rug. I am so appreciative of your opinion. That you noticed the color play says a lot.
Your pears are beautiful. I love them, too!
Rug #5 seems the best choice. The others are all pretty, but the irregular pattern in #5 would be a great contrast to the geometrics of the floor.
That’s my vote.
And a great vote Michelle!!! I usually go the more traditional style rug, but here, I thought an abstract might be the answer. I just wish it was a bit darker. It will be under the dinner table and the glass doors right across from that wall is the major thoroughfare to and from the patio and lake. YIKES!
Can you post a simple floor plan of the area with a bit of the adjoining areas? It would help to get a better feel for the context. Love that pear painting and the brick floor. Both are definitely keepers! For the rug, I like #1 Selbyville. It has enough of the brick color to relate to the floor and the blue relates to the background of the pear art. The pattern is a good size to work with the brick and also to hide the messiness of everyday life. It will definitely define the eating area in the best way. Hope there is more fun than agony in the ensuing make-over!
You make some great points Kim! I picked that one to pick up the colors of the pears. Just wondering if it will end up fighting with the pears. But I so, soo, sooo appreciate your input!
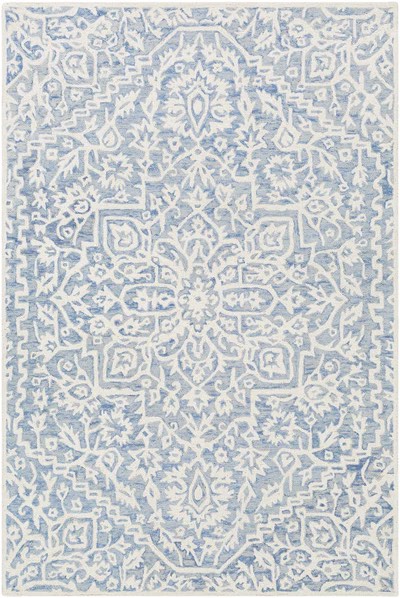
I like #3 and #5. Depending on your color choices, I think one of these would work perfectly.
Thanks so much Dwebbie. I really appreciate your input. You gravitate towards the lighter colored rugs too. My husband justt keeps pointing out that it’s under the dinner table and also right. in front of the main traffic lane to and from the lake.
I love your pear painting! And all your plans are so perfect, except for the bench. I understand that it can be pushed in to allow for more walking room, but from my own experience with bench seating, I know there are disadvantages. Benches are NOT comfortable, especially to anyone with back issues. And they are hard to get in and out of. You need leg room to swing yourself around and that’s difficult if others are sitting on either side of you, or difficult for an older person. Why not choose chairs that can be pushed in to be out of the way? My only comment on the rugs is that I think a smaller design would be best since the pears are very large. I can’t wait to see how this all comes together!
That sounds so exciting Diane! I’ve always loved the ORC and I can’t wait to see how you re-do your “hallway” dining room. I’m definitely cheering you on! I think all those rug choices would be great, but I’m leaning with numbers 1 or 2. Good luck and thanks for sharing your exciting project!
Thanks Barbara!!! I really appreciate your input. I love those two also, a it concerned whether they would try to steal the spotlight, but glad they have your vote.
Hi Diane,
Sorry to hear about your finger…….praying it heals well this time.
Looking forward to seeing your new dining room, but take good care
of that finger and hand. No Rushing!! lol
Have a lovely Sunday,
Blessings,
Nellie
Thanks so much Nellie! I really appreciate your prayers and cheering me on.
I like me # 5 Ahava. It compliments with the color, it is not too busy, and it doesn’t offer a distinctive pattern to conflict with the pears.
I think I am odd man out, but I vote for #1. Sometimes asking makes it even harder, I hope it helped. LOL
This is going to be great! Looking forward to finished pictures.
Thanks bunches Deb. I appreciate all the cheerleading I can get. I’m really looking forward to getting it done so I can take the finished glamour shots.
Definitely rug #1…. It’s going to be a fun project!
Thanks Suzy! I’m so excited about how it is turning out.