
Amazing Makeover: Thrifted Basket + Joint Compound + Pretty Napkins = Faux Pottery Magic!
Somebody had to be the guinea pig. The basket volunteered. New technique, big gamble, delightful results. Come see!
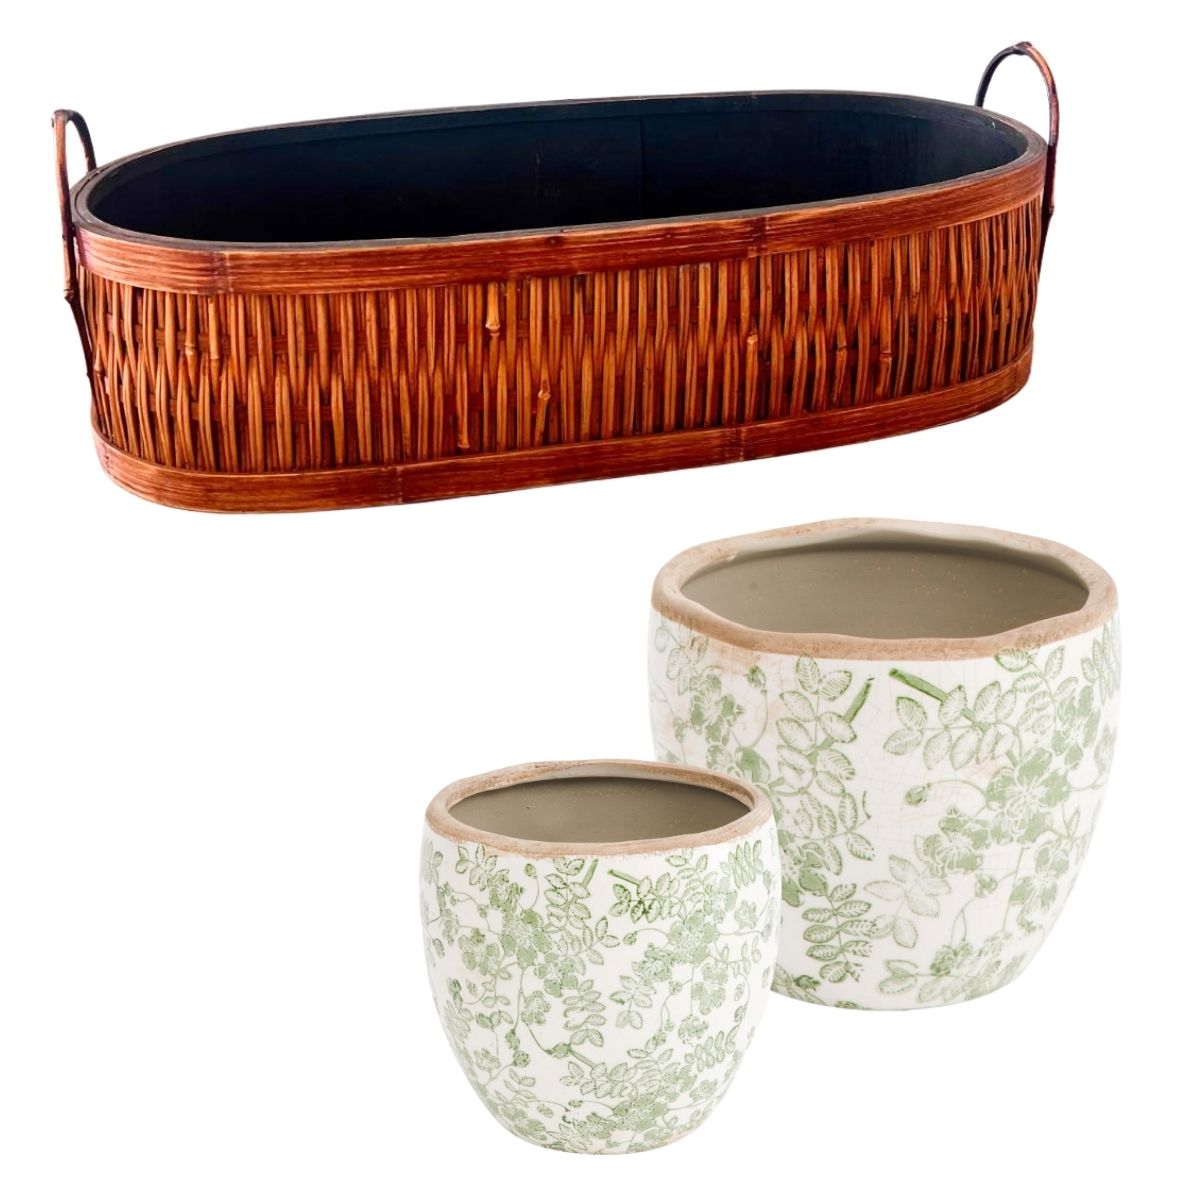
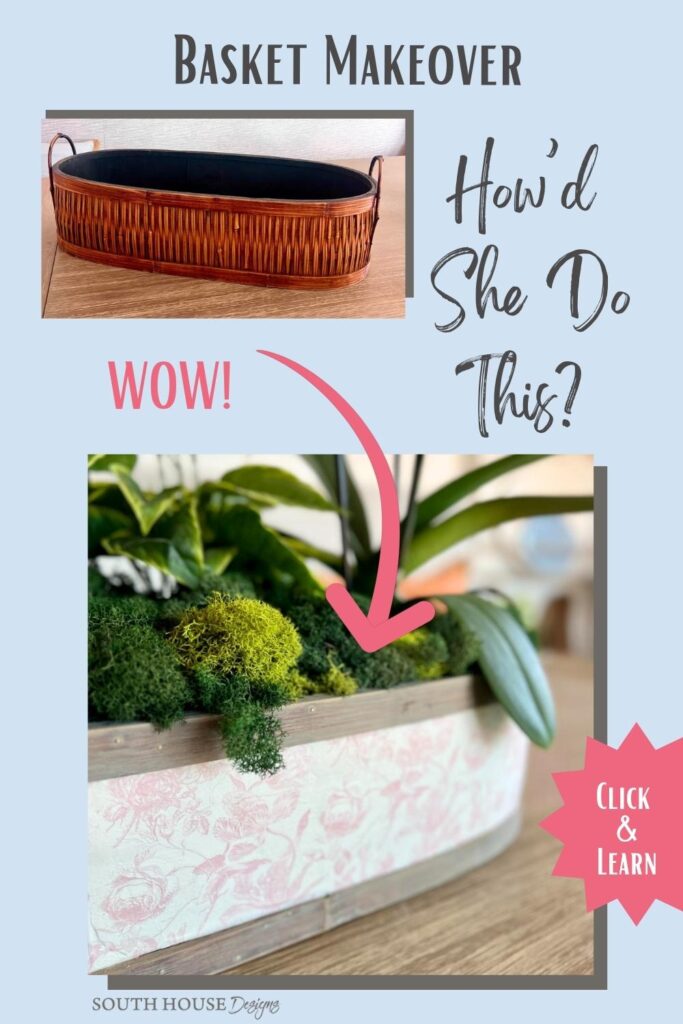
Have you ever thrifted something with great bones but zero personality? That was this basket. Oval, the perfect scale for our dining table, great shape — but the color was to much and the look was just… meh. An easy enough fix, right? A little spray paint and done.
Except once it was sitting in our house, I could see it wanted more.
Here’s where this thrift store basket makeover gets a little unexpected: instead of wanting more texture, I actually wanted less — and a soft, subtle pattern in its place.
I’d been low-key obsessed with these artisan pottery pieces, the kind with delicate toile or floral motifs in the palest, most muted tones. They have this beautiful handcrafted, old-world quality that feels collected rather than decorated. I wanted a larger version, an unusual shape, and honestly — I wanted to make it.
So this thrifted $4 bamboo basket became my canvas.
The technique that made it possible?
My secret weapon: joint compound. If you’ve followed along here for a while, you’ve seen me pull this stuff out before in other joint compound crafts — like these large “rustic pottery” vessels. or these wax and lavender eggs.
It’s humble, it’s cheap, and it does things most crafters never think to try. Combined with decoupage and the right paper, it transformed an ordinary woven basket into something that genuinely looks like it belongs in a charming display — not on a thrift store rack.
Let me show you how.
The links in this post may include affiliate links, which means if you purchase anything using these links, you pay no extra, but I may receive a small commission that helps keep this blog running. I truly appreciate you using affiliate links whenever possible. Please know that I will never recommend a product I do not believe in!
Ready to jump right to it?
Here’s a Quick How-To Card for Confident Crafters
If you’d rather feel like I’m right by your side, stepping you through it — no problem, keep scrolling.

Surprising Basket Makeover
Materials
- Joint compound
- Painter's tape
- White paint (optional spot coverage)
- Decoupage medium (Mod Podge or similar)
- Paper napkins or towelettes in your chosen pattern, see note in Detailed Section
- Sealer of choice
Tools
- Basket (mine is bamboo oval: 22"L x 5"W x 5"H)
- Plastic sheeting (to protect your work surface)
- Straight-edge scraper or old plastic card
- Bowl of clean water + old towel
- Detail sander, sandpaper, and dust mask
- Paint brush
- Rotary cutter, cutting mat, and straight edge (or scissors)
- Plastic kitchen wrap
- Exacto knife
Instructions
- Tape off any edging, handles or details you want to preserve
- Apply two thin coats of joint compound to basket body; smooth and dry between coats
- Sand smooth; wipe clean (outside and wear a mask!)
- Optionally, touch up with white paint if needed or paint with a different base color
- Determine your napkin pattern placement, optionally pattern-matching sections
- Decoupage napkin panels onto basket using plastic wrap to smooth
- Let dry; trim excess with Exacto knife and touch up edging if needed.
- Seal as desired.
Detailed Basket Makeover With All My Hints and Tips:
A Note About Your Basket — and Your Napkin Choice
This works beautifully on baskets with a fairly tight, flat weave. Loose, chunky, or deeply textured weaves need significantly more compound to fill in.
Not all baskets are created equal, and that matters when choosing your napkin pattern, too.
If your basket has flat vertical sides — meaning the walls go straight up and down rather than curving — you can use a structured repeat, stripes, or even plaids. And pattern matching like I do in Step 5 is very achievable.
If your basket curves both around and top to bottom, an allover random pattern is your best friend. It drapes and smooths naturally without fighting the shape. Most baskets fall into that curved category, so when in doubt go random!
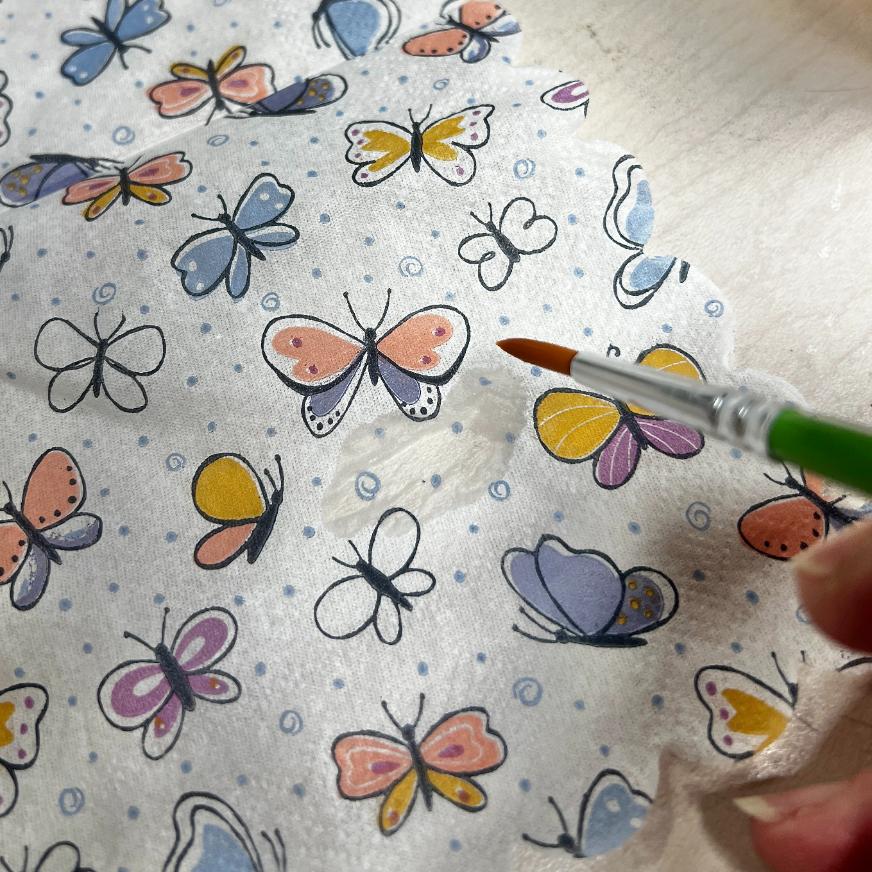
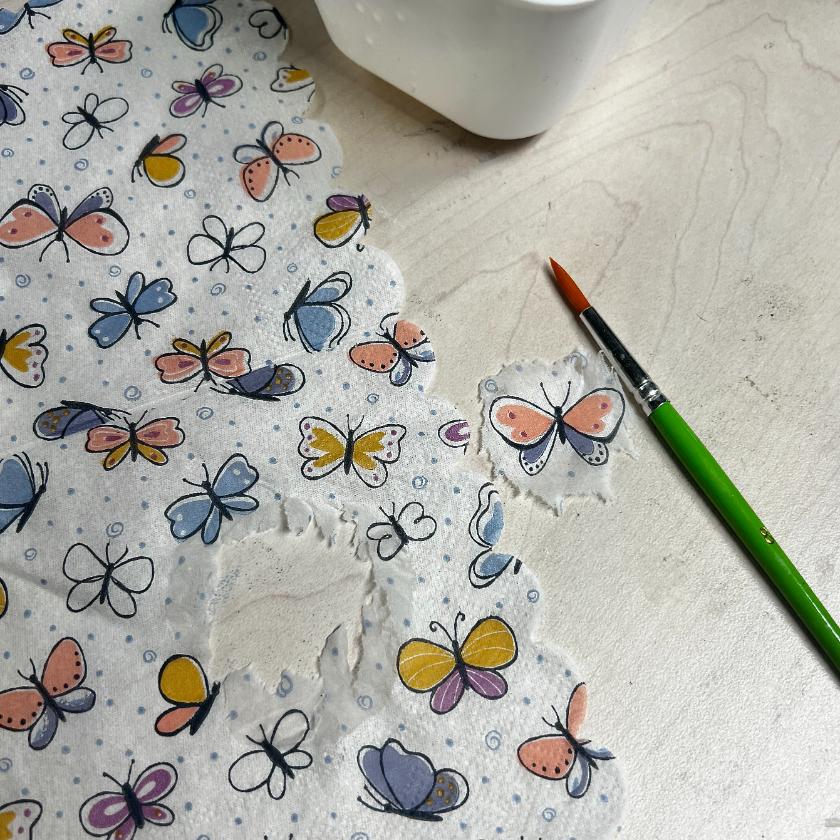
You can also separate the motifs of your napkins and spread them out or create a border. You’re the creative maker, you get to decide. However, when separating motifs, Do NOT cut apart the motifs with scissors.
PRO TIP: I always use a narrow paintbrush dipped in water and draw an outline around the motif then gently pull apart on the wet line. The soft edges disappear using this method.
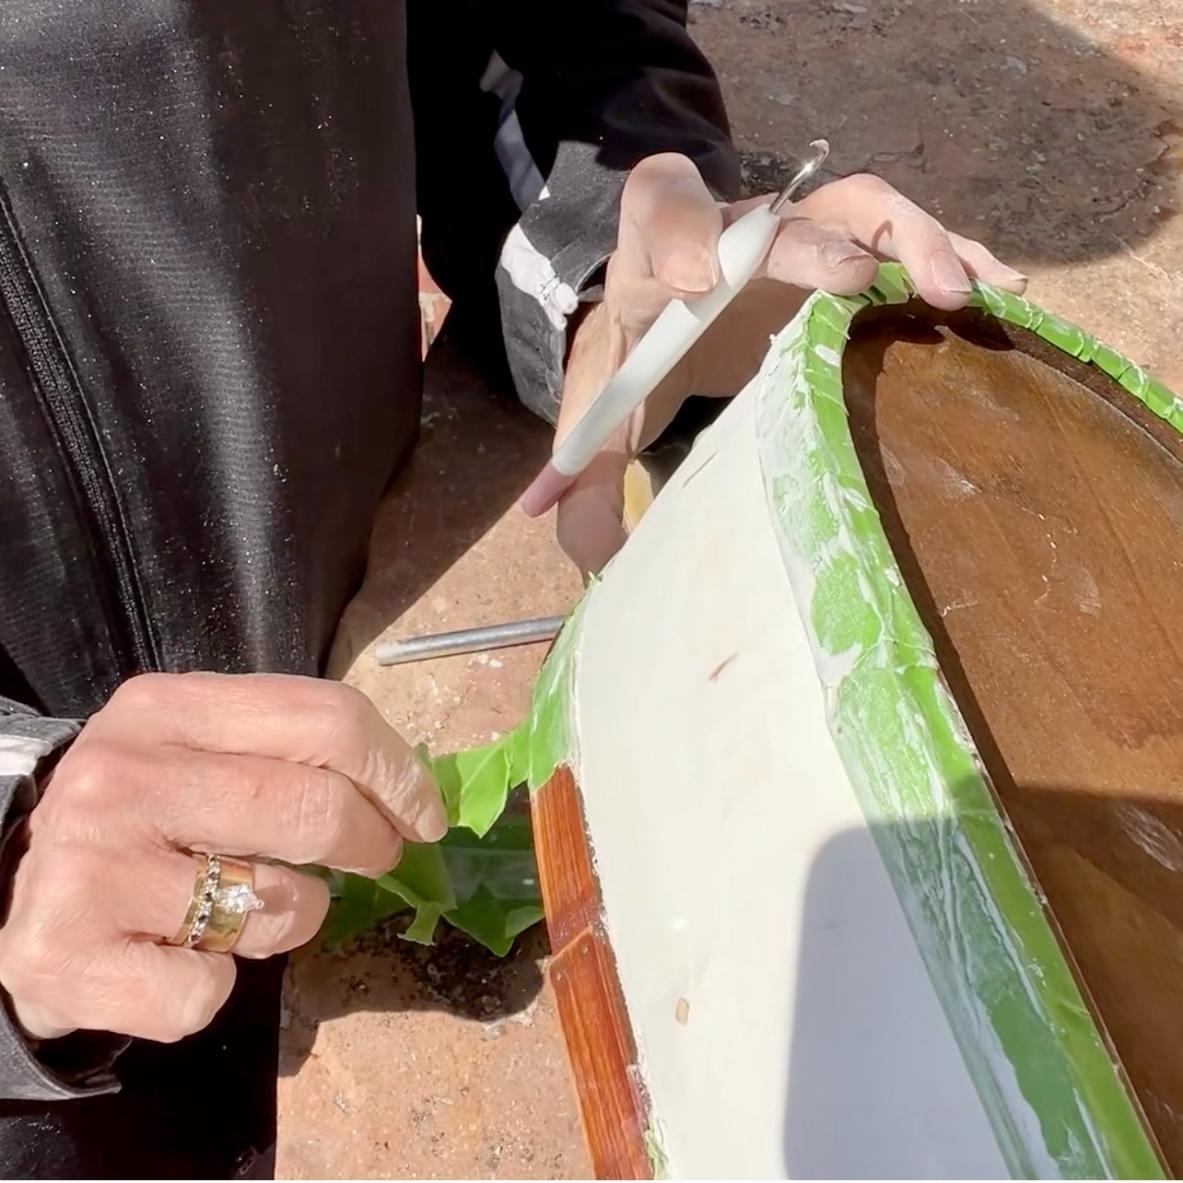
Step 1: Tape Off and Prep-

Before you touch the joint compound, tape off the bamboo edging and handles. You want those surfaces protected — JC where it doesn’t belong is just extra cleanup work you don’t need.
Lay down your plastic sheeting, or newspaper at a minimum. This stuff is messy in the best way.
Step 2: Apply the Joint Compound
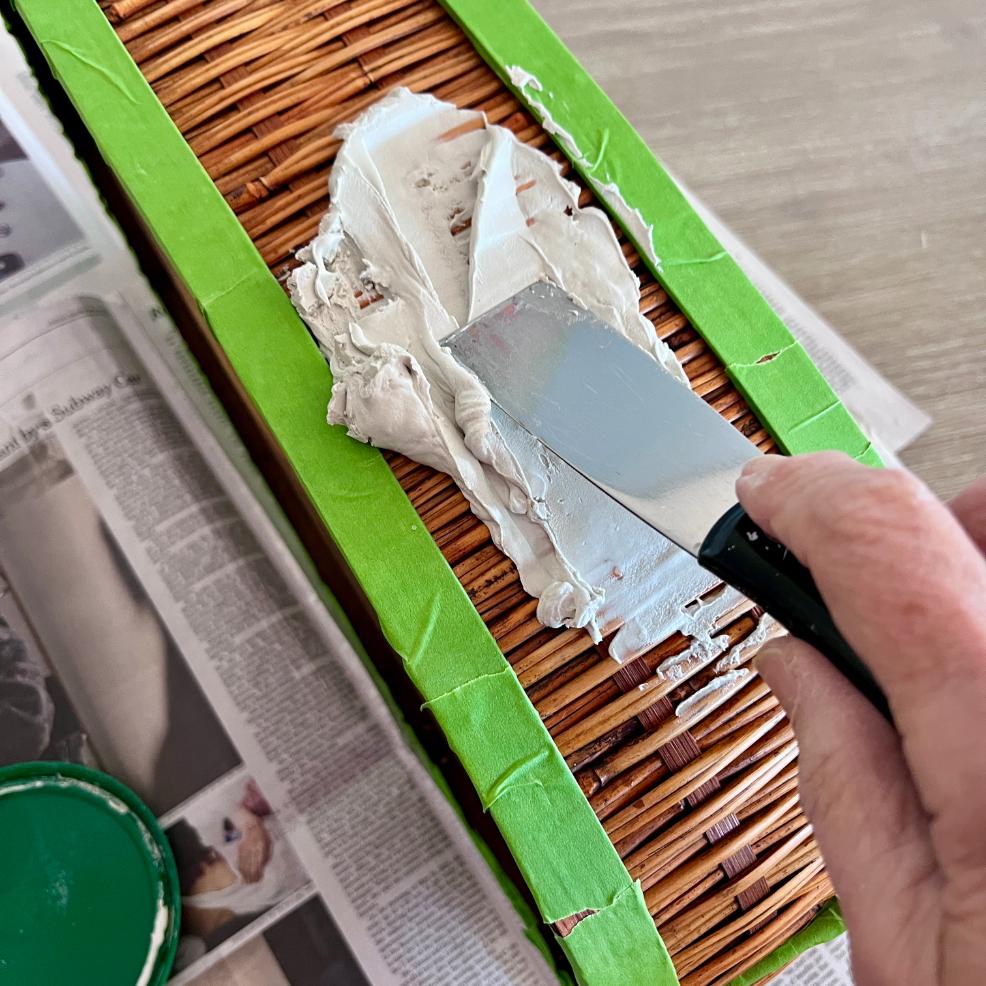
Give your joint compound a good stir to loosen it up. If it feels stiff, you can add the tiniest dab of water — and I mean tiny. Too much water changes the consistency and the way it dries.
Using your scraper or even an old plastic card, spread a thin, even coat over the woven basket body. You’re filling in that weave and creating a smooth-ish surface. Don’t stress about perfection on this first coat — it doesn’t have to be flawless.
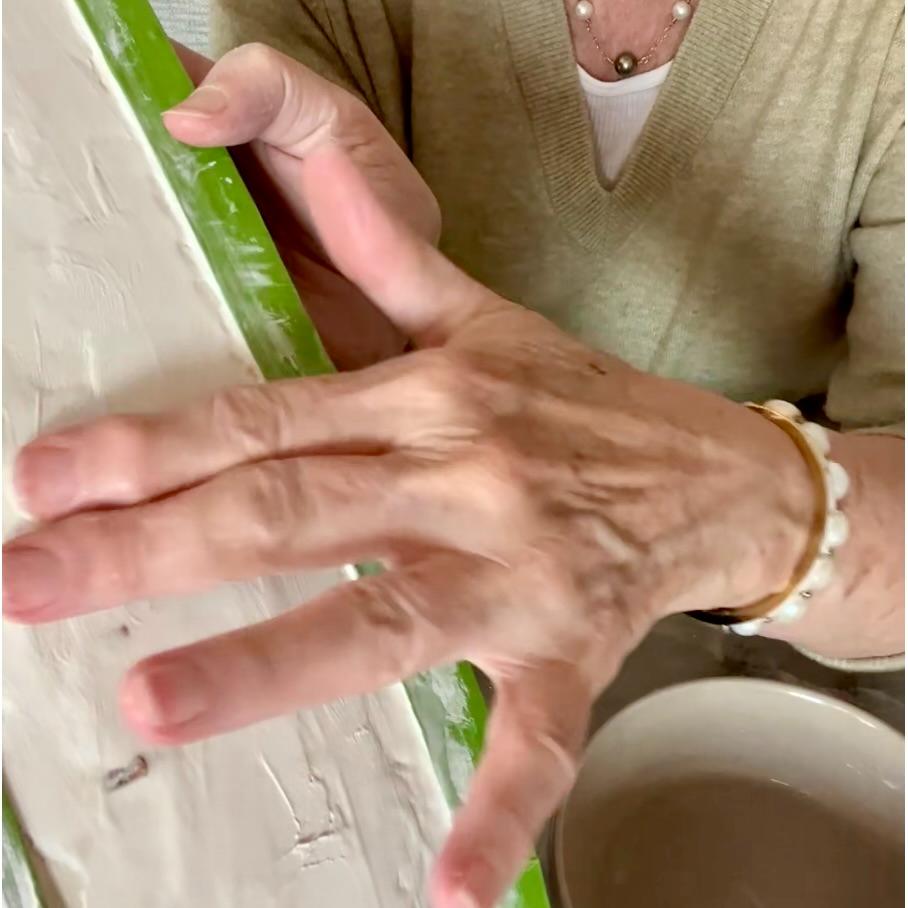
Pro Tip: As the first coat begins to set up (not fully dry, still cool to the touch), dip your fingers in your water bowl and gently smooth out any ridges or scraper marks. It’s almost like working with clay at this stage.

Once the first coat is fully dry, add your second coat. Same process, same smoothing trick as it starts to set. You’re building up enough coverage to obscure the weave entirely — that’s the goal.
Pro Tip — Drying Time: Don’t rush between coats. Depending on humidity and coat thickness, expect anywhere from 2–4 hours per coat, or let it go overnight to be safe. Joint compound that isn’t fully dry before the second coat can crack or peel.
Step 3: Sand and Clean Up
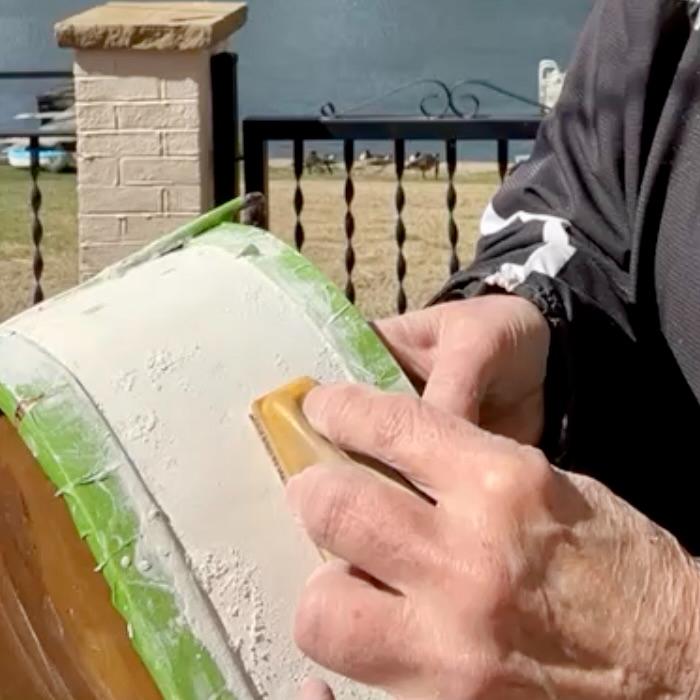
Once completely dry, head outside, put on your dust mask, and sand the joint compound surface.
I wanted a little bit of imperfection — that slightly uneven quality that reads as handmade and old — so I didn’t sand to glass-smooth. You get to decide your finish.
When you’re through sanding the joint compound, remove any painters tape.
If you plan on adding paint or stain to the edges or handles, now is the best time to sand them too for any prep they may need.
Wipe everything down thoroughly to remove all sanding dust. A barely damp cloth works well; just let it dry completely before moving on.
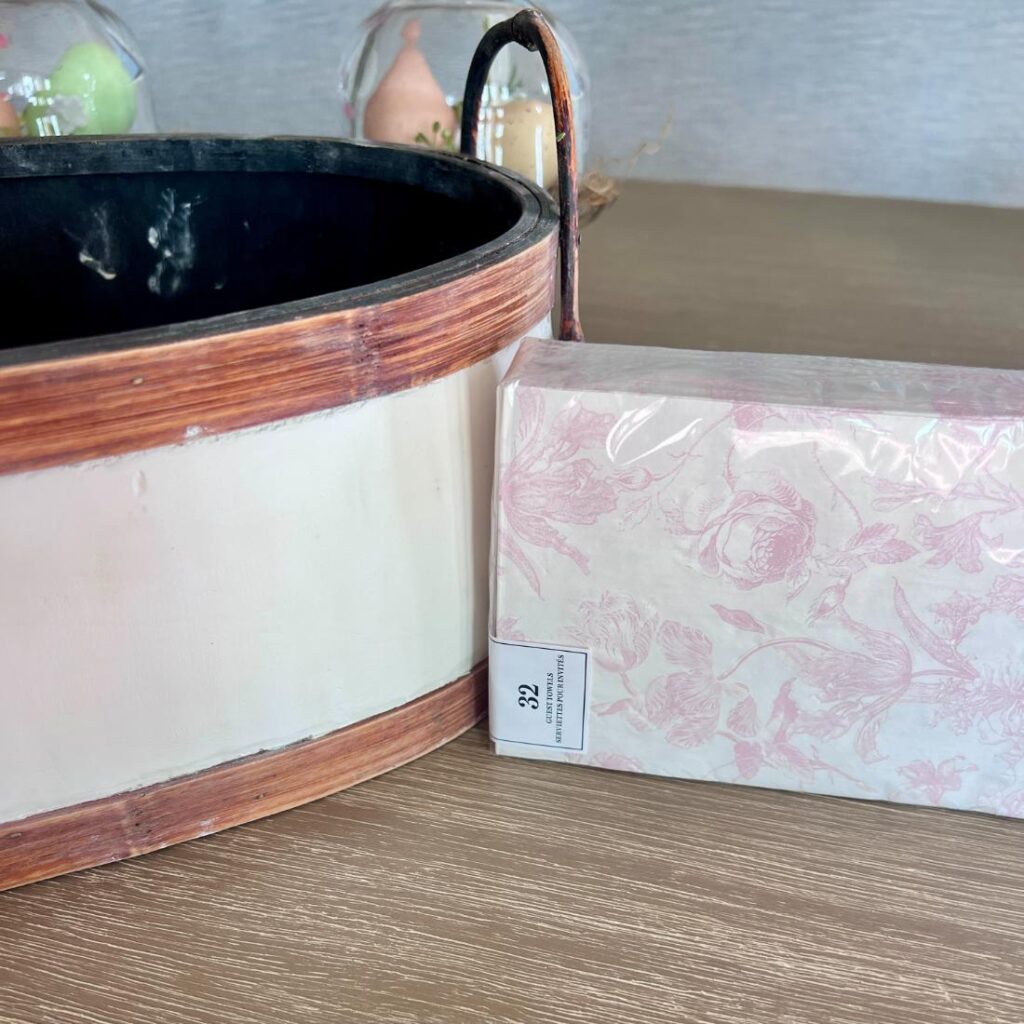
Step 4: Optional White Paint Layer and Changing the Color of the Edging-
Take a good look at your basket in good light. If there are any spots where the original basket color is peeking through and looking distracting, now’s the time for a quick coat of white paint. I had a couple of areas that would have driven me crazy under my pale pink design, so I took the extra 10 minutes. Worth it.
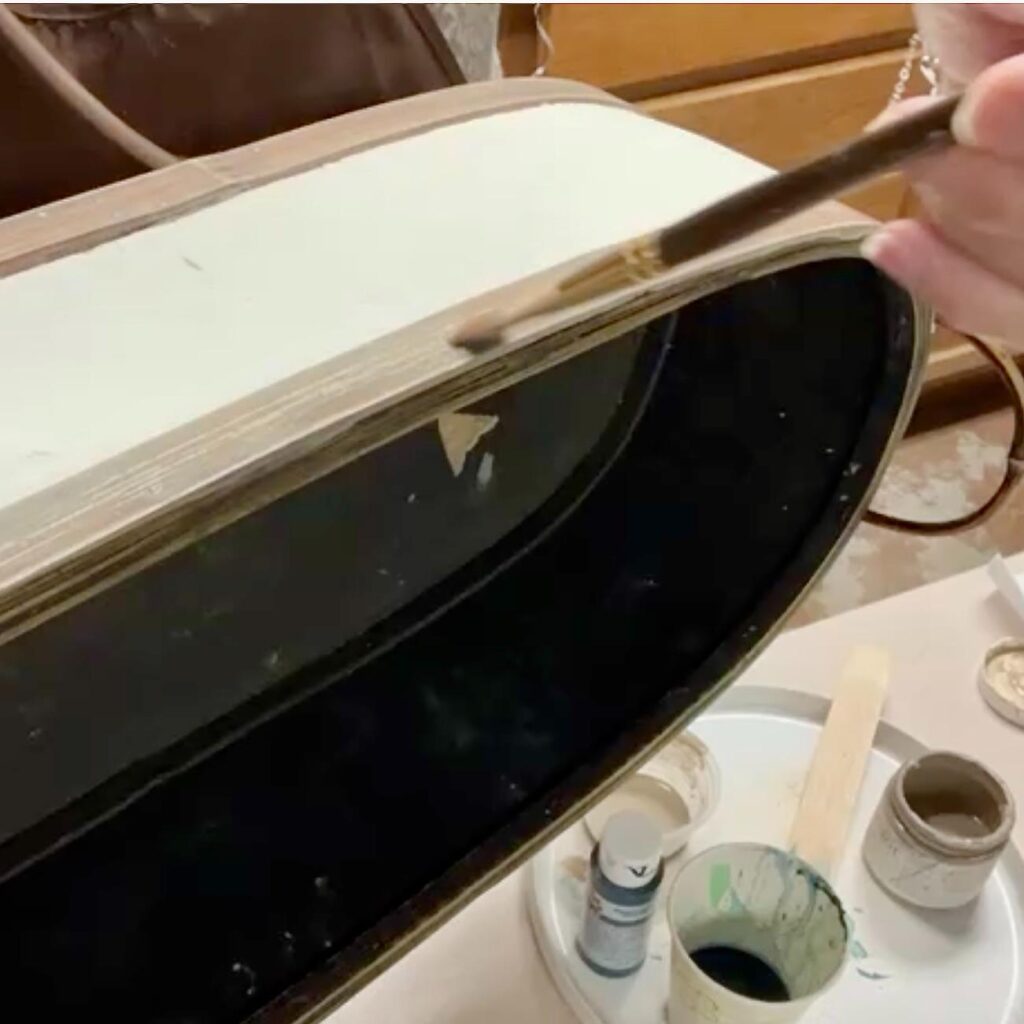
Then, I also did not care for the color of the original basket edging and handles.
So I minimized the orangey tinge with a wash of blue green craft paint. Does that surprise you? It’s an easy fix and included in my color theory tips in my Creative’s Toolkit.
Would you like all my craft room tips? The Creative’s Toolkit is available free:
Many Thanks!!! Now back to our basket makeover:
I followed the blue/green treatment with a wash of Jolie Paint Matte in cocoa.
Step 5: Prep and Optionally Pattern-Match Your Napkins-
This is where decoupage with napkins gets fun — and a little puzzle-like, in a good way.
First, a quick note before you reach for your scissors: this pattern-matching method is designed for flat-sided baskets or trays. If your basket has curved sides, skip the matching steps and choose an allover random pattern instead — it’ll drape and smooth naturally without fighting the curve.
For flat-sided baskets, if you want a continuous pattern, here is how to achieve that look.
First, trim off all the perforated edges of your napkins or towelettes.
Now separate the plies. Standard decoupage rule is to remove all but the printed top layer.
However — after doing my first side that way, I tried only removing the loose bottom ply on the second side, and honestly? The finished result looks identical, and it was easier to handle. Do what works for you.

Pro Tip — Separating Stubborn Plies: Take two pieces of tape. Fold about 1/3 of each onto itself sticky to sticky to create a handle. Place the remaining sticky ends on each side of the same corner. Now hold onto each handle and pull apart to get started. Works like a charm.
Now for pattern-matching a continuous run of napkins:
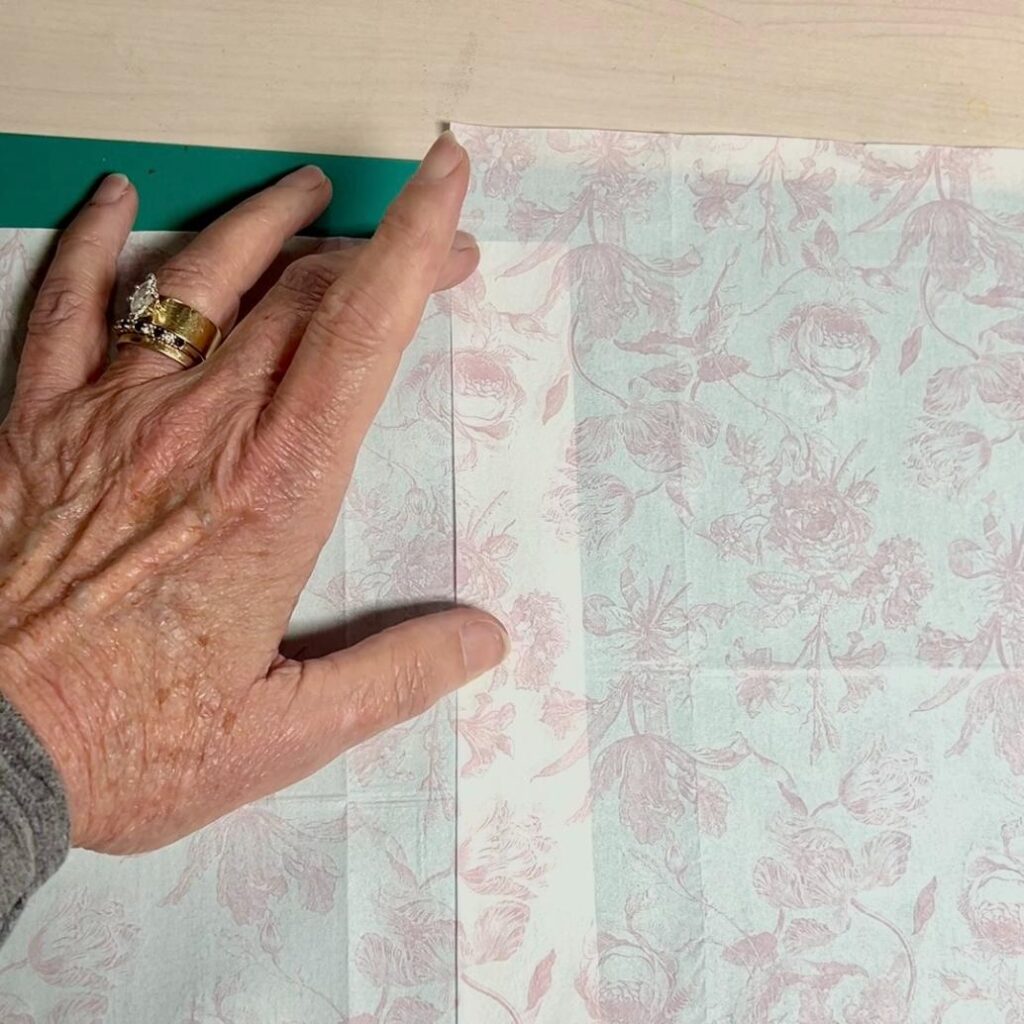
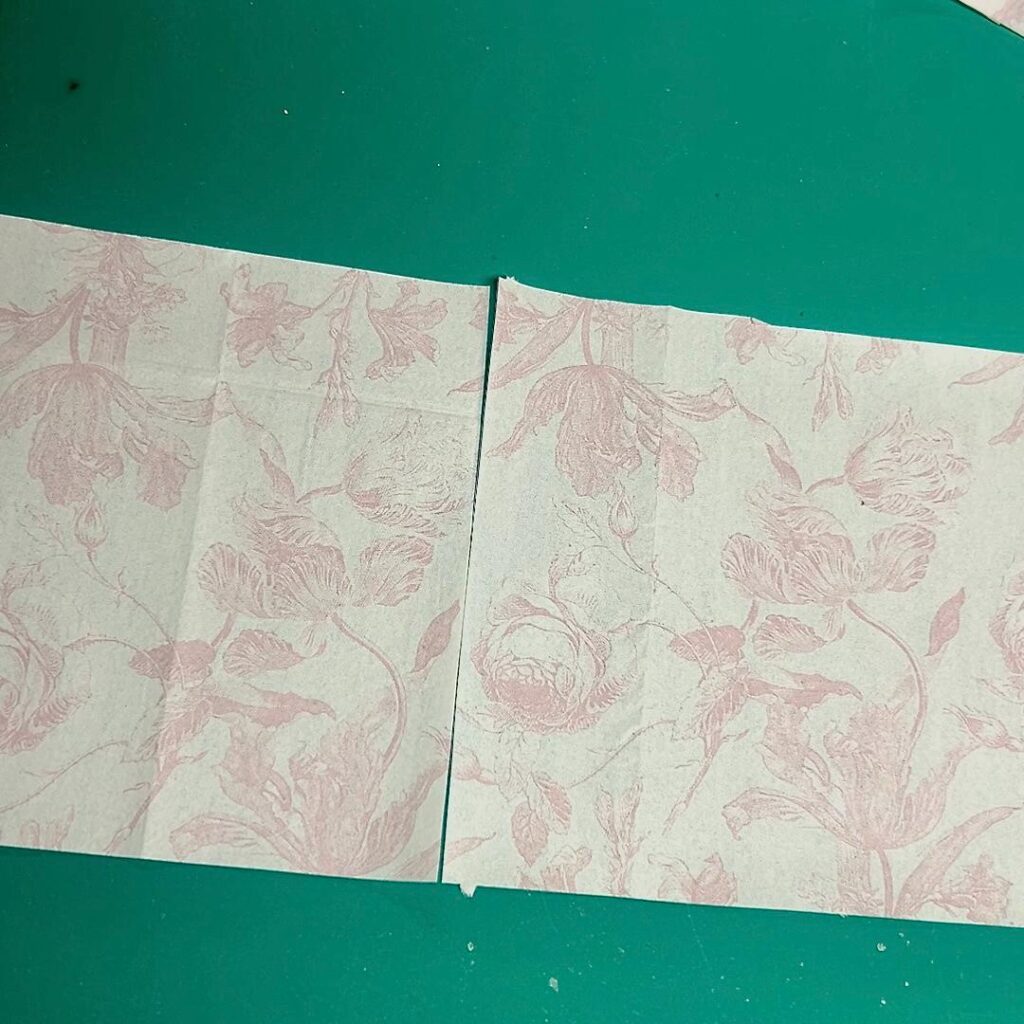
Each side of my 22-inch basket required three towelettes. My goal was a continuous, seamless pattern across the full width:
- Find a repeating element in the pattern and line up your napkins so those elements align, one overlapping the next. NOTE: It’s not like wallpaper, Your panels will overlap and the tops and bottoms will not align.
- Repeat across as many napkins as your basket width requires
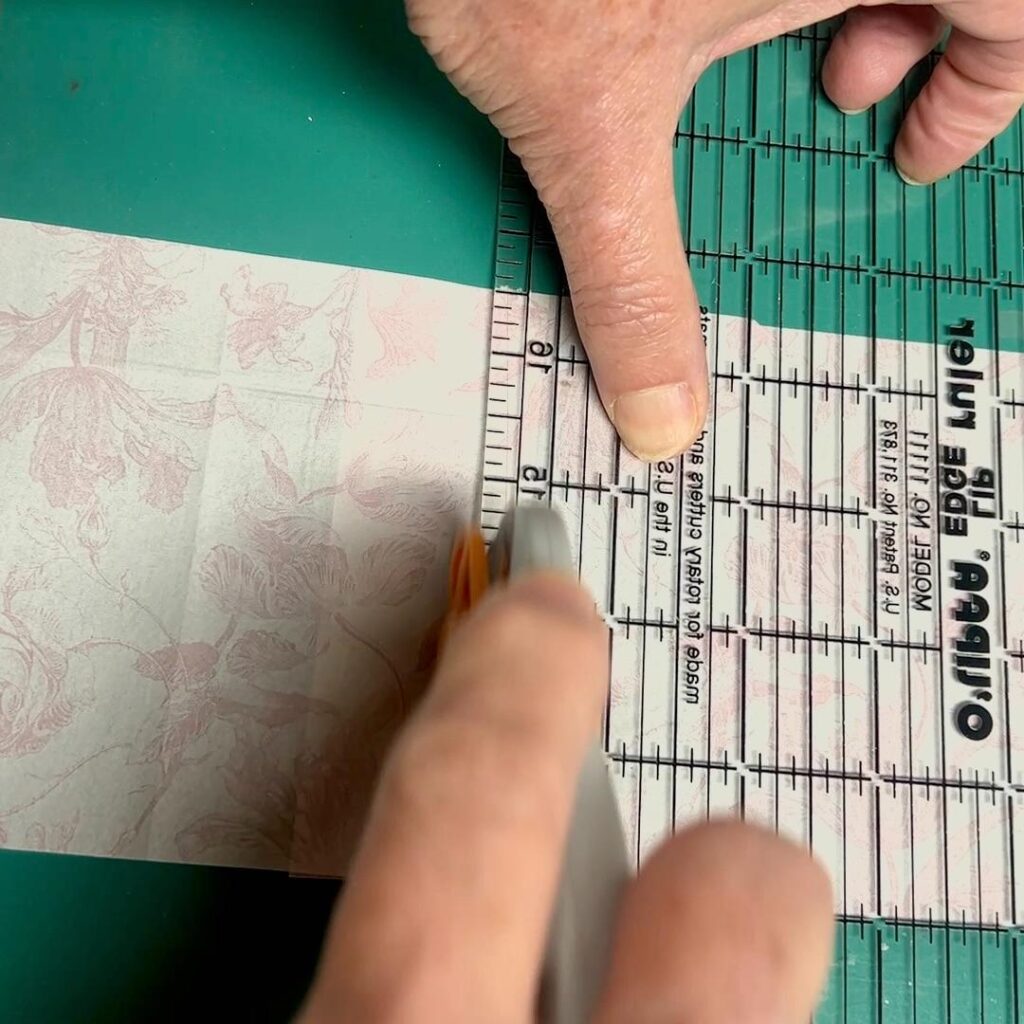
- With your rotary cutter and straight edge, cut the bottom edge straight across all napkins at once
- Cut the top edge the same way, leaving about an inch of extra
- For the vertical seams where panels will meet: with patterns still aligned, lay your ruler through a section that’s mostly background and slice through both layers at once. Remove the trimmings — your pattern should now match up perfectly at every seam
Step 6: Apply the Panels-
Apply a smooth, thorough layer of decoupage medium to a 4–6 inch section of your basket.
Start with the bottom edge — position your napkin panel carefully along that bottom line first, then smooth upward and outward. If you are applying allover random, you can start in the middle and spread outwards.
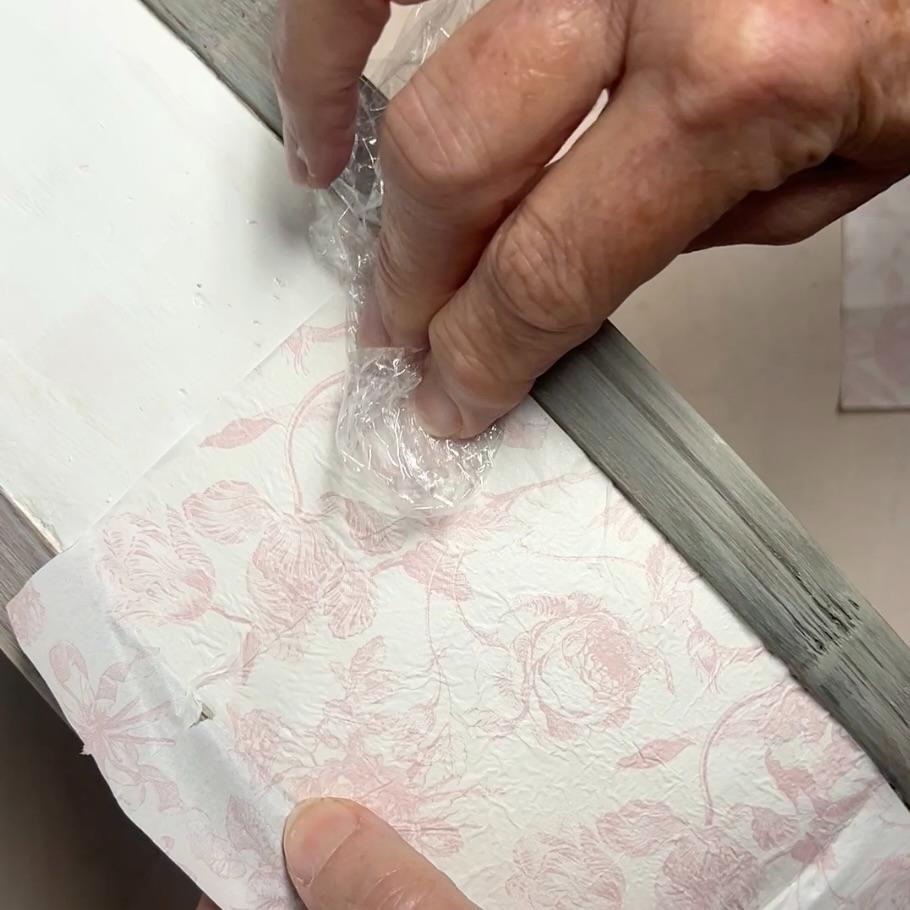
Here’s where your plastic kitchen wrap becomes your best friend. I like wadding it up loosely and using it like a dabbing/smoothing tool. It lets you apply pressure without tearing the wet napkin.
Yes, there will be wrinkles and small imperfections. Let them be. They’re part decoupage and of the handcrafted, old-pottery charm we’re going for.
For each subsequent panel, line up your pattern match first, keep that bottom edge aligned, and smooth from there.
Pro Tip: Don’t try to trim the excess napkin while it’s wet — it’ll just tear.
However, before the decoupage dries, gently pull any excess away from the basket edge and wipe off any medium that crept onto the bamboo edging. Then lay it back down to dry properly.
Step 7: Trim and Touch Up-
Once everything is fully dry, use your Exacto knife to carefully trim all the excess napkin along the edges. Take your time here — this is a detail step.
Then, if your painted edging got a little roughed up in the process, go back with a fine artist brush and touch it up. I know it seems fussy, but it took less than 10 minutes and made a huge difference to the finished look.
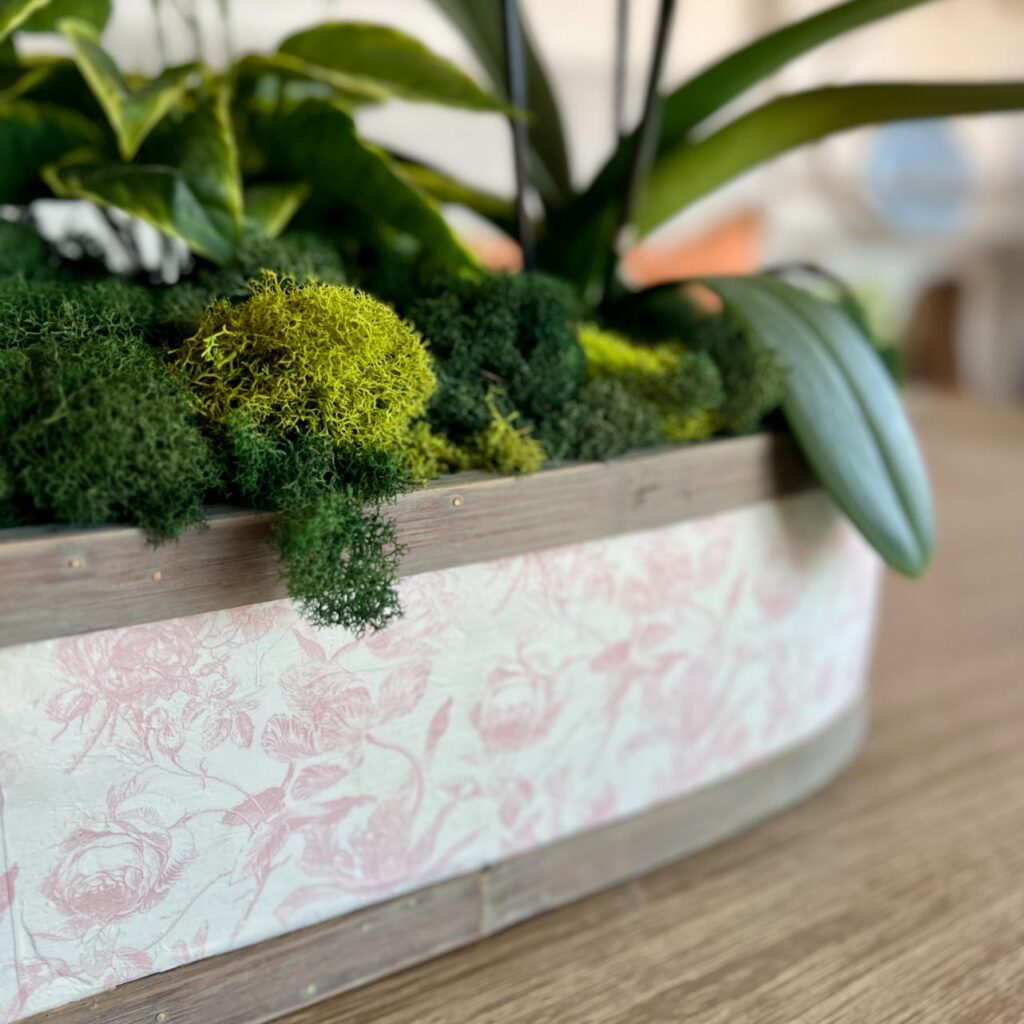
The clean line between the decoupaged body and the bamboo edging is what makes the whole thing feel artisan and polished.
Step 8: Seal It

Here’s my little soapbox moment: Mod Podge is not actually matte. It dries with a sheen that works against that soft, old-world look we’ve worked so hard to create. So I skipped it as a sealer and used a matte spray sealer instead. It protects the surface without any unwanted shine.
Note: I had originally planned to add a very faint color wash at this stage to deepen that aged pottery feel — but once I got here, I loved it exactly as it was and couldn’t bring myself to change it. That said, it’s a beautiful option if you want to push the look further.
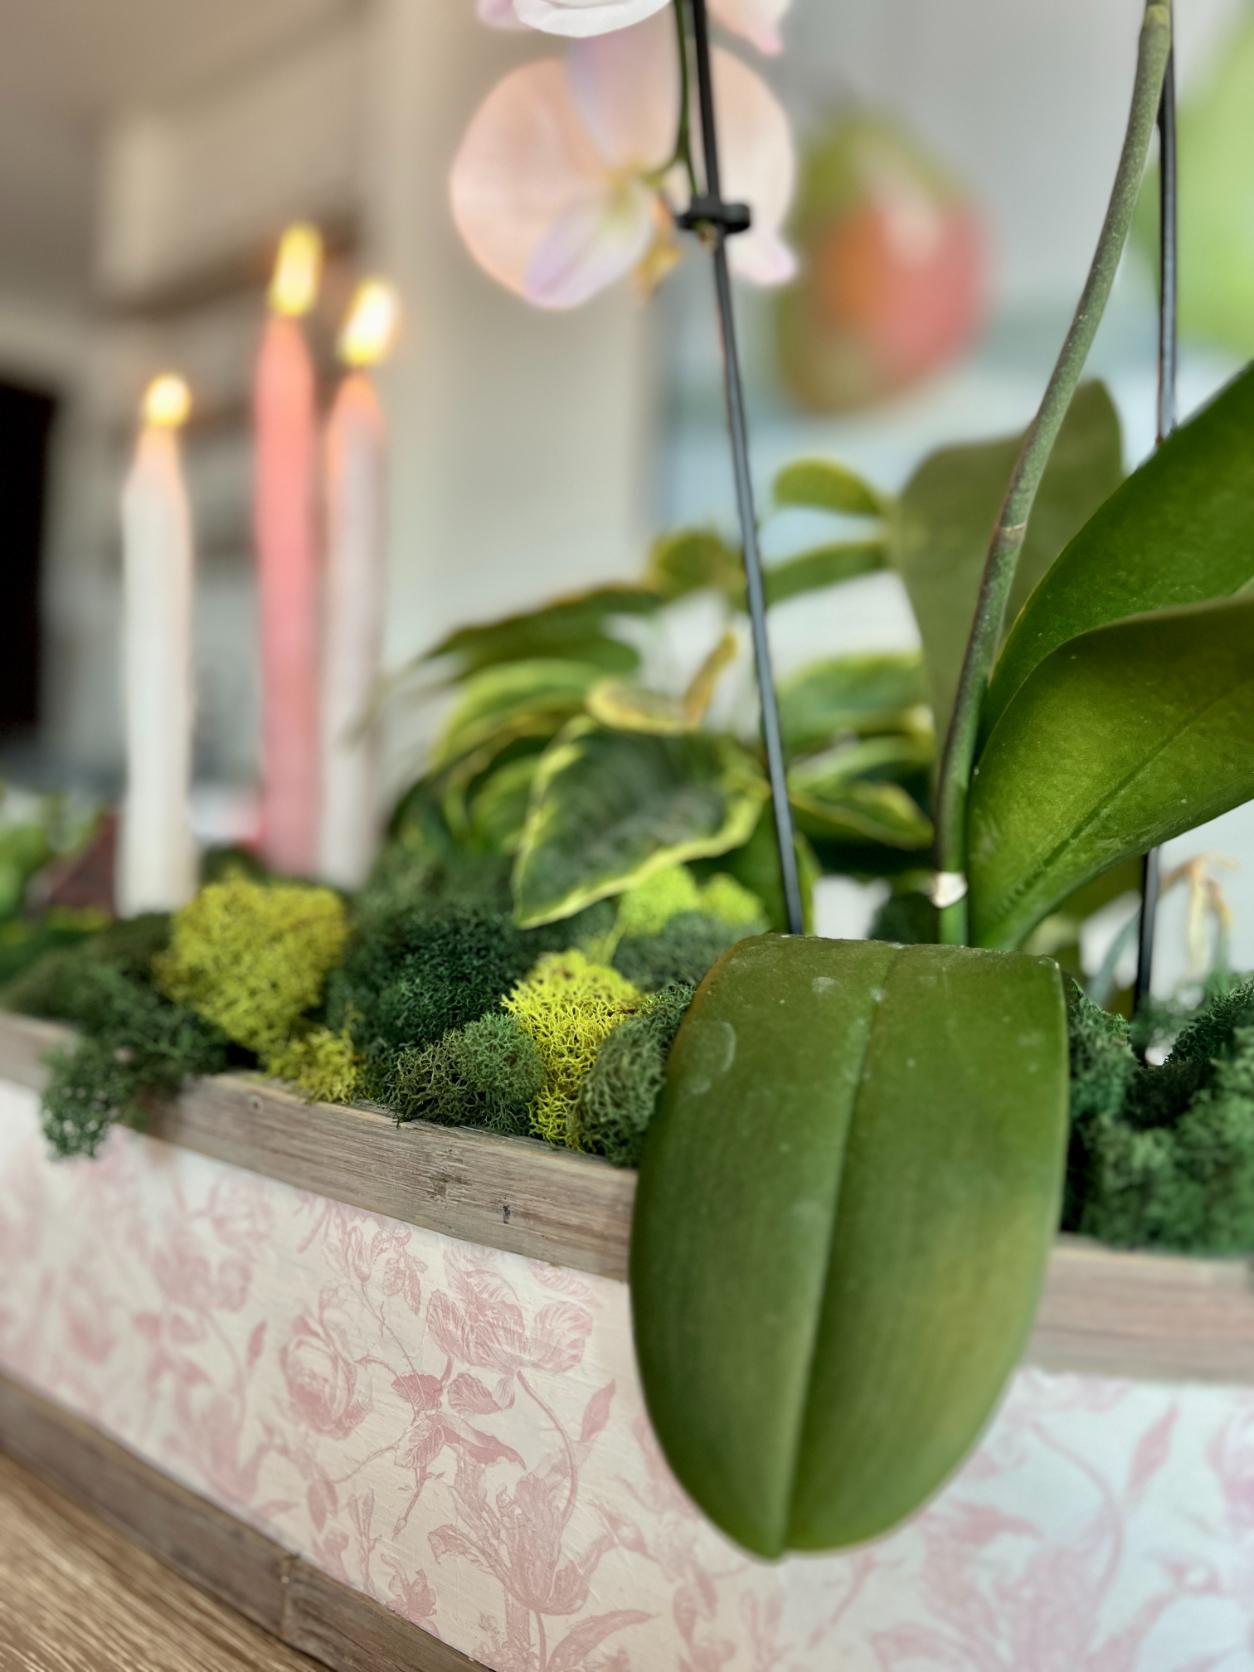
Styling This Basket Makeover
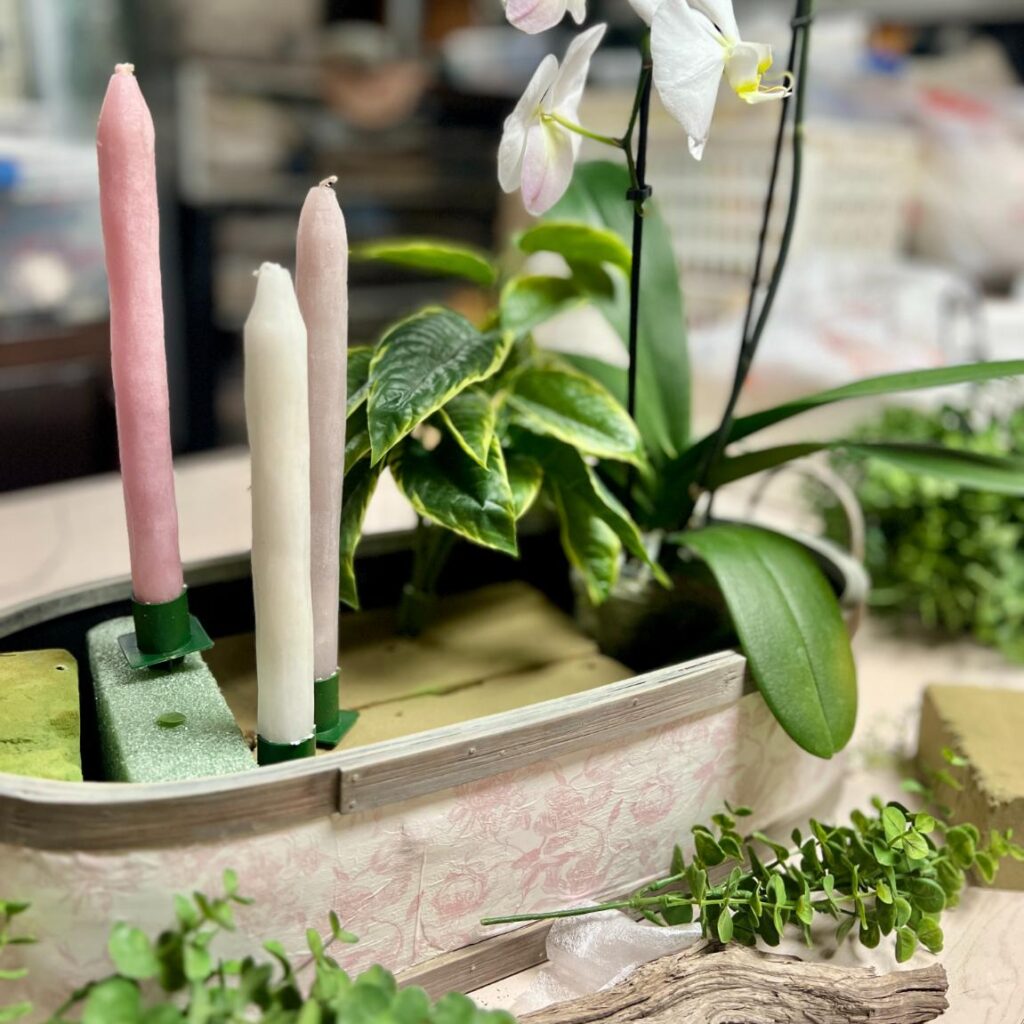
I started by adding a beautiful waterfall orchid my husband gave me on Valentine’s Day in one end and filled the rest with various pieces of florist foam. I added three candles, a small philodendron and then layered in moss to keep the arrangement simple so my made over basket could really shine. One lovely pod and a green sprig helps add some balance of weight to the other end.
I thrifted this basket with our dining table in mind, and that’s exactly where it landed — as a centerpiece base. But it’s equally at home on a sofa table or styled on a mantel.
Any flat-woven wicker piece with good bones is fair game for this thrift store basket makeover treatment. I’m on the lookout for a wide framed mirror. How about you?
Now is the ideal time to save this pin so when you find the perfect project, you’ll have all the details and tips without wasting any time searching around..
Takeaway
A thrift store find + a tub of joint compound + a pack of pretty paper napkins — and you end up with something that looks like it came from a chic boutique. That’s the kind of math I love.
Joint compound crafts have become one of my go-to techniques precisely because of moments like this one. It’s not precious, it’s not expensive, and it completely transforms whatever surface you’re working with. Once you see what it can do, you’ll start looking at every woven surface differently.
And if you’re new to the joint compound rabbit hole, check out these other projects where it earned its “secret weapon” title: I think these birdbath centerpieces I made for an online wedding magazine may have been my first. Then probably a mirror that I made for an event prop and then used for years and years hanging including here. Recently, these pinecones. I could go on and on!
If you make your own version, I’d love to see it — drop it in the comments or tag me.

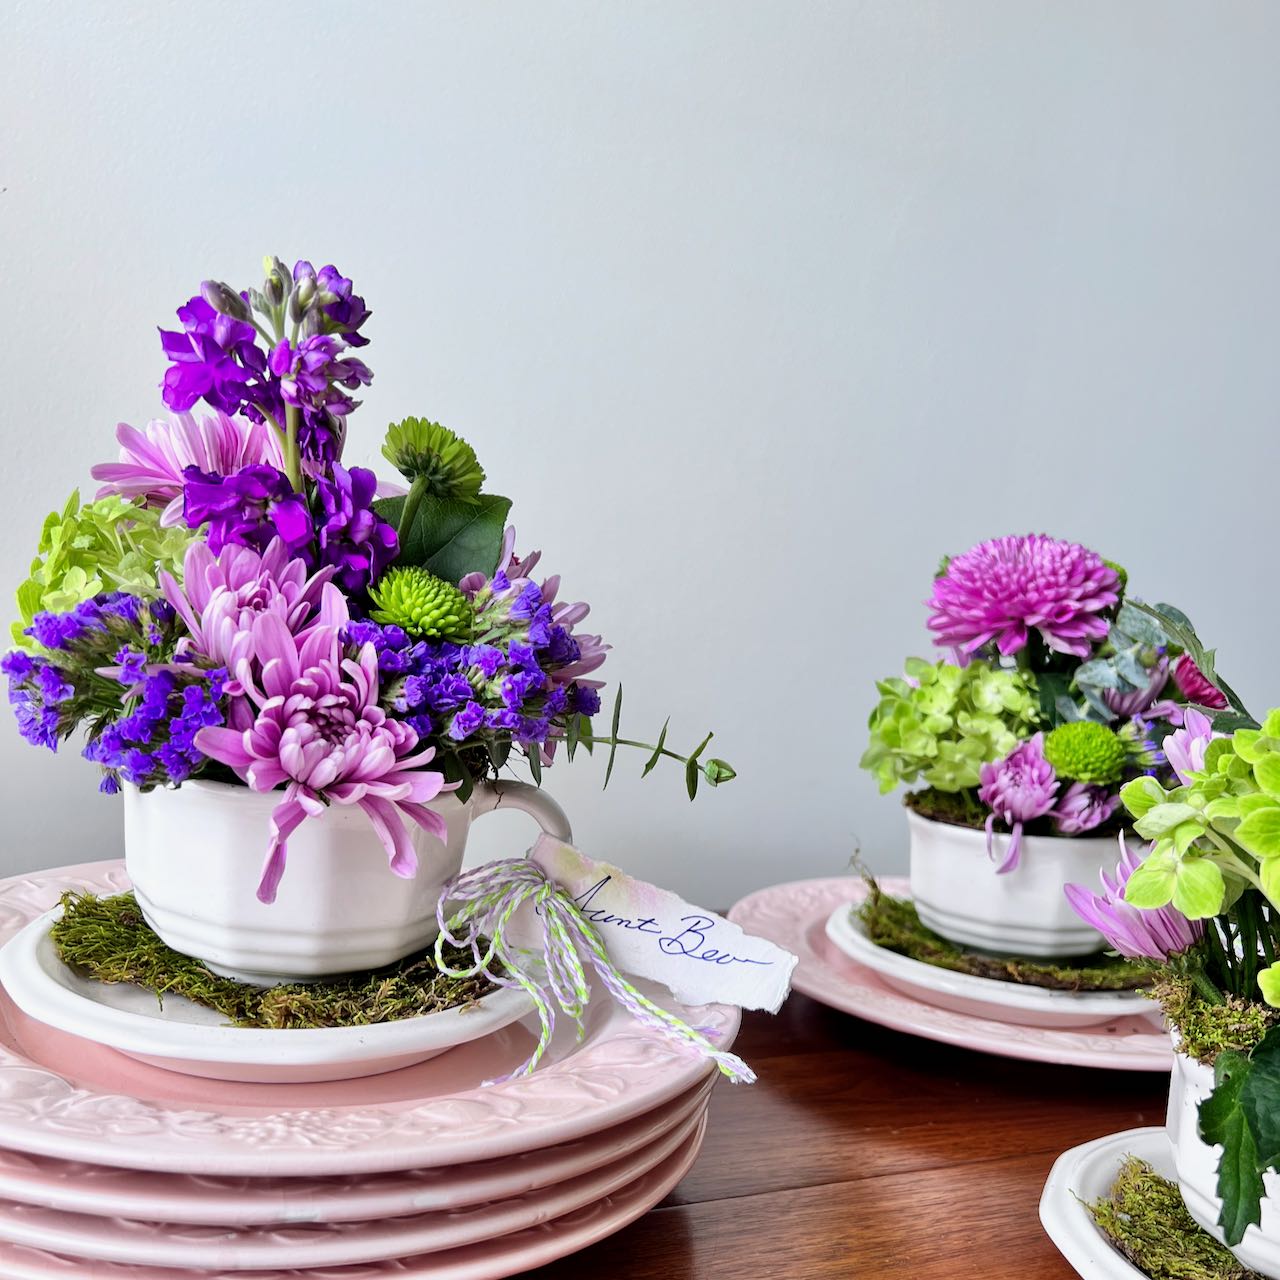
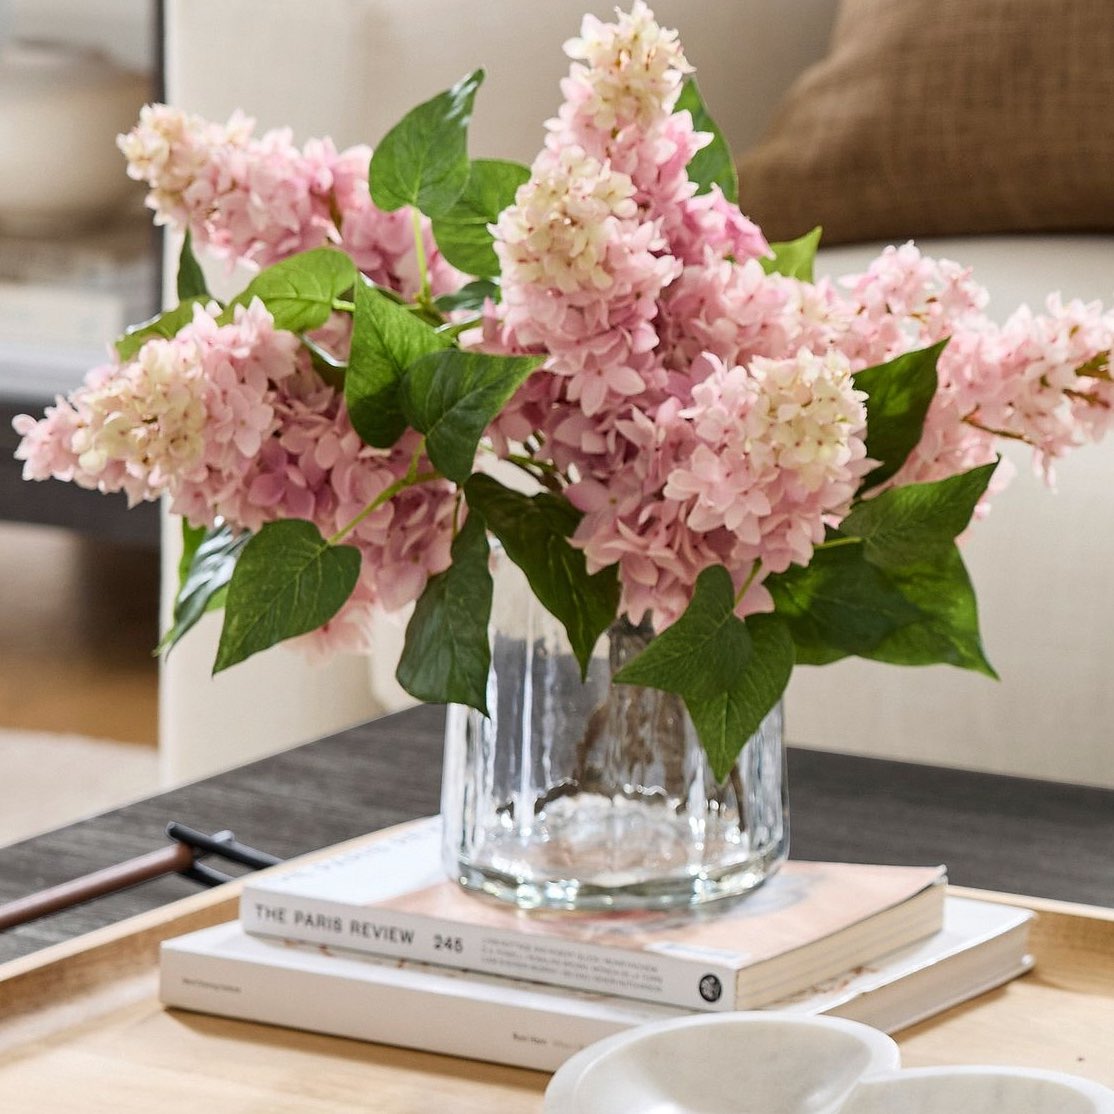
More Projects to Enjoy

Brilliant, Oh Queen of all things insanely creative! I must try this!