
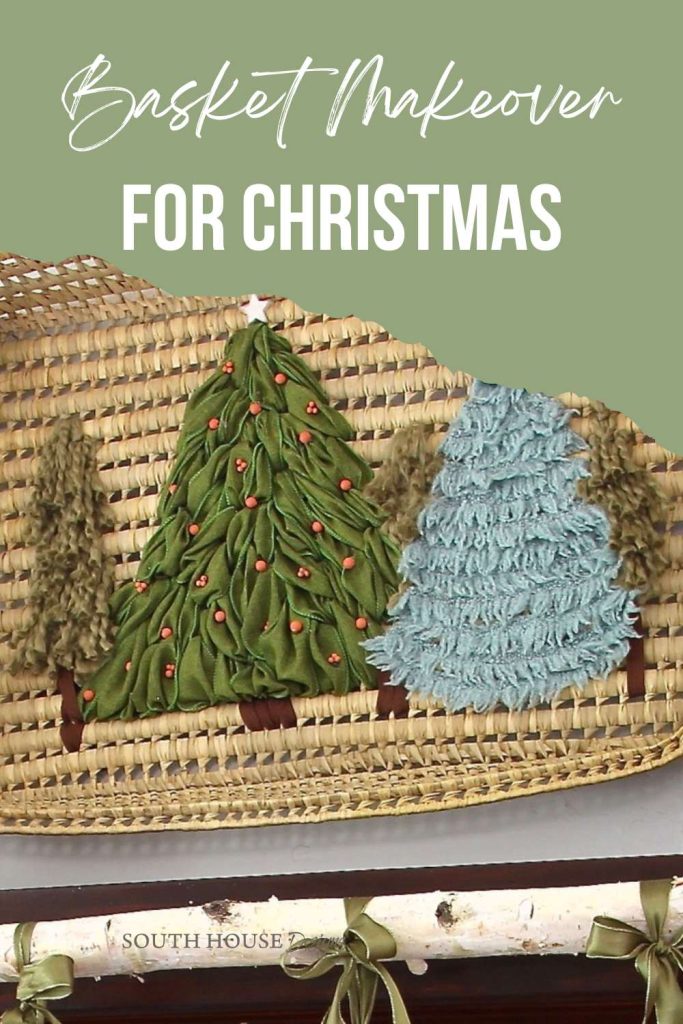
Basket Upcycle: How to Easily Make Festive Christmas Decor
Learn how to transform a large flat basket into festive Christmas home decor with this easy-to-follow ribbon embroidery tutorial.
Do you love craft projects, especially for the holiday season?
Oh good, then you’ve come to the right place.
I love crafting and upcycling as creative ways to make unique Christmas decorations with a personal touch.
No need to spend a lot of money on holiday decor when you can DIY your own!
And today’s project is a great way to make a big impact with just a few simple supplies.
This project is perfect for beginners, as it requires no prior experience with embroidery!!!
Let’s Talk General Basket as Christmas Decor First
Your embroidered basket will probably look completely different than mine.
And that’s just one reason why we love crafting, right? You get to put your own spin on your project.
Look at my project. Take what works for you but then add your own touches, your own style to it.
Plus when we’re upcycling, we probably won’t be starting out with the same items.
I have a large flat basket tray, to hang on the wall. You may have a large round basket to sit on your hearth filled with firewood or maybe cozy throws.
I opted to make a Christmas tree in a forest of other trees. You may choose to do a band of candy canes, or maybe snowflakes falling.
I encourage you to take inspiration and use my tips and hints, but create whatever great idea will work for you and your home.
Table of Contents:
Supplies and Materials-
For Materials, you really only need two things (maybe three):
- The basket you want to use as your canvas
- The ribbon, yarn, twine, strips of fabric that you want to use as your “paint”
- Any accents you may want, strictly optional
For Supplies, you really only need
- Long twist ties, or plastic embroidery needle is you already have one
- Scissors
- Glue of choice, if applying accents (or you just run short on time)
The Basket-
Anything goes here, you can use a bushel basket, an old wicker basket, decorative storage baskets, even a hanging basket can work.
Shop your house first, then hit the thrift stores. My favorite local thrift store sells all their baskets for $2 (unless otherwise marked). I have spent up to $8 for something that was really special. Here you can see two that I bought when I wanted to add seashells to a basket.
TIP: The one thing to consider is the weaving loose enough to allow you to thread your “paint” materials through them.
The Embroidery “Paint” or Textiles-
Seriously, almost any long and thin textile of sorts will work here.
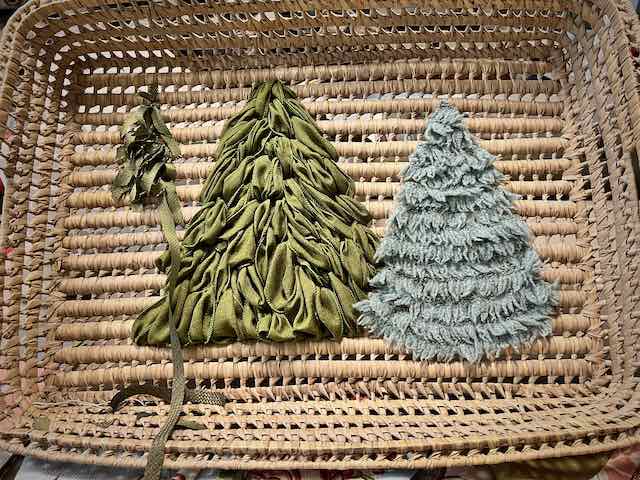
I used a wide green ribbon for my Christmas tree, then the blue tree is made from a length selvedge from some linen fabric,
HINT: The selvedge is the two edges that runs down the length of fabric that keeps the sides from unraveling. I often save them when they’re a nice fluffy fringe,
The three trees behind these two are made from a thick sage colored yarn, and the last tall thin tree is made from some fabric I cut into long strips.
A great thing about this project is you can use up leftovers that you’ve been holding onto in your stash.
OR: you can start a tree and if you don’t like how it’s looking, take it out and start over as I did here. I thought the strips of fabric would look great, but I quickly realized that the color was too close to my large focal point tree, shifting the focus onto the blue spruce. Which was not what I intended due to the Christmas stockings this was being made to accent.
If you are a novice crafter or a tidy minimalist at heart, because you don’t need tons and tons, you might score the perfect “paint” for your vision at the thrift store while shopping for a basket.
The Long Twist Tie-
Puzzled by this? Don’t be. I have a long history with the highly underrated, often overlooked, humble twist tie.
Over 11 years ago, I wrote a blog post that still remains a favorite of many. Check out: How to Thread a Big Fat Ribbon Through a Small Round Hole. I think that was perhaps my first true creative-problem-solving blog post.
Oops, digressing a bit. Back to baskets . . .
I used twist ties as needles to thread the ribbon or yarn through the basket.
TIP: easiest to use the long ones that come with some trash bags or that are often wrapped around Christmas lights or power cords in their packaging. Coated electrical wire will also work.
Let’s Transform Our Baskets
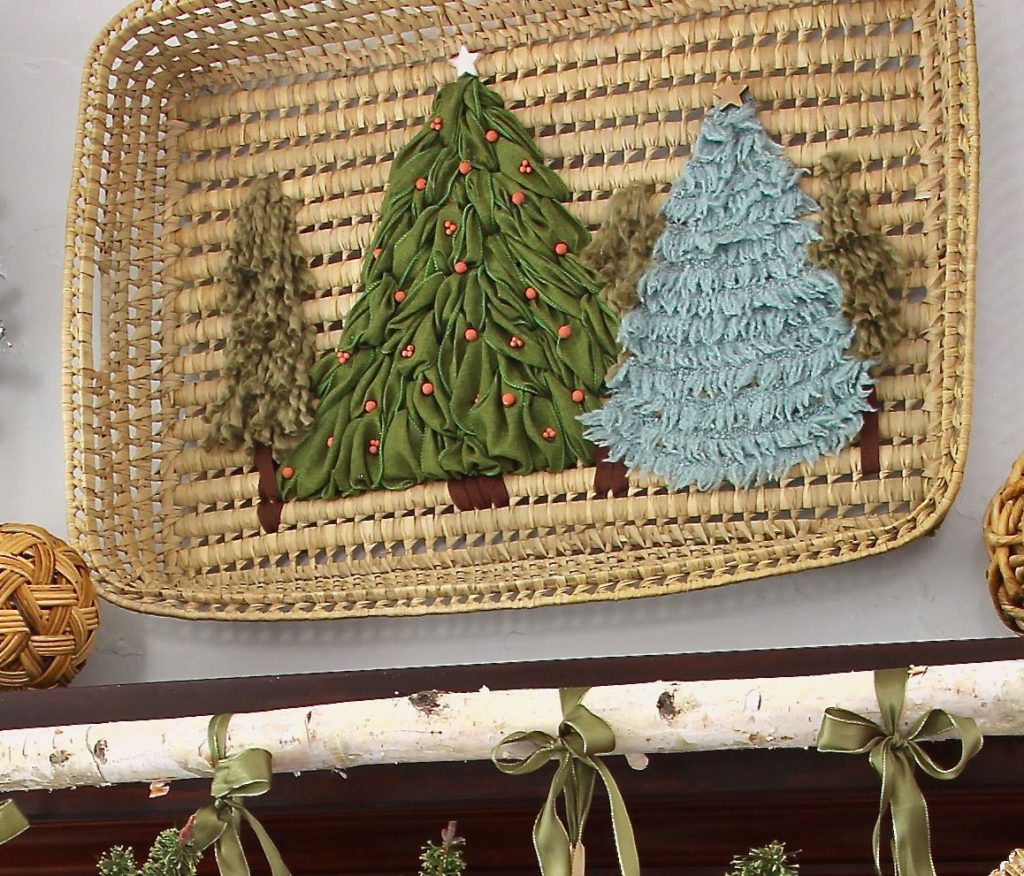
Since my basket Christmas decor was made to hang on the living room wall, I embroidered my trees on the base of the basket.
You might add your design around the outside of a tall basket. A forest of trees growing from the bottom up would look great all the way around.
Or you may want to do you embroidery around the lip of your basket.
As you’re planning your design, keep proportions and scale in mind,
If you are working with a large basket, but want just a small design, such as stars, repeated around the basket, you can give it more impact and weight with paint stripes using simple acrylic craft paint or chalk paint.
Embroidering With Ribbon-

Here is where you need to pull out your twist tie. An inch or two from the end of the ribbon, bend the twist tie in half, creating a loop around the ribbon. Cinch it down so it’s like the eye of a needle.
Feed either end of your twist tie needle through the basket and gently pull the needle and ribbon through the basket.
(I apologize for using a black twist tie as it’s kind of hard for you to pick out in the pictures. The black twist tie is right there by my fingertips).
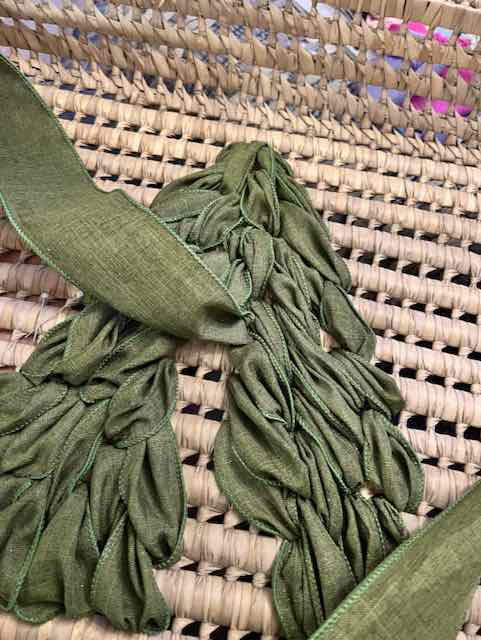
I started with my largest green Christmas tree since it is my focal. I started at the top, pulling one end of a long length through the basket from the back to the front (or inside). Then to the side and down a bit, I fed the ribbon through the basket to the back forming the first tree branch.
Next, I brought the end of the ribbon around one spine and back out to the front. Angling out to the side and down some more, I fed it to the back again. This created the next lower outside branch. I continued this way forming one outer edge of my tree.
I started at the top again, repeating this process but angling the opposite direction to form the other outside edge. With the outline of my tree formed, I filled in the tree with a similar pattern, but always leaving the centermost branches as the final layer for each row.

One of the advantages of using this wide ribbon us that you can easily pull it this way and that, stretching it out as needed to fill any voids like the ones you see here before I gave it its final fluffing.
Making A Yarn Tree-
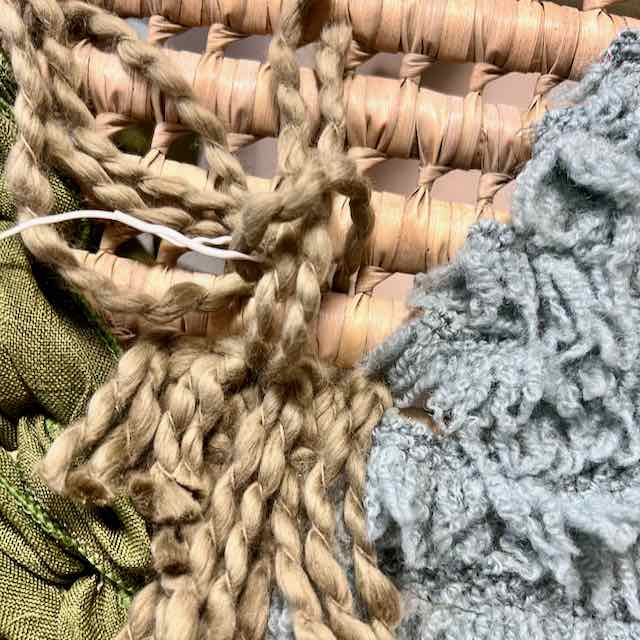
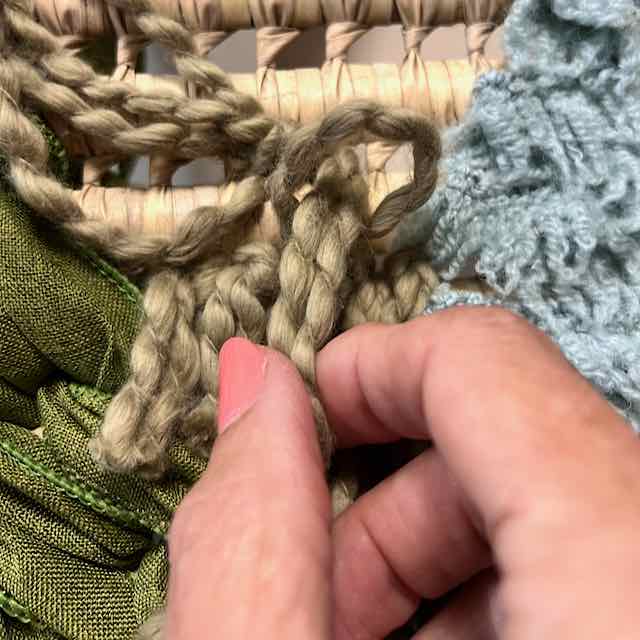

I wanted my trees to be very irregular and fluffy, so rather than actually embroidering the yarn trees, I opted to knot strands around the weave of the basket and let them fall as they pleased.
I found it easiest to work from the front.
- Left– threaded my “needle” to the halfway point of a piece of yarn, pushed through to the back, then brought the needle over a basket weave and threaded back to the front
- Center– fed the ends through the loop and removed the twist tie
- Right– pulled the end tight
- Then rotate to the direction you want the ends laying (these were then pulled down)
- Then next layer overlaps these and narrows at the top
- Trim the yarn ends as you want
Please excuse this quick interruption. Have you been enjoying this post? Please join us by subscribing or joining the House Mates:
Oodles of thanks! Now back to our baskets:
Making My Blue Spruce Tree-
For this tree I took a short cut! I was running out of time, so I pulled out the glue. Otherwise, to get the curved horizontal look I wanted, I could have used a needle and thread and hand sewn around the basketweaves, tacking the selvedge trim in place.
Sometimes, shortcuts are needed in life right? This is not and was never intended to be an heirloom piece, so I was happy to give myself grace in these situations.
Adding Trunks-
I used brown woven herringbone ribbon wrapped flat against the basket. I mean trunks in nature are textured but flat, so that’s how I wanted my trunks. But I kept the branches of my two main trees and the three background trees more dimensional, but with different styles, like in nature.
Adding Optional Accents-
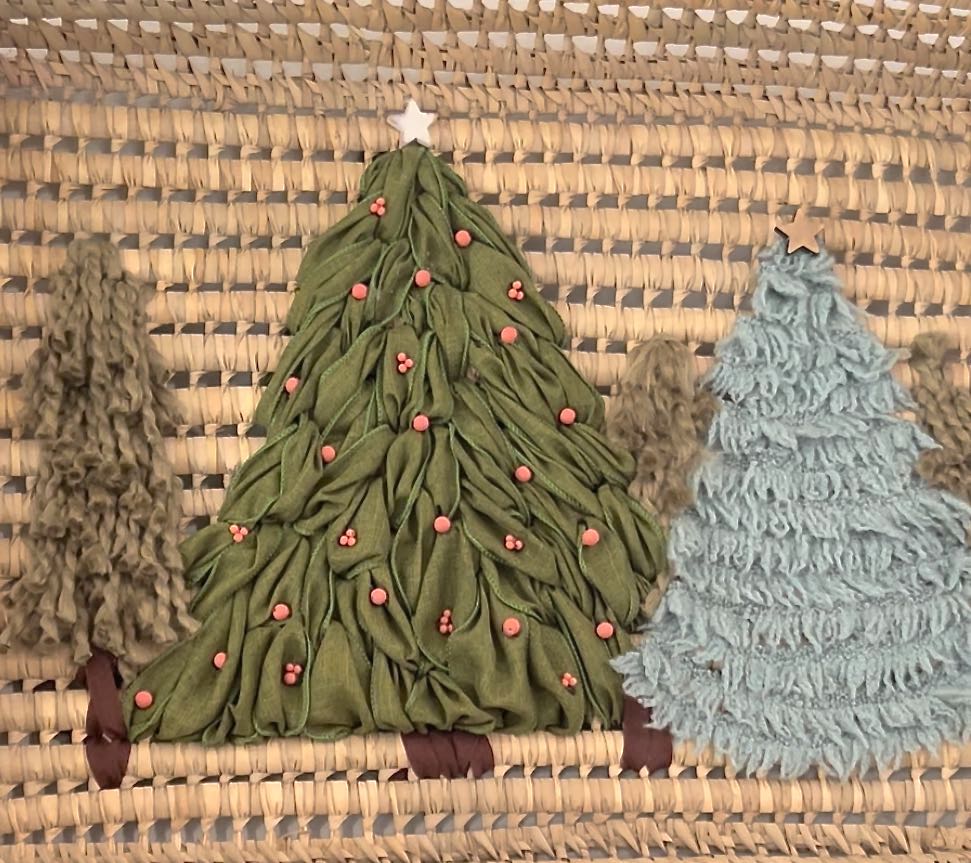
Stars of course were needed as well as some berries. For interest, I added clusters of little berries along with individual larger ones.
What do you think? Are you going to give an old basket a new life?
Thanks for spending some time with me today.
I hope you have a wonderful holiday season filled with the blessings of living a creative life, spreading joy to all around you.

What a cute idea! I just love how each tree turned out. What a creative way of using left over trim, ribbon and yarn.
Thanks Lynn! Not my typical style. But it was fun to push myself outside my norm and come up with something for each stocking grouping each year.