How To Jazz Up Basic Pendant Lights With Gold Leaf Accents
It’s so much easier than you might think to add extra style to basic pendant lights. Let’s make that $40 pendant look like it cost $250.
Yes! Let’s make basic pendant lights from Amazon, look like they came straight out of a Ballard Designs catalog or other high-end designers.
That’s the magic of gold leaf! Or copper leaf or any of the metallic finishes.

When we were remodeling our quirky 60’s house, I ordered two of these pendant lights from Amazon for our kitchen island (actually it’s a peninsula).
That’s how small our kitchen is, we could only squeeze a peninsula in, not a whole island.
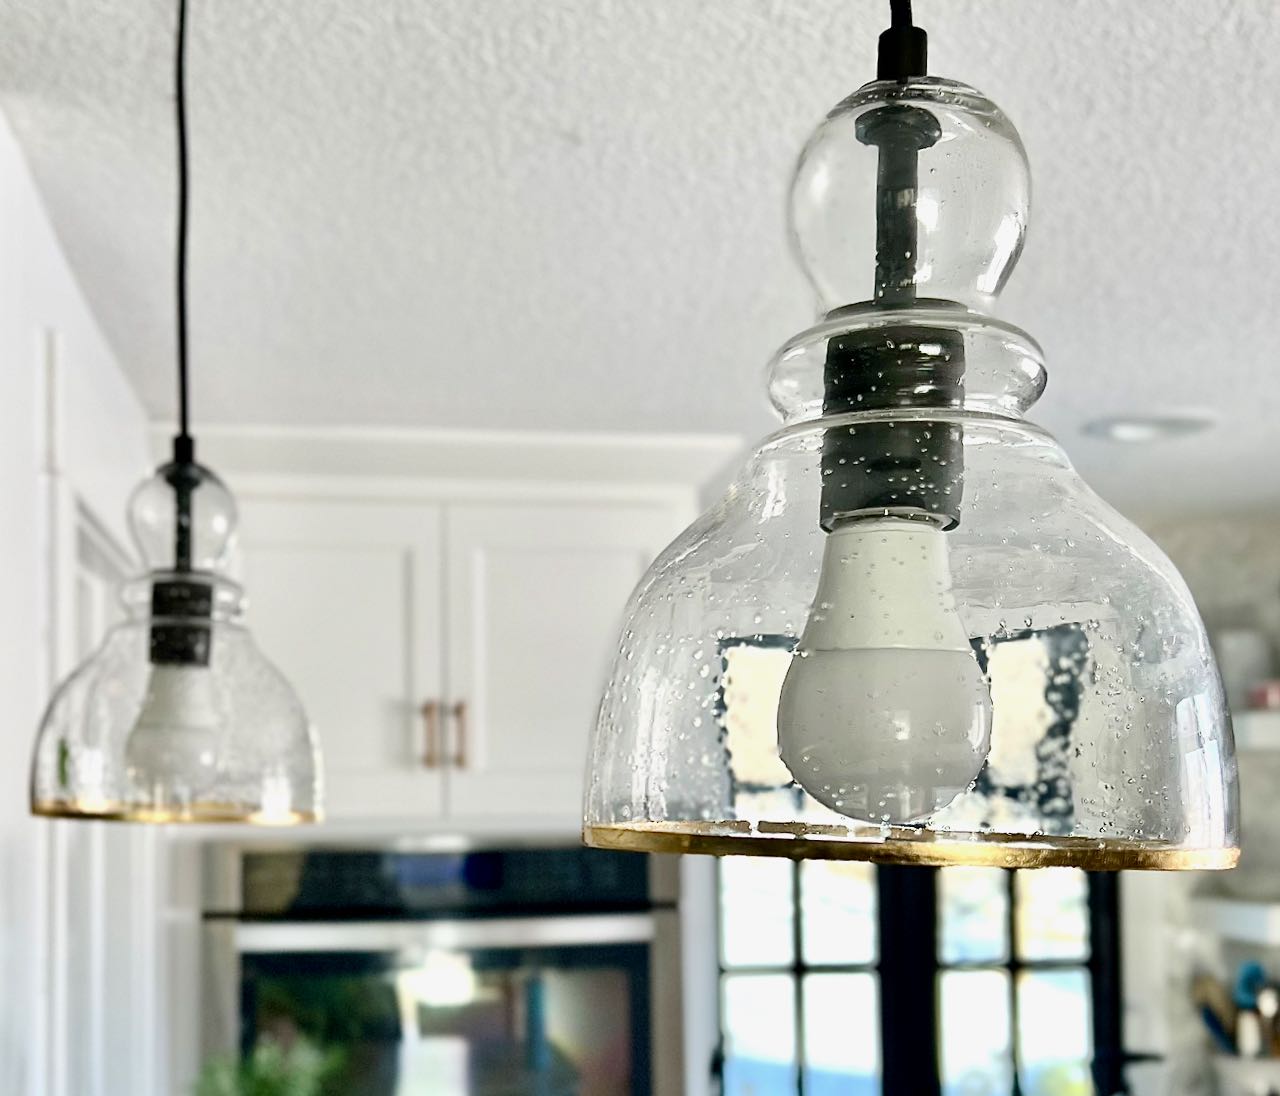
I wanted a touch of matte black, mostly on the canopy and cord.
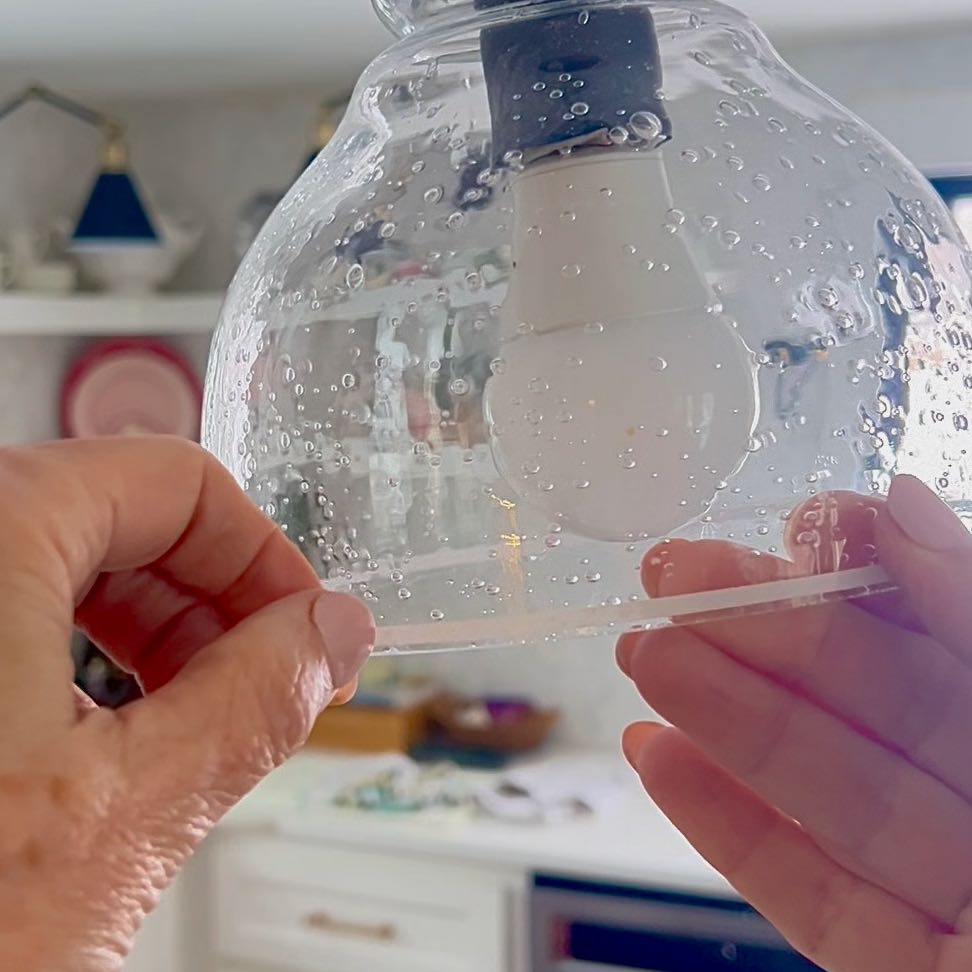
And I purposely wanted clear, but interesting glass for the shade. This kept obstructing the views out the two kitchen windows to a minimum. And it helped to keep the flow of conversation open between the kitchen side of the peninsula and the dining area entertaining side.
Oh, and don’t forget, I needed budget-friendly.
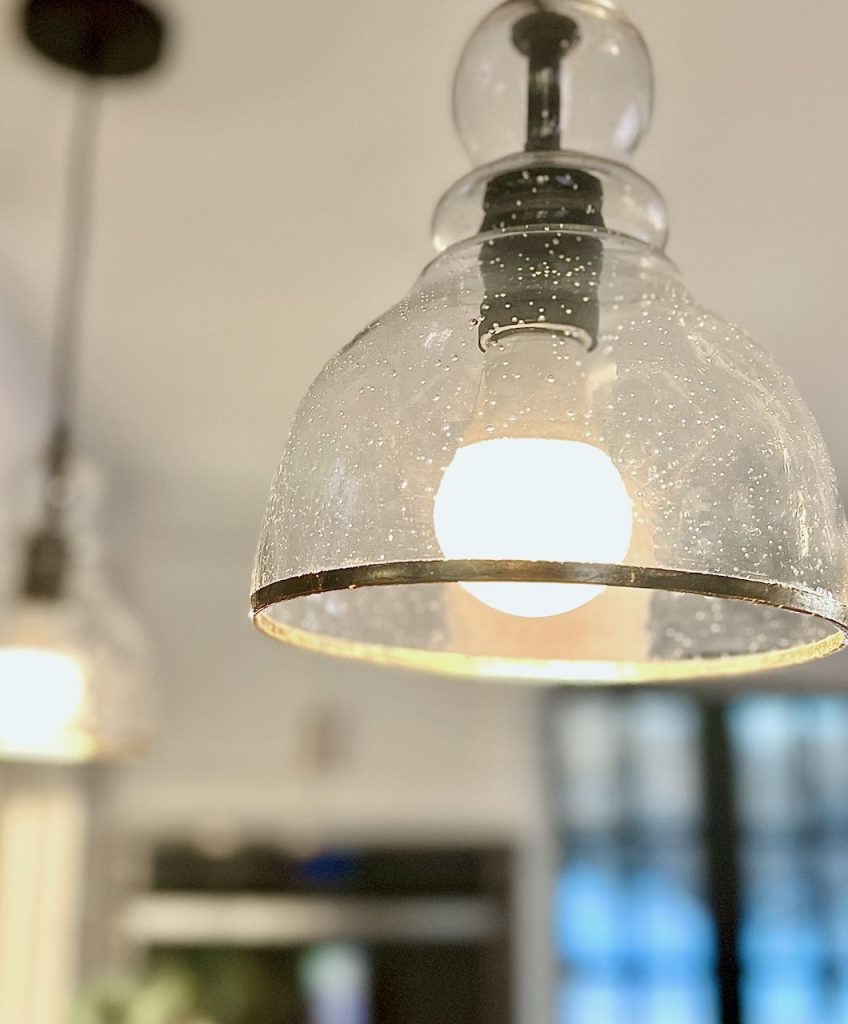
These fixtures certainly met those requirements. I have always liked them, but I felt they needed an extra something.
During the day, the clear glass shade almost disappears.
TABLE OF CONTENTS:
Please note: some of my link are affiliate links. Which means you pay nothing extra, but I may make a small commission to help keep my small business rolling along to inspire, educate and support my followers.
So much so, that during last year’s One Room Challenge, I carried a board into the dining room through the glass sliding doors that span the kitchen and dining room. Yes, you knew it didn’t you? I took out a light in the process!!!
Fortunately, the original light fixtures are still available. So I ordered a replacement and decided this was the decor gods telling me it was time to jazz them up a bit. Just a bit of zhuzh, nothing crazy.
Let’s Give Them Some Oomph — With Gold Accents!
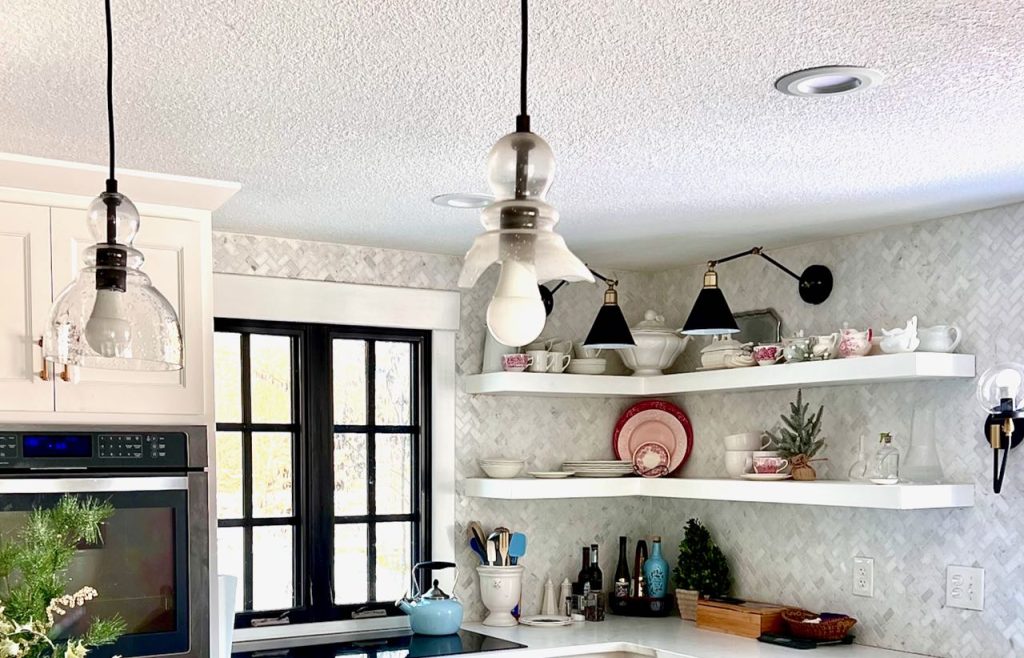
I wanted our kitchen to have an elegant look — but casual and inviting. This house does not have a formal dining room. In fact, it just received a proper dining area of any sort in last year’s One Room Challenge. So these pendant lights are part kitchen, part dining room.
We have gold accents — a vintage gold or brushed gold rather than antique gold or brass — throughout the kitchen and dining room. It seemed like that is what was missing from our lights.
Gold pendant lights would be too much gold. But a rim of gold was what I had in mind.
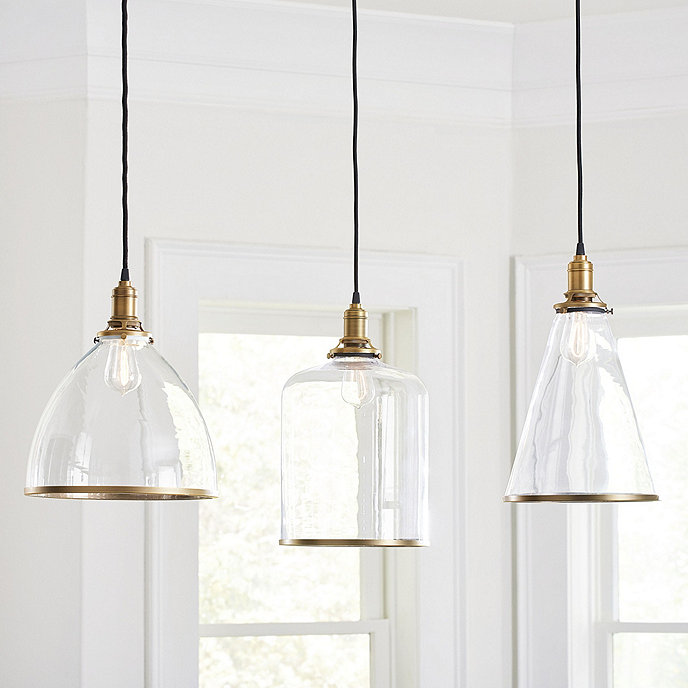
This selection of pendant lighting from Ballard Designs is what I had in my mind, but not in my budget. I could buy one replacement pendant for $40 or I could buy two of these for $500.
I love the classic designs and the beautiful glass, but the metal rim is glued on and the glue can be seen through the glass on the inside. Not with my fixtures though.
Let’s take a super quick pause to remind you there’s a lot more of great DIY, crafts and problem solving where this came from. Please join our community of creatives and novice creators:
Thanks bunches!!! Now on to gold leafing:
Do You Prefer Video Tutorials?
No Worries! I’ve got ya! Just click on the cover below.

How to Apply Gold Leaf to Pendant Glass Shade
Materials and Supplies —
- Pendant Shade, this is ours
- Metal Leaf Sheets *
- Metal Leaf Adhesive
- Metal Leaf Sealer
- Painter’s Tape
- Exacto Knife, or razor blade
- Small artist paint brush
- Soft bristle brush
NOTES: *You can optionally use gold leaf flakes if your shades can be taken down. If they are hanging, like one of mine, I highly recommend using sheets. I only used two sheets for this project in total. I have a lot of supplies left for more gold leaf accents!
Or order this Gold Leaf Bundle from Amazon — same products listed above, but bundled at a better price
Step 1) Clean glass thoroughly —
I used a degreasing all-purpose cleaner first to make sure the any grease (particularly on the one hanging) is gone. Then I followed up with Windex to eliminate streaking from the all-purpose cleaner.
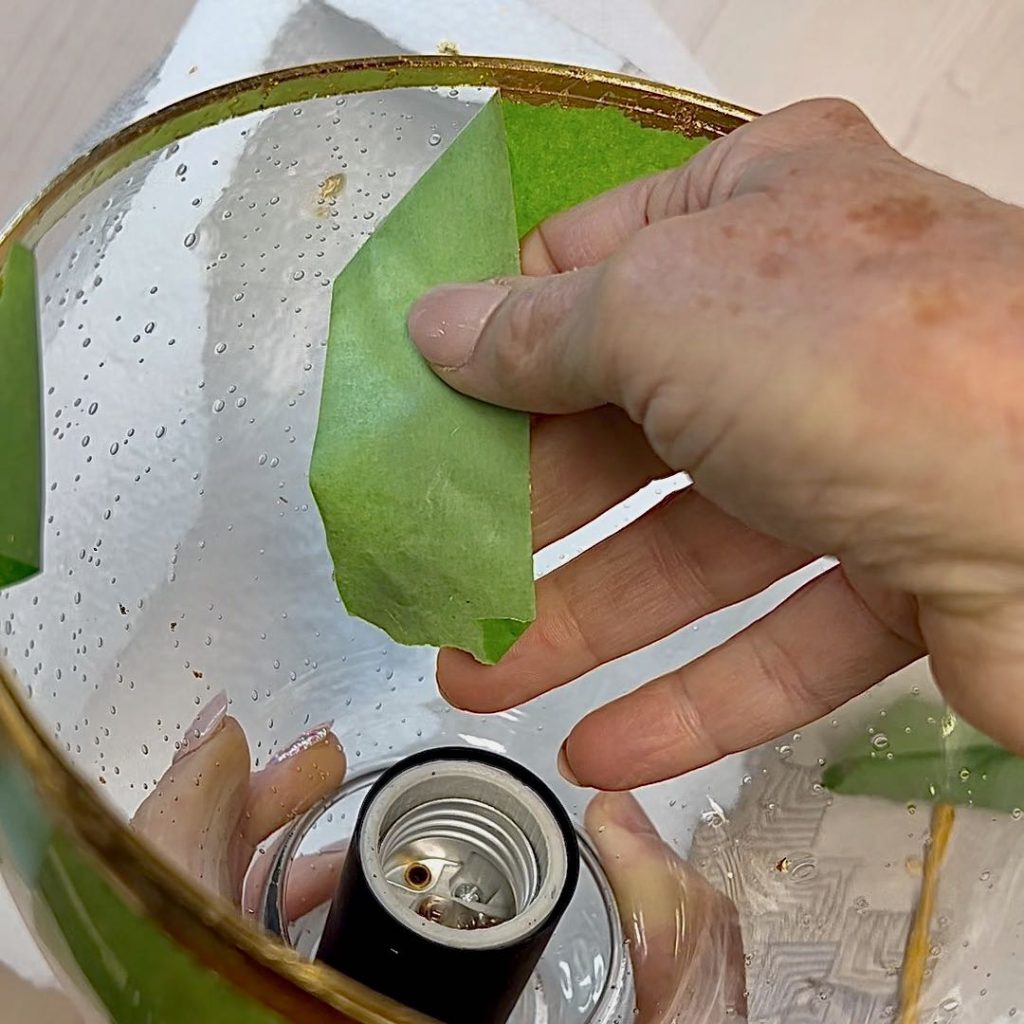
Step 2) Masking —
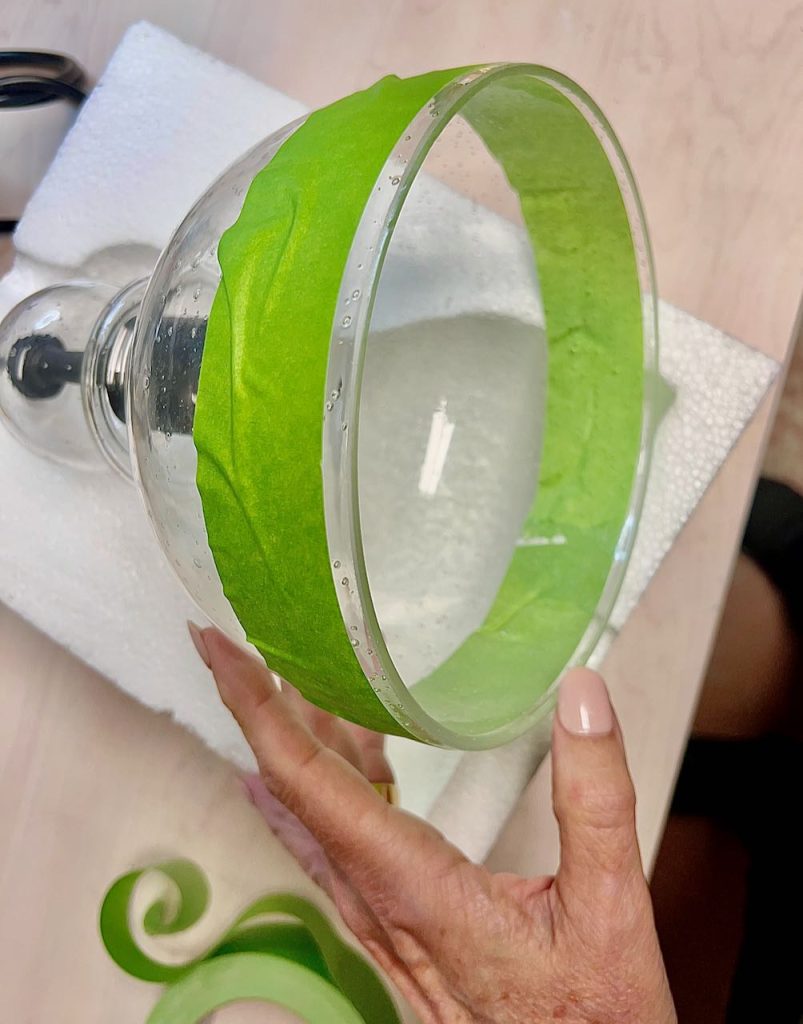
Use painter’s tape to mask off the area you want to gold leaf, inside and outside of shade.
TIP: to get the painter’s tape consistent distance from the edge, apply a “guide tape” first. Then your painter’s tape right next to it. Remove the guide tape and proceed.
I didn’t have any 1/4-inch tape, so I used some 1/8-inch and just set it up a but from the edge. It is much easier to keep a thin sliver consistent than a wider gap.
Step 3) Apply Adhesive —
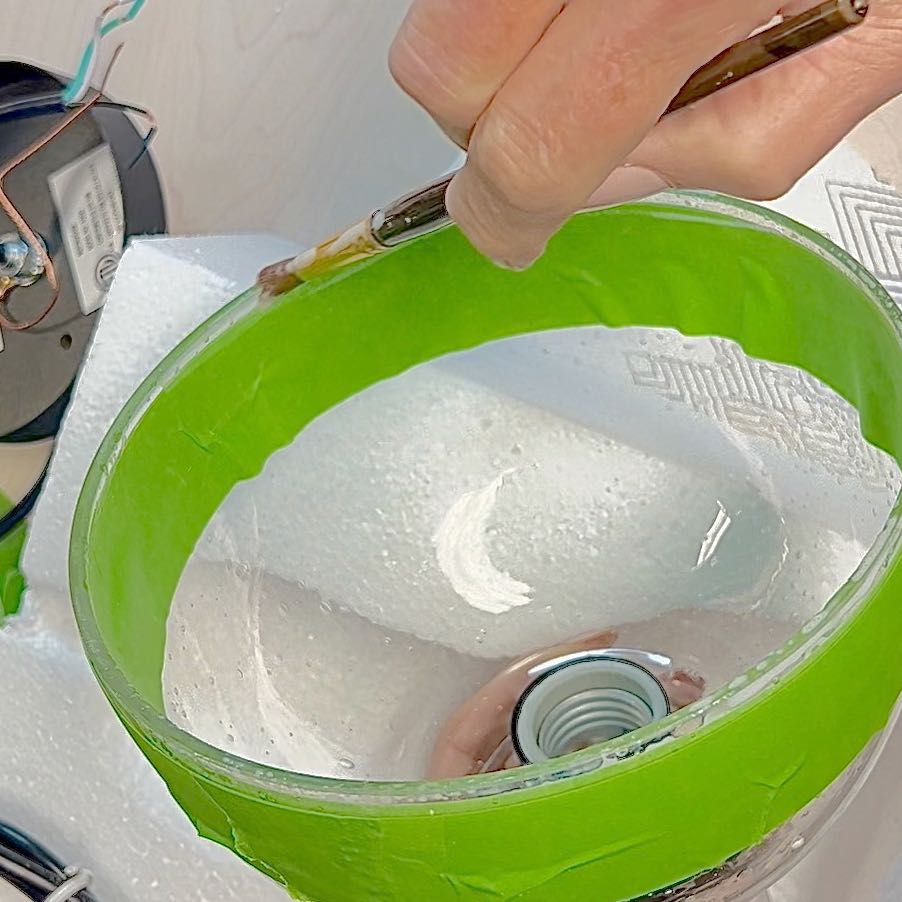
Sometimes called sizing. Use artist small paint brush to apply adhesive on the inside, outside and bottom edge of the shade. Try to paint the adhesive just up to the edge of your tape, not over it.
Wait the length of time recommended by the adhesive you use. The adhesive should be clear and tacky.
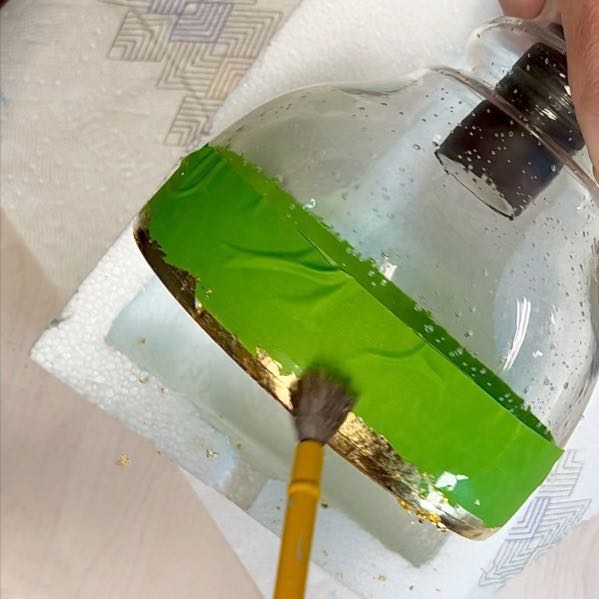
Step 4) Apply Gold Leaf —

Gently lay one sheet of gold leaf on the outside band of adhesive. Gently press in place and lightly run your finger over it. Fold the bottom of the sheet over the edge of the shade and down the inside.
Press and lightly burnish the sheet to the adhesive on the edge and inside. After a few minutes, pull off the loose remnants of the sheet and apply them to the next section of adhesive. Repeat, working your way all around the shade.
Step 5) Burnish and Brush Off —
Carefully go over the whole area with a light finger to burnish the leafing and make sure all spots are covered. Then lightly brush with a soft bristle brush to remove any remaining bits of loose metal leaf.
Step 6) Remove Painter’s Tape —
With an Exacto knife or razor blade handy, slowly remove the painter’s tape. If you come to a point where it looks like the adhesive and leaf overlapped the tape a bit, just slice it with the Exacto knife for a clean edge and continue on.
Step 7) Seal the Leafing —

With an artists small paint brush, coat the gold leaf with a sealer. I used the Speedball “Mona Lisa” one that is specifically designed to metal leafing.
Two coats are recommended, but I did three because I find that I need to clean these pendants frequently since they are relatively close to the cooktop.
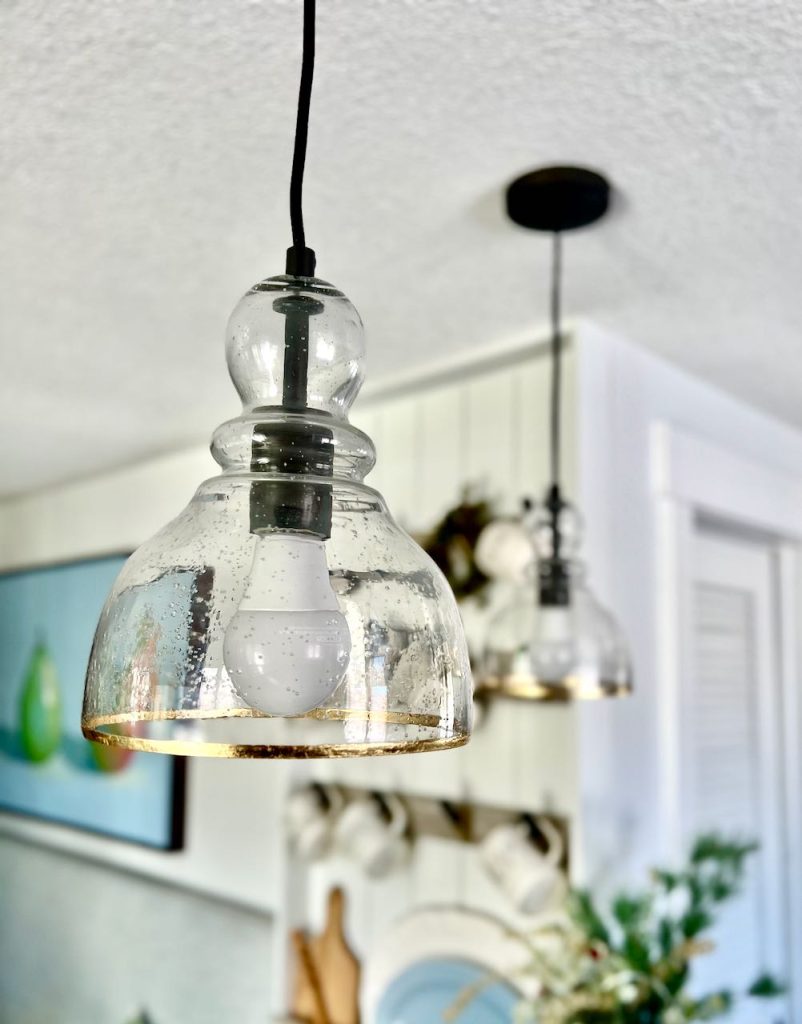
And that’s it!
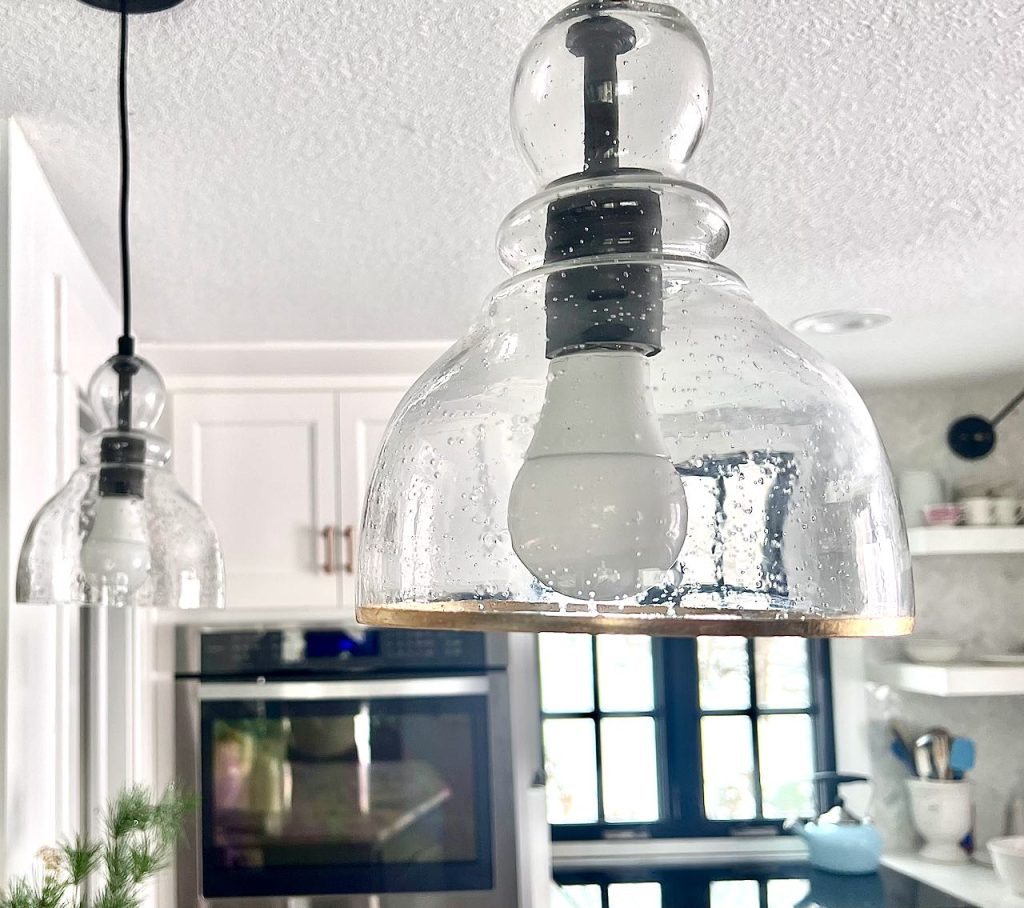
One done and hung, now one to go!
NOTE: Why didn’t I just take the shade off the original pendant? The glass shades are integrated in the pendant lights. They do not come apart, so I had to do the original one suspended in air (or rewire it — ugh).
Besides, it wasn’t really that hard to do even with it suspended. But I’m not quite ready to apply to Cirque de Soleil.
If You Have to Do This While Fixture is Hanging:
Don’t worry, it is still very doable — actually easier than I had thought it would be. Read on . . .
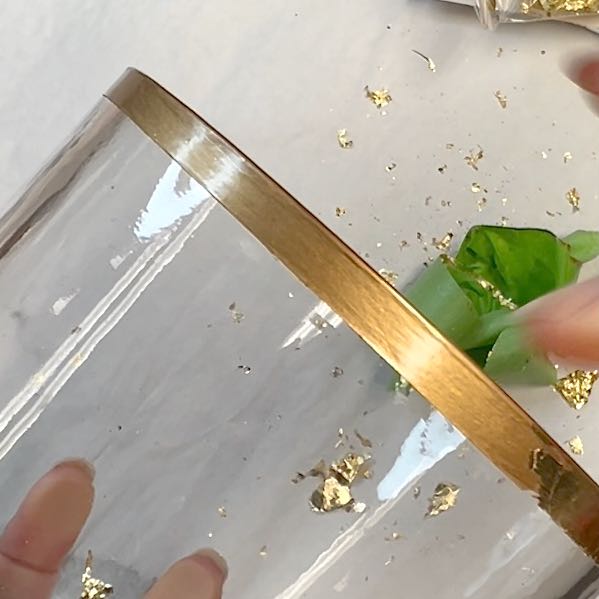
Same basic steps just reordered a bit because I felt like I did not have a steady hand applying the adhesive in mid air.
So to make sure my gold leaf trim had a crisp line, I intentionally paint over the edge of the tape a bit. I decided it was better to have the crisp line of the adhesive before applying the gold leaf.
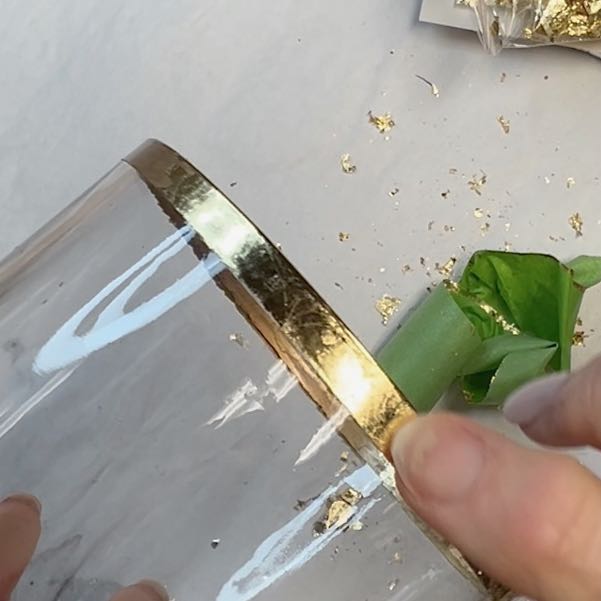
I removed the painter’s tape BEFORE applying the gold leaf.
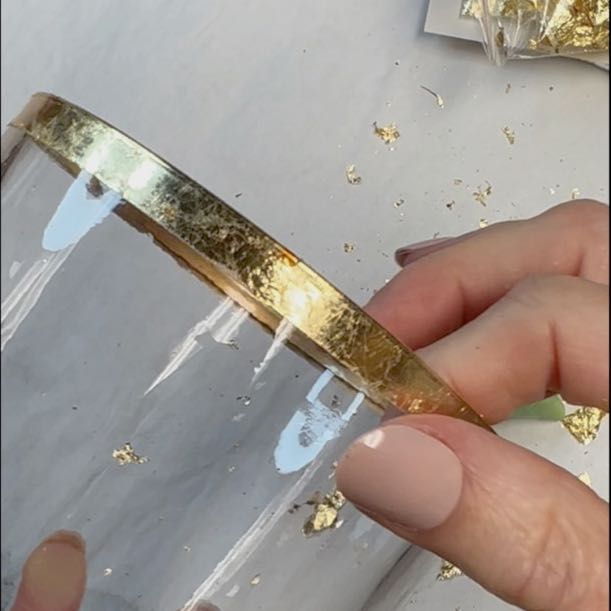
Then I applied the gold leaf and cleaned up the edge with my fingernail if the leaf tried to stick to the glass
Worked great!
Let’s Talk Clean Up —
Pretty simple, really.
The adhesive dries incredibly sticky. So be sure to wash any drips and your paint brush with soap and warm water right away.
TIP: This includes the neck of the adhesive jar. Clean it well before replacing the cap or you may never open that jar again.
When cleaning up, those super lightweight fragments of metal leaf can be hard to gather up — and you don’t want anyone breathing them in!
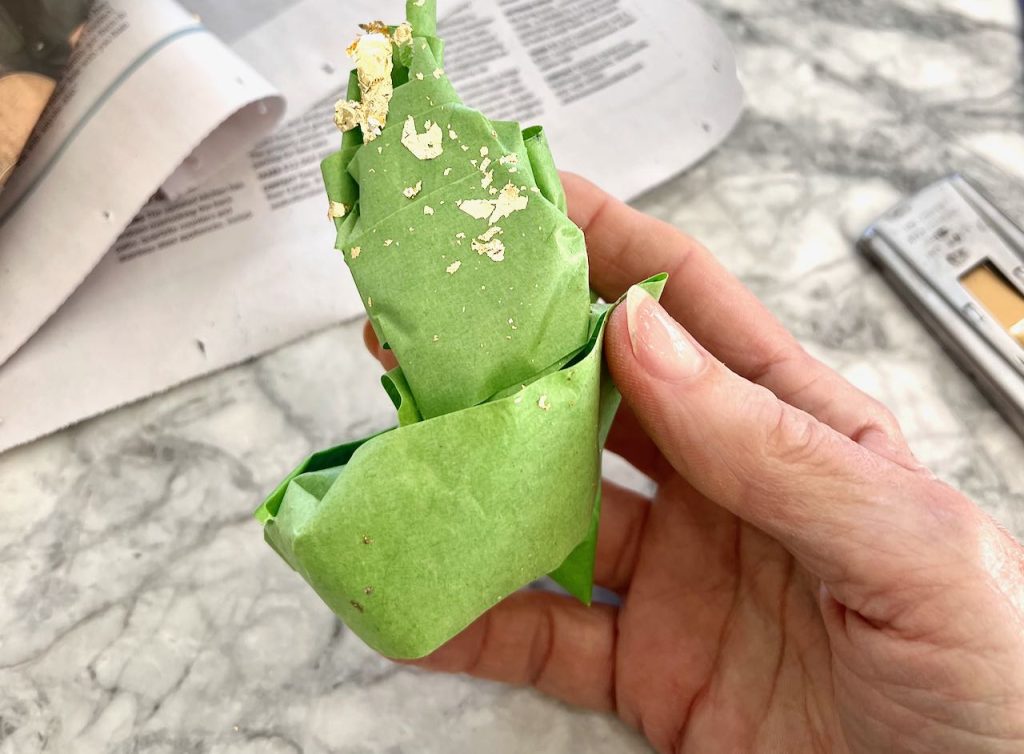
TIP: Do NOT vacuum! Instead grab that big length of painter’s tape you used for masking and pounce it on all the fragments. It’s quick, easy and keeps them out of the air.
More Options
Now do you believe me when I say that it’s unbelievably easy to update a classic design into beautiful lighting fixtures with a contemporary, elegant style.
Depending on your home decor, you may want to choose a different metal leafing than the gold I used. Predictably there is silver and copper, but there is also a champagne gold (which tempted me).
And this is just the beginning. Think about all the vases, pots, candlesticks, decorative dishes, trays and more. We’ve all seen gold leafed frames, but recently I saw gold leafed mats on oil landscapes and they were stunning!
Liquid Leaf paint by Plaid
Gold Leaf Sheets
Gold Leaf Flakes
I encourage you to experiment on a cheap glass vase first to get the feel of it. Above is my practice vase where I tried:
- Liquid Leaf paint from Plaid
- Gold leaf sheets
- Gold leaf flakes
The Liquid Leaf looks most like the Ballard Designs fixtures, but when I held the vase up above my kitchen island, I knew the gold leaf was the right one. I really liked the more rumpled texture of the flakes, but when I applied them, I knew it would be very frustrating the get the surface covered completely on the pendant that was hanging. So I used the sheets.
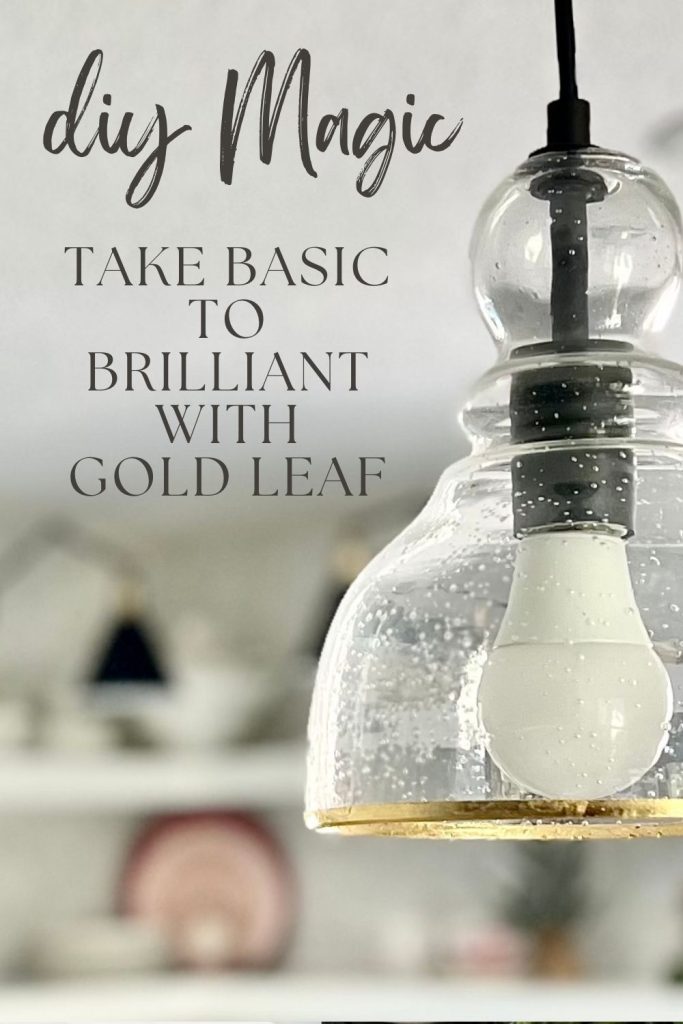
Here’s a pretty pin to save so you’ll find it when you feel the need for a touch of gold (or other metal leafing).
I hope I’ve inspired you to take a fresh look at any light fixtures you think are falling a bit flat. Would gold leaf accents bring the fresh, high-end style you’ve been craving?

More Posts You Will Probably Like!
What a brilliant idea Diane! Thanks for sharing! Pinned!
This is gorgeous! Pinned!
Thanks Cindy! Glad you like them.