
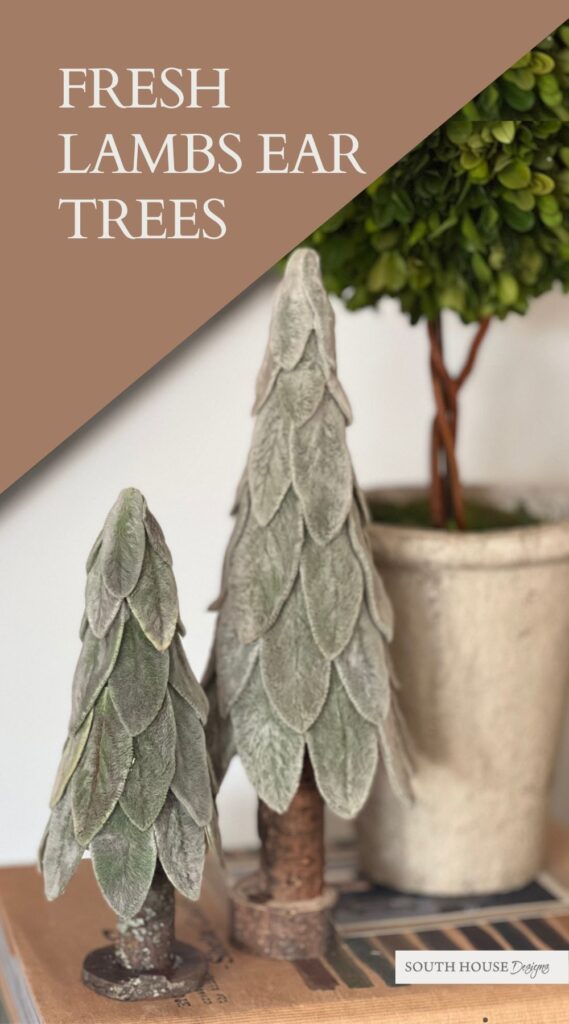
How to Make Small Christmas Trees with Fresh Lambs Ear
Bring that soft, fuzzy sage green lambs ear in from the garden for truly special Christmas decor. Make adorable little Christmas trees for a tabletop display.
Looking for a festive and unique way to decorate your tabletop this Christmas? Why not try making a cute little tabletop Christmas tree out of fresh lambs ear?
They’re easy to make, and they look great with a charming cozy vibe in a neutral yet modern color scheme!
If you’re looking for a great way to add a new twist to a mini Christmas tree display, be sure to give this one a try!
Gather your friends and with just a little time and minimal additional cost, you’ll have a whole new look for this holiday season with these handmade floral designs.
What Do You Do With Lambs Ear at the End of the Season?
Depending on your locale, the “the season”can be quite extended.
Lambs Ear is perennial through zone 4 and will stay green in the garden unless you have a particularly hard winter.
The biggest foe for Lambs Ear is boggy soil or too much water. So it’s best to clean out any desiccated leaves and the dead flowers to leave plenty of room for air to circulate.
And then I finish their season, or harvest repeated over two or three months, by cutting off any leaves I want to use for my crafting projects.
How Do You Dry Lambs Ear?
It’s quite easy! There is not much to it.
Here is a blog post on how I dry my Lambs Ear with two ways of how I use them dried — in sweet bud vases and as little bundles to hang. And then here is how I made a wreath embellished with dried Lambs Ear.
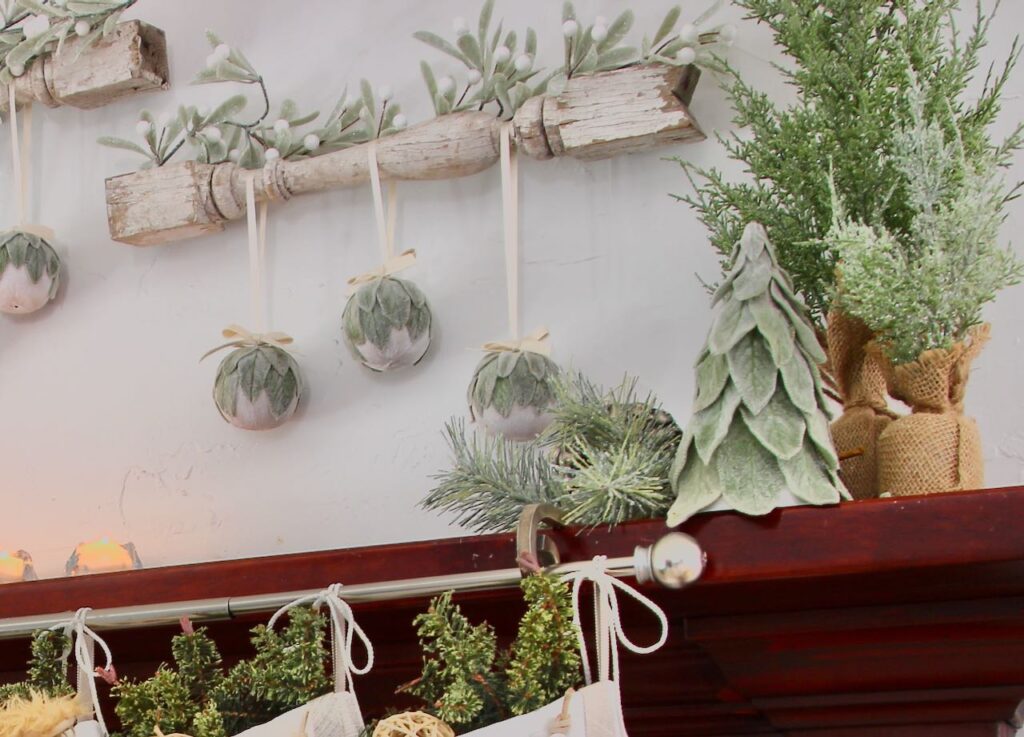
And my most recent Lambs Ear craft is an absolutely adorable Christmas ornament shared here. i say Christmas ornament, but I think I’ll be using mine to also transition through Winter.
IMPORTANT: For both the ornaments and these trees, you do NOT want to dry your Lambs Ear first.
As the Lambs Ear dry, they retain their signature soft, fuzzy texture as well as the soft sage green coloring, but the do become brittle as they dry out.
So if your project requires any kind of curve, manipulate the Lambs Ear while it is soft and it will dry in place.
Let’s Get Started Making A Lambs Ear Tree
Materials:
- Fresh Lamb’s Ear stems
- Lightweight poster board to make a cone
- One sheet of “thicker” paper
- A section of tree limb for a trunk
- Two larger round wood discs per tree
Supplies:
- Scissors
- Hot Glue Gun and Glue sticks — preferably low heat
The links in this post may include affiliate links, which means if you purchase anything using these links, you pay no extra, but I may receive a small commission that helps keep this blog running. I truly appreciate you using affiliate links whenever possible. Please know that I will never recommend a product I do not believe in!
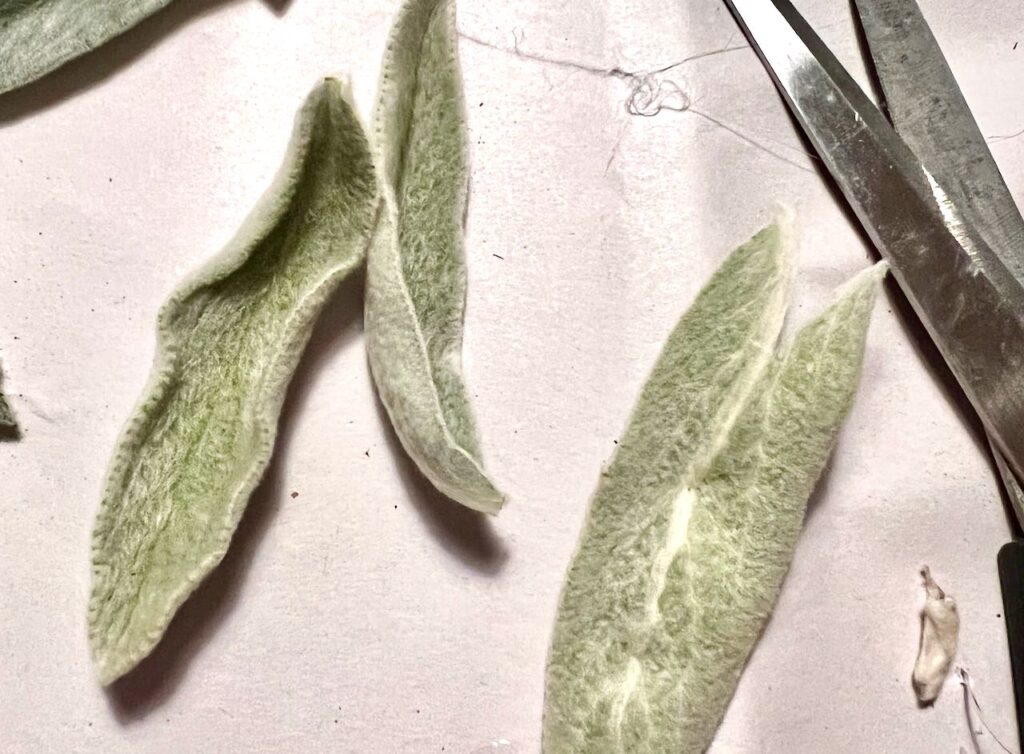
Step 1) Gather Your Lambs Ear-
Using sharp scissors cut dry leaves only. Do not harvest the Lambs Ear leaves when they are wet with dew or rainwater. Let them dry in the garden and then clip them. Be sure to gather a variety of sizes.
Step 2) Prepare Your Lambs Ear Leaves–
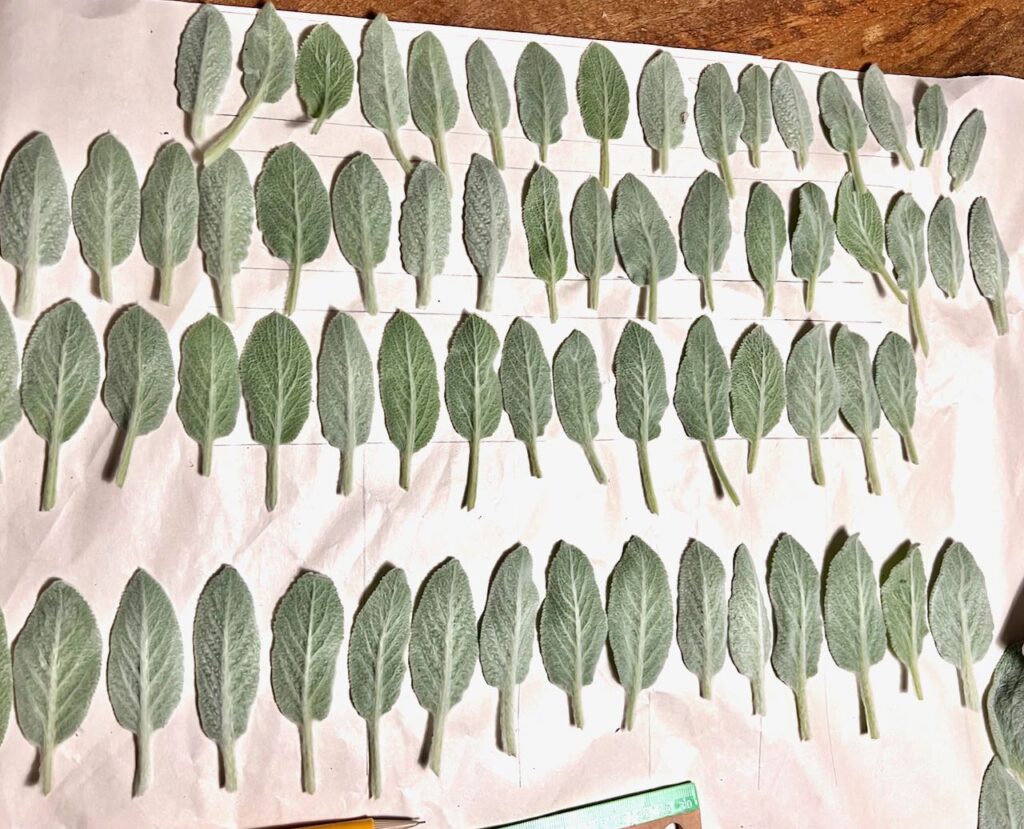
This is not absolutely required. I just find it easier, so I don’t have to stop once I have my glue gun all fired up.
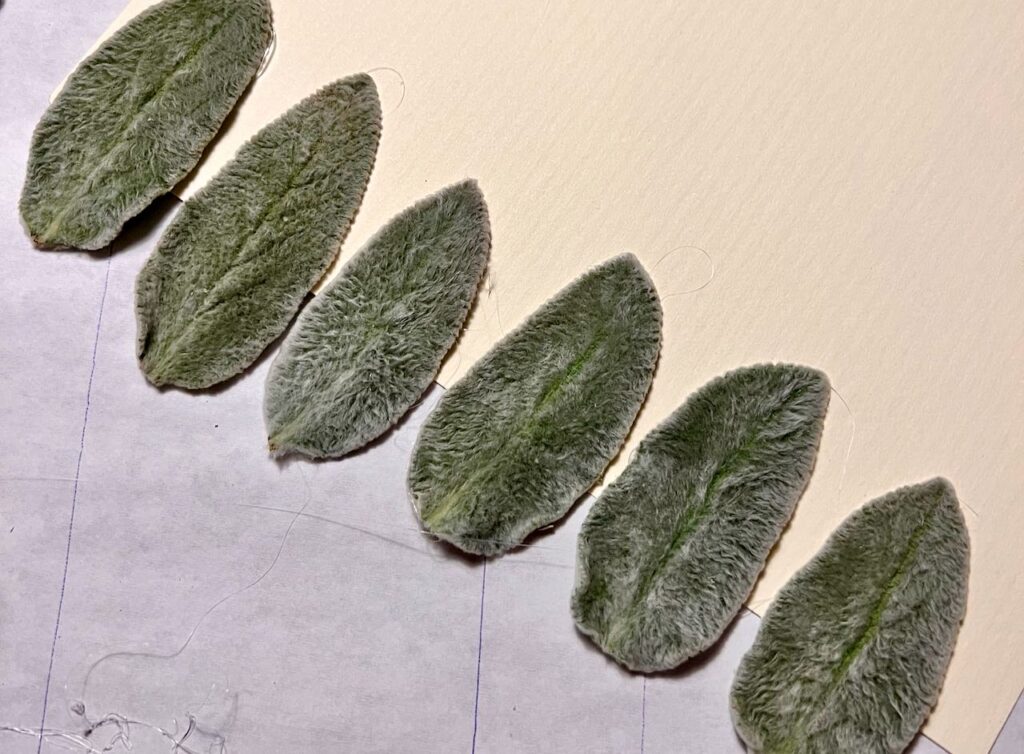
I draw pairs of parallel lines on a piece of newsprint. Each pair of lines grows progressively closer together. Then I organize my leaves by length from the tip to the beginning of the stem.
HINT: After I took this picture, I realized it’s much easier to trim the stems off before organizing them.
Classic case of “Do as I say, not as I did”. You’re welcome!
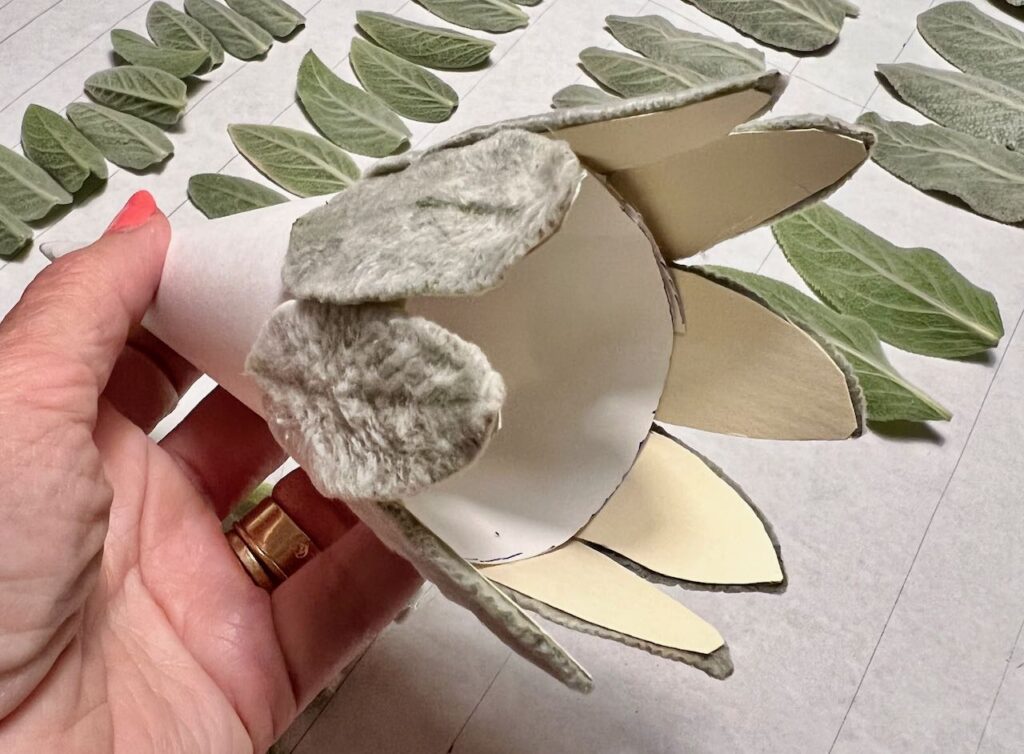
Step 3) Make Your Cone-
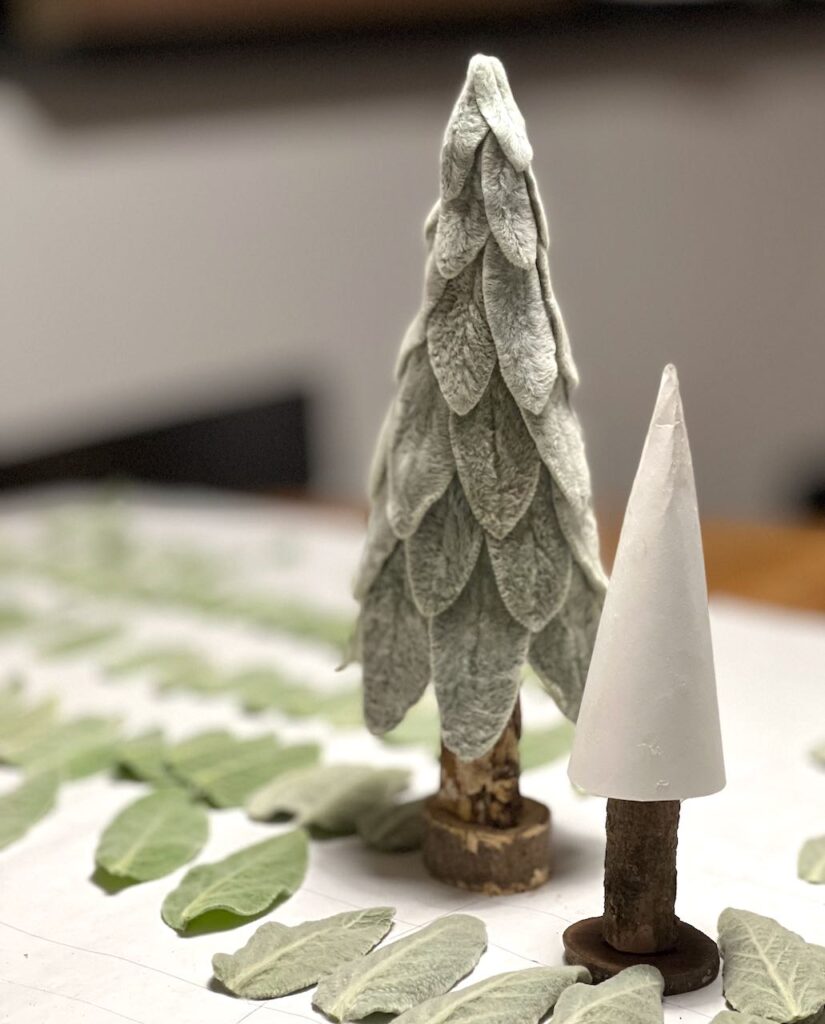
Determine the height you want your tree, not including the trunk. My three cones cut from one piece of Dollar Tree poster board were 17-inches, 7.5-inches and 5-inches along the sides. My trees are actually taller than that because of the tall trunks and the bottom row of leaves hang below the cone quite a bit.
Full Disclosure: The two smaller trees are my third attempt at this idea and I finally have a winning process. So let’s ignore how the tall tree was actually crafted and let it just sit pretty in the background shall we?
Along one side of the poster board, mark your desired length. Attach a pencil to a string or the end of a yardstick. holding the string or yardstick on the corner of the poster board at your desired length. Keeping the corner at the same spot on the string or yardstick, glide the pencil from one side of the poster board to the adjacent side resulting in a long curved line.
Cut on that line.
Roll the poster board overlapping the two straight edges as much as you like to create a tall thin cone. If the end of the sides don’t match up exactly, it’s okay, the leaves will cover that. You want to make sure the cone is straight and even.
Hot glue in place.
The tips of the leaves will become brittle when they dry, so you don’t want the leaves resting on the table. So for now, secure your cone a couple of inches above your work surface
My smaller cones are sitting on their trunks while my tall tree (I’m not really showing here) sat on a grocery store florist heavy vase.
Step 4) Make a Trunk–
I used dead branches from our firewood pile.

If your trunk is rather narrow, consider adding a wood disc to the bottom to stabilize your tall, narrow Christmas tree.
Then hold your tree cone over the stem and determine your desired height. Remember, you will have your lowest leaves hanging down below the cone.
Note where the top of the trunk comes to inside the tree.
Measure the diameter of the cone at that point. Cut a slice of wood the larger diameter if needed (or substitute a circle cut from heavy cardboard).
Adhere that circle to the top of your trunk.
Sit your tree on your prepared trunk!
This makes for a fairly stable tree, but also allows you to reuse this trunk many times over as I doubt that our lambs ear trees will survive more than one season. If you prefer, of course you can add some glue around this top circle and press your tree in place.
I expect the lambs ear ornaments will last two seasons maybe even three, but the tree probably not because the loose end of the leaves will be fragile and break off.
New Annual Tradition, perhaps?
Step 5) Start With Your Longest Leaves-
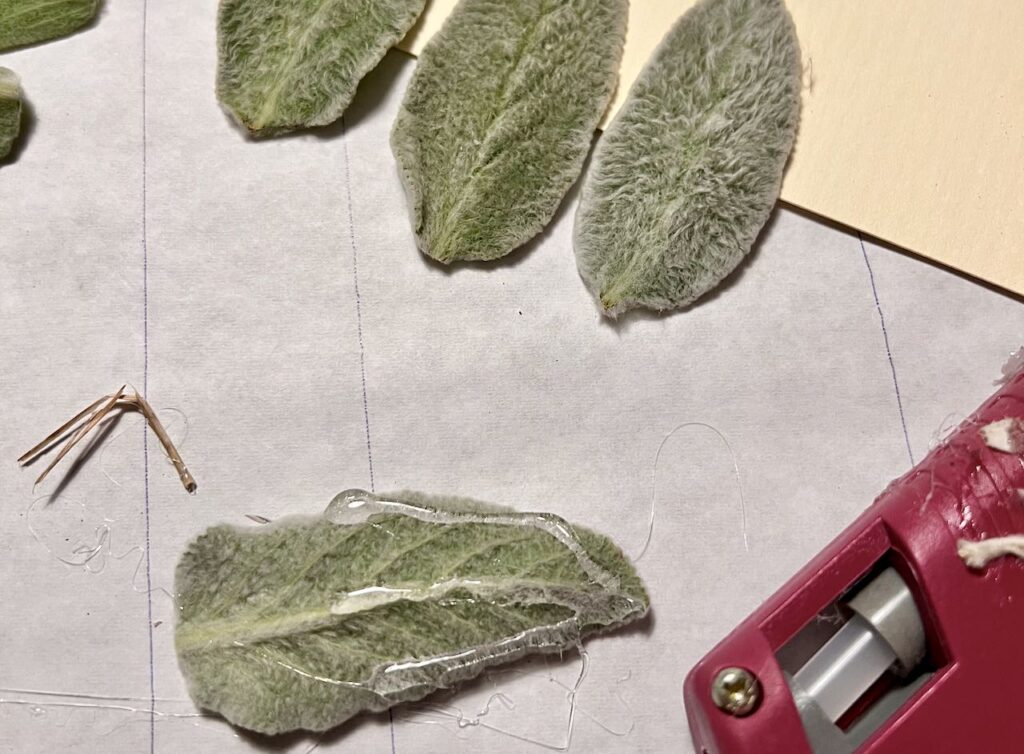
On the backside of each leaf, run hot glue down the spine and both edges covering the widest part and down to the tip.
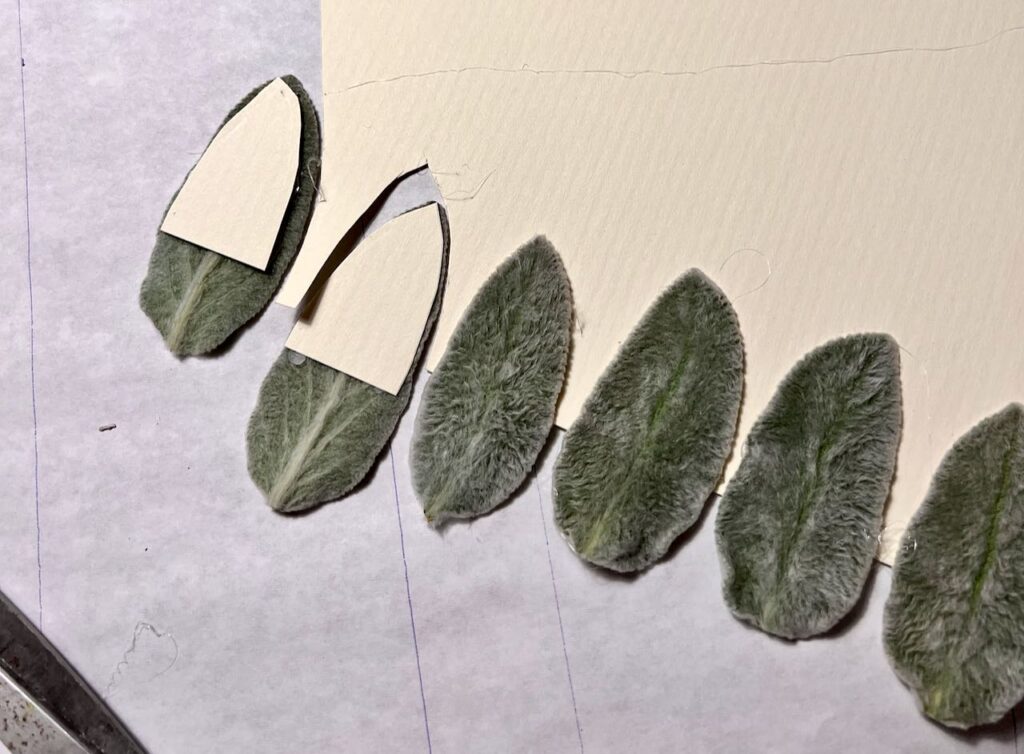
Turn this over and place on your heavy paper.
Once you have enough done for the bottom row of your cone. Carefully cut them out trying to slide your scissors under the leaf a bit and snipping off the tip of the paper.
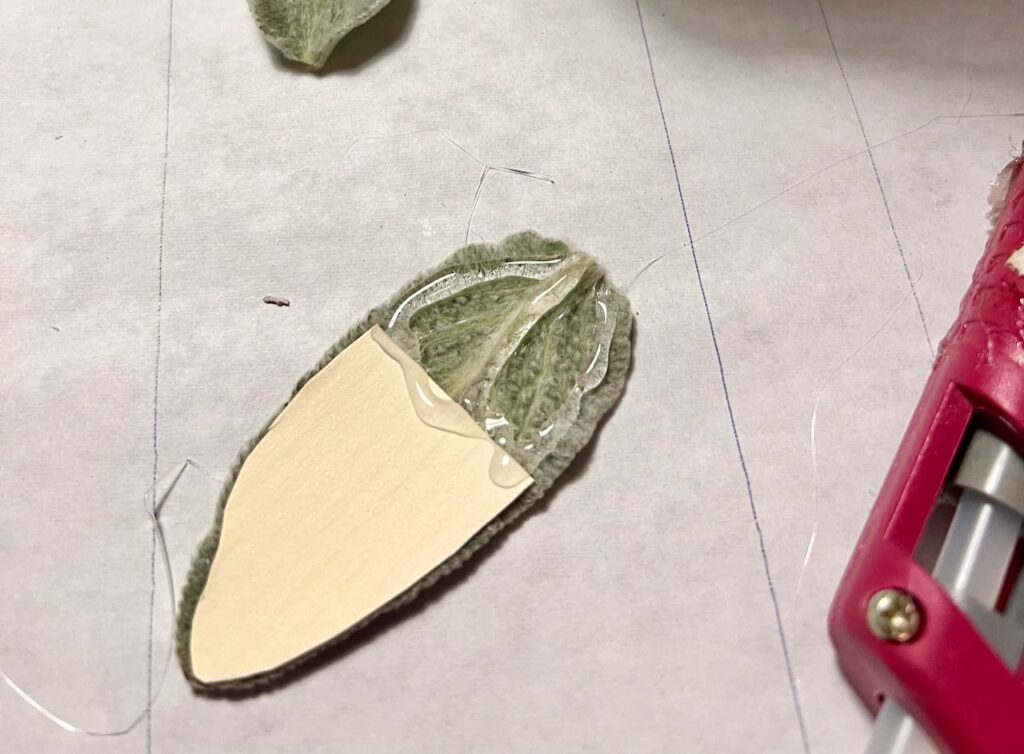
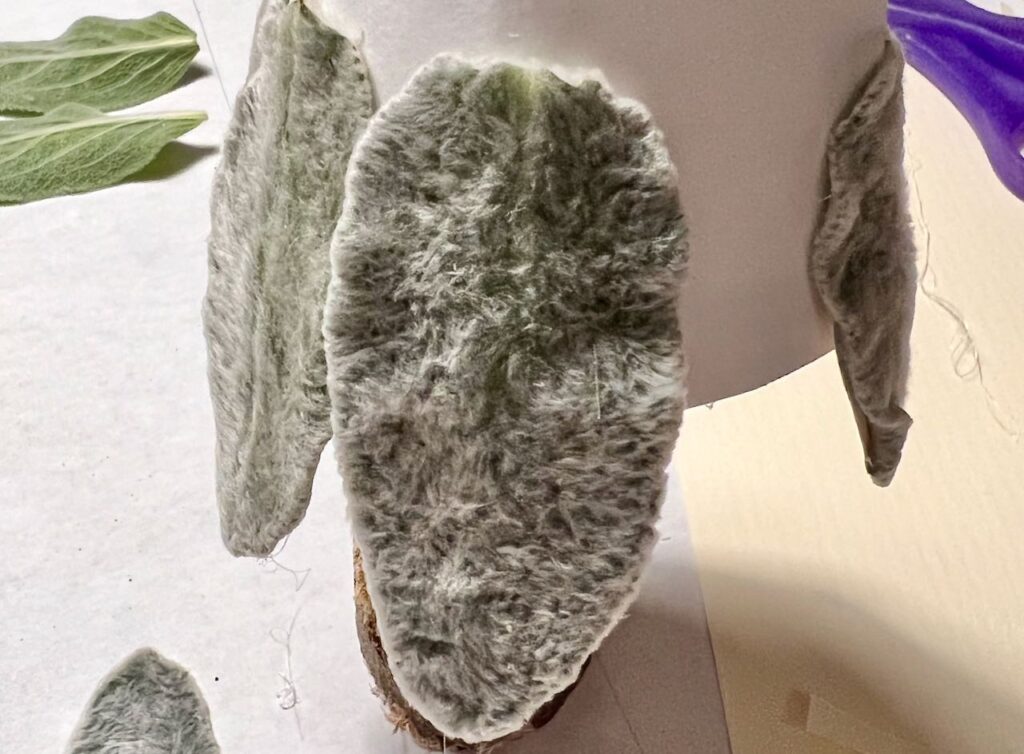
Now run hot glue across the top of your heavy paper and up the sides and spine.
Place on the cone so the paper overlaps the cone a bit and the leaves overlap a bit on the sides.
Your bottom row is done!
HINT: If I had planned this out, I would have bought a piece of sage colored scrapbook paper, but this worked just fine. If I want to place this up high in a hutch where you could see the underside of these leaves, I’ll hot glue another leaf inside matching up to this bottom row.
Here’s what my first tree attempt looked like.
And two months later, the tips are all broken and sad! And the leaves are shriveled a bit and exposing even more of the white cone,
Waa! waa! waa!
HINT: Glue all the edges down. Overlap generously.
Yep, those are my takeaways. from my first attempt. Aren’t you glad I’m saving you from these rookie mistakes?
We’re almost done! But first, are you enjoying this post? We are just heading into “my” season. So hang on, there’s so much more coming! Don’t want to miss a thing? May I suggest subscribing? You pick how much! You’re in control!
Step 6) Continue Attaching Overlapping Rows of Leaves-
Decrease the length of the leaves as your rows move up the cone. And alternate the placement of the leaves so that the new leaves cover the seam of the leaves directly below it.
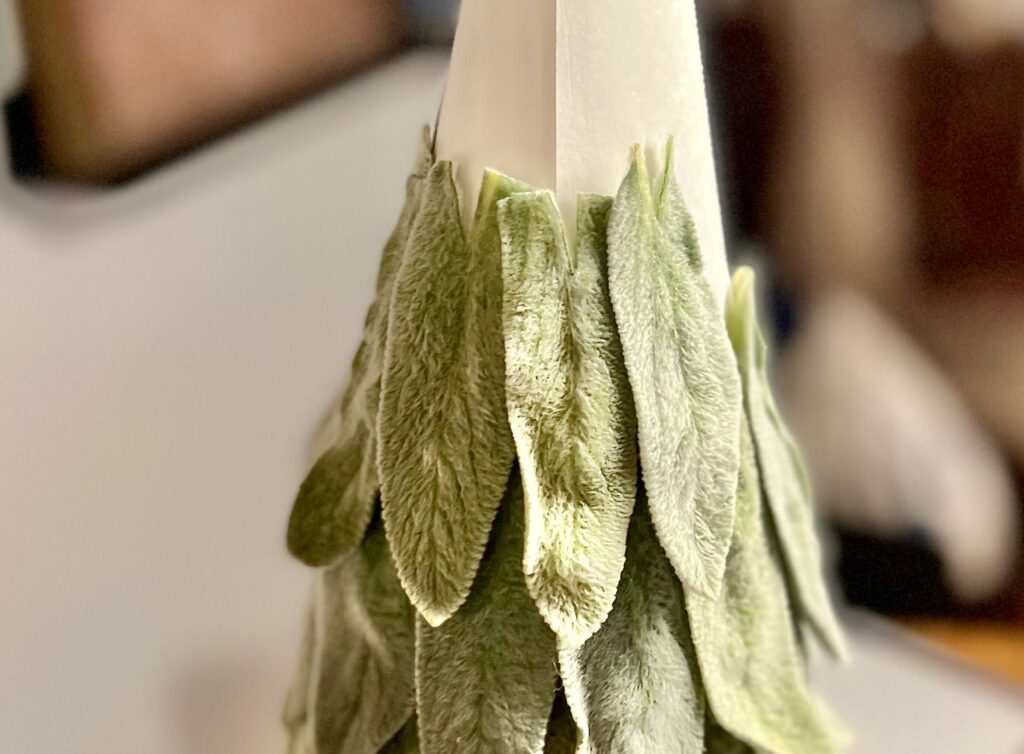
TIP: If some of your leaves have begun the dry out and are wanting to curl in on themselves, just trim off a bit more of the stem and then cut down the center of the stem, maybe half an inch, so that your leaf will lay flat against the cone. That v cut will be covered by the leaves above.
The very top are the tiniest, sweetest little leaves.
One done! One more to go (well at least for tonight — They are really quite addicting).
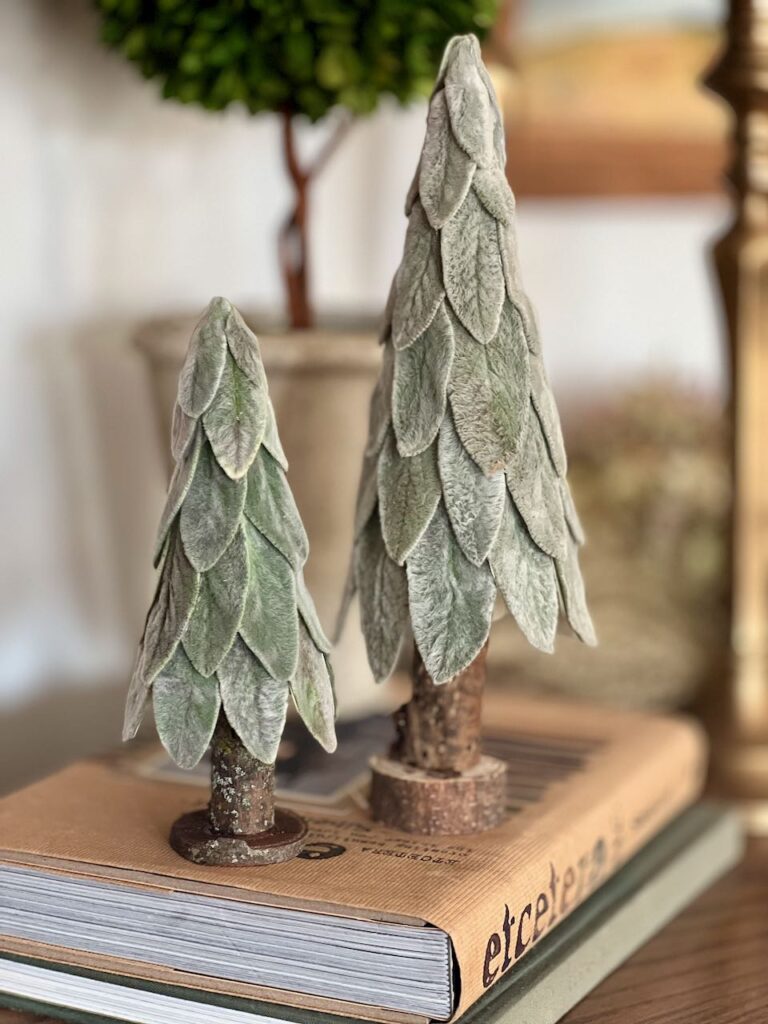
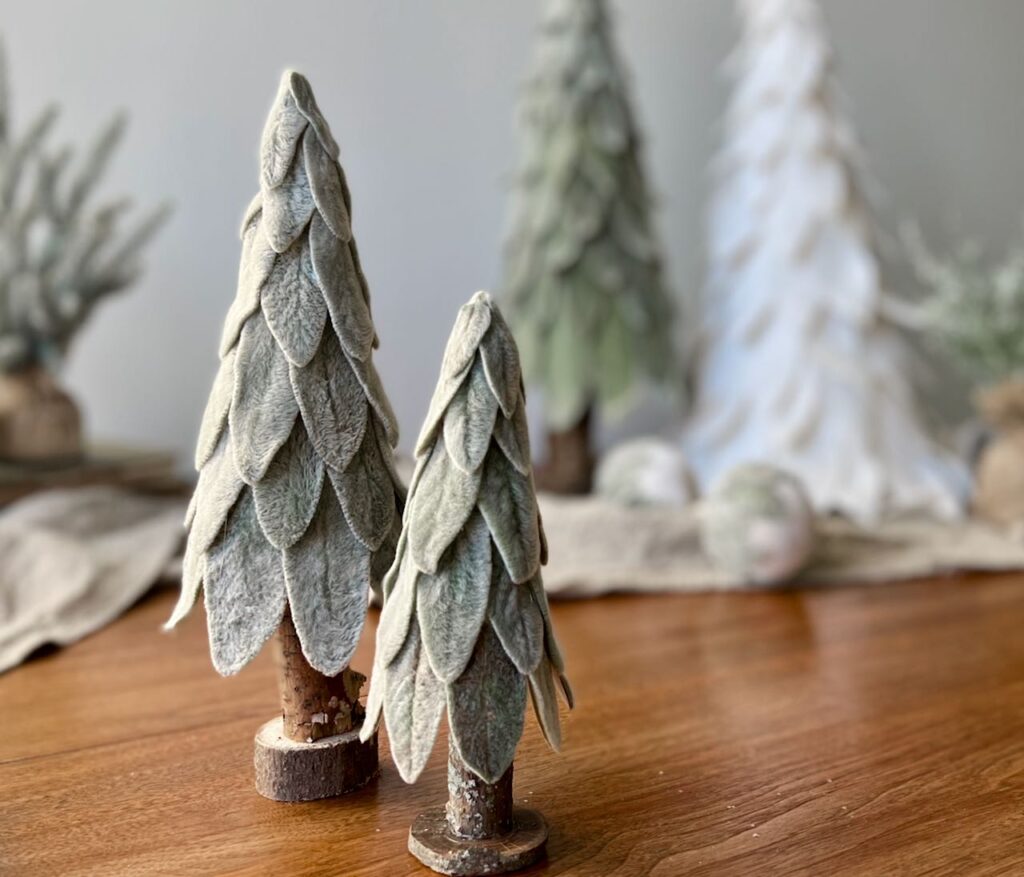
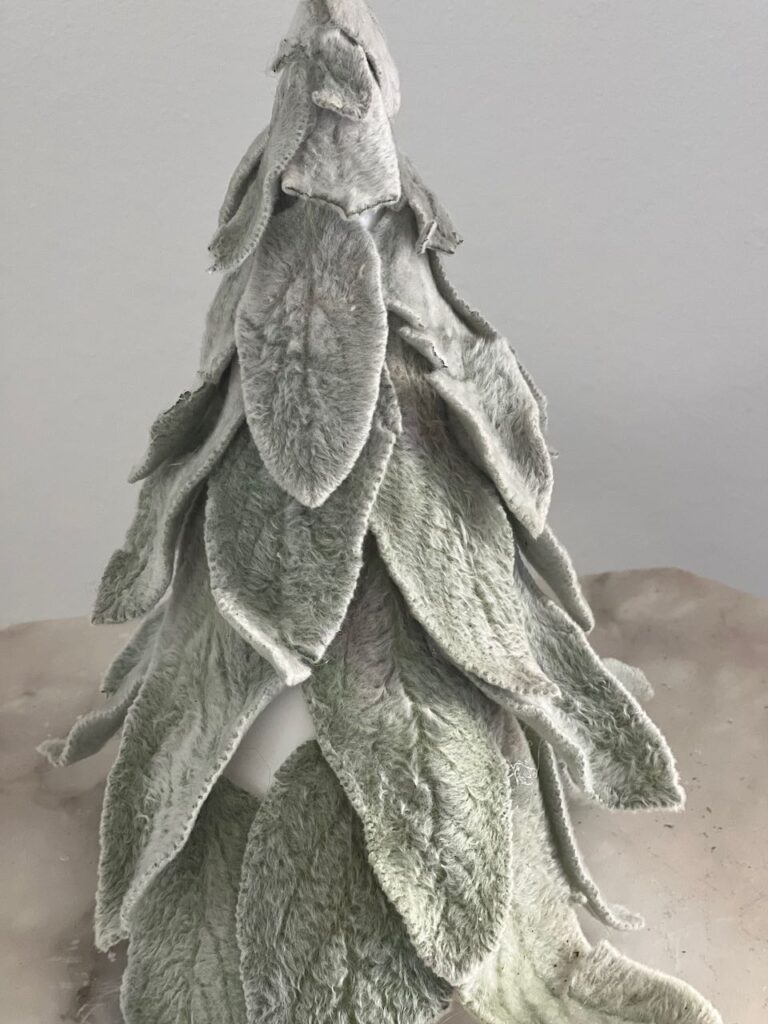
The Final Results!
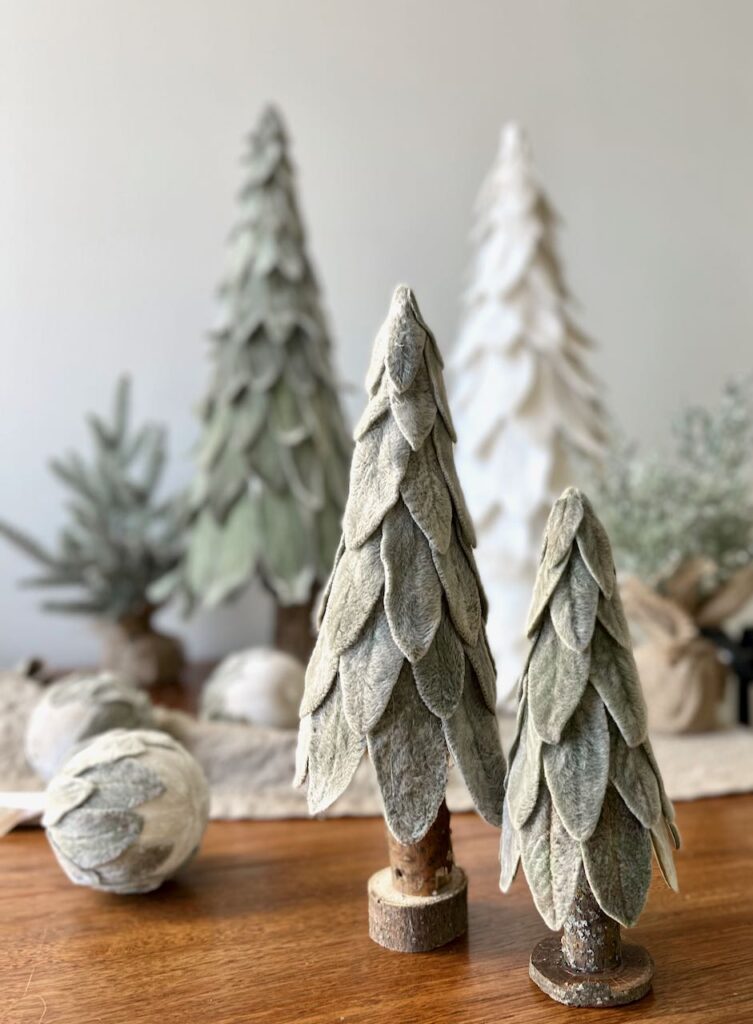
Isn’t this Christmas tree the sweetest? Lambs ear is enjoying the spotlight right now, and I can sure see why! I love its soft coziness. And the soft green color acts like a neutral, but a neutral that’s fresh and intriguing.
How to Display Your New Small Christmas Tree?
So many way!
- Pairs with mistletoe and frosted evergreens, as shown on the mantel above
- with an assortment of larger trees
- intertwined with a burlap ribbon garland for a farmhouse christmas tree look
- as part of a centerpiece on the dining room table
- nestled in a hutch with a eucalyptus garland
- on a sideboard or console table to brighten the cone trees from last year
And that’s just for starters!

Pin it so you Don’t Forget it!
I hope this has inspired you further to harvest Lambs Ear from your garden for beautiful decor and Christmas crafting.

Ok- these are the cutest things ever!! Who would have ever thought you could do so much with lamb’s ears!? I could see a whole holiday color scheme based on these fuzzy beauties. Thanks for the clear directions and all your fabulous ideas – you’re totally inspiring me! 💚
Oh I am soooo glad to hear that Barbara! I want, no, I demand pictures of your soft, fuzzy holiday soiree.😉
Oh my goodness! I love these. Such a great idea.
Thanks Renae. Surely you have loads of Lambs Ear at the farm — if not, you will next year, right?
Hi Diane! I love this project. What a fabulous idea. Thank you for participating in the Home Imagined Link Party.
These are just too adorable Diane!! I’m definitely planting more lamb’s ear so I have some to make next year! Pinned 🥰
Oh my goodness! I just love these sweet trees! The lambs ear ornaments are so beautiful and these trees are over-the-top! Thanks for sharing your amazing creativity with us! Pinning now!! Blessings, Donna
I plan to plant Lamb’s Ear next spring only because of these trees and ornaments. You are so creative, Diane! I absolutely love this!
Glad I’ve inspired your Spring activities! Thanks bunches Missy!
Diane, these table top trees are adorable! I love the color and texture of the lamb’s ear. I am so excited to feature your post at this week’s Tuesday Turn About. Thank you so much for sharing!
Wow!This is something really special .
Thanks James!
I planted lambs ear recently and now have an abundance, I’m so excited to give your tutorial a go! These will fit right into my Christmas decor.
I’m so happy to hear that Chilla!!! And since you have an abundance, be sure to check out the blog post of 13 great decor items to make with fresh Lambs Ear