
DIY Bathroom Wall Mural Idea: Best Custom Line Art Ever!
It’s easier than you think to create customized line art decor wall mural for your home. If you can trace a line, you can do this!
Do you have a bare wall staring back at you, begging for a refresh?
Maybe wallpaper feels overwhelming or doesn’t fit your budget.
Here’s a perfect solution: a customizable line art mural.
Wall murals, typically wallpaper murals, are a trendy way to add personality to your space. But unlike traditional murals, with line art murals you control every aspect:size, subject matter, and color.
It’s a creative and affordable way to make a statement, even for the non-artist!
But First, a Bit of Background:
We remodeled our Powder Room for our first One room Challenge.
- Here is the before and the our inspiration board.
- Here is a post about all the decisions that need to be made before starting a wood accent wall.
- Here are tips to help when choosing the “right” paint color.
- The reveal is here.
- How we built the open shelf vanity and countertop is here.
- Then how I finished and sealed the vanity is here.
- Here are all the tricks I learned tiling for the first time.
Now you’re all caught up!
Today, I’m sharing how I added our custom bathroom wall mural.
TABLE OF CONTENTS:
- But First, a Bit of Background:
- Materials and Supplies Needed:
- Step 1) Inspiration-
- Step 2) Finding Your Perfect Line Art-
- Step 3) Customizing Your Design, Canva to the Rescue-
- Step 4) Printing Your Design-
- Step 5) Practice Makes Perfect (and Saves Walls!)-
- Step 6) Take Your Masterpiece to the Walls-
- Step 7) Paint Your Line Art Wall Decor-
Let’s Explore Making Your Own Line Art Wall Mural the Easy Way!
NOTE: This wall art is great for any blank walls whether a small bathroom or a large living room. or a bedroom wall or just even a small niche or corner that needs some visual appeal.
Materials and Supplies Needed:
- Line art, digital vector files are best, many free sources discussed further
- Tape measure
- Canva account (or a similar design tool)
- Tracing paper or graphite paper
- Colored pencil, just one color is necessary
- Acrylic paint and brushes or paint markers, I used this chalk marker
The links in this post may include affiliate links, which means if you purchase anything using these links, you pay no extra, but I may receive a small commission that helps keep this blog running. I truly appreciate you using affiliate links whenever possible. Please know that I will never recommend a product I do not believe in!
Step 1) Inspiration-
Every good project started with a concept or inspiration — and a mural is no exception!
I’d suggest starting with google search, a pinterest search, or an Instagram search for “Line Art Wall Decor”, or “Line Art Mural” or “Wall Line Art”. You get the idea.
Save a bunch of images that speak to you as good mural ideas. See what inspires you. Then go back and look at them in your room.
At this point, don’t worry about the scale, the size, the colors. You’re going to be customizing all of that.
Concentrate on the subject matter and the general feel or style.
For your new mural, do you want abstract faces, simplified succulents, dog stylizations, geometric shapes, abstracts, botanical, and on and on? So many options!
Our powder room inspiration was Modern Mediterranean. So I ended up landing on olive branches.
Before you get too far, please consider pinning this so you can find it again. And maybe even share it with a friend or on your socials. Thanks bunches!

Step 2) Finding Your Perfect Line Art-
Alright, let’s get down to the fun part: finding the perfect line art for your perfect wall mural!
Don’t worry, your masterpiece doesn’t have to cover the entire wall. Sometimes, strategically placed line art can make an even bigger impact. Think of it like a gorgeous statement necklace – it adds pizazz without overwhelming the outfit.

First things first, dive into the wonderful world of online resources! Here are a few of my favorite places to find downloadable line art:
- Etsy: This treasure trove has tons of amazing artists selling unique SVG (Scalable Vector Graphic) files. Just search for “___ line art SVG” and prepare to be wowed! Above are the first six options that popped up for “peony line art SVG”
- Shutterstock: They offer a free trial month, so you can browse their collection of high-quality line art.
- The Graphics Fairy: This fantastic website has a ton of free vintage-inspired line art that might be perfect for your project.
PRO TIP: When searching, be specific! This will help you avoid getting lost in a never-ending sea of designs.
Super Important Note: No matter where you find your line art, make sure it’s in a vector format (like SVG, PDF, AI,EPS).
This lets you resize the image without it getting all blurry or pixelated. Trust me, you’ll want to be able to adjust the size to fit your wall perfectly.
Now, you probably won’t find the exact design you have in your head, and that’s okay! Most likely, you’ll want to tweak it a bit.
Maybe you’ll need to adjust the size or scale. Or, you could take one or two elements you love and repeat them down the wall to create block print stripes.
And then you can think about color!
For my bathroom walls I wanted over-sized, white line art. If you’re good with paint, you might try painting and shading a large romantic floral. Or for a kids’ playroom, transform white walls with black outlines and then color in with bold, fun colors. How about a castle behind your princess’s bed?
The possibilities are endless!
Quick pause: Are you enjoying this idea? Please join the House Mates community for more ideas and how-to’s straight to your inbox:
Thanks Bunches! Now back to our Murals in the Making:
Step 3) Customizing Your Design, Canva to the Rescue-
Now that you’ve found your perfect line art, it’s time to get it ready for the wall! Here’s where our friend Canva comes in.
- Download and Upload: Save your downloaded line art from your chosen website to your computer. Then, hop on Canva.com and click “Create a Design” followed by “Custom Size.”
- Sizing Up Your Wall: This is where things get fun! Adjust the project size to match the area on your wall where you want your masterpiece to shine. Keep in mind that Canva has a size limit of 83 x 33 inches (a little quirky, we know!). If you have a bigger vision, don’t worry! divide your wall’s measurements by 2 and design at a half scale
- Wall Preview (Optional): Want to see how your art will look in its final home? Canva lets you add elements like doors, windows, and even furniture to your design space. If your way is sat half scale, be sure your details are also at half scale.This helps you visualize the scale and placement of your line art.
- Time to Shine! Now, upload your SVG line art files and drag them onto your “wall” in Canva. Resize them to fill the space or create a cool pattern by duplicating them.
- Layering Like a Pro: If you have multiple pieces of art like I did, play around with layering them to create your desired effect.
- Cleaning Up (Optional): If your art has a background you don’t want, with the image selected, click on “Edit Image” then “Background Remover.” Want to erase any unwanted lines from layering? Just grab the “Eraser” tool and you’re good to go!
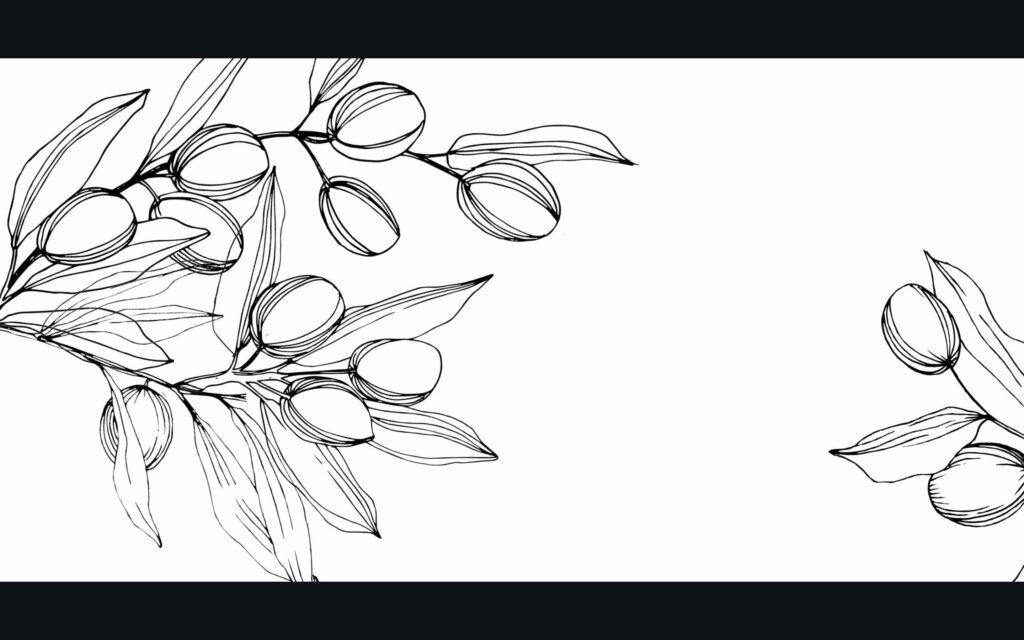
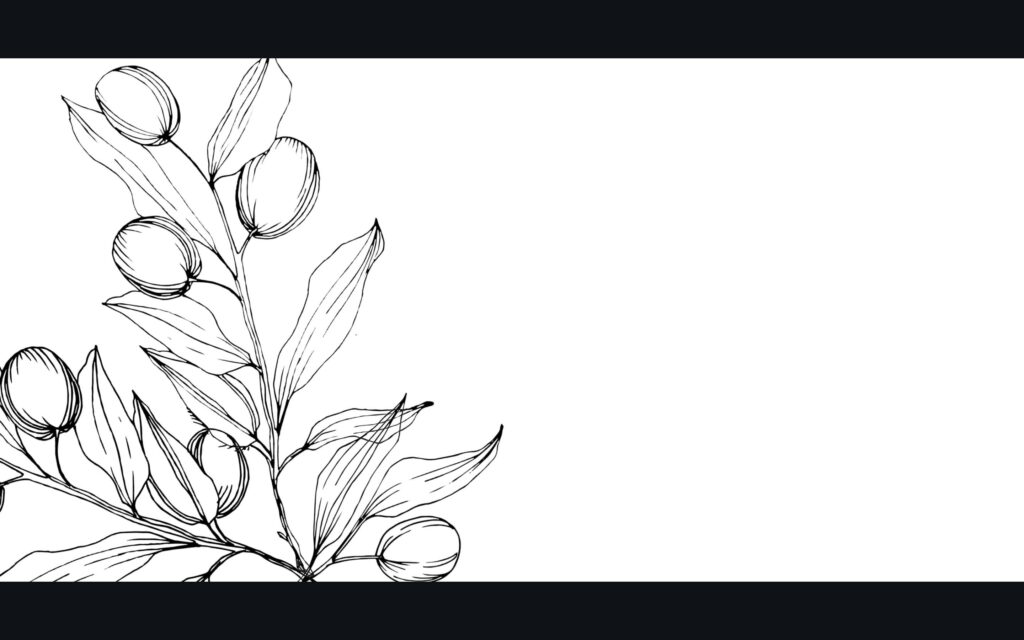
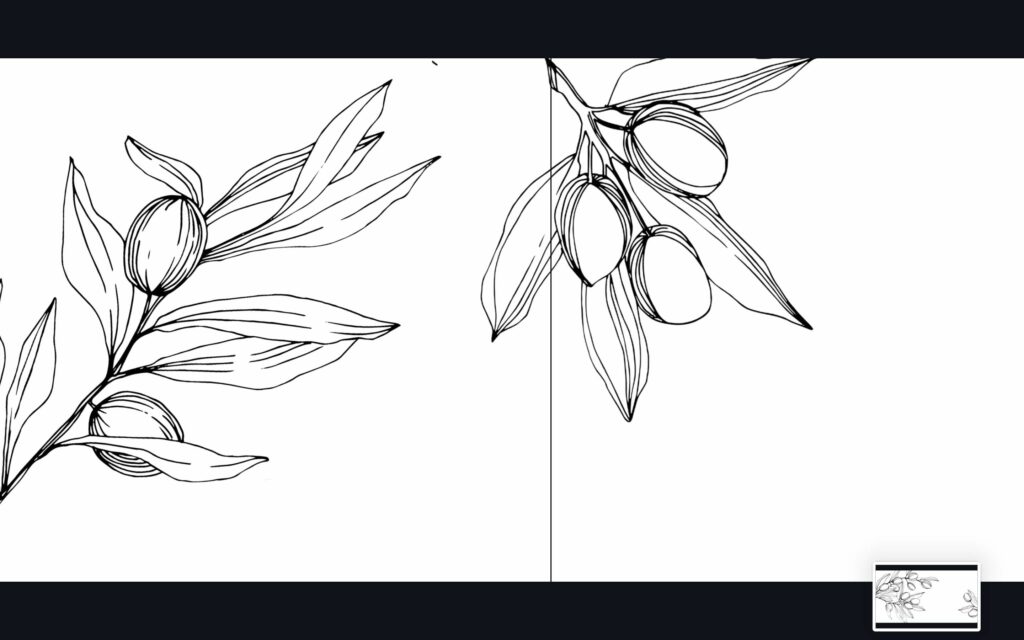
These are screenshots of my Canva designs ready to be sent to be printed. The vertical line on the third page is a reference line for the corner.
Step 4) Printing Your Design-
With your design just the way you want it, save and download it to your computer as a PDF Print file.
Now upload to an office supply store and have them print it as a blueprint. I used Staples, but other office stores and printing stores also offer this service. Printing blue print size images runs $2 to $8 per page depending on size.
I had mine printed in black and white on three different pages, all sized 24 x 36. They were $4 each, so for roughly $12, I had my mural.
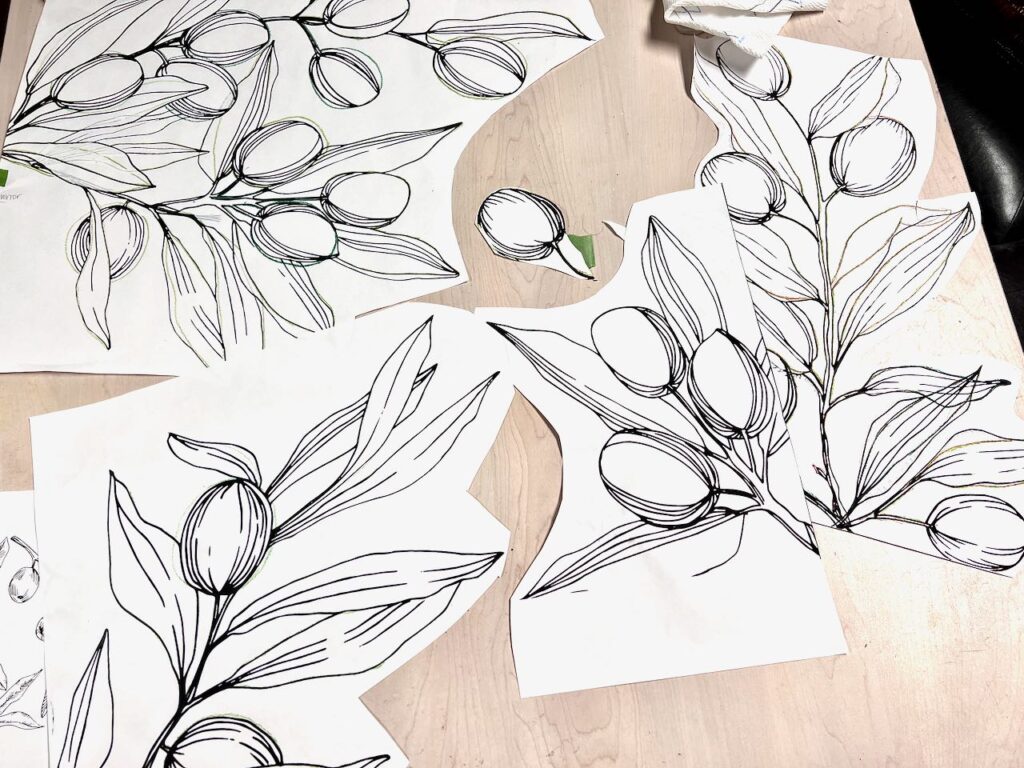
(Sorry, looks like I forgot to snap a picture of the full blue prints as printed, These are after I had trimmed them and had already used them to trace the lines on the wall. Keep reading.)
Step 5) Practice Makes Perfect (and Saves Walls!)-
Alright, this was my first rodeo with line art murals, so I wanted to make sure I had things down before tackling the real wall.
Here are some tips I learned along the way:
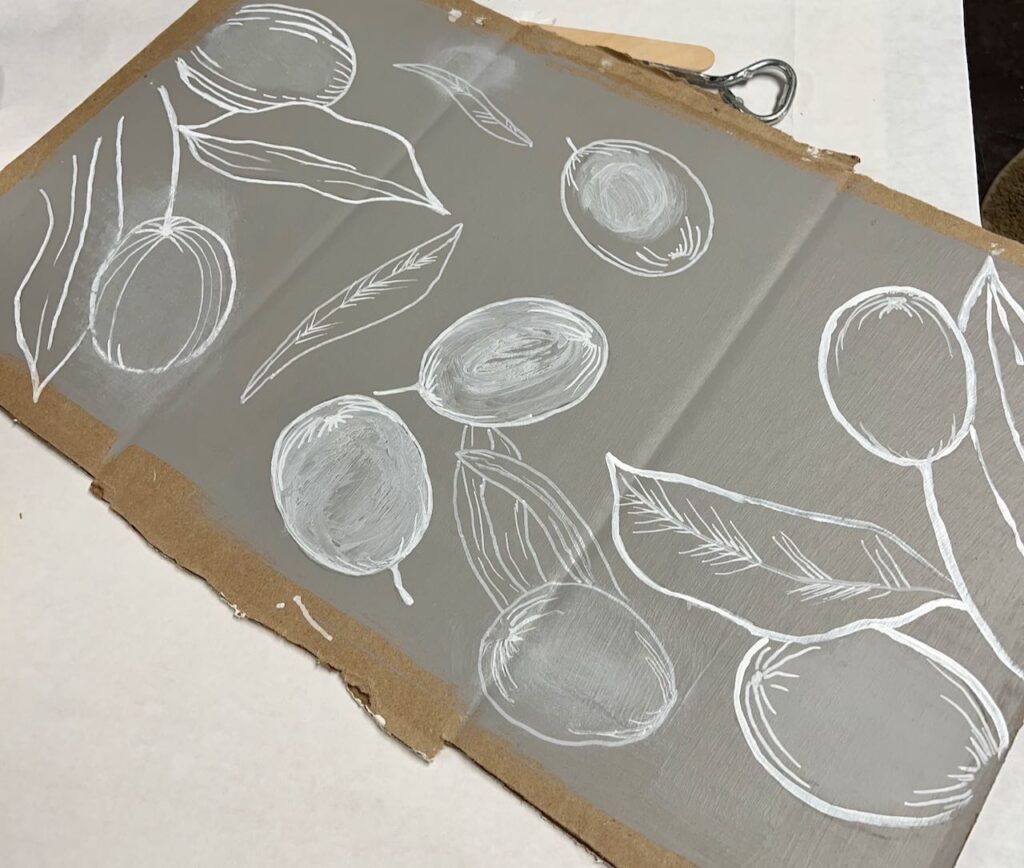
- Color Test on Cardboard: Grab some leftover paint from your wall and slap it on a piece of cardboard. This gives you a perfect canvas to test different colors and see how they’ll look with your chosen line art.
- Trace and Experiment: Once your paint is dry, grab some carbon paper and trace a bit of your design onto the painted cardboard. Now comes the fun part: experiment! Try out different paintbrushes, markers, or even chalk markers (like I did) to see what feels best for you. In my case, the paintbrush wasn’t my friend, but the marker did the trick!
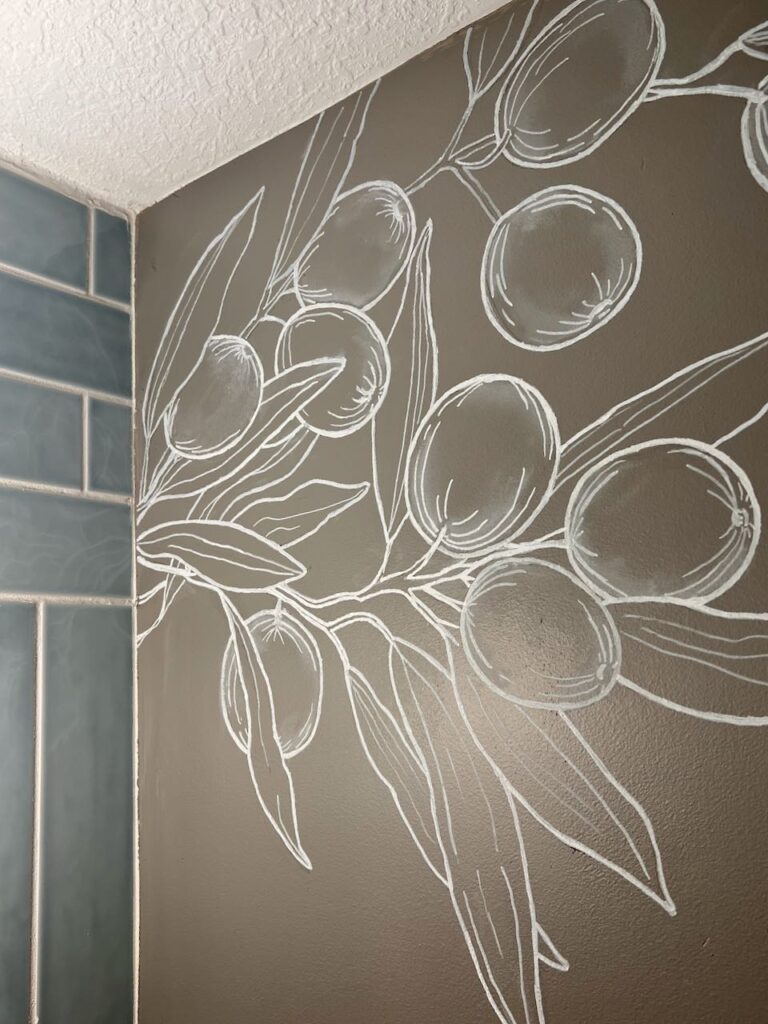
- Shading Shenanigans: I had a bit of a “lightbulb moment” here. Since we’re working with line art, the white paint actually creates shadows (around the edges of the olives) instead of highlights (in the center). Who knew, right?This might seem counterintuitive, but trust me, it works!
- Leaf Detail Decisions: While I was practicing, I also decided how I wanted to detail the leaves. This helped me solidify my vision before moving on to the actual wall.
By taking the time to practice on cardboard, you can avoid any mishaps on your beautiful wall. Plus, it’s a fun way to experiment and find your perfect technique!
Step 6) Take Your Masterpiece to the Walls–

Cut away any large excess paper around your design.
Use large pieces of graphite paper.
With painter’s tape, secure graphite paper to your wall where your design will be. Then secure your blue print on top of that.
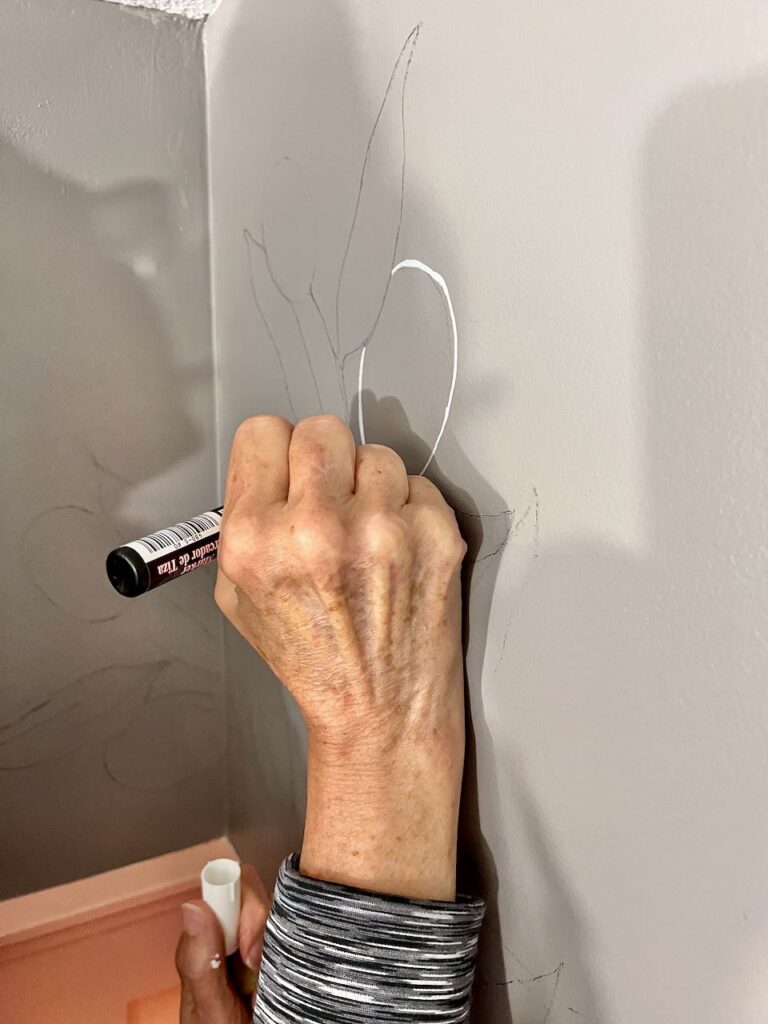
Now, trace all your design’s lines onto the wall. Use a dull colored pencil. This helps you see where you have and have not traced.
Here You can see the lines transferred to the walls.
Remember, how I said the blue print was mainly for the composition and I chose one style to use for the olives? Look at the blue print, you can see where the green pencil made most of the olives a little more rounded.
I also found it helpful to hang the blue print next to the transferred design for reference.
Step 7) Paint Your Line Art Wall Decor-
Now for the moment of truth: getting your art onto the wall! Here’s how I did it:
- Trim the Fat: First things first, get rid of any extra paper around your design. You want a clean outline for tracing.
- Graphite Paper Power: Grab some large sheets of graphite paper (like magic transfer paper!). Use painter’s tape to secure the graphite paper to the wall, exactly where you want your design to shine. Then, carefully place your printout on top of the graphite paper.
- Trace, Trace, Trace: With a dull pencil (it helps you see where you’ve been!), trace all the lines of your design onto the wall. This transfers the design through the magic of graphite paper!
PRO TIP: Use a dull colored pencil so you can see very easily what lines you have traced and those that still need tracing
Periodically, sneak a peek and make sure the lines you traced are faintly visible on the wall.
Refining the Details (Optional): Remember how I mentioned solidifying the details? You can see where the green pencil softened the sharp edges of some olives on the printout. Feel free to draw outside the lines to refine your design on the wall.
HINT: For an extra boost of confidence, I hung my printout next to the transferred design for reference while I painted.
There is no right or wrong way to do this. And I just had my mantra of “It’s only paint” on loop in my brain.
I had three different clusters of olive branches. What worked for me was to do one cluster and then move to the next cluster.
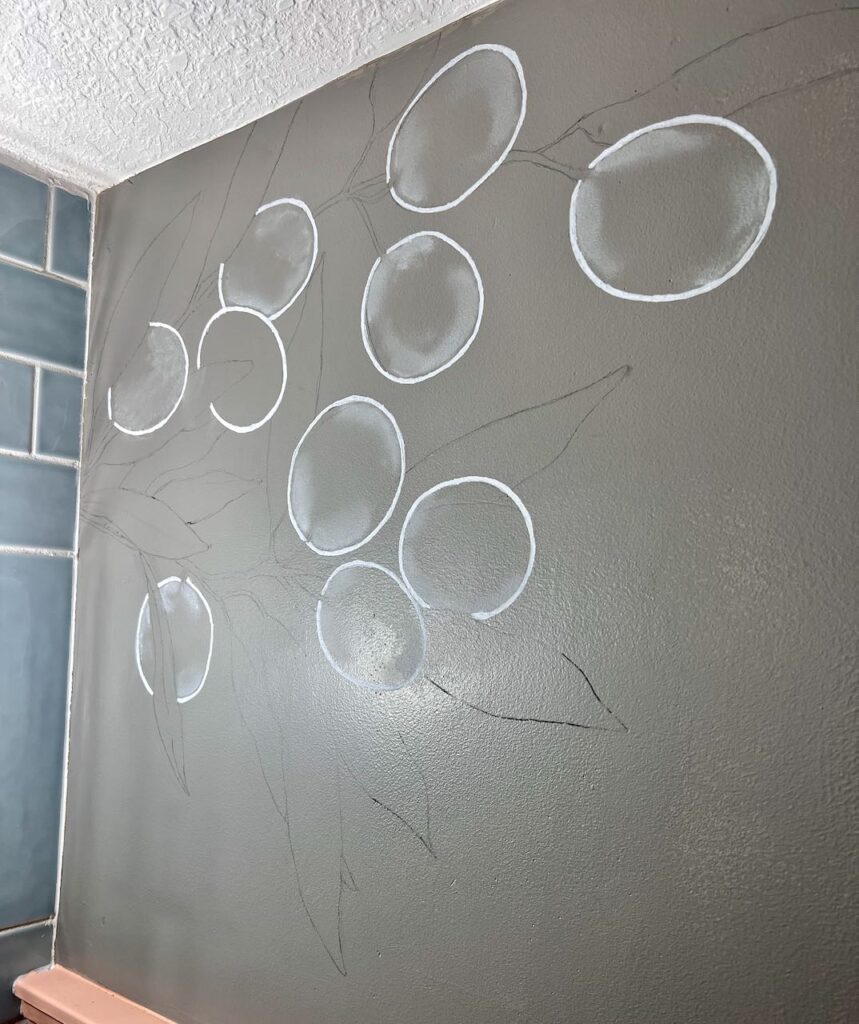
I started with outlining all the olives in a cluster.
Then I shaded those olives. To shade them, I added a bit of the chalk marker fluid where I wanted the shadows, and then gently wiped away most of it with a damp paper towel.
Next, I added the highlights to the olives and then I traced the leaves and branches of this cluster.
Then I moved to the next cluster.
Once all three clusters were at this point, it was time for the final detailing of the leaves. I saved this to do for all the leaves together probably because it made me most nervous. These were free-handed – Yikes!
Ta Da!
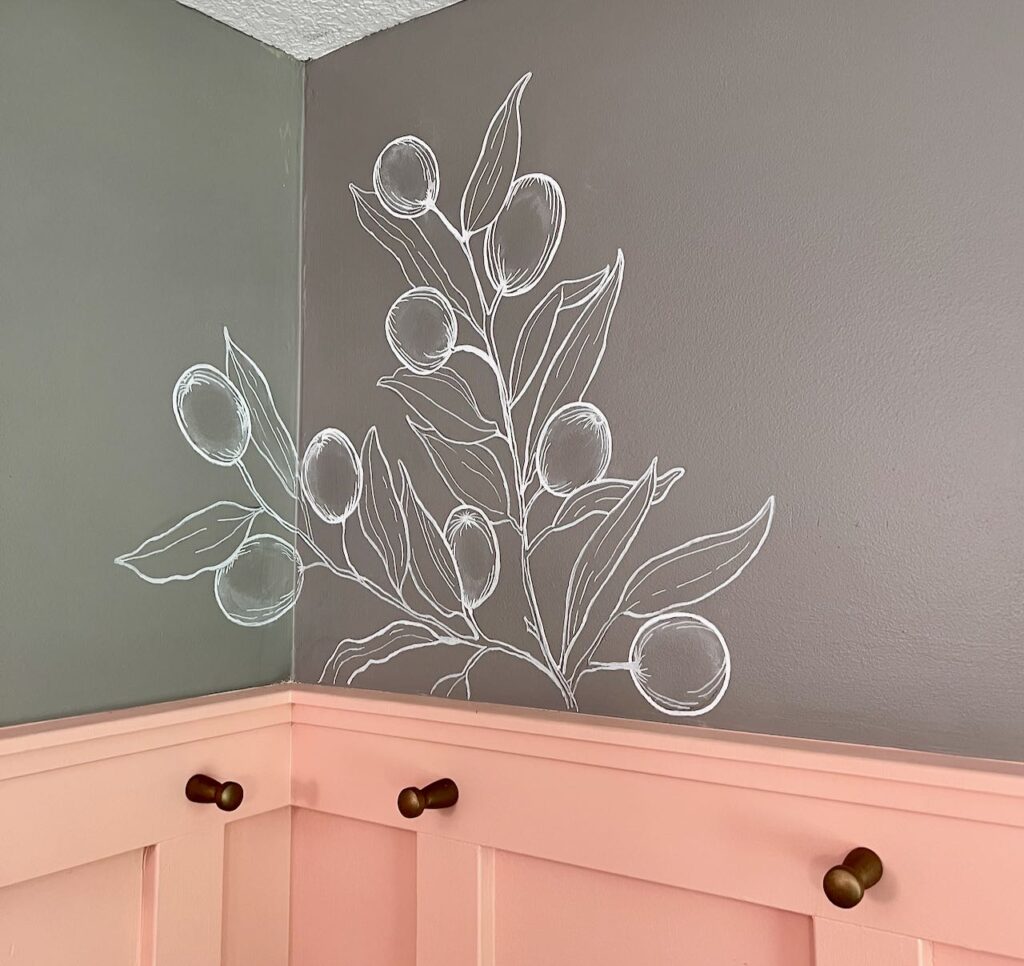
All finished.
Because I used chalk markers. This would be easy to wipe off with water. So once I was happy with it, I sealed it to protect it from curious fingers.
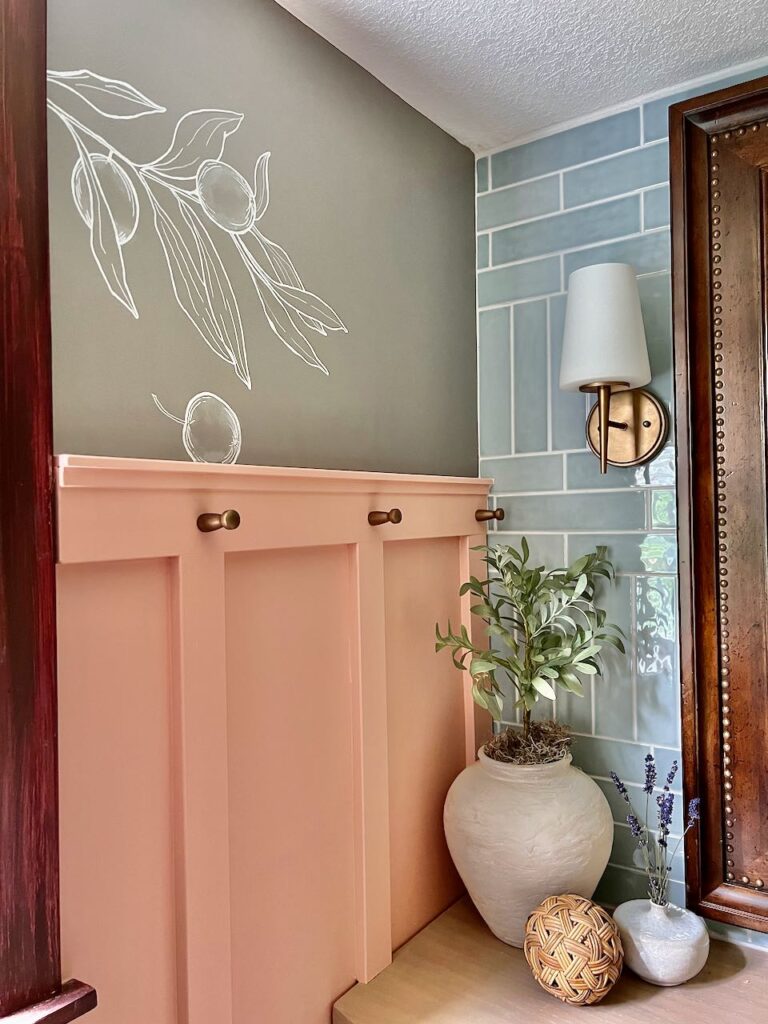
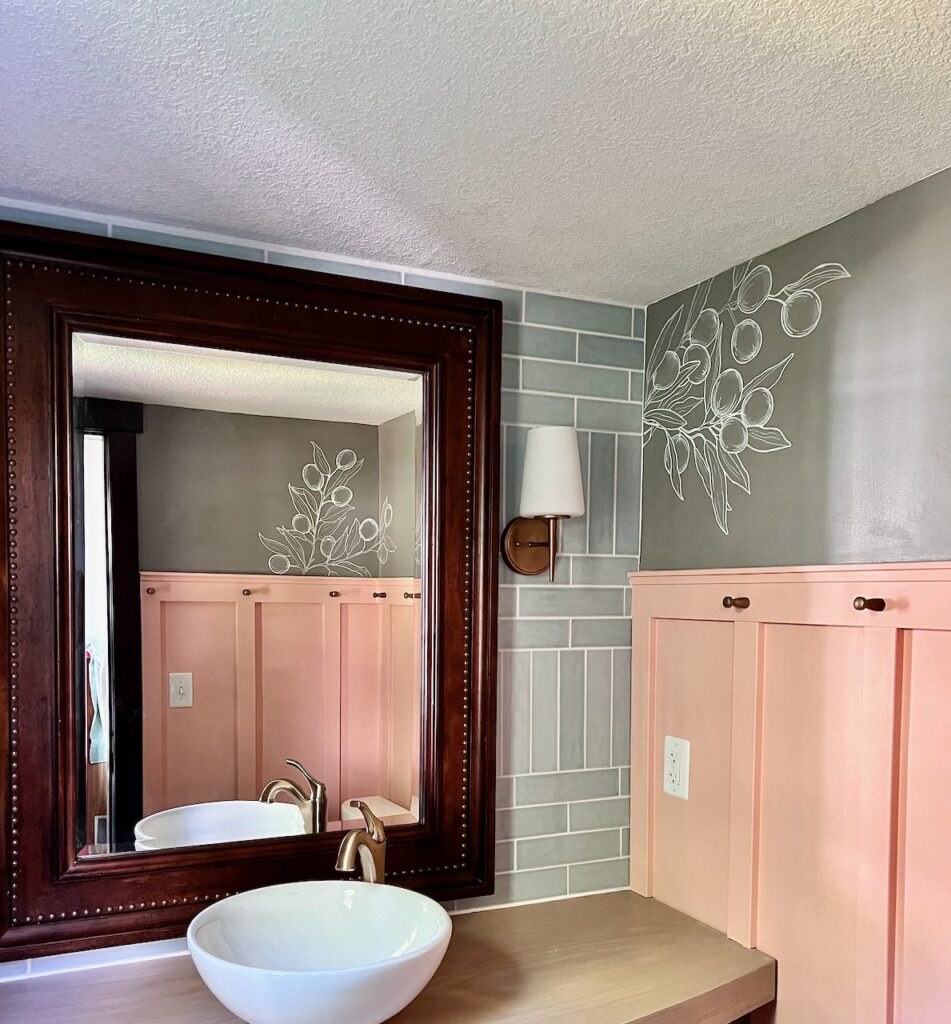
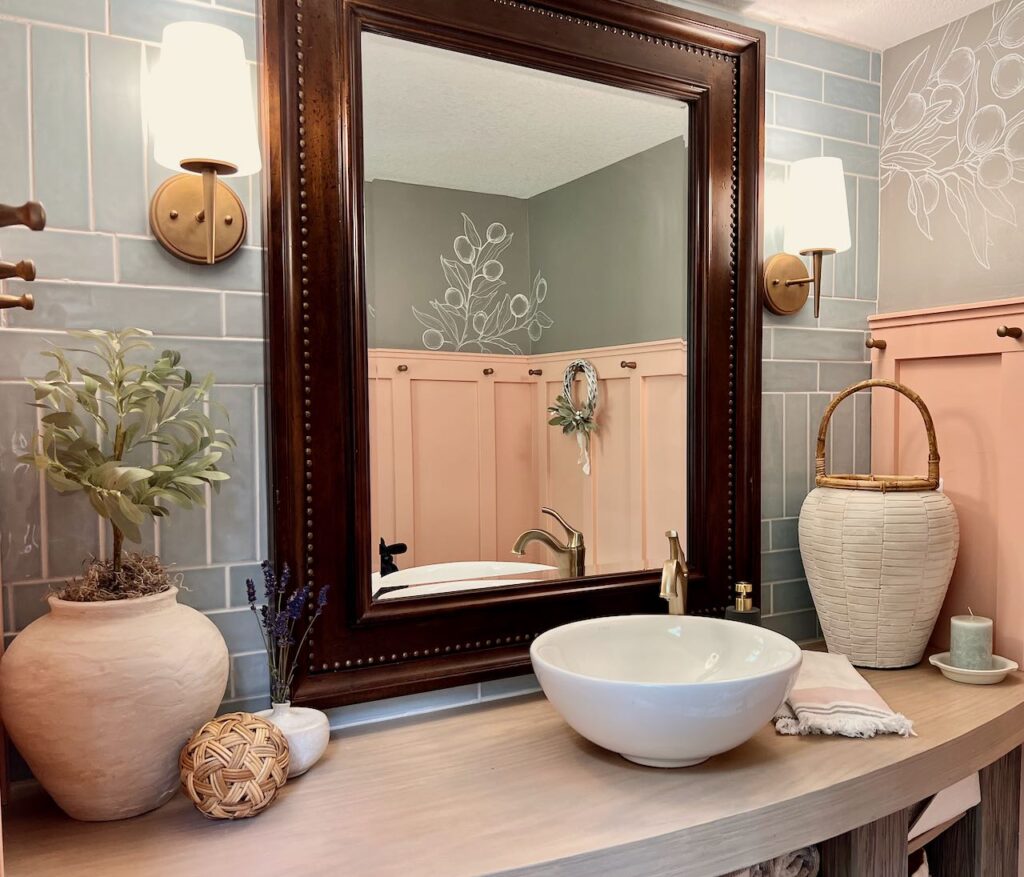
I love how you see two different cluster in natural scenes as you walk into the powder room!
Please consider pinning this.
I truly appreciate every time you share my projects with those around you!

I hope this inspires you to try your hand at a simplified line art accent wall mural even if you don’t consider yourself an artist. I certainly am not an artist, but I love trying creative endeavors to make our home special to us.
Please share your line art murals with me. I LOVE seeing how you reinterpret my projects.

[
This is beautiful Diane, I am so glad you shared it. I missed this on the first go-around. You are quite the artist, I am very imroessed.
You’re so sweet Wendy! It was so fun and surprisingly easy to do. My only regret: I wish I had gone bigger!
I absolutely love this! Thanks for the great tutorial, loaded with important details. Th end result is fabulous. I’m thinking of this for my son’s 101 year old row house in historic center Philadelphia. It was cutter and has. 3 floors of living space. Although one wall is a gorgeous exposed brick, it has lots of wall space with tall ceilings.
Oh Debbee, thanKs so very much! I hope you give it a whirl. If you run into any difficulties or have questions, don’t hesitate to reach out. I am here to help!!! And of course, please send pics!
Diane this is wonderful! So many possibilities. Pinned.
You are amazing!
And Aren’t you the sweetest!!!
I love the detail that you wrote about creating this design. What did you seal you design with when you were done?
Thanks Helene. Funny thing, I was always planning to cover it with Dead Flat Varnish by Modern Masters (I used it on this fireplace surround and love it), but I have never gotten around to it. The chalk marker has retained it’s original look — but I don’t have young children splashing water in here very often.